


JS 中事件捕获与事件冒泡
W3C规定:把DOM事件分为两个阶段,事件捕获阶段和事件冒泡阶段,例如:当页面某一个元素被点击,首先是事件捕获阶段,window最先接收事件,然后一节一节往下捕获,最后由具体元素接收,然后再由具体元素一节一节往上,最后window会再次接收事件,以下为DOM事件流示意图:

如果不好理解,可以这样想事件:某家遭贼了(事件发生),警察叔叔要进某家的院子,进房间,抓捕(捕获)小偷;抓到小偷了,再把小偷押送出来,一层一层出来,最后到某家院子外。
你也可以自己写几个嵌套div 做点击事件测试,利用 addEventListener函数,它有三个参数,第三个参数若是true,则表示采用事件捕获,若是false,则表示采用事件冒泡。
小程序
事件绑定有两种方式:
-
( a) 以bind+事件名称,或 bind: + 事件名称,比如: bindtap 等同于 bind:tap,这种方式不会阻止事件向上冒泡。
-
( b) 以catch+事件名称,或catch: + 事件名称,比如: catchtap 等同于 catch:tap,这种方式会阻止事件向上冒泡。
案例
a) bind
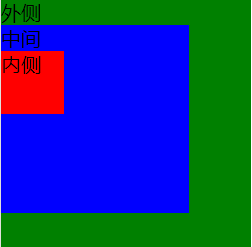
		<view class="outer" capture-bind:tap="handleCaptureView1" bindtap="handleBindView1">
				外侧
				<view class="among" capture-bind:tap="handleCaptureView2" bindtap="handleBindView2">
						中间
						<view class="inner" capture-bind:tap="handleCaptureView3" bindtap="handleBindView3">内侧</view>
				</view>
		</view>
  handleCaptureView1(){
    console.log('handleCaptureView1')
  },
  handleBindView1(){
    console.log('handleBindView1')
  },

  handleCaptureView2(){
    console.log('handleCaptureView2')
  },
  handleBindView2(){
    console.log('handleBindView2')
  },

  handleCaptureView3(){
    console.log('handleCaptureView3')
  },
  handleBindView3(){
    console.log('handleBindView3')
  }
测试一
点击内侧
handleCaptureView1
handleCaptureView2
handleCaptureView3  // 先捕获再冒泡
handleBindView3
handleBindView2
handleBindView1
测试二
点击中间
handleCaptureView1
handleCaptureView2
handleBindView2
handleBindView1
b) catch
		<view class="outer" capture-bind:tap="handleCaptureView1" bindtap="handleBindView1">
				外侧
				<view class="among" capture-bind:tap="handleCaptureView2" catchtap="handleBindView2"> //修改
						中间
						<view class="inner" capture-bind:tap="handleCaptureView3" bindtap="handleBindView3">内侧</view>
				</view>
		</view>
测试一
点击内侧
handleCaptureView1
handleCaptureView2
handleCaptureView3  // 依旧先捕获再冒泡
handleBindView3
handleBindView2  // catchtap阻止冒泡
测试二
点击中间
handleCaptureView1
handleCaptureView2
handleBindView2  // catchtap阻止冒泡


 2580
2580


 被折叠的 条评论
为什么被折叠?
被折叠的 条评论
为什么被折叠?
 到【灌水乐园】发言


