


我这里的基础环境:centos7,1511的镜像。
使用什么yum安装的版本会不同,我用的是centos和老师的软件包。具体方法也不一样
#仅供参考

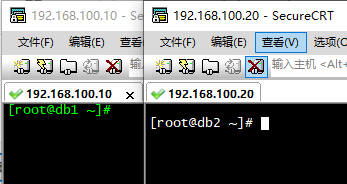
然后创建两个虚拟机名称分别为db1和db2
更改主机名
[root@localhost ~]# hostnamectl set-hostname db1
[root@localhost ~]# hostnamectl set-hostname db2
1、设置主机名映射关系
两个节点都修改文件
[root@db1 ~]# vi /etc/hosts
如下图两个节点都需要添加相同的内容

2、关闭防火墙、setenforce和iptables规则链这个很重要(db1和db2都要)
[root@db1 ~]# setenforce 0
[root@db1 ~]# systemctl stop firewalld
[root@db1 ~]# iptables -Z
[root@db1 ~]# iptables -F
[root@db1 ~]# iptables -X
3、然后配置yum源,使用centos和本地gpmall的包
db1进入yum源配置目录
[root@db1 ~]# cd /etc/yum.repos.d/
添加文件,文件名可以随便写但是后缀必须是.repo
在opt目录创建一个centos文件夹并挂载到此文件夹中
把gpmall包上传到opt目录中
[root@db1 yum.repos.d]# vi ccc.repo
[centos]
name=centos
baseurl=file:///opt/centos
enabled=1
gpgcheck=0
[mariadb]
name=mariadb
baseurl=file:///opt/gpmall-repo
gpgcheck=0
enabled=1
然后就挂载、清空缓存、查看yum源
[root@db1 ~]# mount /dev/sr0 /opt/centos
[root@db1 ~]# yum clean all
[root@db1 ~]# yum repolist
下图可见,在db1节点,我们配置的centos可用,本地gpmall包也是可用的

db2节点的yum配置操作与db1节点相同(也可以使用ftp做)

至此yum源配置和基础环境全部完成,准备安装数据库
两个节点都需要安装
[root@db1 ~]# yum install mariadb mariadb-server -y
[root@db2 ~]# yum install mariadb mariadb-server -y
等待两个节点安装完毕

安装完成后两个节点都需要启动和初始化数据库
启动
[root@db1 ~]# systemctl start mariadb
[root@db2 ~]# systemctl start mariadb
设置开机自启
[root@db1 ~]# systemctl enable mariadb
[root@db2 ~]# systemctl enable mariadb
初始化数据库
[root@db1 ~]# mysql_secure_installation
[root@db1 ~]# mysql_secure_installation

NOTE: RUNNING ALL PARTS OF THIS SCRIPT IS RECOMMENDED FOR ALL MariaDB
      SERVERS IN PRODUCTION USE!  PLEASE READ EACH STEP CAREFULLY!

In order to log into MariaDB to secure it, we'll need the current
password for the root user.  If you've just installed MariaDB, and
you haven't set the root password yet, the password will be blank,
so you should just press enter here.

Enter current password for root (enter for none):
OK, successfully used password, moving on...

Setting the root password ensures that nobody can log into the MariaDB
root user without the proper authorisation.

Set root password? [Y/n] y
New password:
Re-enter new password:
Password updated successfully!
Reloading privilege tables..
 ... Success!


By default, a MariaDB installation has an anonymous user, allowing anyone
to log into MariaDB without having to have a user account created for
them.  This is intended only for testing, and to make the installation
go a bit smoother.  You should remove them before moving into a
production environment.

Remove anonymous users? [Y/n] y
 ... Success!

Normally, root should only be allowed to connect from 'localhost'.  This
ensures that someone cannot guess at the root password from the network.

Disallow root login remotely? [Y/n] n
 ... skipping.

By default, MariaDB comes with a database named 'test' that anyone can
access.  This is also intended only for testing, and should be removed
before moving into a production environment.

Remove test database and access to it? [Y/n] y
 - Dropping test database...
 ... Success!
 - Removing privileges on test database...
 ... Success!

Reloading the privilege tables will ensure that all changes made so far
will take effect immediately.

Reload privilege tables now? [Y/n] y
 ... Success!

Cleaning up...

All done!  If you've completed all of the above steps, your MariaDB
installation should now be secure.

Thanks for using MariaDB!
第一个直接回车
我这里设置的密码是000000
第二个节点操作相同
db1更改配置文件
vi /etc/my.cnf
更改为如下内容
server_id 根据自己的db1节点的id填写我这里是10
[mysqld]
log_bin = mysql-bin #记录操作日志
binlog_ignore_db = mysql #不同步 MySQL 系统数据库
server_id = 10 #数据库集群中的每个节点 id 都要不同, 一般使用 IP 地址的最后段的数字,例如 172.16.51.18,server_id 就写 18


datadir=/var/lib/mysql
socket=/var/lib/mysql/mysq
# Disabling symbolic-links is recommended to prevent assorted security risks
symbolic-links=0


[mysqld_safe]
log-error=/var/log/mariadb/mariadb.log
pid-file=/var/run/mariadb/mariadb.pid
在主节点 db1 虚拟机上使用 mysql 命令登录 MariaDB 数据库
[root@db1 ~]# mysql -u root -p000000
授权在任何客户端机器 上可以以 root 用户登录到数据库
MariaDB [(none)]> grant all privileges on *.* to root@'%' identified by "000000";
Query OK, 0 rows affected (0.000 sec)
在主节点 db1 数据库上创建一个 user 用户让从节点 db2 连接,并赋予从节点同步主节 点数据库的权限
MariaDB [(none)]> grant replication slave on *.* to 'user'@'db2' identified by '000000';
Query OK, 0 rows affected (0.000 sec)
进入db2的数据库
[root@db2 ~]# mysql -u root -p000000
配置从节点连接主节点 的连接信息。master_host 为主节点主机名 db1,master_user 为db1中创建的用户 user
MariaDB [(none)]> change master to master_host='db1',master_user='user',master_password='000000';
Query OK, 0 rows affected (0.00 sec)
然后退出数据库Ctrl+C
MariaDB [(none)]> Ctrl-C -- exit!
Aborted
重启数据之后在进入使用show slave status\G;命令并查看从节点服务状态
[root@db2 ~]# systemctl restart mariadb
[root@db2 ~]# mysql -u root -p000000
Welcome to the MariaDB monitor.  Commands end with ; or \g.
Your MariaDB connection id is 11
Server version: 10.3.18-MariaDB MariaDB Server

Copyright (c) 2000, 2018, Oracle, MariaDB Corporation Ab and others.

Type 'help;' or '\h' for help. Type '\c' to clear the current input statement.

MariaDB [(none)]>
然后查看
MariaDB [(none)]> show slave status\G;
*************************** 1. row ***************************
                Slave_IO_State: Waiting for master to send event
                   Master_Host: db1
                   Master_User: user
                   Master_Port: 3306
                 Connect_Retry: 60
               Master_Log_File: mysql-bin.000001
           Read_Master_Log_Pos: 701
                Relay_Log_File: db2-relay-bin.000007
                 Relay_Log_Pos: 555
         Relay_Master_Log_File: mysql-bin.000001
              Slave_IO_Running: Yes
             Slave_SQL_Running: Yes
               Replicate_Do_DB:
           Replicate_Ignore_DB:
            Replicate_Do_Table:
        Replicate_Ignore_Table:
       Replicate_Wild_Do_Table:
   Replicate_Wild_Ignore_Table:
                    Last_Errno: 0
                    Last_Error:
                  Skip_Counter: 0
           Exec_Master_Log_Pos: 701
               Relay_Log_Space: 862
               Until_Condition: None
                Until_Log_File:
                 Until_Log_Pos: 0
            Master_SSL_Allowed: No
            Master_SSL_CA_File:
            Master_SSL_CA_Path:
               Master_SSL_Cert:
             Master_SSL_Cipher:
                Master_SSL_Key:
         Seconds_Behind_Master: 0
 Master_SSL_Verify_Server_Cert: No
                 Last_IO_Errno: 0
                 Last_IO_Error:
                Last_SQL_Errno: 0
                Last_SQL_Error:
   Replicate_Ignore_Server_Ids:
              Master_Server_Id: 10
                Master_SSL_Crl:
            Master_SSL_Crlpath:
                    Using_Gtid: No
                   Gtid_IO_Pos:
       Replicate_Do_Domain_Ids:
   Replicate_Ignore_Domain_Ids:
                 Parallel_Mode: conservative
                     SQL_Delay: 0
           SQL_Remaining_Delay: NULL
       Slave_SQL_Running_State: Slave has read all relay log; waiting for the slave I/O thread to update it
              Slave_DDL_Groups: 0
Slave_Non_Transactional_Groups: 0
    Slave_Transactional_Groups: 0
1 row in set (0.000 sec)

ERROR: No query specified
Slave_IO_Running 和 Slave_SQL_Running 的状态都为 YES
从节点服务开启成功
测试是否成功开启
在db1中进入数据库并且创建test数据库
[root@db1 centos]# mysql -u root -p000000
Welcome to the MariaDB monitor.  Commands end with ; or \g.
Your MariaDB connection id is 13
Server version: 10.3.18-MariaDB-log MariaDB Server

Copyright (c) 2000, 2018, Oracle, MariaDB Corporation Ab and others.

Type 'help;' or '\h' for help. Type '\c' to clear the current input statement.

MariaDB [(none)]> create database test;
Query OK, 1 row affected (0.001 sec)

MariaDB [(none)]> show databases;
+--------------------+
| Database           |
+--------------------+
| information_schema |
| mysql              |
| performance_schema |
| test               |
+--------------------+
4 rows in set (0.001 sec)

MariaDB [(none)]>
查看后有test数据库
到db2节点查看
[root@db2 ~]# mysql -u root -p000000
Welcome to the MariaDB monitor.  Commands end with ; or \g.
Your MariaDB connection id is 12
Server version: 10.3.18-MariaDB MariaDB Server

Copyright (c) 2000, 2018, Oracle, MariaDB Corporation Ab and others.

Type 'help;' or '\h' for help. Type '\c' to clear the current input statement.

MariaDB [(none)]> show databases;
+--------------------+
| Database           |
+--------------------+
| information_schema |
| mysql              |
| performance_schema |
| test               |
+--------------------+
4 rows in set (0.000 sec)

MariaDB [(none)]>


 428
428


 被折叠的 条评论
为什么被折叠?
被折叠的 条评论
为什么被折叠?
 到【灌水乐园】发言


