


1.WebService简介
webservice即网站服务,他是一种跨编程语言,跨操作系统平台的远程调用技术。
2.写一个WebService
springboot
SpringBoot快速搭建
我们在直接得基础上新建一个boot项目
2.1 pom文件
父工程得pom
<?xml version="1.0" encoding="UTF-8"?>
<project xmlns="http://maven.apache.org/POM/4.0.0" xmlns:xsi="http://www.w3.org/2001/XMLSchema-instance"
         xsi:schemaLocation="http://maven.apache.org/POM/4.0.0 https://maven.apache.org/xsd/maven-4.0.0.xsd">
    <modelVersion>4.0.0</modelVersion>
    <packaging>pom</packaging>
    <modules>
        <module>demo1</module>
        <module>demo2</module>
        <module>EurekaServer</module>
        <module>zuul</module>
        <module>webService</module>
    </modules>
    <parent>
        <groupId>org.springframework.boot</groupId>
        <artifactId>spring-boot-starter-parent</artifactId>
        <version>2.2.1.RELEASE</version>
        <relativePath/> <!-- lookup parent from repository -->
    </parent>
    <groupId>com.liu</groupId>
    <artifactId>study</artifactId>
    <version>0.0.1-SNAPSHOT</version>
    <name>study</name>
    <description>Demo project for Spring Boot</description>
    <properties>
        <java.version>1.8</java.version>
    </properties>
    <dependencyManagement>
        <dependencies>
            <!--springCloud的依赖-->
            <dependency>
                <groupId>org.springframework.cloud</groupId>
                <artifactId>spring-cloud-dependencies</artifactId>
                <version>Hoxton.SR12</version>
                <type>pom</type>
                <scope>import</scope>
            </dependency>
        </dependencies>
    </dependencyManagement>
    <dependencies>
        <dependency>
            <groupId>org.springframework.boot</groupId>
            <artifactId>spring-boot-starter</artifactId>
        </dependency>

        <dependency>
            <groupId>org.springframework.boot</groupId>
            <artifactId>spring-boot-starter-test</artifactId>
            <scope>test</scope>
        </dependency>
        <!--springweb的依赖-->
        <dependency>
            <groupId>org.springframework.boot</groupId>
            <artifactId>spring-boot-starter-web</artifactId>
        </dependency>
        <!--Feign的依赖-->
        <dependency>
            <groupId>org.springframework.cloud</groupId>
            <artifactId>spring-cloud-starter-feign</artifactId>
            <version>1.4.6.RELEASE</version>
        </dependency>

    </dependencies>

    <build>
        <plugins>
            <plugin>
                <groupId>org.springframework.boot</groupId>
                <artifactId>spring-boot-maven-plugin</artifactId>
            </plugin>
        </plugins>
    </build>

</project>
你可以直接快速新建一个springboot项目,不需要像我这样,我是之前建好了,现在只要新增一个模块就行。
我们新增得WebService得pom文件
       <dependencies>
        <!--webservice接口-->
        <dependency>
            <groupId>org.springframework.boot</groupId>
            <artifactId>spring-boot-starter-web-services</artifactId>
        </dependency>
        <dependency>
            <groupId>org.apache.cxf</groupId>
            <artifactId>cxf-spring-boot-starter-jaxws</artifactId>
            <version>3.2.7</version>
        </dependency>
    </dependencies>
2.2 启动类实体类等准备
启动类
package com.liu;

import org.springframework.boot.SpringApplication;
import org.springframework.boot.autoconfigure.SpringBootApplication;

@SpringBootApplication
public class WebServiceApplication {
    public static void main(String[] args) {
        SpringApplication.run(WebServiceApplication.class, args);
    }
}
application.yml
server:
  port: 8088
spring:
  application:
    name: webService
RegisterBO 实体类
package com.liu.pojo;

/**
 * @author liu
 * @create 2022-06-16 15:00
 */

public class RegisterBO {
    private int id;  //id
    private String name;   //姓名
    private String pwd;   //密码

    public int getId() {
        return id;
    }

    public void setId(int id) {
        this.id = id;
    }

    public String getName() {
        return name;
    }

    public void setName(String name) {
        this.name = name;
    }

    public String getPwd() {
        return pwd;
    }

    public void setPwd(String pwd) {
        this.pwd = pwd;
    }
}
2.3 新建接口 IRegisterApiService
package com.liu.service;

import com.liu.pojo.RegisterBO;
import org.springframework.beans.factory.annotation.Value;

import javax.jws.WebMethod;
import javax.jws.WebParam;
import javax.jws.WebService;

/**
 * @author liu
 * @create 2022-06-16 14:46
 */

@WebService
public interface IRegisterApiService {

    @WebMethod
    public RegisterBO getUser(@WebParam(name = "Name",
            targetNamespace = "http://service.liu.com/")
                                            String Name);
}
getUser是方法名 name是参数
最重要得是targetNamespace 这个是规定好,到时候调用得xml就需要和这个对应
2.4 实现类 RegisterApiServiceImpl
package com.liu.service.impl;

import com.liu.pojo.RegisterBO;
import com.liu.service.IRegisterApiService;
import org.springframework.beans.factory.annotation.Value;
import org.springframework.stereotype.Service;

import javax.jws.WebService;

/**
 * @author liu
 * @create 2022-06-16 15:03
 */

@Service
@WebService(serviceName = "IRegisterApiService", targetNamespace = "http://service.liu.com/",
        endpointInterface = "com.liu.service.IRegisterApiService"
)
public class RegisterApiServiceImpl implements IRegisterApiService {

    @Override
    public RegisterBO getUser(String Name) {
        RegisterBO registerBO = new RegisterBO();
        registerBO.setId(1);
        registerBO.setName(Name);
        registerBO.setPwd("123456");
        return registerBO;
    }
}
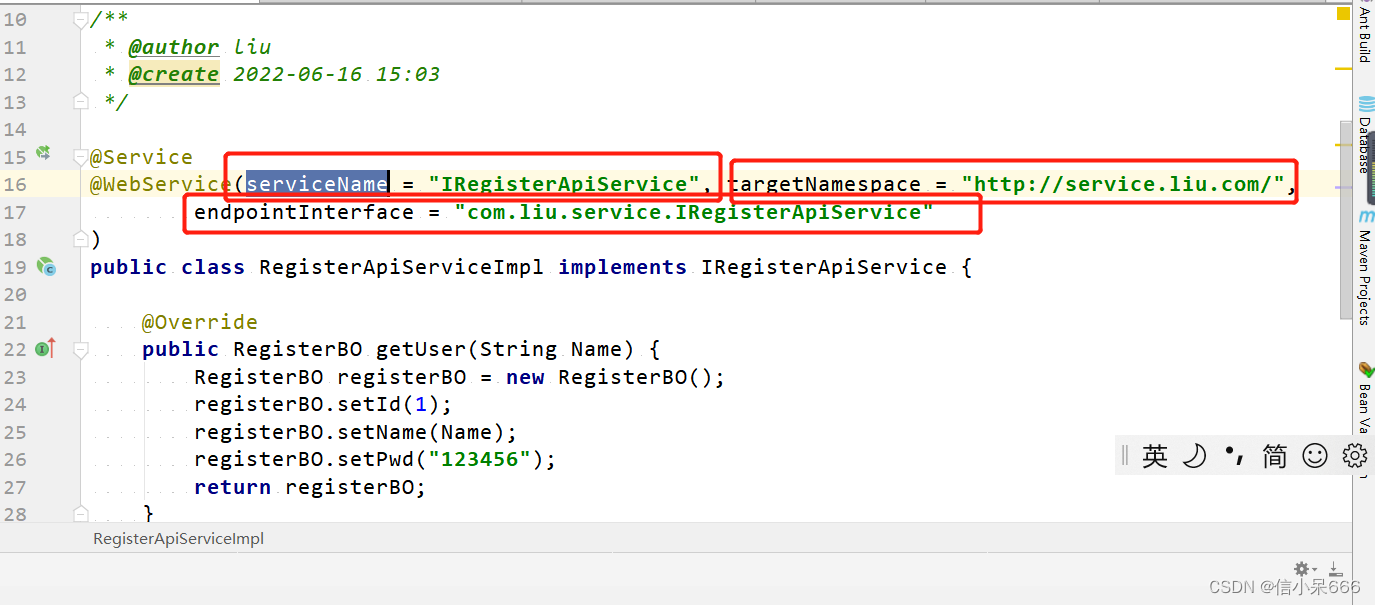
这三个参数
serviceName写我们需要实现得接口名
targetNamespace 写自己得包名得反序 和之前接口targetNamespace一定要一样
endpointInterface写全路径 包名加类名
2.5 配置文件 WebServiceConfig
package com.liu.config;


import com.liu.service.IRegisterApiService;
import org.apache.cxf.Bus;
import org.apache.cxf.bus.spring.SpringBus;
import org.apache.cxf.jaxws.EndpointImpl;
import org.apache.cxf.transport.servlet.CXFServlet;
import org.springframework.beans.factory.annotation.Autowired;
import org.springframework.boot.web.servlet.ServletRegistrationBean;
import org.springframework.context.annotation.Bean;
import org.springframework.context.annotation.Configuration;

import javax.xml.ws.Endpoint;

/**
 * @author liu
 * @create 2022-06-16 14:43
 */

@Configuration
public class WebServiceConfig {

    @Autowired
    private IRegisterApiService registerApiService;

    /**
     * 注入servlet  bean name不能dispatcherServlet 否则会覆盖dispatcherServlet
     *
     * @return
     */
    @Bean(name = "cxfServlet")
    public ServletRegistrationBean cxfServlet() {
        return new ServletRegistrationBean(new CXFServlet(), "/ws/*");
    }

    @Bean(name = Bus.DEFAULT_BUS_ID)
    public SpringBus springBus() {
        return new SpringBus();
    }

    /**
     * 注册WebServiceDemoService接口到webservice服务
     *
     * @return
     */
    @Bean(name = "RegisterApiServiceEndpoint")
    public Endpoint sweptPayEndpoint() {
        EndpointImpl endpoint = new EndpointImpl(springBus(), registerApiService);
        endpoint.publish("/getName");
        return endpoint;
    }

}

这块规定后面所有得url都走ip+ws即可
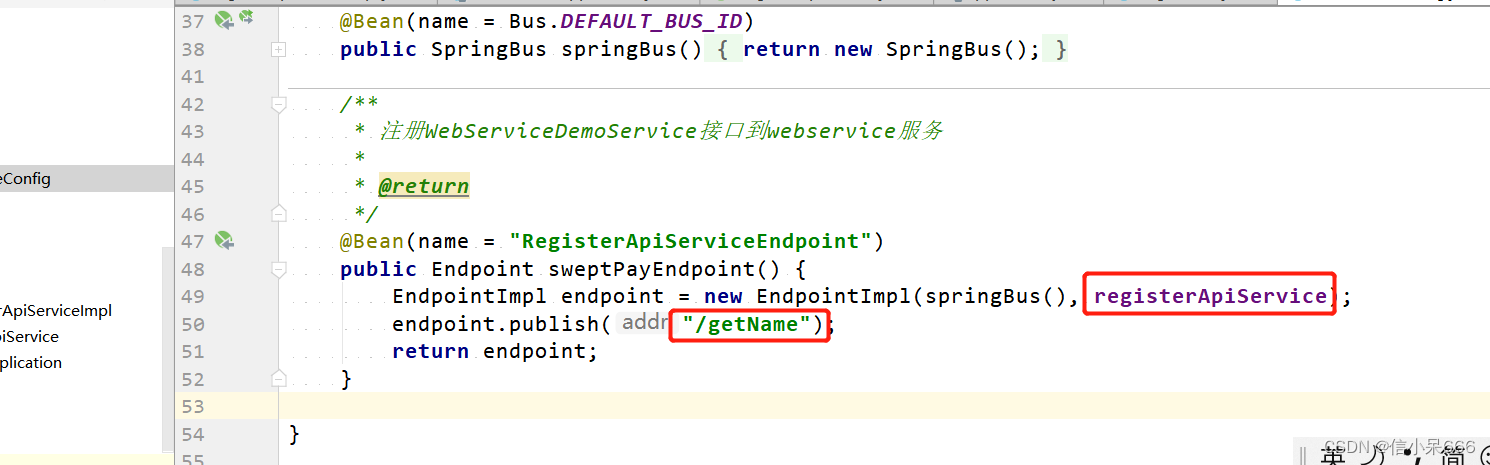
这块是url得地址 需要指定对应得webService接口名
发布即可
2.6 发布后测试
http://localhost:8088/ws
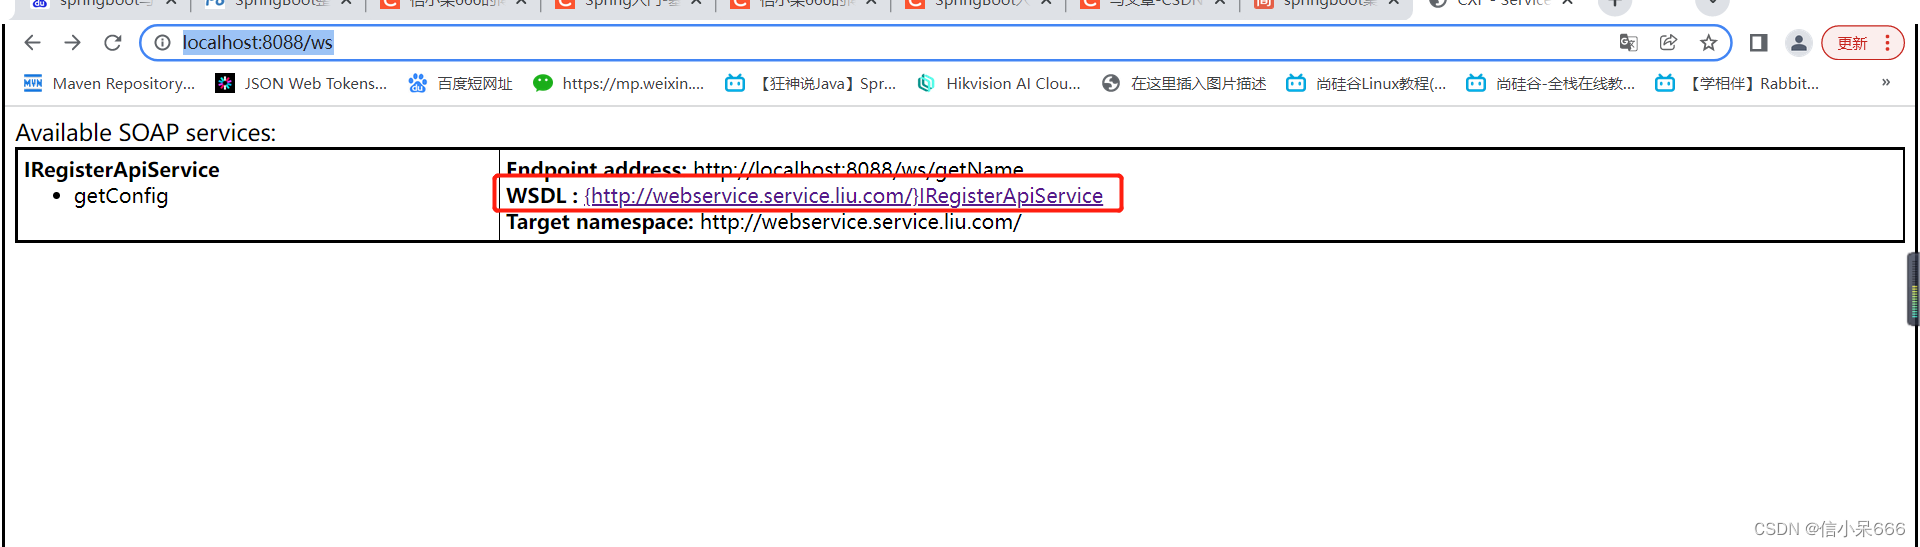
出来这个页面说明发布成功了
点击这个连接 http://localhost:8088/ws/getName?wsdl
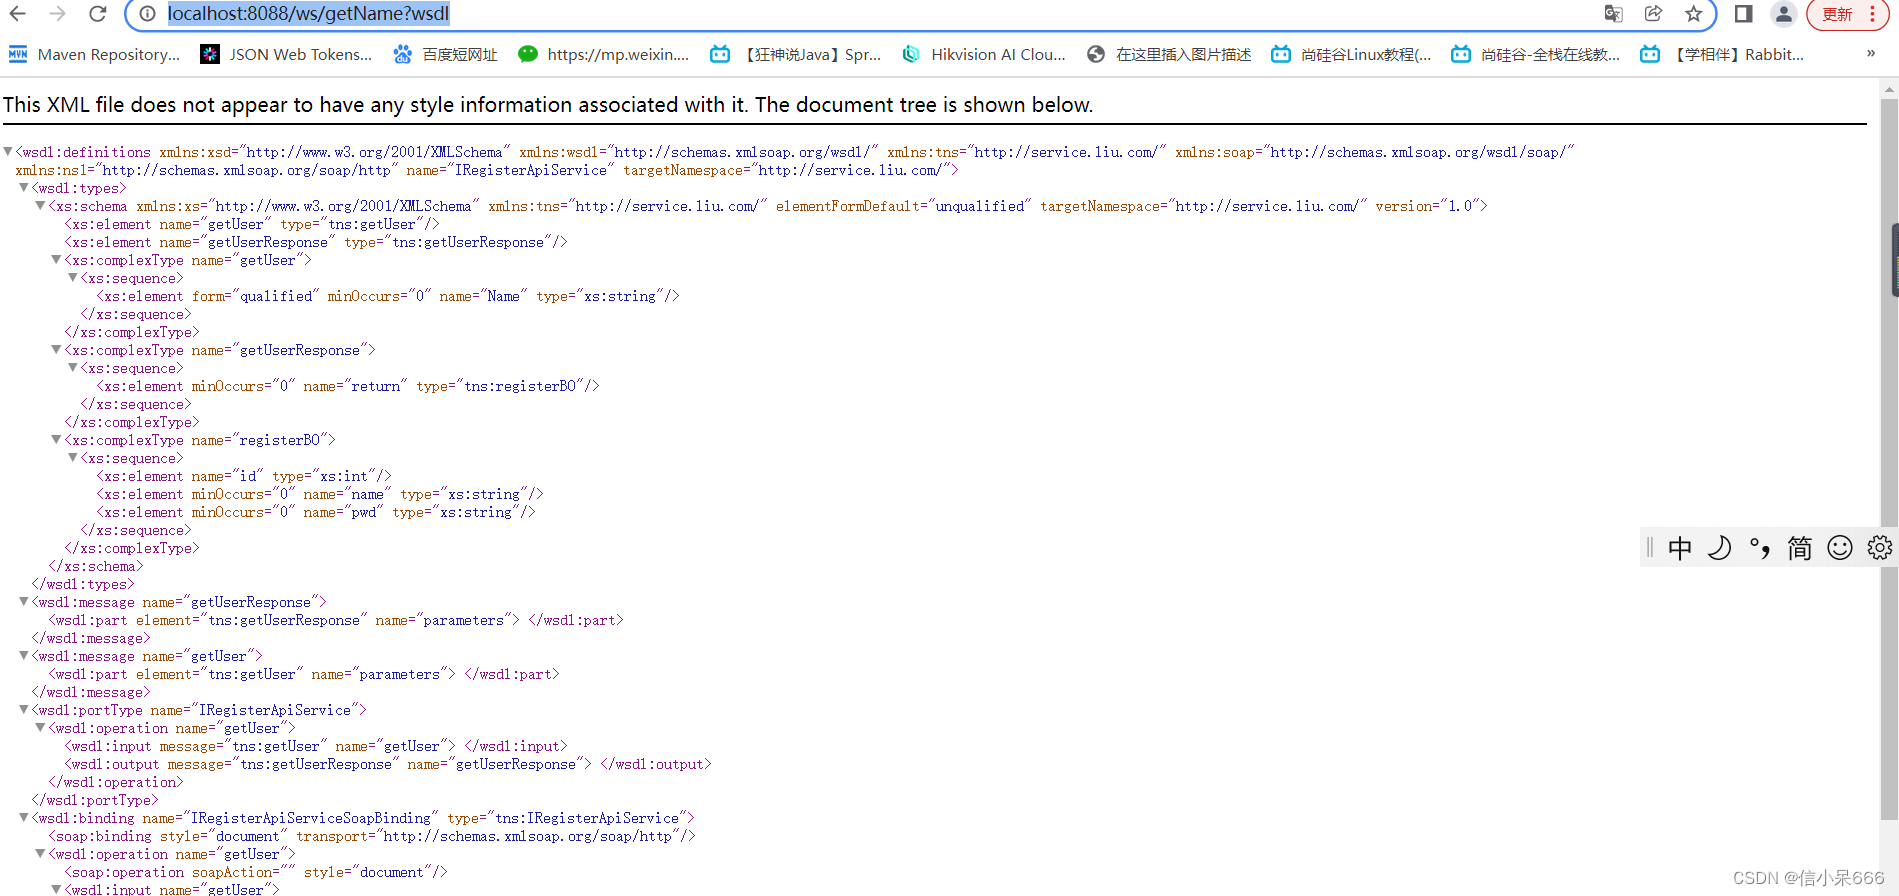
就会出来对应得xml
3. postman测试webService接口
之前写过postman入门到精通 但是只介绍https得接口调用
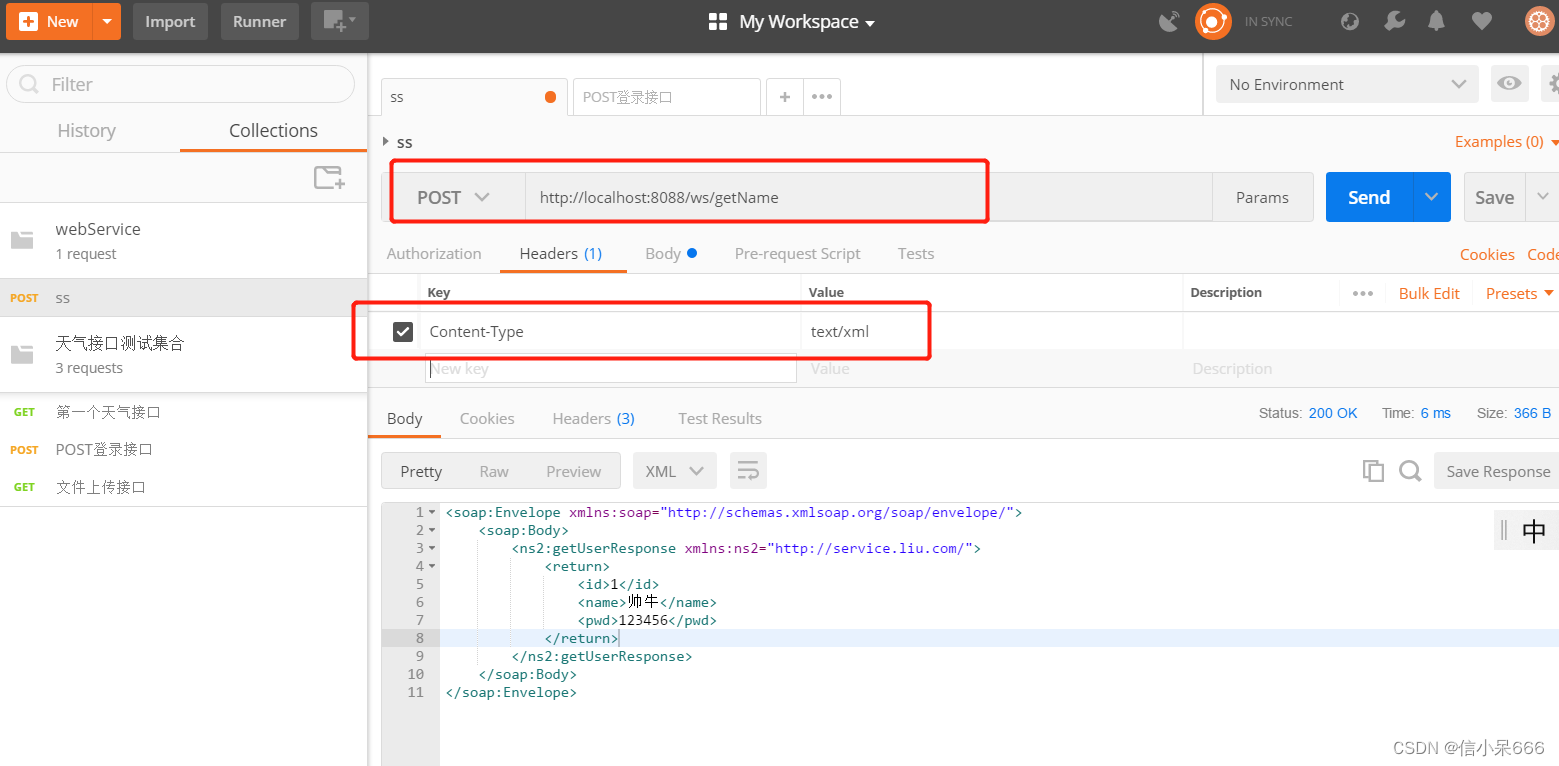
新建post请求
url:http://localhost:8088/ws/getName
这里前面是ip ws是之前配置文件写的 getName
头部 Content-Type text/xml
body
<?xml version="1.0" encoding="utf-8"?>
<soap:Envelope xmlns:xsi="http://www.w3.org/2001/XMLSchema-instance" xmlns:xsd="http://www.w3.org/2001/XMLSchema" xmlns:soap="http://schemas.xmlsoap.org/soap/envelope/">
  <soap:Body>
    <getUser xmlns="http://service.liu.com/">
      <Name>帅牛</Name>
    </getUser>
  </soap:Body>
</soap:Envelope>
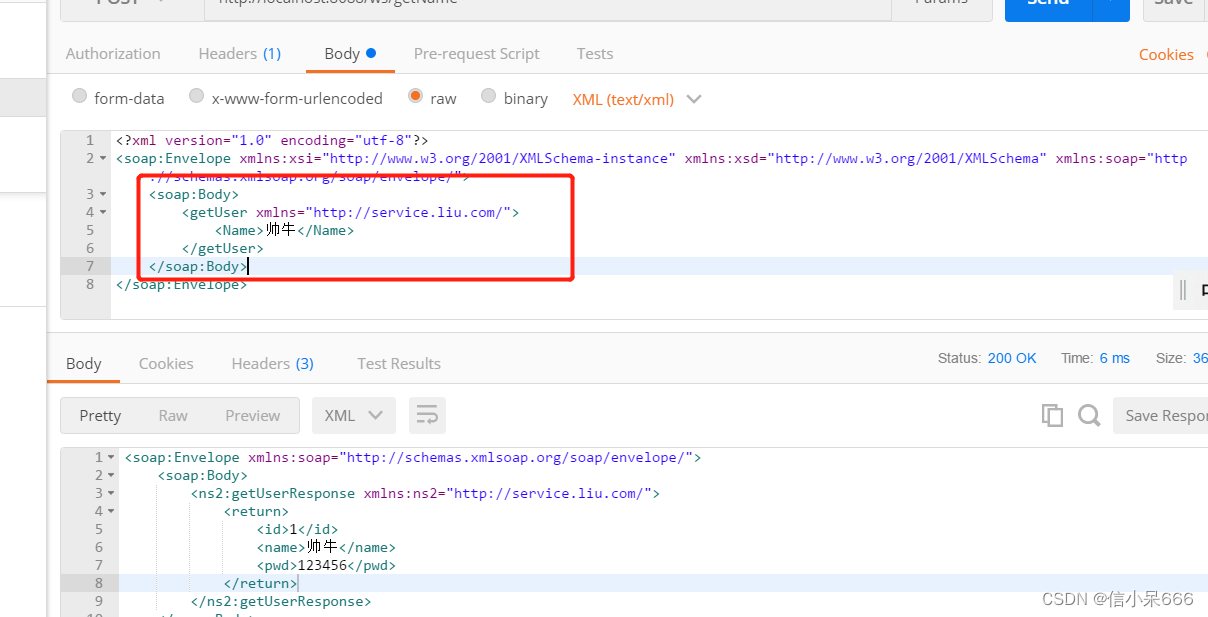
soap:Body这块参数 getUser是我们接口写的方法名字 要以键值对
xmlns="http://service.liu.com/"是我们代码 targetNamespace 参数
Name 是我们入参 也是键值对
发送成功后
<soap:Envelope xmlns:soap="http://schemas.xmlsoap.org/soap/envelope/">
    <soap:Body>
        <ns2:getUserResponse xmlns:ns2="http://service.liu.com/">
            <return>
                <id>1</id>
                <name>帅牛</name>
                <pwd>123456</pwd>
            </return>
        </ns2:getUserResponse>
    </soap:Body>
</soap:Envelope>
return是返回成功得结果集
下一章学习下java自己如何调用webService接口


 1580
1580


 被折叠的 条评论
为什么被折叠?
被折叠的 条评论
为什么被折叠?
 到【灌水乐园】发言


