


vue-cli的简单操作及开展项目
vue-cli
一、 安装环境
1.官网下载nodejs安装,按普通流程走。
2.命令提示符进行以下操作以安装主体环境,注意:最好在管理员权限下进行安装
(1)node -v //查看nodejs安装是否成功
(2)npm -v //查看npm组件是否安装成功
(3)npm install cnpm -g //全局安装cnpm淘宝镜像,这样后续下载会快一点
(4)cnpm install vue-cli -g //使用cnpm镜像下载vue-cli脚手架,可以在C:\Users\10370\AppData\Roaming\npm\node_modules文件夹中看到下载的模板。

等待下载完20个文件
(5)vue list 可以查看vue能够进行什么操作
2.转到总目标文件夹下,构建cli项目
(1)vue init webpack myvue
webpack指使用webpack的打包方式构建项目,myvue是项目名,也是项目文件夹名。

一开始都选no,可以体验构建过程
(2)
cd myvue

npm install
在我们的项目文件夹中,构建npm的运行环境
(3)npm run dev 打包项目并发布到网页,便于查看项目
此时可以看见一个静态的网页外观。
3.通过idea打开项目可以看见vue-cli的项目组成

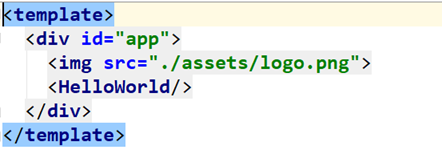
(1)Webpack.base.conf.js包含使用webpack方法打包项目的配置内容,logo.png就是页面的那个logo图标,Helloworld.vue作为组件被保存,主要写的是页面下方那些选项,App.vue就是页面的vue文件,主要模板如下,可以看见就是引入了图标文件和Helloworld.vue组件。
(2)Config文件夹下的index.js文件包含端口、ip和静态资源存储
(assetsSubDirectory)的配置,如有需要可进行更改。
(3)Index.html文件就是vue-cli项目的总页面
<body>
  <div id="app"></div>
  <!-- built files will be auto injected -->
</body>
设置了id为app的div,它与src下的main.js文件中的vue对象进行了绑定,这个vue对象又与App.vue进行绑定,以此完成页面的构建。
new Vue({
  el: '#app',
  components: { App },
  template: '<App/>'
})
webpack
webpack是前端的依赖管理、文件管理和打包部署的工具,类似于后端的maven。Webpack用require方法导入依赖的其他模块,用export或module.export暴露需要导出的接口.
Webpack是同步加载,存在阻塞情况.后续出现了AMD\CMD\ES6规范的技术来解决各种问题。
1.安装webpack及其客户端
npm install webpack -gnpm install webpack-cli -g检查其版本号,看看是否安装成功
webpack -vwebpack-cli -v简单的看下webpack原理
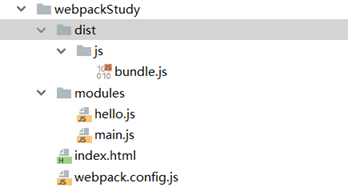
建一个webpackStudy空项目,在modules目录下建立hello.js文件:
//用exports暴露一个接口
exports.hehe=function () {
    document.write('optimics prime')
}
再建立main.js,通过require方法接收那个接口实例化对象,在通过对象调接口的方法
//接收暴露的方法,形成对象,使用时只需要用对象调用方法
var hehe=require("./hello");

hehe.hehe();
建立webpack.config.js文件,使用module.exports导出模板,其入口(entry)为模板源文件,出口为webpack打包文件的目标位置。
module.exports={

    entry:'./modules/main.js',

    output:{

        filename:'./js/bundle.js'

    }

};
在使用时,只需要导入压缩文件的位置即可使用。
<script src="dist/js/bundle.js"></script>这样可以看出,Webpack使js文件更容易管理和输出。
Vue-router
1.安装Vue-router:
npm install vue-router --save-dev编写MyComponent1组件
<template>
    <h1>内容1</h1>
</template>
<script>
    export default {
        name: "MyComponent1"
    }
</script>
<style scoped>
</style>
3.创建router文件夹,创建index.jsp文件
在index.jsp中注册路由器
//注册所有组件
import Vue from 'vue'

import VueRouter from 'vue-router'

import MyComponent1 from '../components/MyComponent1'

import HelloWorld from '../components/HelloWorld'
//安装路由
Vue.use(VueRouter);//配置导出路由
export default new Router({

  routes:[{

    //与RequestMapping作用相同,但这个不需要经过后端,可由前端直接跳转

    path:'/component1',

    name:'MyComponent1',

    //跳转的组件

    component:MyComponent1
  },{
    path:'/HelloWorld',
    name:'HelloWorld',
    component:HelloWorld
  }]
});
4在main.js中注册路由
import Vue from 'vue'

import App from './App'
import router from './router'//自动扫描包下的index.js文件
//必须显式的声明vue-router
Vue.use(router);

/* eslint-disable no-new */
new Vue({
  el: '#app',
  router,
//直接声明router
})
5.在vue.js中引入相关路由组件
<template>
  <div id="app">
    <router-link to="/HelloWorld">首页</router-link>
   <router-link to="/component1">第一页</router-link>
    <router-view></router-view>
  </div>
</template>
Element UI简单项目构建
一、安装环境
1.总项目文件夹下建立新项目目录:
vue init webpack hello-vue 2.进入新项目目录:
cd hello-v·ue3.安装vue-router:
npm install vue-router --save-dev4.安装element-ui:
npm i element-ui -S5.安装依赖:
npm install6.安装sass加载器:
cnpm install sass-loader node-sass --save-dev7.启动测试:
npm run dev二、项目内部构建
建立如下内部构成的项目:
1.在views文件夹中主要存放页面视图,这里构建两个视图,分别为首页Main.vue和登录页面login.vue。Main.vue为登陆后的首页范例,可以简单的做个样子:
 <template>
    <h1>首页</h1>
</template>
<script>
    export default {
        name: "Main"
    }
</script>
<style scoped>

</style>
Login.vue是登录页面,可以从element-ui的示例中截取代码,加以改造,成为我们需要的前端样式
(element-ui官网示例https://element.eleme.cn/#/zh-CN/component/installation):
<template>

  <el-form:model="ruleForm"
  status-icon :rules="rules"
  ref="ruleForm"
  label-width="100px"
  class="demo-ruleForm">

    <h3 class="welcome">欢迎登录</h3>

<!--用户名-->
    <el-form-item label="用户名" prop="username">

      <el-input type="text" v-model="ruleForm.username"
      placeholder="输入用户名"></el-input>

    </el-form-item>


    <!--密码和确认密码框-->

    <el-form-item label="密码" prop="pass">
      <el-input type="password" v-model="ruleForm.pass" autocomplete="off">
      </el-input>
    </el-form-item>

    <el-form-item label="确认密码" prop="checkPass">
      <el-input type="password" v-model="ruleForm.checkPass" autocomplete="off">
      </el-input>
    </el-form-item>

    <!--提交和重置按钮-->
    <el-form-item>
      <el-button type="primary" v-on:click="submitForm('ruleForm')">提交
      </el-button>
      <el-button @click="resetForm('ruleForm')">重置</el-button>
    </el-form-item>
  </el-form>

</template>

<!--登陆失败时的对话框-->

<el-dialog title="温馨提示" width="30%" :visible.sync="dialogVisible"
:before-close="handleClose">
  <span>请重新输入账号和密码</span>
  <span slot="footer" class="dialog-footer">
    <el-button type="primary" @click="dialogVisible=false">确定</el-button>
  </span>
</el-dialog>

<script>
    export default {
        name: "Login",
      //指定的规则函数
      data() {
        // var checkUserName =(rule, value, callback) => {
        //   if (!value) {
        //     callback(new Error('用户名不能为空'));
        //   }
          // setTimeout(() => {
          //   if (value.length>=20) {
          //     callback(new Error('用户名不能过长'));
          //   }
          // });
        // };

        var validatePass = (rule, value,callback) => {
          if (value === '') {
            callback(new Error('请输入密码'));
          } else {
            if (this.ruleForm.checkPass !== '') {
              this.$refs.ruleForm.validateField('checkPass');
            }
            callback();
          }
        };
        var validatePass2 = (rule, value,callback) => {
          if (value === '') {
            callback(new Error('请再次输入密码'));
          } else if (value !== this.ruleForm.pass) {
            callback(new Error('两次输入密码不一致!'));
          } else {
            callback();
          }
        };
        return {
          //表单的关联名
          ruleForm: {
            username:'',
            pass: '',
            checkPass: ''
          },
          //表单事件与指定的规则函数相关联,事件类型为失去焦点
          rules: {
            username: [
              //{validator:checkUserName, trigger: 'blur'}
              { required:true,message:'用户名不得为空', trigger: 'blur' }
            ],
            pass: [
              { validator: validatePass,trigger: 'blur' }
            ],
            checkPass: [
              { validator: validatePass2,trigger: 'blur' }
            ],
          },
          //对话框默认隐藏,注意别写在rules里面了
          dialogVisible:false
        };
      },
      methods: {
        //  提交事件触发的方法
        submitForm(formName) {
          this.$refs[formName].validate((valid) => {
            if (valid) {
              //转发到首页
              this.$router.push("/main");
            } else {
              //提交不成功就弹出登陆失败的对话框
              this.dialogVisible=true;
              return false;
            }
          });
        },
        //重置触发的方法
        resetForm(formName) {
          this.$refs[formName].resetFields();
        }
      }
    }
</script>
<style scoped>

</style>
2.在router文件夹中注册路由
//注册路由
import Vue from 'vue'

import VueRouter from 'vue-router'
//导入组件
import Main from '../views/Main'

import Login from '../views/login'
//显式声明路由
Vue.use(VueRouter);//定义组件的浏览器路径
export default new VueRouter({

  routes:[{
    path:'/main',
    name:'main',
    component: Main
  },{
    path:'/login',
    component: Login
  }]
})
3.在main.js文件中导入写好的路由和element-ui组件
import Vue from 'vue'

import App from './App'


//在main.js中注册路由和element-ui

import router from './router'

import ElementUI from 'element-ui';


//导入element-ui的css渲染模式

import 'element-ui/lib/theme-chalk/index.css';


//显式的引用路由和element-ui

Vue.use(router);

Vue.use(ElementUI);


new Vue({

  el: '#app',


//对象中引入上述两个属性

  router,

  render: h => h(App)


})
在主页面App.vue中显示写好的内容
<template>
  <div id="app">
    <router-view></router-view>
  </div>
</template>
路由嵌套:
1.在router/index.js里导入要嵌套的路由:
import UserProfile from '../views/user/UserProfile'

import UserList from '../views/user/UserList'
2.在父路由的属性定义下定义子路由
{

  path:'/main',

  name:'main',

  component: Main,

  //路由嵌套

  children:[{

    path:'/user/profile',

    component:UserProfile

  },{

    path:'/user/list',

    component:UserList

  }]

}
3.父路由视图引入子路由
<el-menu-item-group>
  <template slot="title">信息</template>
  <el-menu-item index="1-1">

    <router-link to="/user/profile">用户信息</router-link>

  </el-menu-item>

  <el-menu-item index="1-2">

    <router-link to="/user/list">用户列表</router-link>

  </el-menu-item>

</el-menu-item-group>
4.预览子视图
<router-view/>路由传参
1.在父视图Main.vue文件中更改点击导向的路径
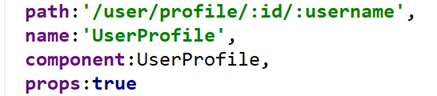
<router-link  v-bind:to="{name:'UserProfile',params:{id:1,username:'wmy'}}">用户信息

</router-link>
name是指定的路由名,params是要传递的参数
2.然后在router/index.js中更改路径,添加参数传递的许可
3.在UserProfile视图文件中添加参数声明,并显示参数
<template>

  <!--template下必须只有一个根标签,且所有内容都必须在标签内-->

  <div>

    <h1>用户信息</h1>

    {{id}}

    {{username}}

  </div>


</template>


<script>

    export default {

        name: "UserProfile",

      props:['id','username']

    }

</script>
重定向:只需要在路由的属性定义下添加如下内容:
{
  path:'/goHome',
  redirect:'/login'
}
这样你的/goHome路径就会被重定向到/login路径下。
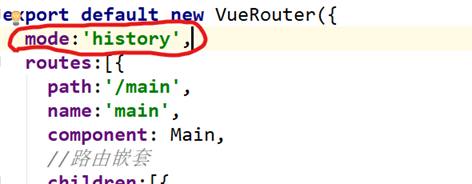
路由的地址模式:
Hash模式:带#号 history模式:不带#号
设置方法:
404页面
编写NotFound视图页面,并添加路由:
import NotFound from ‘…/views/NotFound’
定义属性

路由钩子函数:
1.安装vue-axios
npm install --save axios vue-axios
cnpm install --save axios
vue-axios 只有用淘宝镜像下载,国际版下不了
2.导入axios
import axios from ‘axios’
import VueAxios from ‘vue-axios’
Vue.use(axios, VueAxios)
调用axios方法


 2196
2196


 被折叠的 条评论
为什么被折叠?
被折叠的 条评论
为什么被折叠?
 到【灌水乐园】发言


