


Spring 整合 Web
容器初始化(XML配置)
启动容器时需要自动装载 ApplicationContext,Spring 提供的 ContextLoaderListener 就是为了自动装配 ApplicationContext 的配置信息
POM
- 需要在 pom.xml 增加 org.springframework:spring-web 依赖
<dependency>
    <groupId>javax.servlet</groupId>
    <artifactId>javax.servlet-api</artifactId>
    <version>3.1.0</version>
    <scope>provided</scope>
</dependency>

<dependency>
    <groupId>org.springframework</groupId>
    <artifactId>spring-web</artifactId>
    <version>4.3.17.RELEASE</version>
</dependency>
配置 web.xml
- web.xml 配置如下
<?xml version="1.0" encoding="UTF-8"?>
<web-app xmlns="http://xmlns.jcp.org/xml/ns/javaee"
         xmlns:xsi="http://www.w3.org/2001/XMLSchema-instance"
         xsi:schemaLocation="http://xmlns.jcp.org/xml/ns/javaee http://xmlns.jcp.org/xml/ns/javaee/web-app_3_1.xsd"
         version="3.1">

    <context-param>
        <param-name>contextConfigLocation</param-name>
        <param-value>classpath:spring-context*.xml</param-value>
    </context-param>
    <listener>
        <listener-class>org.springframework.web.context.ContextLoaderListener</listener-class>
    </listener>
</web-app>
ApplicationContextAware
- 当一个类实现了这个接口(
ApplicationContextAware)之后,这个类就可以方便获得ApplicationContext中的所有 bean。换句话说,就是这个类可以直接获取 Spring 配置文件中,所有有引用到的 Bean 对象。
package com.funtl.leeshop.commons.context;

import org.apache.commons.lang3.Validate;
import org.slf4j.Logger;
import org.slf4j.LoggerFactory;
import org.springframework.beans.BeansException;
import org.springframework.beans.factory.DisposableBean;
import org.springframework.context.ApplicationContext;
import org.springframework.context.ApplicationContextAware;

public class SpringContext implements ApplicationContextAware, DisposableBean {

    private static final Logger logger = LoggerFactory.getLogger(SpringContext.class);

    private static ApplicationContext applicationContext;

    /**
     * 获取存储在静态变量中的 ApplicationContext
     * @return
     */
    public static ApplicationContext getApplicationContext() {
        assertContextInjected();
        return applicationContext;
    }

    /**
     * 从静态变量 applicationContext 中获取 Bean,自动转型成所赋值对象的类型
     * @param name
     * @param <T>
     * @return
     */
    public static <T> T getBean(String name) {
        assertContextInjected();
        return (T) applicationContext.getBean(name);
    }

    /**
     * 从静态变量 applicationContext 中获取 Bean,自动转型成所赋值对象的类型
     * @param clazz
     * @param <T>
     * @return
     */
    public static <T> T getBean(Class<T> clazz) {
        assertContextInjected();
        return applicationContext.getBean(clazz);
    }

    /**
     * 实现 DisposableBean 接口,在 Context 关闭时清理静态变量
     * @throws Exception
     */
    public void destroy() throws Exception {
        logger.debug("清除 SpringContext 中的 ApplicationContext: {}", applicationContext);
        applicationContext = null;
    }

    /**
     * 实现 ApplicationContextAware 接口,注入 Context 到静态变量中
     * @param applicationContext
     * @throws BeansException
     */
    public void setApplicationContext(ApplicationContext applicationContext) throws BeansException {
        SpringContext.applicationContext = applicationContext;
    }

    /**
     * 断言 Context 已经注入
     */
    private static void assertContextInjected() {
        Validate.validState(applicationContext != null, "applicationContext 属性未注入,请在 spring-context.xml 配置中定义 SpringContext");
    }
}
还需要在 spring-context.xml 配置文件中装配 <bean id="springContext" class="com.funtl.leeshop.commons.context.SpringContext" />;
注意:请将该 Bean 放在配置顶部,否则使用时会报错
POM
需要在 pom.xml 中增加 org.apache.commons:commons-lang3 依赖
<dependency>
    <groupId>org.apache.commons</groupId>
    <artifactId>commons-lang3</artifactId>
    <version>3.5</version>
</dependency>
完整的 POM 文件
<?xml version="1.0" encoding="UTF-8"?>
<project xmlns="http://maven.apache.org/POM/4.0.0"
         xmlns:xsi="http://www.w3.org/2001/XMLSchema-instance"
         xsi:schemaLocation="http://maven.apache.org/POM/4.0.0 http://maven.apache.org/xsd/maven-4.0.0.xsd">
    <modelVersion>4.0.0</modelVersion>

    <groupId>com.funtl</groupId>
    <artifactId>leeshop</artifactId>
    <version>1.0.0-SNAPSHOT</version>
    <packaging>war</packaging>

    <dependencies>
        <!-- Spring Begin -->
        <dependency>
            <groupId>org.springframework</groupId>
            <artifactId>spring-context</artifactId>
            <version>4.3.17.RELEASE</version>
        </dependency>
        <dependency>
            <groupId>org.springframework</groupId>
            <artifactId>spring-webmvc</artifactId>
            <version>4.3.17.RELEASE</version>
        </dependency>
        <!-- Spring End -->

        <!-- Servlet Begin -->
        <dependency>
            <groupId>javax.servlet</groupId>
            <artifactId>javax.servlet-api</artifactId>
            <version>3.1.0</version>
            <scope>provided</scope>
        </dependency>
        <!-- Servlet End -->

        <!-- Log Begin -->
        <dependency>
            <groupId>org.slf4j</groupId>
            <artifactId>slf4j-api</artifactId>
            <version>1.7.25</version>
        </dependency>
        <dependency>
            <groupId>org.slf4j</groupId>
            <artifactId>slf4j-log4j12</artifactId>
            <version>1.7.25</version>
        </dependency>
        <dependency>
            <groupId>org.slf4j</groupId>
            <artifactId>jcl-over-slf4j</artifactId>
            <version>1.7.25</version>
        </dependency>
        <dependency>
            <groupId>org.slf4j</groupId>
            <artifactId>jul-to-slf4j</artifactId>
            <version>1.7.25</version>
        </dependency>
        <dependency>
            <groupId>log4j</groupId>
            <artifactId>log4j</artifactId>
            <version>1.2.17</version>
        </dependency>
        <!-- Log End -->

        <!-- Commons Begin -->
        <dependency>
            <groupId>org.apache.commons</groupId>
            <artifactId>commons-lang3</artifactId>
            <version>3.5</version>
        </dependency>
        <!-- Commons End -->
    </dependencies>
</project>
Bean 的装配方式(注解)
Bean 的装配方式是通过代码 getBean() 的方式从容器获取指定的 Bean 实例,容器首先会调用 Bean 类的无参构造器,创建空值的实例对象。除了使用 getBean() 的装配方式外,还可以使用注解的装配方式
容器中 Bean 的作用域
在学习 Bean 的装配方式之前,我们先了解一下 Bean 的作用域。当通过 Spring 容器创建一个 Bean 实例时,不仅可以完成 Bean 的实例化,还可以通过 scope 属性,为 Bean 指定特定的作用域。Spring 支持 5 种作用域。
- singleton:单态模式。即在整个 Spring 容器中,使用 singleton 定义的 Bean 将是单例的,只有一个实例。默认为单态的。
- prototype:原型模式。即每次使用 getBean 方法获取的同一个 的实例都是一个新的实例。
- request:对于每次 HTTP 请求,都将会产生一个不同的 Bean 实例。
- session:对于每个不同的 HTTP session,都将产生一个不同的 Bean 实例。
- global session:每个全局的 HTTP session 对应一个 Bean 实例。典型情况下,仅在使用 portlet 集群时有效,多个 Web 应用共享一个 session。一般应用中,global-session 与 session 是等同的。
<bean id="" class="" scope="作用域"/>
注意事项:
- 对于 scope 的值 request、session 与 global session,只有在 Web 应用中使用 Spring 时,该作用域才有效。
- 对于 scope 为 singleton 的单例模式,该 Bean 是在容器被创建时即被装配好了。
- 对于 scope 为 prototype 的原型模式,Bean 实例是在代码中使用该 Bean 实例时才进行装配的。
基于注解的装配方式
对于 DI 使用注解,将不再需要在 Spring 配置文件中声明 Bean 实例。Spring 中使用注解, 需要在原有 Spring 运行环境基础上再做一些改变
需要在 Spring 配置文件中配置组件扫描器,用于在指定的基本包中扫描注解。
<?xml version="1.0" encoding="UTF-8"?>
<beans xmlns="http://www.springframework.org/schema/beans"
       xmlns:xsi="http://www.w3.org/2001/XMLSchema-instance"
       xmlns:context="http://www.springframework.org/schema/context"
       xsi:schemaLocation="
       http://www.springframework.org/schema/beans http://www.springframework.org/schema/beans/spring-beans.xsd
       http://www.springframework.org/schema/context http://www.springframework.org/schema/context/spring-context.xsd
">
	<!--告訴spring容器扫描一下包中的注解-->
    <context:annotation-config />
    <context:component-scan base-package="com.**"/>
</beans>
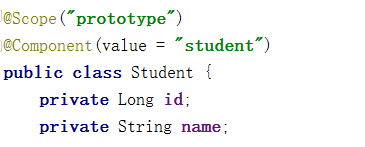
@Component
需要在类上使用注解 @Component,该注解的 value 属性用于指定该 bean 的 id 值。
@Component(value = "student")
public class Student {
    private Long id;
    private String name;

    public Long getId() {
        return id;
    }

    public void setId(Long id) {
        this.id = id;
    }

    public String getName() {
        return name;
    }

    public void setName(String name) {
        this.name = name;
    }

    @Override
    public String toString() {
        return "Student{" +
                "id=" + id +
                ", name='" + name + '\'' +
                '}';
    }
}
Spring 还提供了 3 个功能基本和 @Component 等效的注解
@Repository:用于对 DAO 实现类进行注解
@Service:用于对 Service 实现类进行注解
@Controller:用于对 Controller 实现类进行注解
@Scope
需要在类上使用注解 @Scope,其 value 属性用于指定作用域。默认为 singleton。
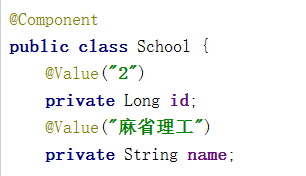
@Value
需要在属性上使用注解 @Value,该注解的 value 属性用于指定要注入的值。

使用该注解完成属性注入时,类中无需 setter。当然,若属性有 setter,则也可将其加到 setter 上。
@Autowired
需要在域属性上使用注解 @Autowired,该注解默认使用 按类型自动装配 Bean 的方式。
使用该注解完成属性注入时,类中无需 setter。当然,若属性有 setter,则也可将其加到 setter 上。

@Resource
需要在域属性上使用注解 @Resource,该注解有一个 name 属性,可以创建指定的 bean
@Resource(name = "userService")
private UserService userService;
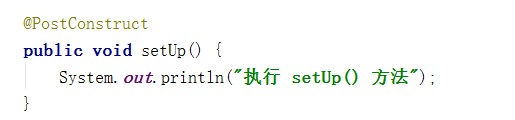
@PostConstruct
在方法上使用 @PostConstruct 相当于初始化
注解与 XML 配置的区别
-
注解的好处是,配置方便,直观。但其弊端也显而易见:以硬编码的方式写入到了 Java 代码中,其修改是需要重新编译代码的。
-
XML 配置方式的最大好处是,对其所做修改,无需编译代码,只需重启服务器即可将新的配置加载。
-
若注解与 XML 同用,XML 的优先级要高于注解。这样做的好处是,需要对某个 Bean 做修改,只需修改配置文件即可。
浏览器端存储技术简介
Cookie
Cookie 是指存储在用户本地终端上的数据,同时它是与具体的 Web 页面或者站点相关的。Cookie 数据会自动在 Web 浏览器和 Web 服务器之间传输,也就是说 HTTP 请求发送时,会把保存在该请求域名下的所有 Cookie 值发送给 Web 服务器,因此服务器端脚本是可以读、写存储在客户端的 Cookie 的操作。
LocalStorage
在 HTML5 中,新加入了一个 localStorage 特性,这个特性主要是用来作为本地存储来使用的,解决了 Cookie 存储空间不足的问题(Cookie 中每条 Cookie 的存储空间为 4k),localStorage 中一般浏览器支持的是 5M 大小,这个在不同的浏览器中 localStorage 会有所不同。
SessionStorage
SessionStorage 与 LocalStorage 的唯一一点区别就是 LocalStorage 属于永久性存储,而 SessionStorage 属于当会话结束的时候,SessionStorage 中的键值对就会被清空。
UserData、GlobalStorage、Google Gear
这三种的使用都有一定的局限性,例如
userData 是 IE 浏览器专属,它的容量可以达到 640K,这种方案可靠,不需要安装额外插件,只不过它仅在IE下有效
globalStorage 适用于 Firefox 2+ 的浏览器,类似于 IE 的 userData
google gear 是谷歌开发出的一种本地存储技术,需要安装 Gear 组件
#Flash ShareObject(Flash Cookie)
这种方式能能解决上面提到的 Cookie 存储的两个弊端,而且能够跨浏览器,应该说是目前最好的本地存储方案。不过,需要在页面中插入一个 Flash,当浏览器没有安装 Flash 控件时就不能用了。所幸的是,没有安装 Flash 的用户极少。
附:CookieUtils
package com.funtl.leeshop.commons.utils;

import javax.servlet.http.Cookie;
import javax.servlet.http.HttpServletRequest;
import javax.servlet.http.HttpServletResponse;
import java.io.UnsupportedEncodingException;
import java.net.URLDecoder;
import java.net.URLEncoder;

/**
 * Cookie 工具类
 * <p>Title: CookieUtils</p>
 * <p>Description: </p>
 *
 * @author Lusifer
 * @version 1.0.0
 * @date 2017/12/10 22:00
 */
public final class CookieUtils {

    /**
     * 得到Cookie的值, 不编码
     *
     * @param request
     * @param cookieName
     * @return
     */
    public static String getCookieValue(HttpServletRequest request, String cookieName) {
        return getCookieValue(request, cookieName, false);
    }

    /**
     * 得到Cookie的值,
     *
     * @param request
     * @param cookieName
     * @return
     */
    public static String getCookieValue(HttpServletRequest request, String cookieName, boolean isDecoder) {
        Cookie[] cookieList = request.getCookies();
        if (cookieList == null || cookieName == null) {
            return null;
        }
        String retValue = null;
        try {
            for (int i = 0; i < cookieList.length; i++) {
                if (cookieList[i].getName().equals(cookieName)) {
                    if (isDecoder) {
                        retValue = URLDecoder.decode(cookieList[i].getValue(), "UTF-8");
                    } else {
                        retValue = cookieList[i].getValue();
                    }
                    break;
                }
            }
        } catch (UnsupportedEncodingException e) {
            e.printStackTrace();
        }
        return retValue;
    }

    /**
     * 得到Cookie的值,
     *
     * @param request
     * @param cookieName
     * @return
     */
    public static String getCookieValue(HttpServletRequest request, String cookieName, String encodeString) {
        Cookie[] cookieList = request.getCookies();
        if (cookieList == null || cookieName == null) {
            return null;
        }
        String retValue = null;
        try {
            for (int i = 0; i < cookieList.length; i++) {
                if (cookieList[i].getName().equals(cookieName)) {
                    retValue = URLDecoder.decode(cookieList[i].getValue(), encodeString);
                    break;
                }
            }
        } catch (UnsupportedEncodingException e) {
            e.printStackTrace();
        }
        return retValue;
    }

    /**
     * 设置Cookie的值 不设置生效时间默认浏览器关闭即失效,也不编码
     */
    public static void setCookie(HttpServletRequest request, HttpServletResponse response, String cookieName,
                                 String cookieValue) {
        setCookie(request, response, cookieName, cookieValue, -1);
    }

    /**
     * 设置Cookie的值 在指定时间内生效,但不编码
     */
    public static void setCookie(HttpServletRequest request, HttpServletResponse response, String cookieName,
                                 String cookieValue, int cookieMaxage) {
        setCookie(request, response, cookieName, cookieValue, cookieMaxage, false);
    }

    /**
     * 设置Cookie的值 不设置生效时间,但编码
     */
    public static void setCookie(HttpServletRequest request, HttpServletResponse response, String cookieName,
                                 String cookieValue, boolean isEncode) {
        setCookie(request, response, cookieName, cookieValue, -1, isEncode);
    }

    /**
     * 设置Cookie的值 在指定时间内生效, 编码参数
     */
    public static void setCookie(HttpServletRequest request, HttpServletResponse response, String cookieName,
                                 String cookieValue, int cookieMaxage, boolean isEncode) {
        doSetCookie(request, response, cookieName, cookieValue, cookieMaxage, isEncode);
    }

    /**
     * 设置Cookie的值 在指定时间内生效, 编码参数(指定编码)
     */
    public static void setCookie(HttpServletRequest request, HttpServletResponse response, String cookieName,
                                 String cookieValue, int cookieMaxage, String encodeString) {
        doSetCookie(request, response, cookieName, cookieValue, cookieMaxage, encodeString);
    }

    /**
     * 删除Cookie带cookie域名
     */
    public static void deleteCookie(HttpServletRequest request, HttpServletResponse response,
                                    String cookieName) {
        doSetCookie(request, response, cookieName, "", -1, false);
    }

    /**
     * 设置Cookie的值,并使其在指定时间内生效
     *
     * @param cookieMaxage cookie生效的最大秒数
     */
    private static final void doSetCookie(HttpServletRequest request, HttpServletResponse response,
                                          String cookieName, String cookieValue, int cookieMaxage, boolean isEncode) {
        try {
            if (cookieValue == null) {
                cookieValue = "";
            } else if (isEncode) {
                cookieValue = URLEncoder.encode(cookieValue, "utf-8");
            }
            Cookie cookie = new Cookie(cookieName, cookieValue);
            if (cookieMaxage > 0)
                cookie.setMaxAge(cookieMaxage);
            if (null != request) {// 设置域名的cookie
                String domainName = getDomainName(request);
//                System.out.println(domainName);
                if (!"localhost".equals(domainName)) {
                    cookie.setDomain(domainName);
                }
            }
            cookie.setPath("/");
            response.addCookie(cookie);
        } catch (Exception e) {
            e.printStackTrace();
        }
    }

    /**
     * 设置Cookie的值,并使其在指定时间内生效
     *
     * @param cookieMaxage cookie生效的最大秒数
     */
    private static final void doSetCookie(HttpServletRequest request, HttpServletResponse response,
                                          String cookieName, String cookieValue, int cookieMaxage, String encodeString) {
        try {
            if (cookieValue == null) {
                cookieValue = "";
            } else {
                cookieValue = URLEncoder.encode(cookieValue, encodeString);
            }
            Cookie cookie = new Cookie(cookieName, cookieValue);
            if (cookieMaxage > 0)
                cookie.setMaxAge(cookieMaxage);
            if (null != request) {// 设置域名的cookie
                String domainName = getDomainName(request);
//                System.out.println(domainName);
                if (!"localhost".equals(domainName)) {
                    cookie.setDomain(domainName);
                }
            }
            cookie.setPath("/");
            response.addCookie(cookie);
        } catch (Exception e) {
            e.printStackTrace();
        }
    }

    /**
     * 得到cookie的域名
     */
    private static final String getDomainName(HttpServletRequest request) {
        String domainName = null;

        String serverName = request.getRequestURL().toString();
        if (serverName == null || serverName.equals("")) {
            domainName = "";
        } else {
            serverName = serverName.toLowerCase();
            serverName = serverName.substring(7);
            final int end = serverName.indexOf("/");
            serverName = serverName.substring(0, end);
            final String[] domains = serverName.split("\\.");
            int len = domains.length;
            if (len > 3) {
                // www.xxx.com.cn
                domainName = "." + domains[len - 3] + "." + domains[len - 2] + "." + domains[len - 1];
            } else if (len <= 3 && len > 1) {
                // xxx.com or xxx.cn
                domainName = "." + domains[len - 2] + "." + domains[len - 1];
            } else {
                domainName = serverName;
            }
        }

        if (domainName != null && domainName.indexOf(":") > 0) {
            String[] ary = domainName.split("\\:");
            domainName = ary[0];
        }
        return domainName;
    }

}
下一节Spring MVC


 379
379


 被折叠的 条评论
为什么被折叠?
被折叠的 条评论
为什么被折叠?
 到【灌水乐园】发言


