


Vue: 深入理解 v-model 工作原理
文章目录
动态绑定 v-model
用过 vue 的人应该都知道 v-model 的用法,官方文档也告诉我们应该用 v-model 来绑定 input、textarea 等标签的值。
然而当我们想要对 input 等输入控件进行封装的时候,就有必要学会如何在自定义组件上使用 v-model 来实现输入控件的绑定(也就是 React 官方文档中提到的 受控组件 的概念)
基础使用
首先我们先来看第一种,教程文档中教我们的用法
/src/components/BasicVModel.vue
<template>
  <div>
    <h1>Basic v-model Usage</h1>
    <input type="text" v-model="input" @input="onInput" @change="onChange" />
  </div>
</template>

<script>
export default {
  name: 'BasicVModel',
  data() {
    return {
      input: '',
    };
  },
  methods: {
    onInput(e) {
      console.log(`onInput: e.target.value=${e.target.value}`, e);
    },
    onChange(e) {
      console.log(`onChange: e.target.value=${e.target.value}`, e);
    },
  },
  watch: {
    input(input) {
      console.log(`[watch] input = ${input}`);
    },
  },
};
</script>

<style></style>
- 运行截图
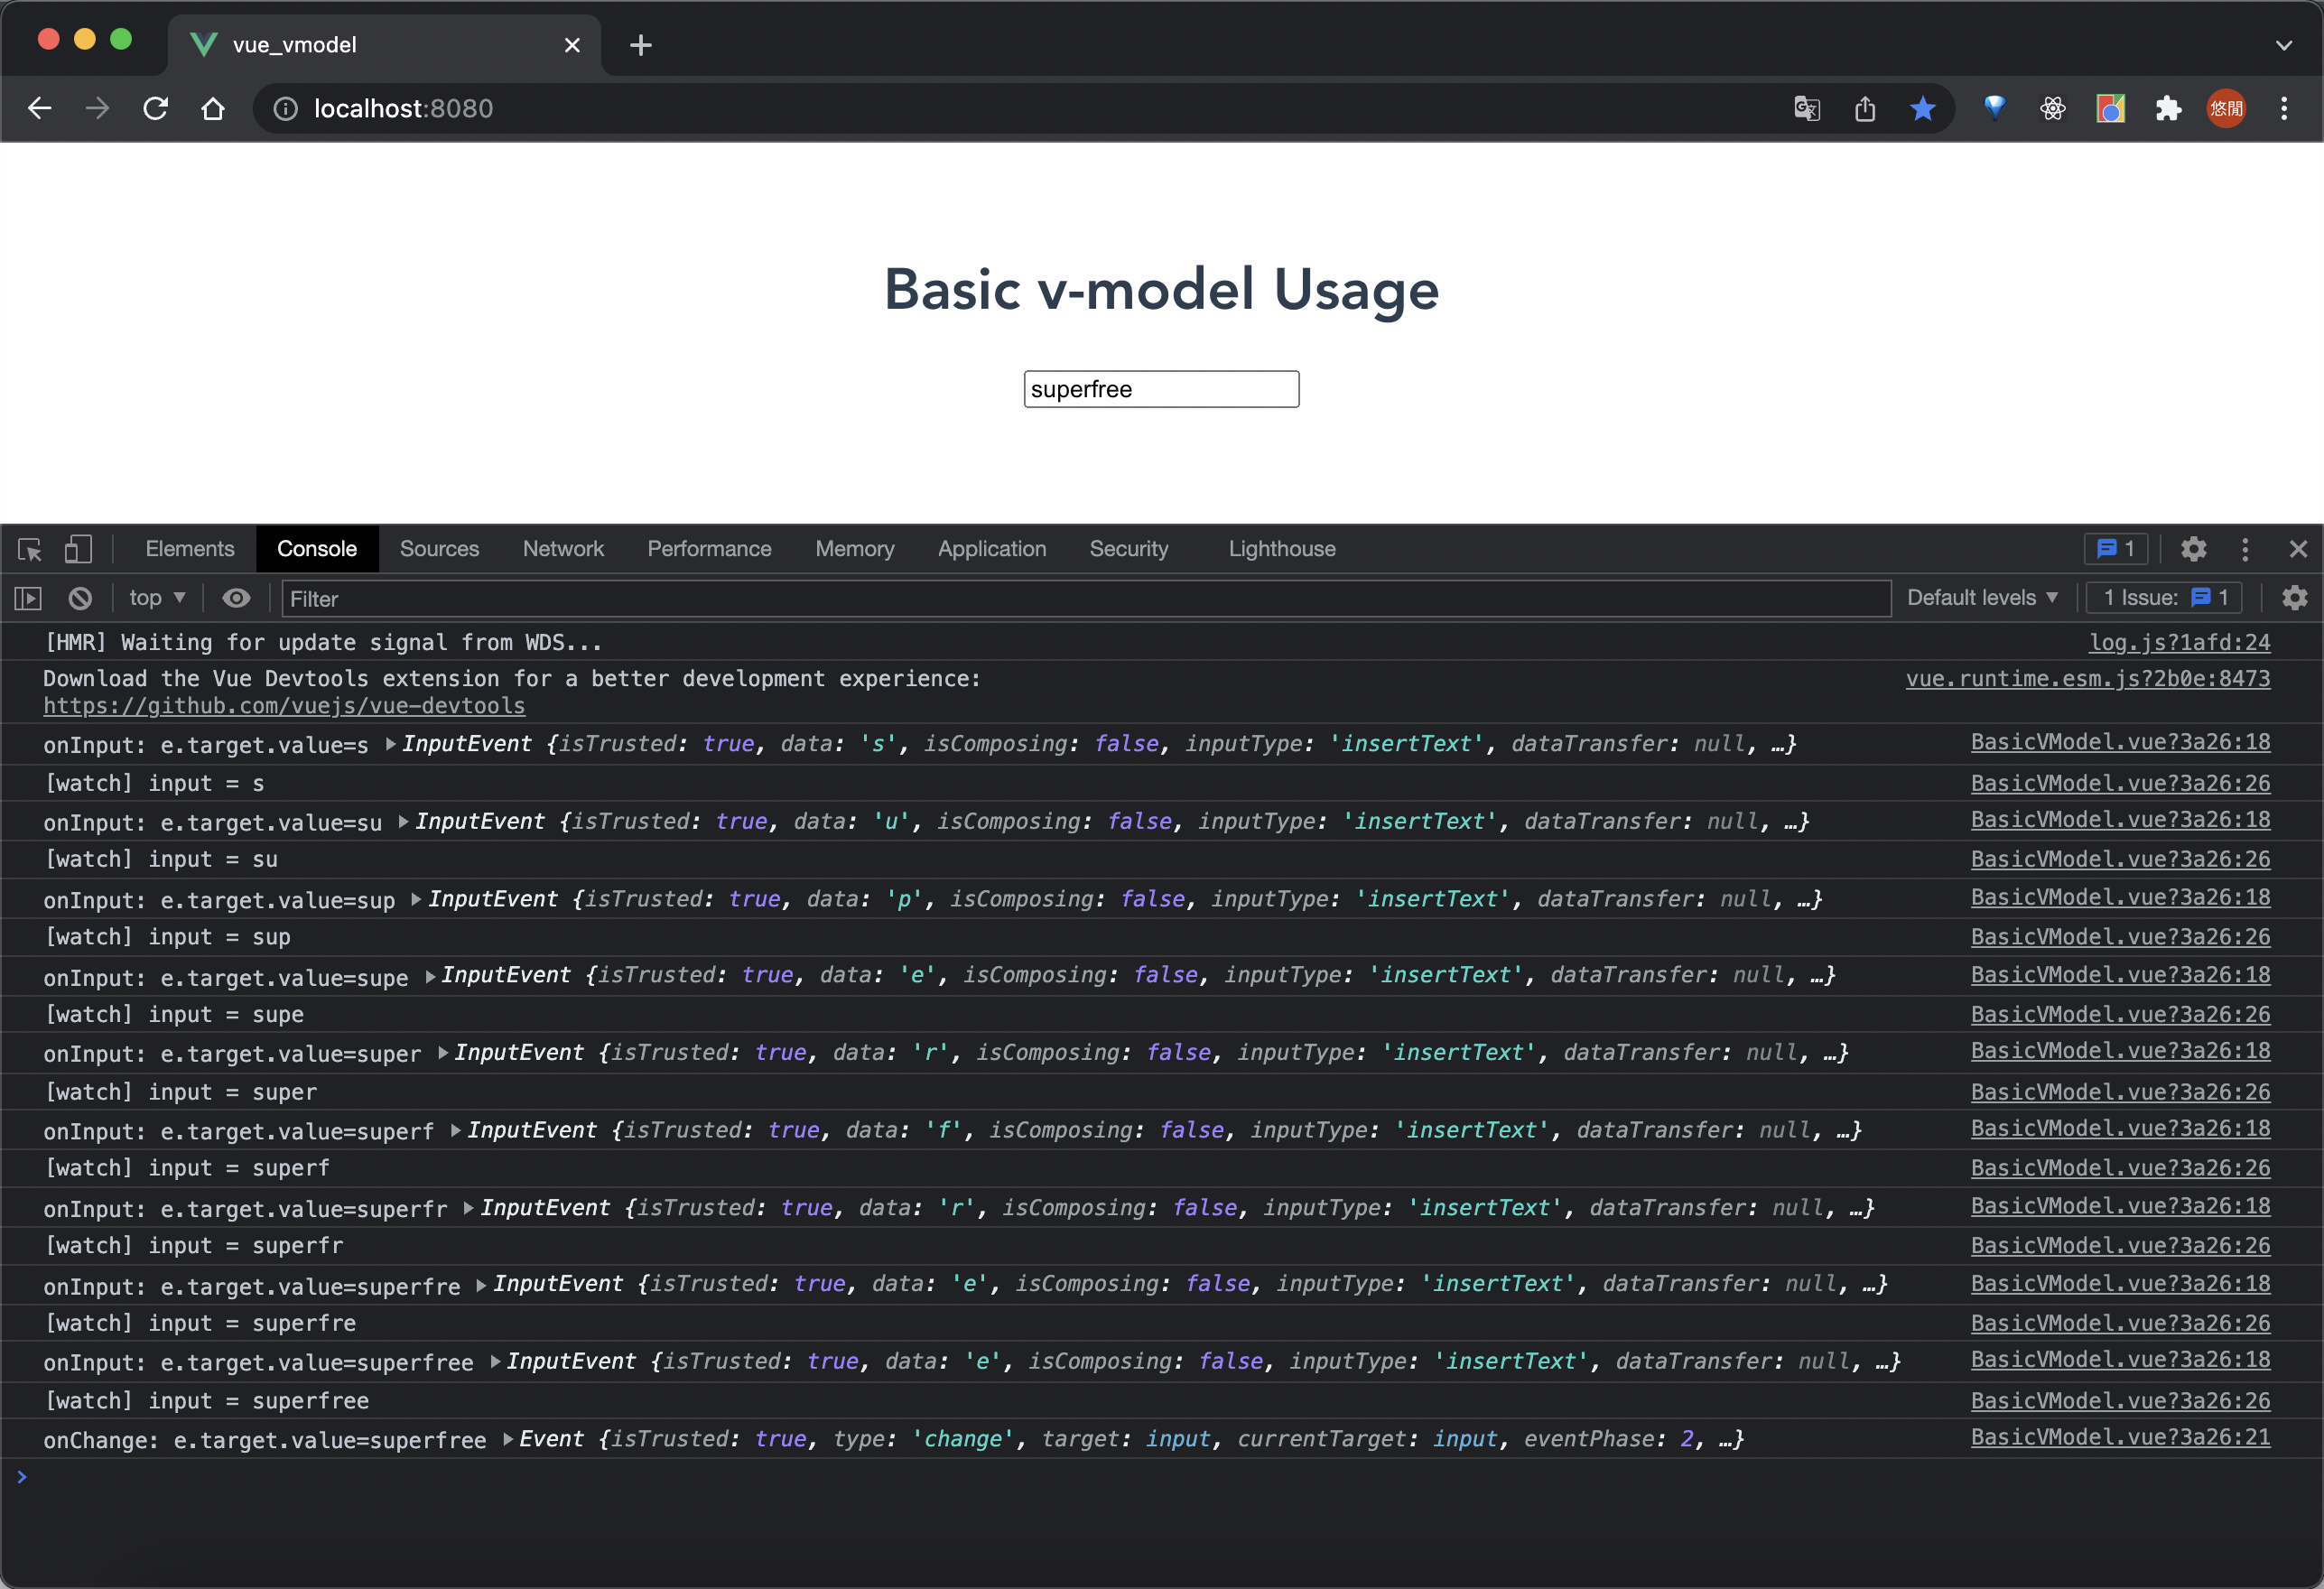
我们从输出截图可以看到,输入的过程中会不断触发 Input 事件,然后是 Vue 的 watch 钩子观测到 input 的修改后触发回调;最后在输入 Enter 或是取消 <input> 标签的焦点之后才会触发 change 事件
从官方文档我们也能看到,实际上 Vue 利用的是 Input 事件,因此后续将不再讨论 Change 事件的产生
v-model 绑定自定义组件(推荐)
接下来我们要来介绍如何在自定义组件上使用 v-model,首先先给大家推荐标准做法
/src/components/CustomComponent.vue
首先我们的外部组件使用了一个自定义的 CustomComponentInput 组件,然后使用 v-model="input" 将数据绑定到自定义组件上
<template>
  <div>
    <h1>v-model on Custom Component</h1>
    <CustomComponentInput v-model="input" @input="onInput" />
  </div>
</template>

<script>
import CustomComponentInput from './CustomComponentInput.vue';

export default {
  components: { CustomComponentInput },
  data() {
    return {
      input: 'Hello',
    };
  },
  methods: {
    onInput(input) {
      console.log(`onInput: input = ${input}`);
    },
  },
  watch: {
    input(input) {
      console.log(`[watch] input = ${input}`);
    },
  },
  mounted() {
    console.log(`[mounted] input = ${this.input}`);
  },
};
</script>

<style></style>
接下来我们要怎么定义子组件来满足上述 v-model 的用法呢?
/src/components/CustomComponentInput.vue
<template>
  <input :value="value" @input="$emit('input', $event.target.value)" />
</template>

<script>
export default {
  name: 'CustomComponentInput',
  props: ['value'],
};
</script>

<style></style>
根据官方文档的描述,v-model 将主动利用组件的 prop: value 以及 Input 事件来满足 v-model 的绑定,而对于 Input 事件可以利用 Vue.prototype.$emit 来传递并对外抛出 Input 事件,同时我们的参数设置为 $event.target.value 来满足外面组件对于 value 的取值正确
- 运行截图

观察上面运行截图可以看到,当我们在子组件正确的绑定 value 与 Input 事件时,外部组件就能正确的获取实时的 input 值(这里我们的外部组件将数据绑定在 input 数据字段上)
不使用 v-model 捕获组件 value 值
到这里其实就已经足够大家开发使用了,下面我们透过自定义联动 value 值的方式来尝试理解 Vue 的 v-model 进行双向绑定的逻辑
使用 input 事件
如果我们选择不使用 v-model 来绑定自定义组件数据的话,实际上我们还是可以透过 Input 事件获取数据修改的状态
/src/components/UnbindCustomComponent.vue
<template>
  <div>
    <h1>Unbind Custom Component</h1>
    <CustomComponentInput ref="input_ref" @input="onInput" />
  </div>
</template>

<script>
import CustomComponentInput from './CustomComponentInput.vue';
export default {
  components: { CustomComponentInput },
  methods: {
    onInput(input) {
      console.log(`onInput: input = ${input}`);
      console.log(`value = ${this.$refs.input_ref.value}`);
    },
  },
};
</script>

<style></style>
- 运行截图
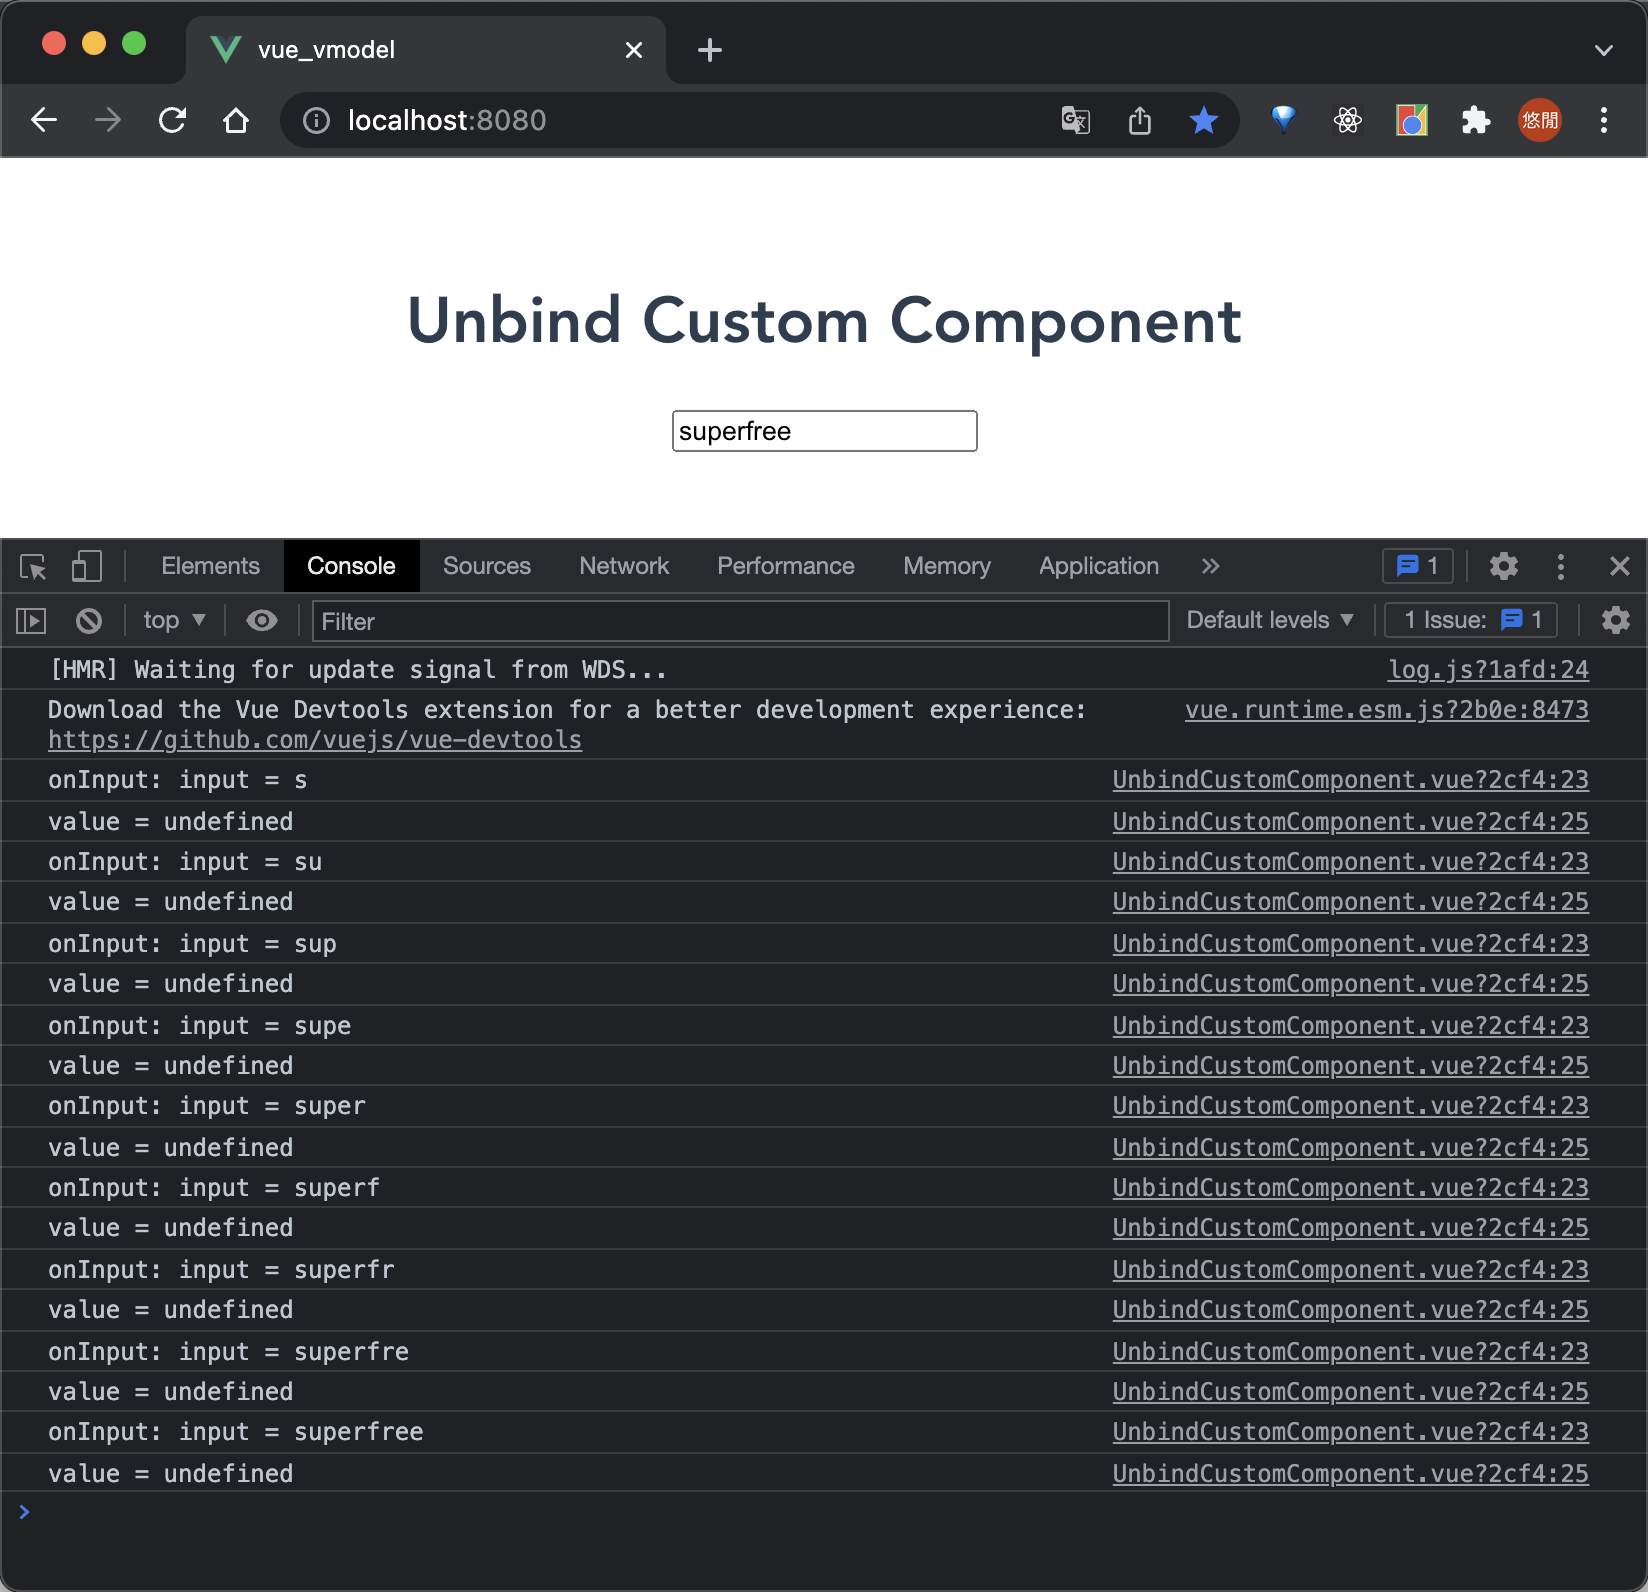
从上图能看到,Input 事件接到的 input 是正确的,然而使用 $refs 获取的组件 value 字段却是 undefined。实际上这是因为我们的输入框实际上将输入的字符串绑定在内部的 <input> 标签的 value 上,因此我们直接取组件的 value 当然是没东西的
绑定 value
那这时候如果我们在外部组件加一个 value 并使用 v-bind 绑定到子组件可不可行呢?
/src/components/UnbindCustomComponent.vue
<template>
  <div>
    <h1>Unbind Custom Component</h1>
    <CustomComponentInput ref="input_ref" :value="input" @input="onInput" />
  </div>
</template>

<script>
import CustomComponentInput from './CustomComponentInput.vue';
export default {
  components: { CustomComponentInput },
  data() {
    return {
      input: 'Init value',
    };
  },
  methods: {
    onInput(input) {
      console.group('onInput');
      console.log(`onInput: input = ${input}`);
      console.log(`this.input = ${this.input}`);
      console.log(`value = ${this.$refs.input_ref.value}`);
      console.groupEnd();
    },
  },
};
</script>

<style></style>
- 运行截图

这时候我们可以看到,一开始组件的 value 确实与 input 字段相同,但是经过一些输入修改之后,组件的 value 属性依旧还是原本的值,并没有实现 v-model 的双向绑定效果。
这是因为这时候仅仅只是将 input 字段绑定到组件的 value 属性,但是却还是与内部的 <input> 标签是脱节的,也就是说是两份完全独立的数据字段
value 与 input 事件联动
这时候其实我们只需要在 Input 事件的回调,将新的数据值同步到 input 字段就可以了
/src/components/UnbindCustomComponent.vue
<!-- template ... -->

<script>
import CustomComponentInput from './CustomComponentInput.vue';
export default {
  // ...

  methods: {
    onInput(input) {
      // 同步到 input 字段上
      this.input = input;

      console.group('onInput');
      console.log(`onInput: input = ${input}`);
      console.log(`this.input = ${this.input}`);
      console.log(`value = ${this.$refs.input_ref.value}`);
      this.$nextTick(() => {
        console.log(`[$nextTick] value = ${this.$refs.input_ref.value}`);
        console.groupEnd();
      });
    },
  },
};
</script>
- 运行截图
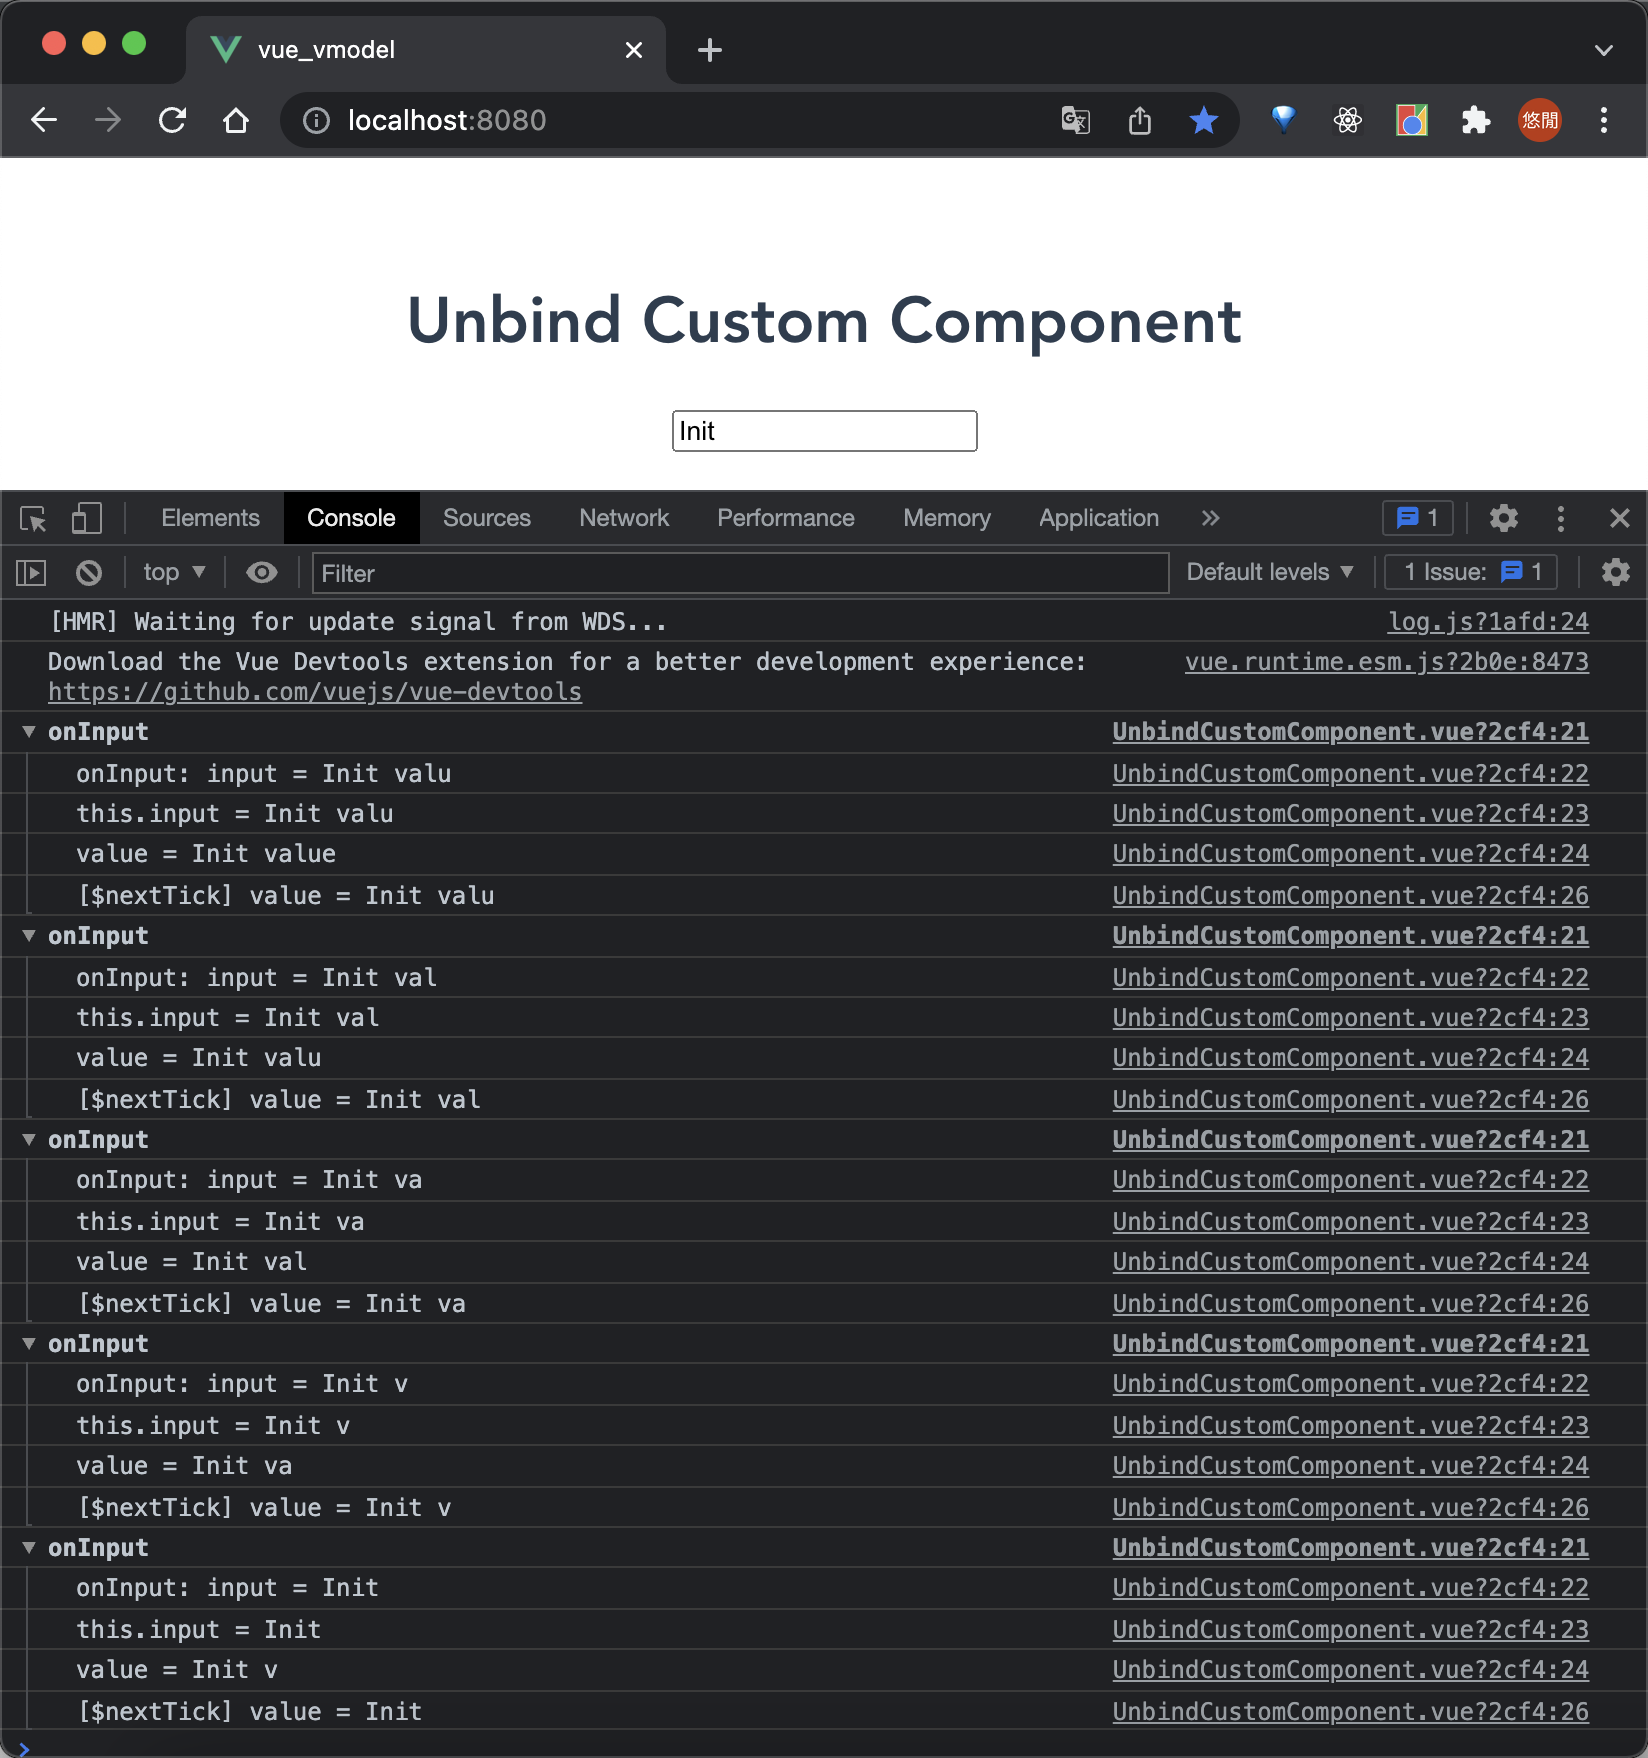
这时候我们就能看到,外部组件的 input 字段与自定义 Input 组件的 value 确实是与当前输入字符串同步了。
然而最后还有一个遗留问题是,由于我们利用 $refs 取出组件的 value 属性值,但是 onInput 回调却是发生在组件响应式更新之前,也就是说如上图 value 总会是"慢一拍"的感觉,这时候我们就可以利用 Vue.prototype.$nextTick,在 Vue 组件的下一跳中再去取组件的 value 就可以了
小结
本篇是作者在写 Vue 的时候遇到的疑问之一,由于作者相较之下更熟悉 React 的运行机制,回头来看 Vue 却是能够慢慢发觉更多内部机制运行规律,对于响应式的把握也更高一些。
其他资源
参考连接
| Title | Link |
|---|---|
| 自定义组件的 v-model - Vue 官方 | https://cn.vuejs.org/v2/guide/components-custom-events.html#%E8%87%AA%E5%AE%9A%E4%B9%89%E7%BB%84%E4%BB%B6%E7%9A%84-v-model |
完整代码示例
https://github.com/superfreeeee/Blog-code/tree/main/front_end/vue/vue_vmodel_deep_dive


 126
126


 被折叠的 条评论
为什么被折叠?
被折叠的 条评论
为什么被折叠?
 到【灌水乐园】发言


