


开始
自己用spring cloud 搭建Eureka 的时候也是遇到了很多问题,查了很多文章,现在就用自己的搭建步骤来写一个博客,顺便作为自己的笔记使用
搭建 服务注册中心
我用的是sts spring 官方提供的项目,因为个人用习惯了eclipse 系列。
首先搭建一个spring boot 项目

这里我选择了web 的引用,其他的到pom 里面导包 pom.xml 添加如下代码:

引入DependencyManagement 的时候的位置。指定jdk 的同级 下,不是在引入jar 位置的位置
	<!-- 使用dependencyManagement进行版本管理 -->
	<dependencyManagement>
		<dependencies>
			<dependency>
				<groupId>org.springframework.cloud</groupId>
				<artifactId>spring-cloud-dependencies</artifactId>
				<version>${spring-cloud.version}</version>
				<type>pom</type>
				<scope>import</scope>
			</dependency>
		</dependencies>
	</dependencyManagement>
然后再引入 Eureka 的jar
		<!-- Eureka 的server jar 文件很多网上的都会有错 -->
		<dependency>
			<groupId>org.springframework.cloud</groupId>
			<artifactId>spring-cloud-starter-netflix-eureka-server</artifactId>
		</dependency>
		<dependency>
			<groupId>org.springframework.boot</groupId>
			<artifactId>spring-boot-starter-test</artifactId>
			<scope>test</scope>
		</dependency>
引入jar 文件以后找到启动类加入注解 @EnableEurekaServer 表示这个服务为Eureka 的服务发现中心。

接下来就是配置application.properties
	#设置tomcat服务端口号
	server.port=1111
	#设置服务名称
	spring.application.name=eureka-service

	eureka.instance.hostname=localhost
	#注册中心不需要注册自己
	eureka.client.register-with-eureka=false
	#注册中心不需要去发现服务
	eureka.client.fetch-registry=false
	#设置服务注册中心的URL
	eureka.client.serviceUrl.defaultZone=http://${eureka.instance.hostname}:${server.port}/eureka
然后打包启动项目。
maven clear install
进入Eureka 的控制台可以看到自己的注册中心

注册服务提供者
同样建一个spring boot 项目选择web 然后pom 文件加入引入DependencyManagement 管理版本
	<!-- 使用dependencyManagement进行版本管理 -->
	<dependencyManagement>
		<dependencies>
			<dependency>
				<groupId>org.springframework.cloud</groupId>
				<artifactId>spring-cloud-dependencies</artifactId>
				<version>${spring-cloud.version}</version>
				<type>pom</type>
				<scope>import</scope>
			</dependency>
		</dependencies>
	</dependencyManagement>
然后再引入 Eureka 的jar
		<dependency>
			<groupId>org.springframework.boot</groupId>
			<artifactId>spring-boot-starter-test</artifactId>
			<scope>test</scope>
		</dependency>
		<dependency>
	        <groupId>org.springframework.cloud</groupId>
	        <artifactId>spring-cloud-starter-config</artifactId>
	    </dependency>
	    <dependency>
	        <groupId>org.springframework.cloud</groupId>
	        <artifactId>spring-cloud-starter-netflix-eureka-client</artifactId>
	    </dependency>
然后启动类添加注解 @EnableEurekaClient 表示一个服务。

在创建一个Controller ClientController
	package com.example.demo.controller;

	import java.util.List;

	import org.slf4j.Logger;
	import org.slf4j.LoggerFactory;
	import org.springframework.beans.factory.annotation.Autowired;
	import org.springframework.cloud.client.discovery.DiscoveryClient;
	import org.springframework.web.bind.annotation.RequestMapping;
	import org.springframework.web.bind.annotation.RestController;

	@RestController
	public class ClientController {

		Logger logger = LoggerFactory.getLogger(ClientController.class);

	    @Autowired
	    DiscoveryClient discoveryClient;

	    @RequestMapping("/hello")
	    public String hello() {
	        // 获取当前的所有 服务名称
	    	List<String> service = discoveryClient.getServices();

	        return "hello,this is hello-service"+service.toString();
	    }
	}
最后修改配置文件
	#这个表示的是 服务主机的ip
	serverIp=192.168.140.128

	server.port=9090
	#设置服务名
	spring.application.name=hello-service
	#设置服务注册中心的URL,本服务要向该服务注册中心注册自己
	eureka.client.serviceUrl.defaultZone=http://${serverIp}:1111/eureka
打包启动
maven clear install
我是放在两个虚拟机上的。

所以ip 访问的地址不一样。

可以看到这个服务名还有 ip 都已经被这个 服务service 管理 那个显示localhost ip 不用担心啊,可能是我的虚拟机配置问题,具体点开以后会发现ip 已经指定到了 虚拟机上。如图
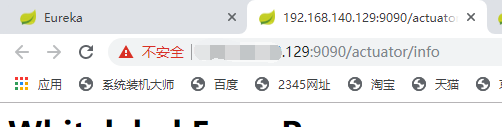
刚才我管理节点的ip 为 128 结束的,现在在另一个虚拟机上变成了 129 所以说这个ip service 已经自动帮我们管理好了。我们只需关注 service 的ip 就可以了。当然止于现在搭建的,另外会有其他管理的东西这里不做多余的解释,只是为了搭建一个简单的Eureka。
服务发现和消费
到现在为止 服务的管理者 提供者都有了,那么还需要一个服务去承担一个消费者的角色去调用其他服务。
同样的搭建一个spring boot 项目。同样的步骤不多阐述了。
pom.xml
	<?xml version="1.0" encoding="UTF-8"?>
	<project xmlns="http://maven.apache.org/POM/4.0.0" xmlns:xsi="http://www.w3.org/2001/XMLSchema-instance"
		xsi:schemaLocation="http://maven.apache.org/POM/4.0.0 http://maven.apache.org/xsd/maven-4.0.0.xsd">
		<modelVersion>4.0.0</modelVersion>
		<parent>
			<groupId>org.springframework.boot</groupId>
			<artifactId>spring-boot-starter-parent</artifactId>
			<version>2.1.3.RELEASE</version>
			<relativePath/> <!-- lookup parent from repository -->
		</parent>
		<groupId>com.example</groupId>
		<artifactId>Eureka-consumer</artifactId>
		<version>0.0.1-SNAPSHOT</version>
		<name>Eureka-consumer</name>
		<description>Demo project for Spring Boot</description>

		<properties>
			<java.version>1.8</java.version>
		</properties>

		<dependencyManagement>
	        <dependencies>
		        <dependency>
		            <groupId>org.springframework.cloud</groupId>
		            <artifactId>spring-cloud-dependencies</artifactId>
		            <version>Finchley.RELEASE</version>
		            <type>pom</type>
		            <scope>import</scope>
		        </dependency>
		    </dependencies>
	    </dependencyManagement>

		<dependencies>
			<dependency>
				<groupId>org.springframework.boot</groupId>
				<artifactId>spring-boot-starter-web</artifactId>
			</dependency>

			<dependency>
				<groupId>org.springframework.boot</groupId>
				<artifactId>spring-boot-starter-test</artifactId>
				<scope>test</scope>
			</dependency>
			<dependency>
		        <groupId>org.springframework.cloud</groupId>
		        <artifactId>spring-cloud-starter-config</artifactId>
		    </dependency>
		    <dependency>
		        <groupId>org.springframework.cloud</groupId>
		        <artifactId>spring-cloud-starter-netflix-eureka-client</artifactId>
		    </dependency>

		</dependencies>

		<build>
			<plugins>
				<plugin>
					<groupId>org.springframework.boot</groupId>
					<artifactId>spring-boot-maven-plugin</artifactId>
				</plugin>
			</plugins>
		</build>

	</project>
application.java 启动类
	package com.example.demo;

	import org.springframework.boot.SpringApplication;
	import org.springframework.boot.autoconfigure.SpringBootApplication;
	import org.springframework.cloud.client.loadbalancer.LoadBalanced;
	import org.springframework.cloud.netflix.eureka.EnableEurekaClient;
	import org.springframework.context.annotation.Bean;
	import org.springframework.web.client.RestTemplate;

	@EnableEurekaClient
	@SpringBootApplication
	public class EurekaConsumerApplication {


		//@Bean 应用在方法上,用来将方法返回值设为为bean
	    @Bean
	    @LoadBalanced  //@LoadBalanced实现负载均衡
	    public RestTemplate restTemplate() {
	        return new RestTemplate();
	    }

		public static void main(String[] args) {
			SpringApplication.run(EurekaConsumerApplication.class, args);
		}

	}
启动类这里啰嗦一下,加上restTemplate 可以自己实现负载均衡,比如说我有两个同样的服务,可以通过这个实现一个负载均衡。达到服务的一个减压。
application.properties
	serverIp=192.168.140.128

	server.port=9999

	spring.application.name=hello-consumer
	eureka.client.serviceUrl.defaultZone=http://${serverIp}:1111/eureka
HelloController.java
	package com.example.demo.controller;

	import org.springframework.beans.factory.annotation.Autowired;
	import org.springframework.web.bind.annotation.RequestMapping;
	import org.springframework.web.bind.annotation.RestController;
	import org.springframework.web.client.RestTemplate;

	@RestController
	public class HelloController {
		//这里注入的restTemplate就是在com.sam.ConsumerApp中通过@Bean配置的实例
	    @Autowired
	    RestTemplate restTemplate;

	    @RequestMapping("/hello-consumer")
	    public String helloConsumer() {
	        //调用hello-service服务,注意这里用的是服务名,而不是具体的ip+port
	        String str = restTemplate.getForObject("http://hello-service/hello", String.class);

	        return "hello consumer finish !!!" + "     "+str;
	    }
	}
然后继续 打包,运行,这里我直接在本地sts 里面运行了。没有再去开启一个虚拟机,当然你如果电脑配置好一点可以再开一个虚拟机。
maven clear install
然后浏览器输入 localhost:9999/hello-consumer

这个就是现在启动的两个服务,到这里 spring cloud - Eureka 搭建完毕。


 932
932


 被折叠的 条评论
为什么被折叠?
被折叠的 条评论
为什么被折叠?
 到【灌水乐园】发言


