


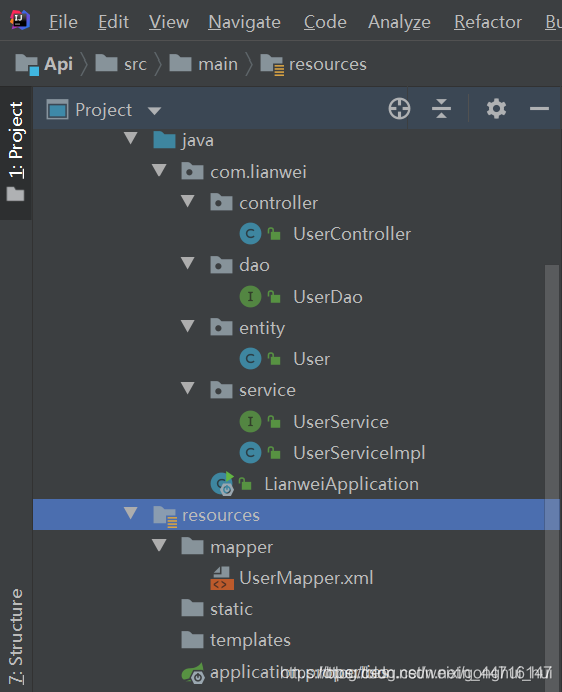
(一)springboot的代码
(1) springboot的基本项目框架和配置文件
(2)在controller创建UserController控制类
(3)在service层创建UserService业务逻辑接口
(4)在dao层中创建Usedao数据接口类,和mapper.xml配置文件
(5)在entity中创建User实体类
(二)Axios的代码
(一)springboot的代码
(1) springboot的基本项目框架和配置文件
applicatio.yml
在这里插入代码片
spring.datasource.username=root
spring.datasource.password=123
spring.datasource.url=jdbc:mysql://localhost:3306/test?serverTimezone=UTC&useUnicode=true&characterEncoding=utf-8
spring.datasource.driver-class-name=com.mysql.cj.jdbc.Driver
# 整合mybatis
mybatis.type-aliases-package=com.lianwei.entity
mybatis.mapper-locations=classpath:mapper/*.xml
pom.xml
在这里插入代码片
<?xml version="1.0" encoding="UTF-8"?>
<project xmlns="http://maven.apache.org/POM/4.0.0" xmlns:xsi="http://www.w3.org/2001/XMLSchema-instance"
         xsi:schemaLocation="http://maven.apache.org/POM/4.0.0 https://maven.apache.org/xsd/maven-4.0.0.xsd">
    <modelVersion>4.0.0</modelVersion>
    <parent>
        <groupId>org.springframework.boot</groupId>
        <artifactId>spring-boot-starter-parent</artifactId>
        <version>2.3.4.RELEASE</version>
        <relativePath/> <!-- lookup parent from repository -->
    </parent>
    <groupId>com</groupId>
    <artifactId>lianwei</artifactId>
    <version>0.0.1-SNAPSHOT</version>
    <name>lianwei</name>
    <description>Demo project for Spring Boot</description>

    <properties>
        <java.version>1.8</java.version>
    </properties>

    <dependencies>
        <dependency>
            <groupId>org.springframework.boot</groupId>
            <artifactId>spring-boot-starter-web</artifactId>
        </dependency>

        <dependency>
            <groupId>org.mybatis.spring.boot</groupId>
            <artifactId>mybatis-spring-boot-starter</artifactId>
            <version>2.0.0</version>
        </dependency>

        <dependency>
            <groupId>mysql</groupId>
            <artifactId>mysql-connector-java</artifactId>
        </dependency>


        <dependency>
            <groupId>org.projectlombok</groupId>
            <artifactId>lombok</artifactId>
        </dependency>

        <dependency>
            <groupId>org.springframework.boot</groupId>
            <artifactId>spring-boot-starter-test</artifactId>
            <scope>test</scope>
            <exclusions>
                <exclusion>
                    <groupId>org.junit.vintage</groupId>
                    <artifactId>junit-vintage-engine</artifactId>
                </exclusion>
            </exclusions>
        </dependency>
    </dependencies>

    <build>
        <plugins>
            <plugin>
                <groupId>org.springframework.boot</groupId>
                <artifactId>spring-boot-maven-plugin</artifactId>
            </plugin>
        </plugins>
    </build>

</project>
(2)在controller创建UserController控制类
在这里插入代码片
package com.lianwei.controller;

import com.lianwei.entity.User;
import com.lianwei.service.UserService;
import org.springframework.beans.factory.annotation.Autowired;
import org.springframework.ui.Model;
import org.springframework.web.bind.annotation.*;

import java.util.HashMap;
import java.util.List;
import java.util.Map;

/**
 * 功能描述:
 *
 * @Author: ghh
 * @Date: 2020/10/28 23:05
 */
@RestController
public class UserController {

    @Autowired
    UserService userService;

    @CrossOrigin
    @GetMapping ("/getfindAll")
    public List<User> getfindAll() {
        List<User> userList = userService.findAll();
        System.out.println("user");
        for (User user : userList) {
            System.out.println(user);
        }
        return userList;
    }
    @CrossOrigin
    @PostMapping("/postfindAll")
    public List<User> postfindAll() {
        List<User> userList = userService.findAll();
        System.out.println("user");
        for (User user : userList) {
            System.out.println(user);
        }
        return userList;
    }

    @CrossOrigin
    @PostMapping("/postId")
    public Object postId(Integer id) {
      /*  public Object postId(@Requestbody User user) {*/
        System.out.println("调用了postid方法");
        System.out.println("传入的ID是:" + id);

        if (id != null) {
            Object result = this.userService.selectUserById(id);
            System.out.println(result);
            if (result != null){
                return result;
            }else {
                return "用户不存在";
            }
        }else{
            return "请输入查询id";
        }
    }
    @CrossOrigin
    @GetMapping("/getName")
    public Object getName(String  name) {
        System.out.println("调用了getName方法");
        System.out.println("传入的name是:" + name);
        if (name != null) {
            Object result = this.userService.selectUserByName(name);
            System.out.println(result);
            if (result != null){
                return result;
            }else {
                return "用户不存在";
            }

        }else{
            return "请输入用户名";
        }
    }
}
(3)在service层创建UserService业务逻辑接口
在这里插入代码片package com.lianwei.service;

import com.lianwei.entity.User;

import java.util.List;

/**
 * 功能描述:
 *
 * @Author: ghh
 * @Date: 2020/10/28 23:05
 */
public interface UserService {

    public List<User> findAll();

    public User selectUserById(int id);

    public User selectUserByName(String name);
}
接口的实现类
在这里插入代码片

```package com.lianwei.service;

import com.lianwei.dao.UserDao;
import com.lianwei.entity.User;
import org.springframework.stereotype.Service;

import javax.annotation.Resource;
import java.util.List;

/**
 * 功能描述:
 *
 * @Author: ghh
 * @Date: 2020/10/28 23:06
 */
@Service
public class UserServiceImpl implements UserService{

    @Resource
    UserDao userDao;


    @Override
    public List<User> findAll() {
        return userDao.findAll();
    }

    @Override
    public User selectUserById(int id) {
        System.out.println("service==>"+id);
        return userDao.selectUserById(id);

    }

    @Override
    public User selectUserByName(String name) {
        return userDao.selectUserByName(name);
    }
}
(4)在dao层中创建Usedao数据接口类,和mapper.xml配置文件
在这里插入代码片
package com.lianwei.dao;

import com.lianwei.entity.User;
import org.apache.ibatis.annotations.Mapper;
import org.springframework.stereotype.Repository;

import java.util.List;
import java.util.Map;

/**
 * 功能描述:
 *
 * @Author: ghh
 * @Date: 2020/10/28 23:05
 */
@Mapper
@Repository
public interface UserDao {

    public List<User> findAll();

    public User selectUserById(int id);

    public User selectUserByName(String name);

    //关键字查询
    List<User> query(Map map);

    //查询用户表总条数
    int querySize(Map map);
}
数据层的mapper.xml
<?xml version="1.0" encoding="UTF-8" ?>
<!DOCTYPE mapper
        PUBLIC "-//mybatis.org//DTD Mapper 3.0//EN"
        "http://mybatis.org/dtd/mybatis-3-mapper.dtd">
<mapper namespace="com.lianwei.dao.UserDao">

    <select id="findAll" resultType="User">
        select * from user
    </select>

    <select id="selectUserById" parameterType="int" resultType="User">
   select *  from user where id = #{id};
    </select>

    <select id="selectUserByName" parameterType="String" resultType="User">
        select *  from user where name = #{name}
    </select>

    <insert id="addUser" parameterType="User">
        insert into user (id,name,pwd) value (#{id},#{name},#{pwd})
    </insert>

    <update id="updateUser" parameterType="User">
        update user set name=#{name},pwd=#{pwd} where id = #{id}
    </update>

    <delete id="deleteUser" parameterType="int">
        delete from user where id = #{id}
    </delete>

</mapper>
(5)在entity中创建User实体类
在这里插入代码片package com.lianwei.entity;

/**
 * 功能描述:
 *
 * @Author: ghh
 * @Date: 2020/10/28 23:04
 */
public class User {
    private int id;
    private String name;
    private String pwd;
    private String perms;

    public User(int id, String name, String pwd, String perms) {
        this.id = id;
        this.name = name;
        this.pwd = pwd;
        this.perms = perms;
    }

    public int getId() {
        return id;
    }

    public void setId(int id) {
        this.id = id;
    }

    public String getName() {
        return name;
    }

    public void setName(String name) {
        this.name = name;
    }

    public String getPwd() {
        return pwd;
    }

    public void setPwd(String pwd) {
        this.pwd = pwd;
    }

    public String getPerms() {
        return perms;
    }

    public void setPerms(String perms) {
        this.perms = perms;
    }
}
(二)Axios的代码
注意: 在HTML中记得引入对应的js文件
在这里插入代码片
<!DOCTYPE html>
<html lang="en">
<head>
    <meta charset="UTF-8">
    <title>Title</title>
</head>
<script src="./lib/vue.js"></script>
<script src="./lib/vue-resource.min.js"></script>
<script src="https://unpkg.com/axios/dist/axios.min.js"></script>
<link href="./lib/bootstrap.min.css" rel="stylesheet">
<body>

<div id="app">

    <
    <div class="panel panel-primary">
        <div class="panel-heading">
            <h3 class="panel-title">添加用户</h3>
        </div>
        <div class="panel-body form-inline text-center">
            <label>
                name:
                <input type="text" v-model="name" class="form-control">
            </label>

            <input type="button" value="添加" @click="add" class="btn btn-primary">
        </div>
    </div>

    <table class="table table-bordered table-hover table-striped">
        <thead>
        <tr>
            <th class ="text-center">ID</th>
            <th class ="text-center">Name</th>
            <th class ="text-center">pwd</th>
            <th class ="text-center">操作</th>
        </tr>
        </thead>
        <tbody>
        <tr v-for="item in list" :key="item.id" class ="text-center" >
            <td >{{item.id}}</td>
            <td>{{item.name}}</td>
            <td>{{item.pwd}}</td>
            <td>
                <a href="" >删除</a>
            </td>
        </tr>
        </tbody>
    </table>

</div>


<script>
    var vm = new Vue({
        el:'#app',
        data: {
            name:'',
            list:[
                {id : 1 , name : '喜羊羊', time : new Date() },
                {id : 2 , name : '懒羊羊', time : new Date() },
                {id : 3, name : '沸羊羊', time : new Date() },
            ]
        },
     created() {
            this.getAllList();
        } ,
        methods: {
            add() { //

            },
            getAllList() {      //  获取所有的品牌列表
               /* this.$http.post('http://localhost:8080/queryUserList').then(result => {
                    var result  = result.body
                    return  this.list = result
                })*/
            axios.get('http://localhost:8080/getfindAll').then(result =>{
                    /*    var result = result.data()*/
                console.log(result.data)
                return this.list = result.data
               /* return this.list = result.data();
                console.log(this.list)*/
                console.log(this.list);

            })
            },
        },

    });
   /*let newVar = axios.create({
       baseU
   });*/

</script>

</body>
</html>


 4529
4529


 被折叠的 条评论
为什么被折叠?
被折叠的 条评论
为什么被折叠?
 到【灌水乐园】发言


