


1、配置文件概述
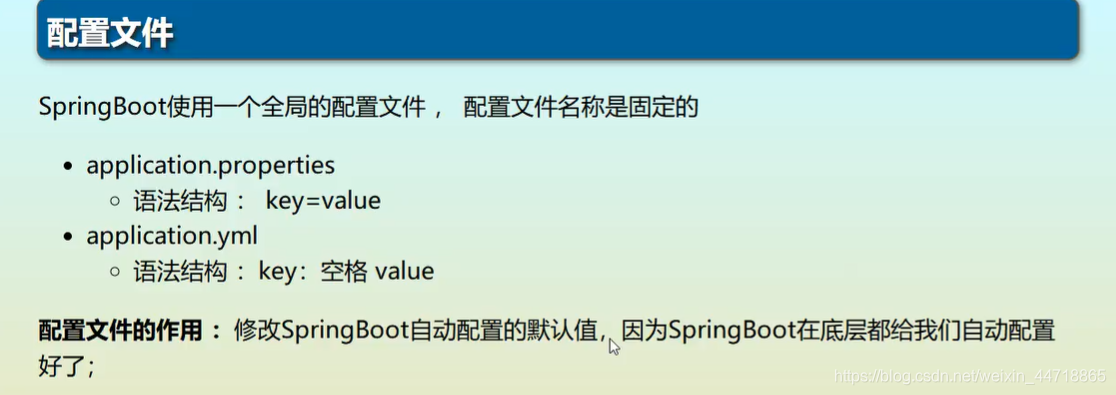
# springboot这个配置文件中到底可以配置哪些东西呢?
# 官方配置太多了
# 了解原理:一通百通
2、yaml语法
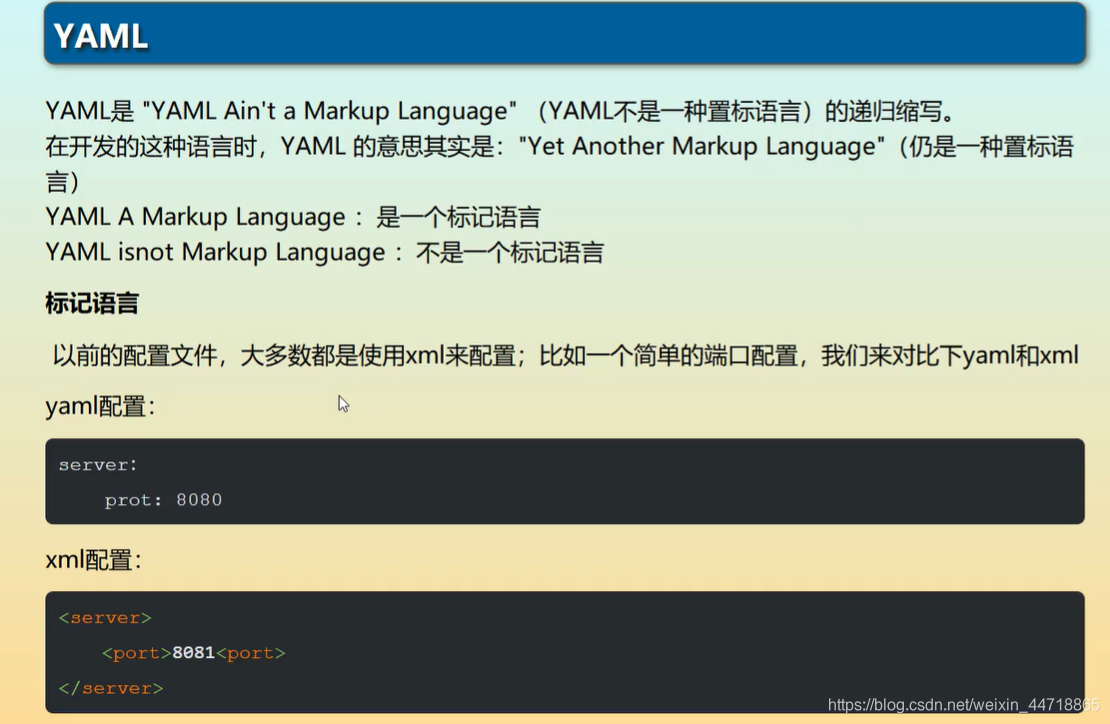
这种语言以数据作为中心,而不是以标记语言为重点!
说明:语法要求严格!
- 空格不能省略
- 以缩进来控制层级关系,只要是左边对齐的一列数据都是同一个层级的
- 属性和值的大小写都是十分敏感的。

2.1、字面量:普通的值 [ 数字,布尔值,字符串 ]
字面量直接写在后面就可以 , 字符串默认不用加上双引号或者单引号;`
k: v
注意:
- “ ” 双引号,不会转义字符串里面的特殊字符 , 特殊字符会作为本身想表示的意思;
- 比如 :name: “kuang \n shen” 输出 :kuang 换行 shen
- ‘’ 单引号,会转义特殊字符 , 特殊字符最终会变成和普通字符一样输出
- 比如 :name: ‘kuang \n shen’ 输出 :kuang \n shen
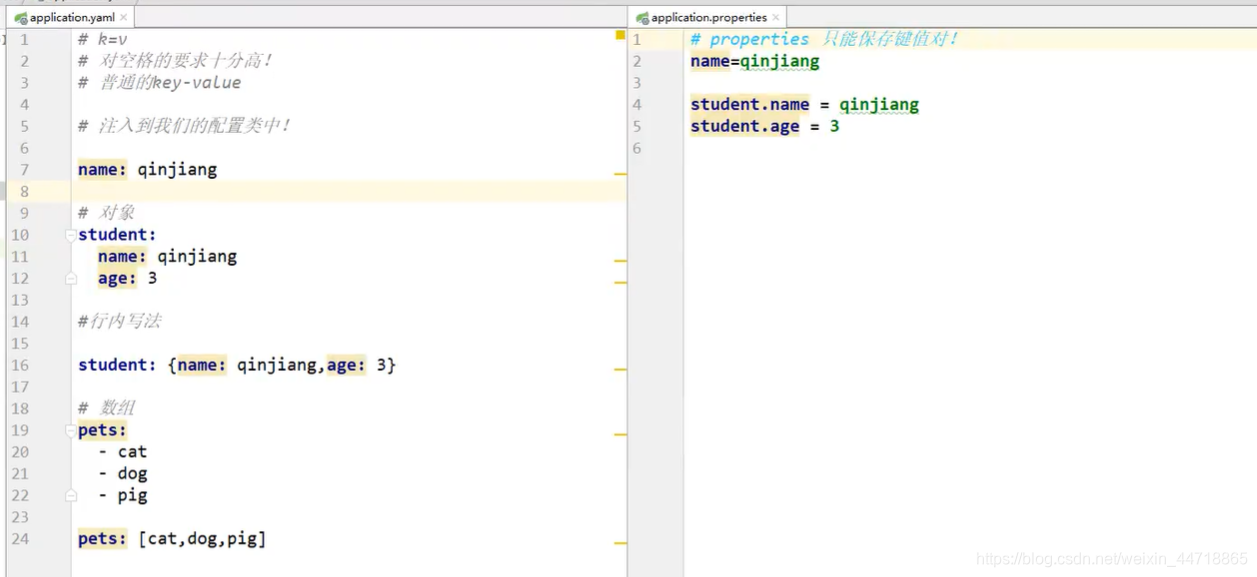
2.2、对象、Map(键值对)
#对象、Map格式
k:
    v1:
    v2:
在下一行来写对象的属性和值得关系,注意缩进;比如:
student:
    name: qinjiang
    age: 3
行内写法
student: {name: qinjiang,age: 3}
2.3、数组( List、set )
用 - 值表示数组中的一个元素,比如:
pets:
 - cat
 - dog
 - pig
行内写法
pets: [cat,dog,pig]
2.4、修改SpringBoot的默认端口号
配置文件中添加,端口号的参数,就可以切换端口;
server:
  port: 8082
3、给属性赋值的几种方式
3.1、注解@Value注入给属性赋值
- 在springboot项目中的resources目录下新建一个文件 application.yml
- 编写一个实体类 Dog;
package com.spring.springbootconfigstudy.pojo;
import org.springframework.stereotype.Component;
@Component  //注册bean到容器中
public class Dog {
    private String name;
    private Integer age;

    //有参无参构造、get、set方法、toString()方法
}
- 思考,我们原来是如何给bean注入属性值的!@Value,给狗狗类测试一下:
@Component //注册bean
public class Dog {
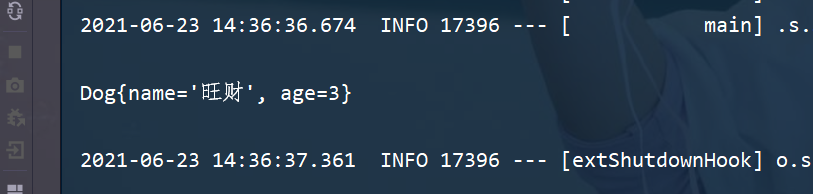
@Value("旺财")
private String name;
@Value("3")
private Integer age;
}
- 在SpringBoot的测试类下注入狗狗输出一下;
@SpringBootTest
class DemoApplicationTests {

    @Autowired //将狗狗自动注入进来
    Dog dog;

    @Test
    public void contextLoads() {
        System.out.println(dog); //打印看下狗狗对象
    }

}
- 结果成功输出,@Value注入成功,这是我们原来的办法对吧。
3.2、yaml注入配置文件给属赋值
yaml文件更强大的地方在于,他可以给我们的实体类直接注入匹配值!
- 我们在编写一个复杂一点的实体类:Person 类
@Component //注册bean到容器中
public class Person {
    private String name;
    private Integer age;
    private Boolean happy;
    private Date birth;
    private Map<String,Object> maps;
    private List<Object> lists;
    private Dog dog;

    //有参无参构造、get、set方法、toString()方法
}
- 我们来使用yaml配置的方式进行注入,大家写的时候注意区别和优势,我们编写一个yaml配置!
person:
  name: qinjiang
  age: 3
  happy: false
  birth: 2000/01/01
  maps: {k1: v1,k2: v2}
  lists:
   - code
   - girl
   - music
  dog:
    name: 旺财
    age: 1
- 我们刚才已经把person这个对象的所有值都写好了,我们现在来注入到我们的类中!
/*
@ConfigurationProperties作用:
将配置文件中配置的每一个属性的值,映射到这个组件中;
告诉SpringBoot将本类中的所有属性和配置文件中相关的配置进行绑定
参数 prefix = “person” : 将配置文件中的person下面的所有属性一一对应
*/
@Component //注册bean
@ConfigurationProperties(prefix = "person")
public class Person {
    private String name;
    private Integer age;
    private Boolean happy;
    private Date birth;
    private Map<String,Object> maps;
    private List<Object> lists;
    private Dog dog;
}
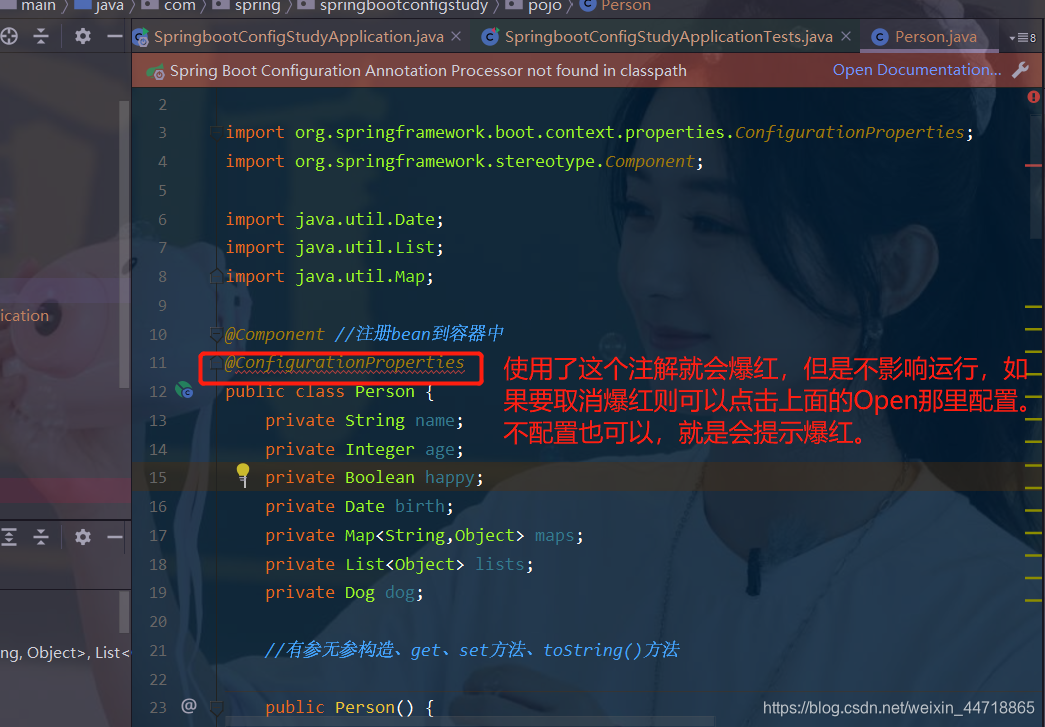
- IDEA 提示,springboot配置注解处理器没有找到,点击上面Open找到配置依赖,让我们看文档,我们可以查看文档,找到一个依赖!
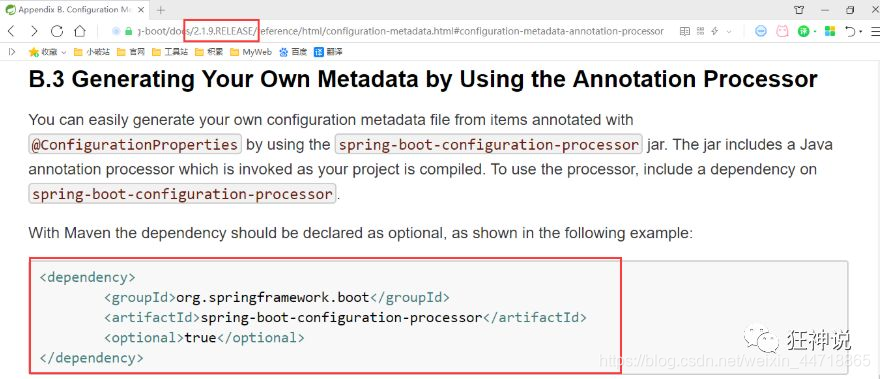
<!-- 导入配置文件处理器,配置文件进行绑定就会有提示,需要重启 -->
<dependency>
  <groupId>org.springframework.boot</groupId>
  <artifactId>spring-boot-configuration-processor</artifactId>
  <optional>true</optional>
</dependency>
- 确认以上配置都OK之后,我们去测试类中测试一下:(如果不要配置上面的依赖直接测试也是可以的)
@SpringBootTest
class DemoApplicationTests {

    @Autowired
    Person person; //将person自动注入进来

    @Test
    public void contextLoads() {
        System.out.println(person); //打印person信息
    }

}
- 结果:所有值全部注入成功!

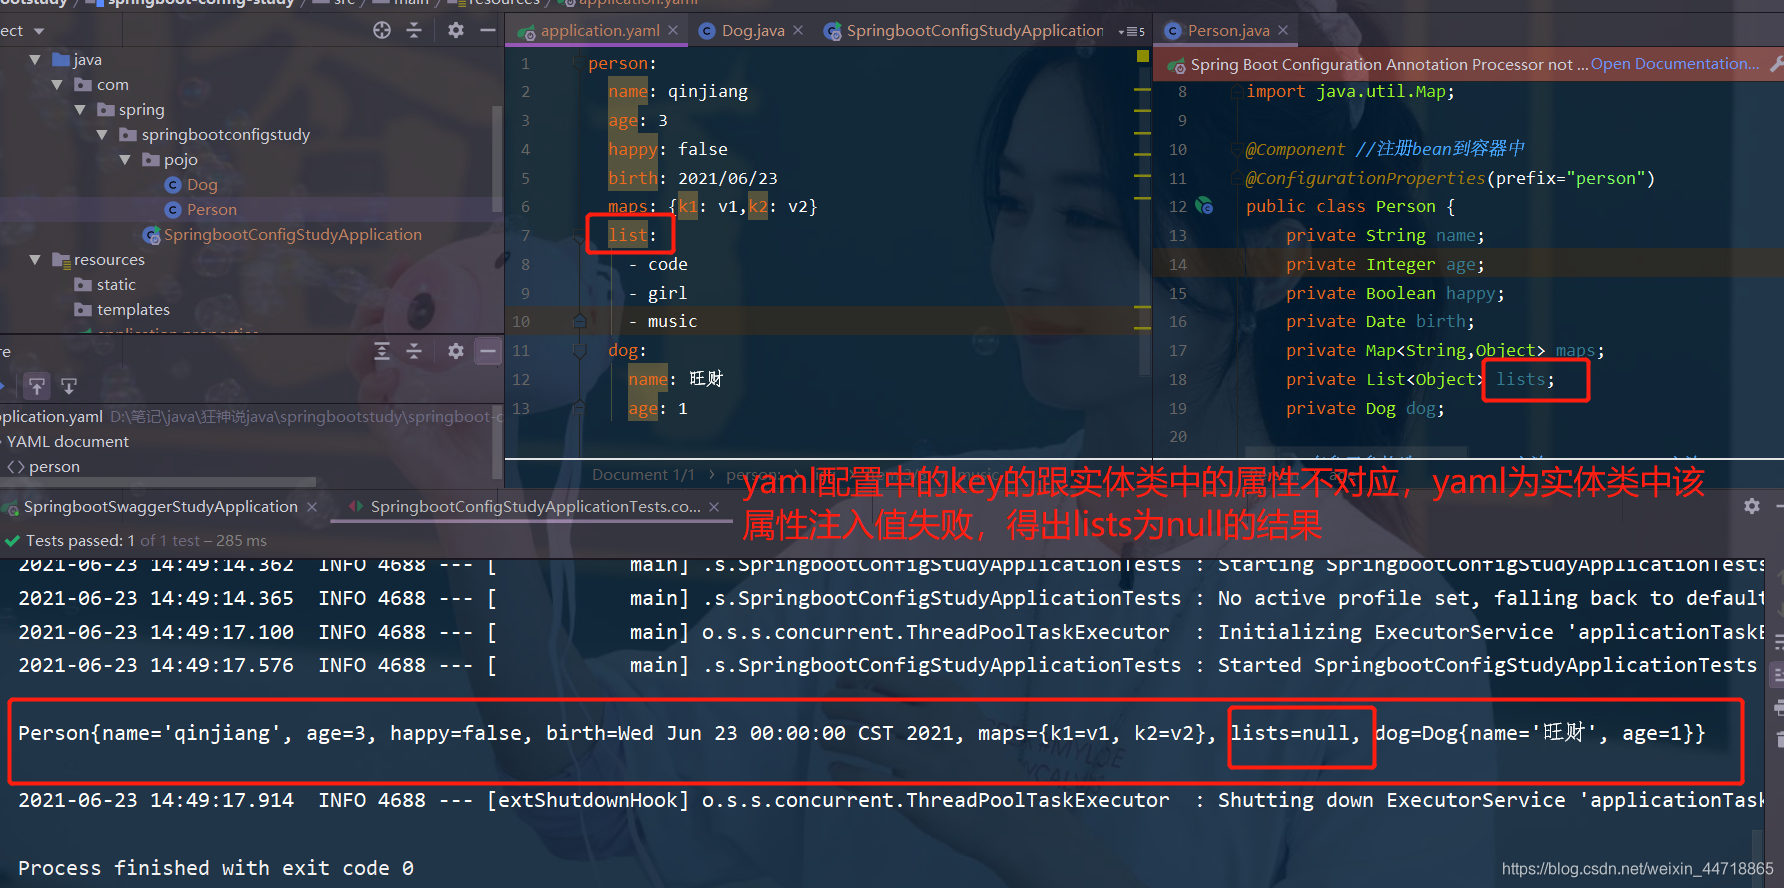
课堂测试:
1、将配置文件的key 值 和 属性的值设置为不一样,则结果输出为null,注入失败
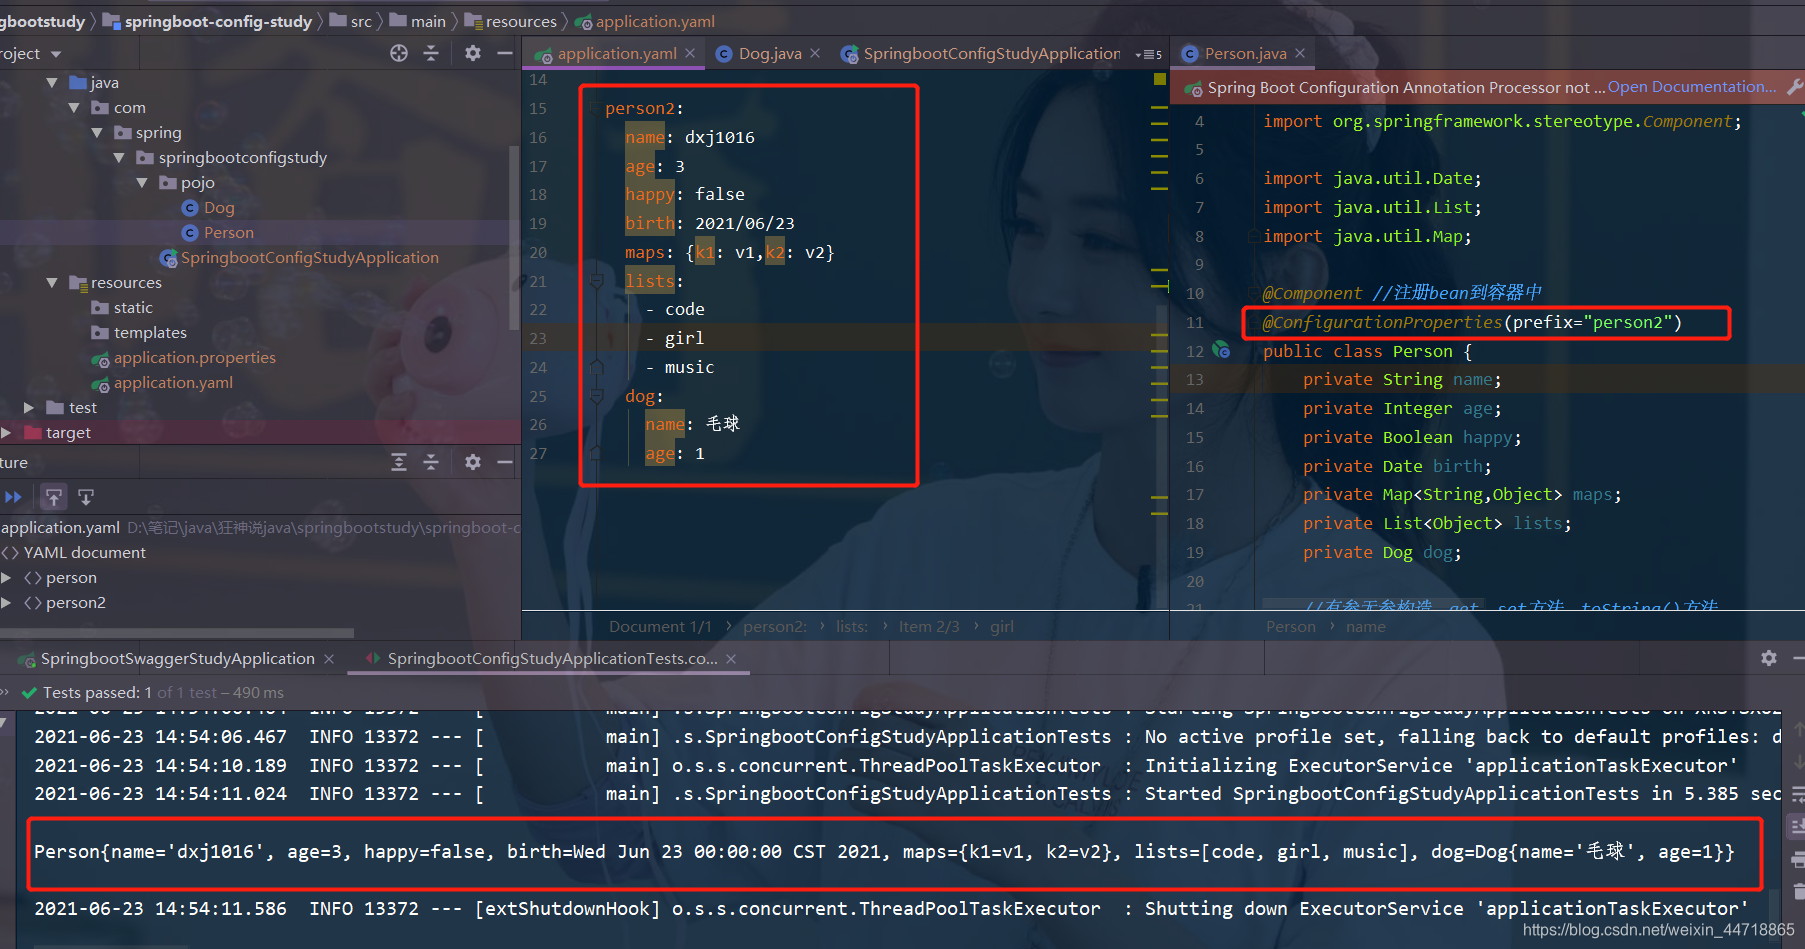
2、在配置一个person2,然后将 @ConfigurationProperties(prefix = “person2”) 指向我们的person2;
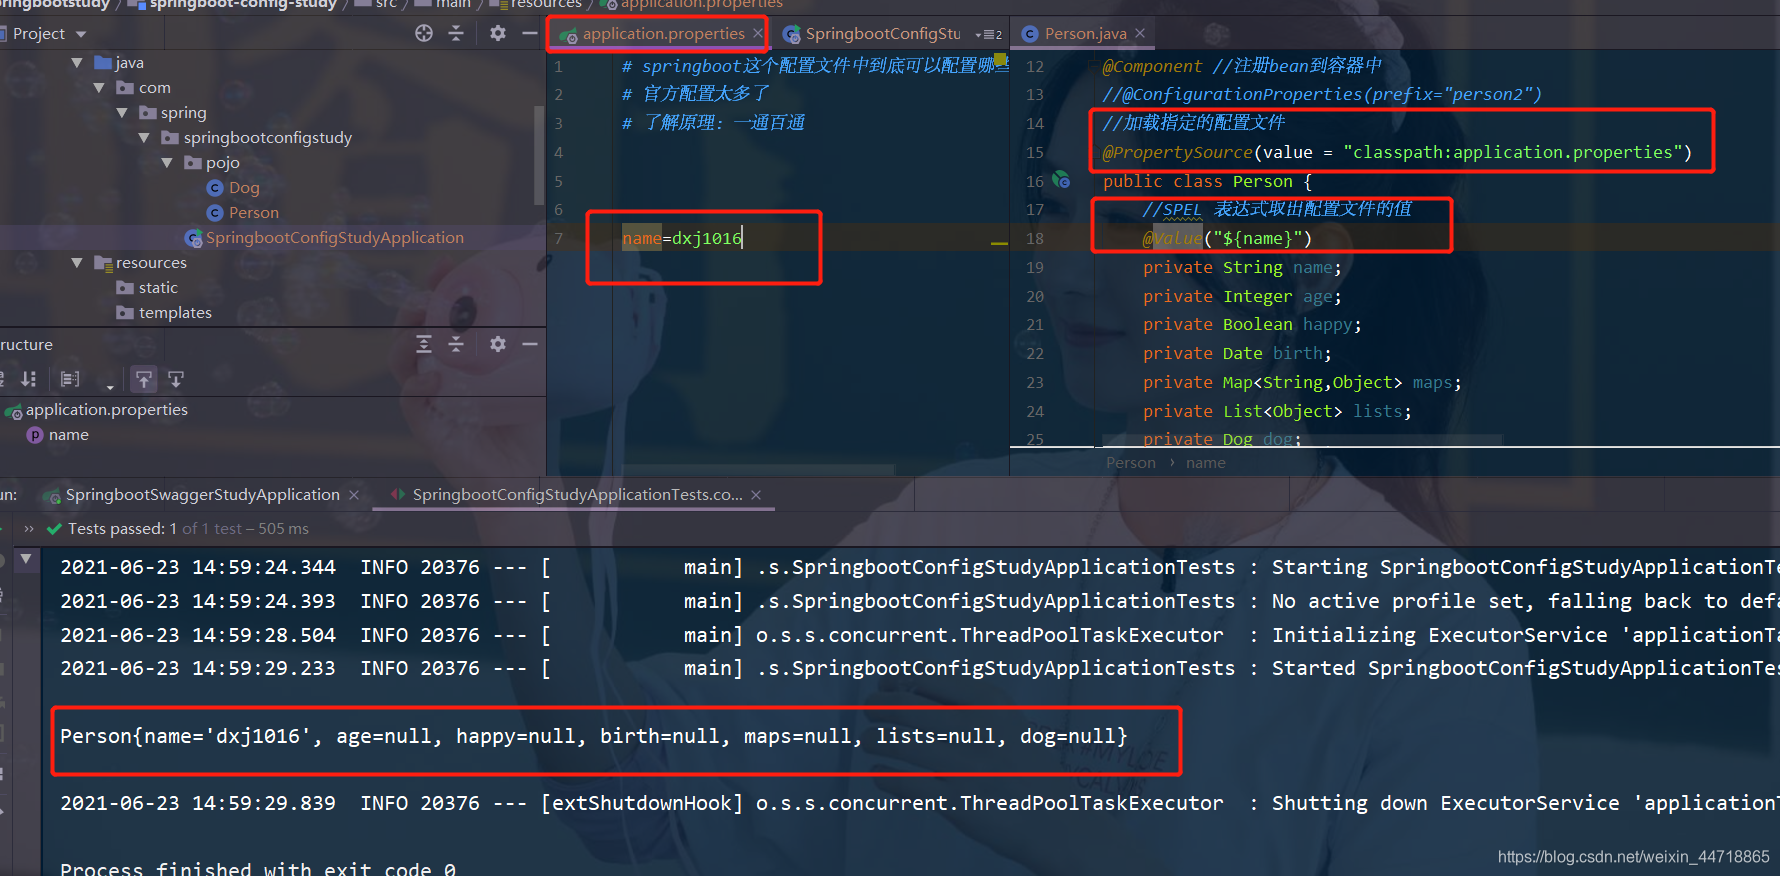
3.3、加载指定的配置文件给属性赋值
- @PropertySource :加载指定的配置文件;
- @configurationProperties:默认从全局配置文件中获取值;
- 我们去在resources目录下新建一个person.properties文件
name=dxj1016
- 然后在我们的代码中指定加载person.properties文件
@PropertySource(value = "classpath:application.properties")
@Component //注册bean
public class Person {
    @Value("${name}")
    private String name;
    ......
}
- 再次输出测试一下:指定配置文件绑定成功!
4、配置文件占位符
配置文件还可以编写占位符生成随机数
- yml文件中添加person3代码如下:
person3:
name: qinjiang${random.uuid} # 随机uuid
age: ${random.int} # 随机int
happy: false
birth: 2000/01/01
maps: {k1: v1,k2: v2}
lists:
- code
- girl
- music
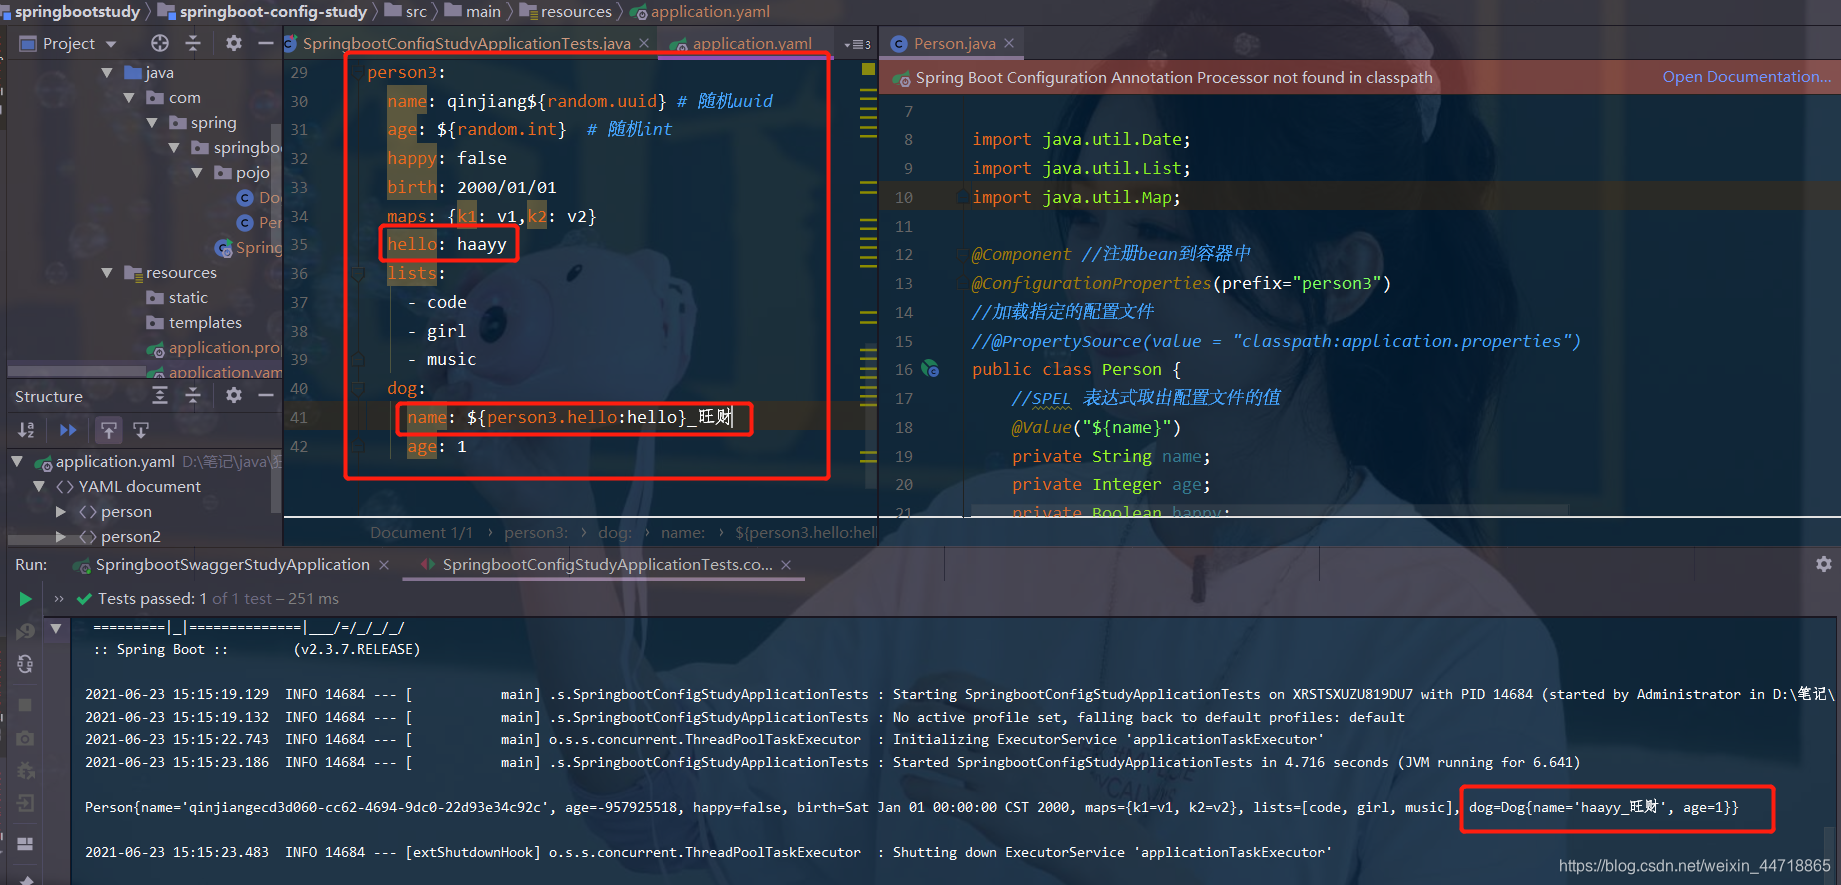
dog:
name: ${person.hello:hello}_旺财
age: 1
- 修改person类
@Component //注册bean到容器中
@ConfigurationProperties(prefix="person3")
//加载指定的配置文件
//@PropertySource(value = "classpath:application.properties")
public class Person {
    //SPEL 表达式取出配置文件的值
    @Value("${name}")
    private String name;
    private Integer age;
    private Boolean happy;
    private Date birth;
    private Map<String,Object> maps;
    private List<Object> lists;
    private Dog dog;

    //有参无参构造、get、set方法、toString()方法
- 测试结果
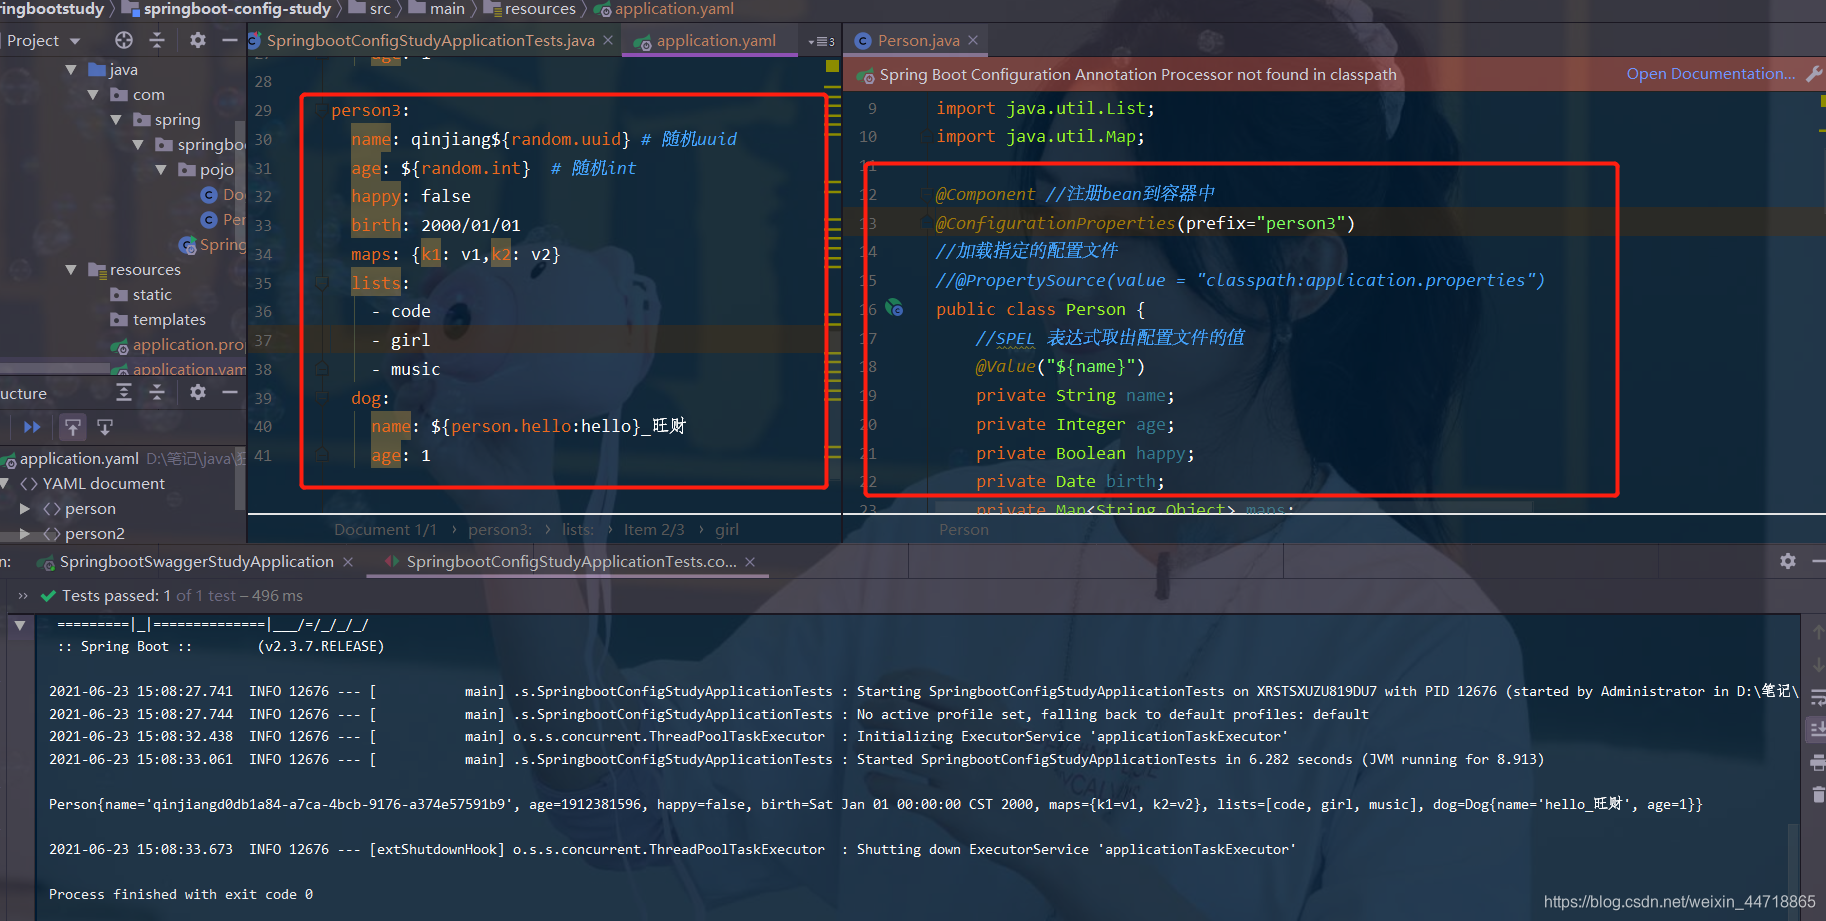
- yaml中的person3中name的属性如果有hello的存在,那么就注入hello的具体值,如果不存在就使用默认的hello,这个可以自己设置。
5、properties配置
properties配置文件在写中文的时候,会有乱码 , 我们需要去IDEA中设置编码格式为UTF-8;
settings–>FileEncodings 中配置;
测试步骤:
- 新建一个实体类User
@Component //注册bean
public class User {
    private String name;
    private int age;
    private String sex;
}
- 编辑配置文件 user.properties
user1.name=kuangshen
user1.age=18
user1.sex=男
- 我们在User类上使用@Value来进行注入!
@Component //注册bean
@PropertySource(value = "classpath:user.properties")
public class User {
    //直接使用@value
    @Value("${user.name}") //从配置文件中取值
    private String name;
    @Value("#{9*2}")  // #{SPEL} Spring表达式
    private int age;
    @Value("男")  // 字面量
    private String sex;
}
- Springboot测试
@SpringBootTest
class DemoApplicationTests {

    @Autowired
    User user;

    @Test
    public void contextLoads() {
        System.out.println(user);
    }

}
- 结果正常输出:

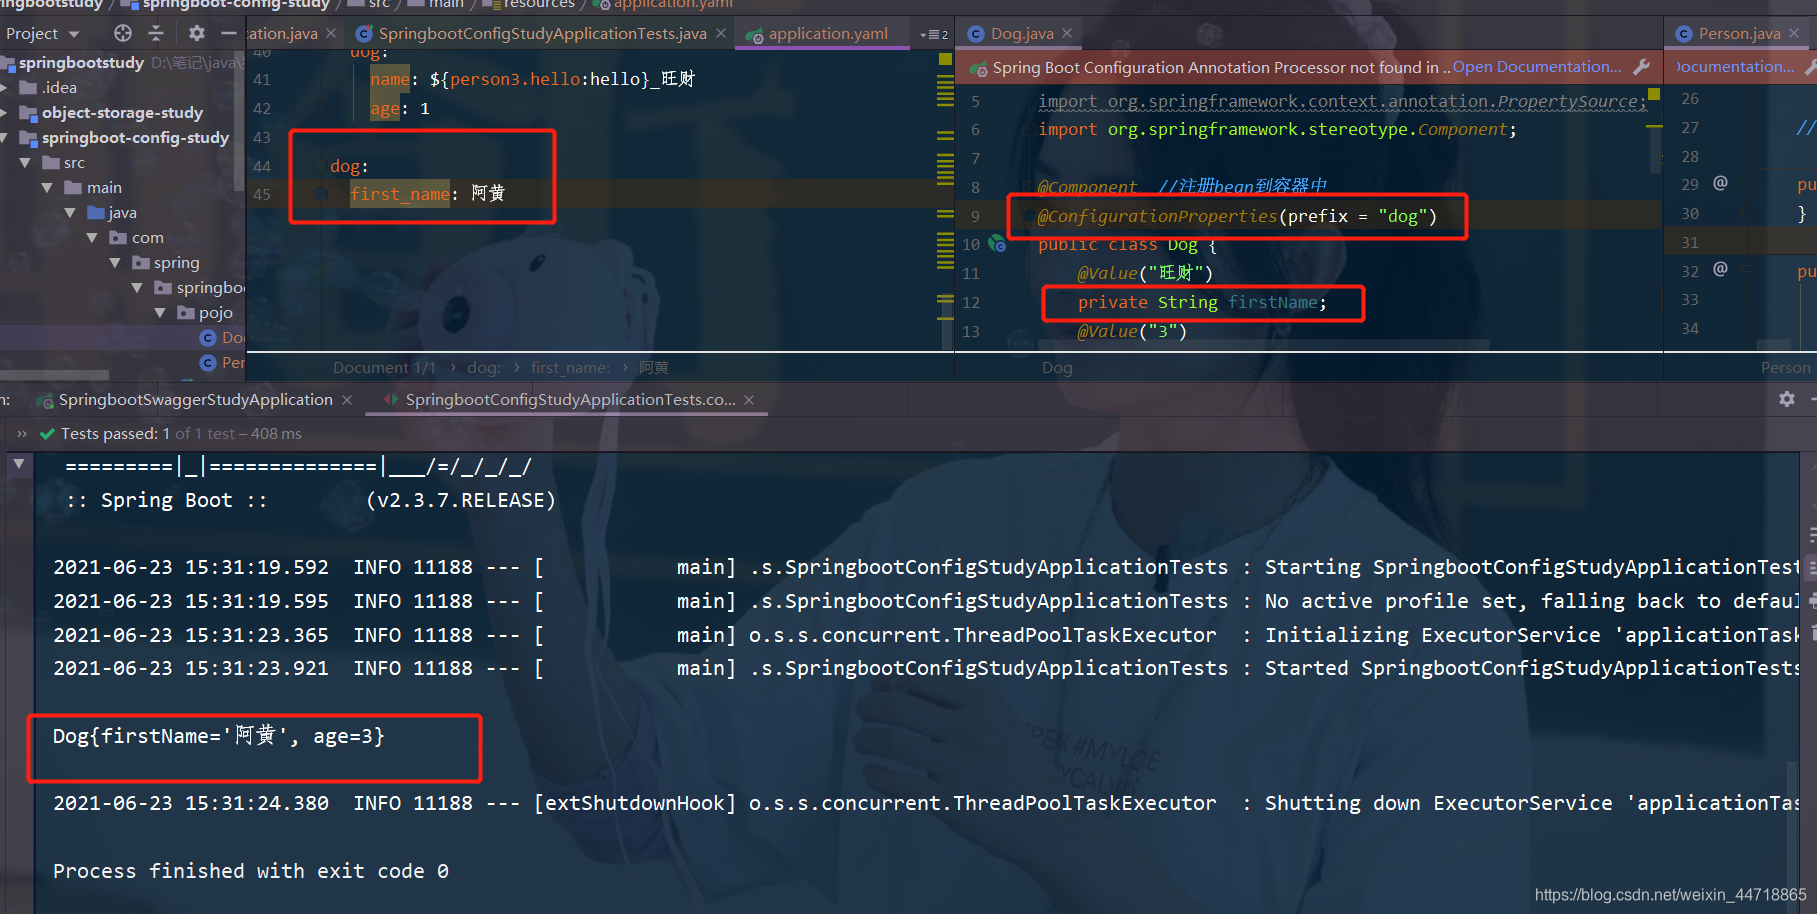
6、对比

6.1、松散绑定
- dog类
@Component  //注册bean到容器中
@ConfigurationProperties(prefix = "dog")
public class Dog {
    @Value("旺财")
    private String firstName;
    @Value("3")
    private Integer age;

    //有参无参构造、get、set方法、toString()方法
- yml配置文件
dog:
  first_name: 阿黄
- 测试类
@SpringBootTest
class SpringbootConfigStudyApplicationTests {
    @Autowired
    private Dog dog;
    @Autowired
    private Person person;
    @Test
    void contextLoads() {
        System.out.println(dog);
    }
}
- 测试结果
6.2、JSR303校验
Springboot中可以用@validated来校验数据,如果数据异常则会统一抛出异常,方便异常中心统一处理。我们这里来写个注解让我们的name只能支持Email格式;
- person类
@Component //注册bean到容器中
@ConfigurationProperties(prefix="person2")
//加载指定的配置文件
//@PropertySource(value = "classpath:application.properties")
@Validated//数据校验
public class Person {
    //SPEL 表达式取出配置文件的值
//    @Value("${name}")
    @Email()
    private String name;
    private Integer age;
    private Boolean happy;
    private Date birth;
    private Map<String,Object> maps;
    private List<Object> lists;
    private Dog dog;
    //有参无参构造、get、set方法、toString()方法
    }
- @Email注解爆红,是因为新版本springboot2.2以上都需要自己导入validation启动器依赖
 <dependency>
            <groupId>org.springframework.boot</groupId>
            <artifactId>spring-boot-starter-validation</artifactId>
        </dependency>
- yml文件
person2:
  name: dxj1016
  age: 3
  happy: false
  birth: 2021/06/23
  maps: {k1: v1,k2: v2}
  lists:
    - code
    - girl
    - music
  dog:
    name: 毛球
    age: 1
- 运行结果 :default message [不是一个合法的电子邮件地址];
使用数据校验,可以保证数据的正确性

6.3、JSR303校验常用属性
@NotNull(message="名字不能为空")
private String userName;
@Max(value=120,message="年龄最大不能查过120")
private int age;
@Email(message="邮箱格式错误")
private String email;

空检查
@Null       验证对象是否为null
@NotNull    验证对象是否不为null, 无法查检长度为0的字符串
@NotBlank   检查约束字符串是不是Null还有被Trim的长度是否大于0,只对字符串,且会去掉前后空格.
@NotEmpty   检查约束元素是否为NULL或者是EMPTY.

Booelan检查
@AssertTrue     验证 Boolean 对象是否为 true
@AssertFalse    验证 Boolean 对象是否为 false

长度检查
@Size(min=, max=) 验证对象(Array,Collection,Map,String)长度是否在给定的范围之内
@Length(min=, max=) string is between min and max included.

日期检查
@Past       验证 Date 和 Calendar 对象是否在当前时间之前
@Future     验证 Date 和 Calendar 对象是否在当前时间之后
@Pattern    验证 String 对象是否符合正则表达式的规则

.......等等
除此以外,我们还可以自定义一些数据校验规则
7、多环境配置及配置文件位置
注意:如果yml和properties同时都配置了端口,并且没有激活其他环境 , 默认会使用properties配置文件的!
profile是Spring对不同环境提供不同配置功能的支持,可以通过激活不同的环境版本,实现快速切换环境;
7.1、properties多环境配置
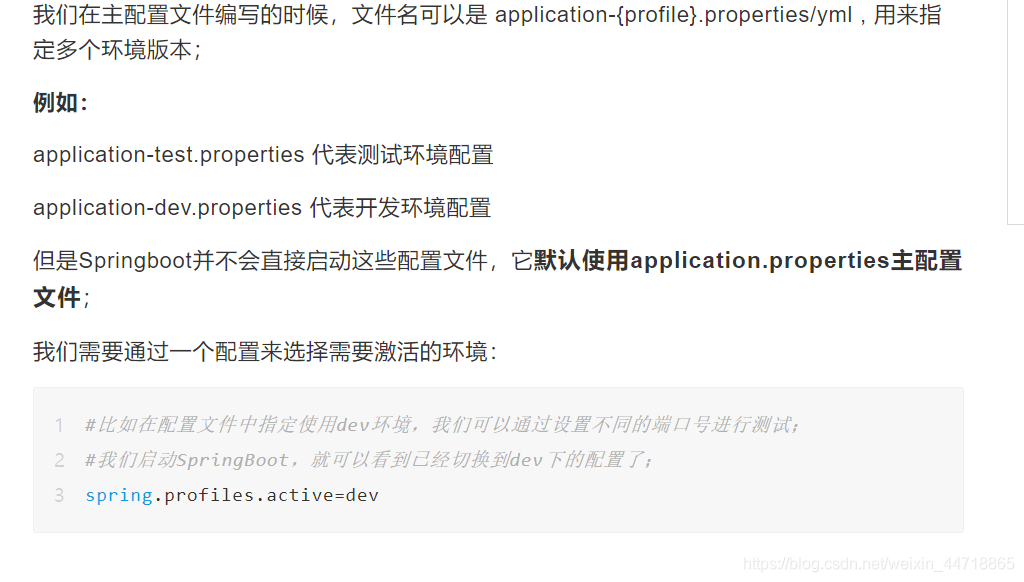
- application.properties
server.port=8080
- application-dev.properties
server.port=8081
- application-test.properties
server.port=8082
- 在application.properties中选择哪个环境配置
server.port=8080
#springboot的多环境配置:可以选择激活哪一个配置文件
spring.profiles.active=dev
7.2、yaml多环境配置
和properties配置文件中一样,但是使用yml去实现不需要创建多个配置文件,更加方便了 !
server:
  port: 8083
#选择要激活那个环境块
spring:
  profiles:
    active: dev

---
server:
  port: 8084
spring:
  profiles: dev #配置环境的名称


---

server:
  port: 8085
spring:
  profiles: test #配置环境的名称
注意:如果yml和properties同时都配置了端口,并且没有激活其他环境 , 默认会使用properties配置文件的!
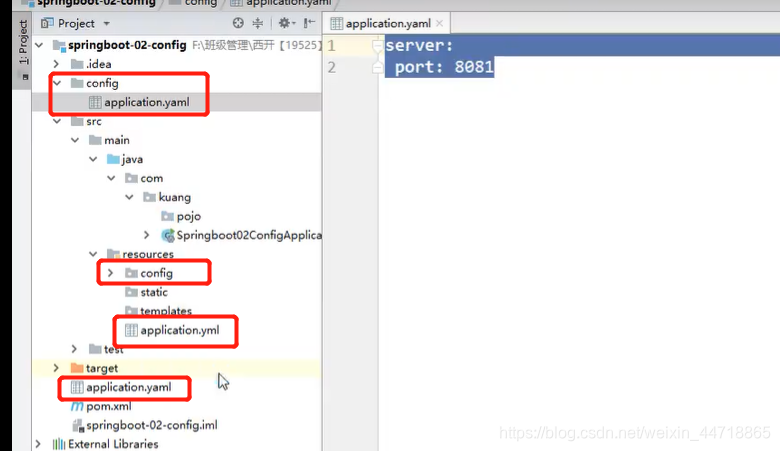
7.3、配置文件加载位置
- 项目下建个config文件夹里面放配置文件application.yaml
- 项目下建个application.yaml
- resources文件夹下建个config文件夹里面放配置文件application.yaml
- resources文件夹下建个配置文件application.yaml
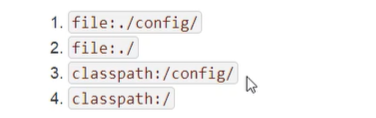
运行顺序是:先1,删掉1运行后是2,删掉2后运行是3,删掉3后运行是4
官方文档说明:
springboot 启动会扫描以下位置的application.properties或者application.yml文件作为Spring boot的默认配置文件:
优先级1:项目路径下的config文件夹配置文件
优先级2:项目路径下配置文件
优先级3:资源路径下的config文件夹配置文件
优先级4:资源路径下配置文件
优先级由高到底,高优先级的配置会覆盖低优先级的配置;
SpringBoot会从这四个位置全部加载主配置文件;互补配置;
我们在最低级的配置文件中设置一个项目访问路径的配置来测试互补问题;
#配置项目的访问路径
server.servlet.context-path=/kuang

java -jar spring-boot-config.jar --spring.config.location=F:/application.properties
8、自动配置原理再理解
配置文件到底能写什么?怎么写?–跟spring.factories有很大的联系
SpringBoot官方文档中有大量的配置,我们无法全部记住

8.1、分析自动配置原理
- 我们以HttpEncodingAutoConfiguration(Http编码自动配置)为例解释自动配置原理;
- 找到spring.factories文件,搜索HttpEncodingAutoConfiguration,打开这个查看源代码
- 有两个@Bean

- @Configuration ://表示这是一个配置类,和以前编写的配置文件一样,也可以给容器中添加组件;
- @EnableConfigurationProperties({HttpProperties.class}) ://启动指定类的ConfigurationProperties功能;
- //进入这个HttpProperties查看,将配置文件中对应的值和HttpProperties绑定起来;//并把HttpProperties加入到ioc容器中
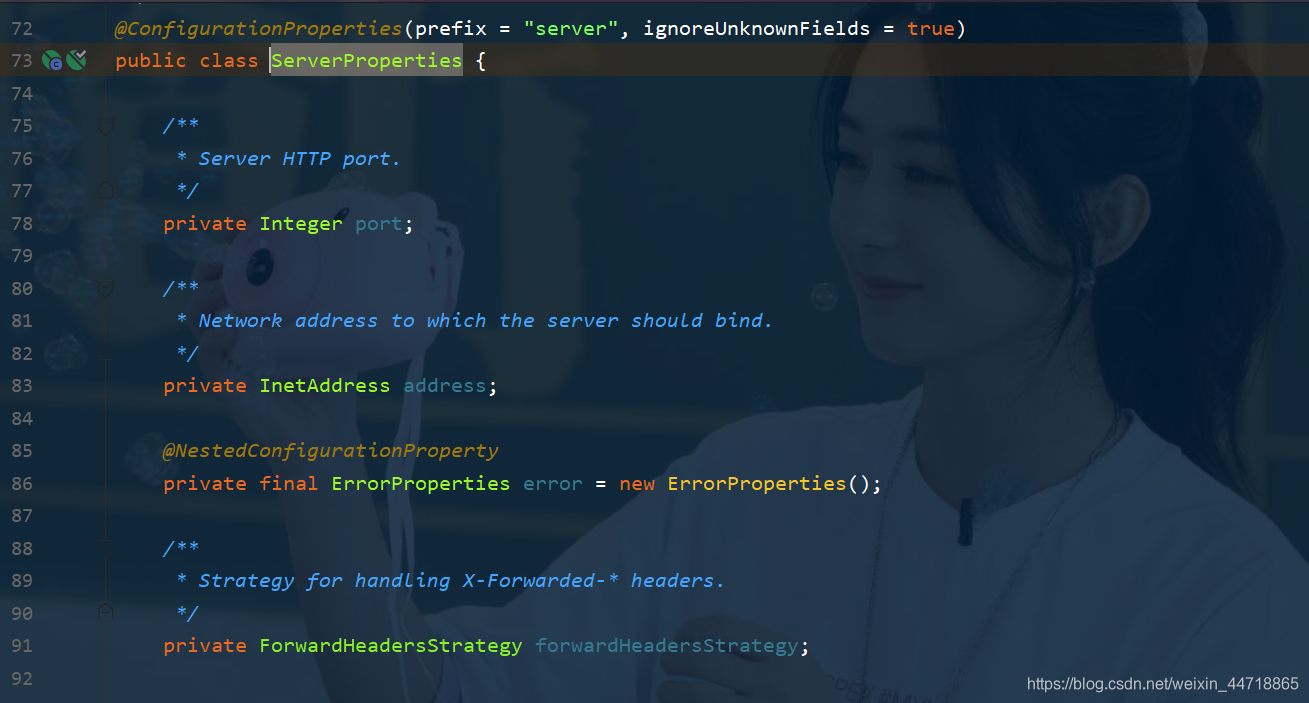
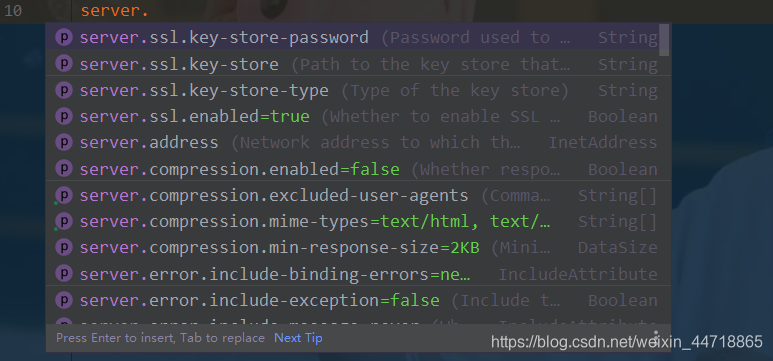
- 这里有个前缀server,去配置文件中打出server可以发现会提示很多,这些跟上面的serverProperties类中的属性是对应的。
- @ConditionalOnWebApplication注解//Spring底层@Conditional注解:
根据不同的条件判断,如果满足指定的条件,整个配置类里面的配置就会生效; - @ConditionalOnClass//判断当前项目有没有这个类CharacterEncodingFilter;SpringMVC中进行乱码解决的过滤器;
- @ConditionalOnProperty//判断配置文件中是否存在某个配置:spring.http.encoding.enabled;//如果不存在,判断也是成立的//即使我们配置文件中不配置pring.http.encoding.enabled=true,也是默认生效的;
//表示这是一个配置类,和以前编写的配置文件一样,也可以给容器中添加组件;
@Configuration
//启动指定类的ConfigurationProperties功能;
  //进入这个HttpProperties查看,将配置文件中对应的值和HttpProperties绑定起来;
  //并把HttpProperties加入到ioc容器中
@EnableConfigurationProperties({HttpProperties.class})

//Spring底层@Conditional注解
  //根据不同的条件判断,如果满足指定的条件,整个配置类里面的配置就会生效;
  //这里的意思就是判断当前应用是否是web应用,如果是,当前配置类生效
@ConditionalOnWebApplication(
    type = Type.SERVLET
)

//判断当前项目有没有这个类CharacterEncodingFilter;SpringMVC中进行乱码解决的过滤器;
@ConditionalOnClass({CharacterEncodingFilter.class})

//判断配置文件中是否存在某个配置:spring.http.encoding.enabled;
  //如果不存在,判断也是成立的
  //即使我们配置文件中不配置pring.http.encoding.enabled=true,也是默认生效的;
@ConditionalOnProperty(
    prefix = "spring.http.encoding",
    value = {"enabled"},
    matchIfMissing = true
)

public class HttpEncodingAutoConfiguration {
    //他已经和SpringBoot的配置文件映射了
    private final Encoding properties;
    //只有一个有参构造器的情况下,参数的值就会从容器中拿
    public HttpEncodingAutoConfiguration(HttpProperties properties) {
        this.properties = properties.getEncoding();
    }

    //给容器中添加一个组件,这个组件的某些值需要从properties中获取
    //以下就是一些过滤,比如请求过滤,响应过滤,然后把他放到bean里面
    @Bean
    @ConditionalOnMissingBean //判断容器没有这个组件?
    public CharacterEncodingFilter characterEncodingFilter() {
        CharacterEncodingFilter filter = new OrderedCharacterEncodingFilter();
        filter.setEncoding(this.properties.getCharset().name());
        filter.setForceRequestEncoding(this.properties.shouldForce(org.springframework.boot.autoconfigure.http.HttpProperties.Encoding.Type.REQUEST));
        filter.setForceResponseEncoding(this.properties.shouldForce(org.springframework.boot.autoconfigure.http.HttpProperties.Encoding.Type.RESPONSE));
        return filter;
    }
    //。。。。。。。
}
- 反正在配置文件中的属性,都可以在spring.factories中找到对应的配置类
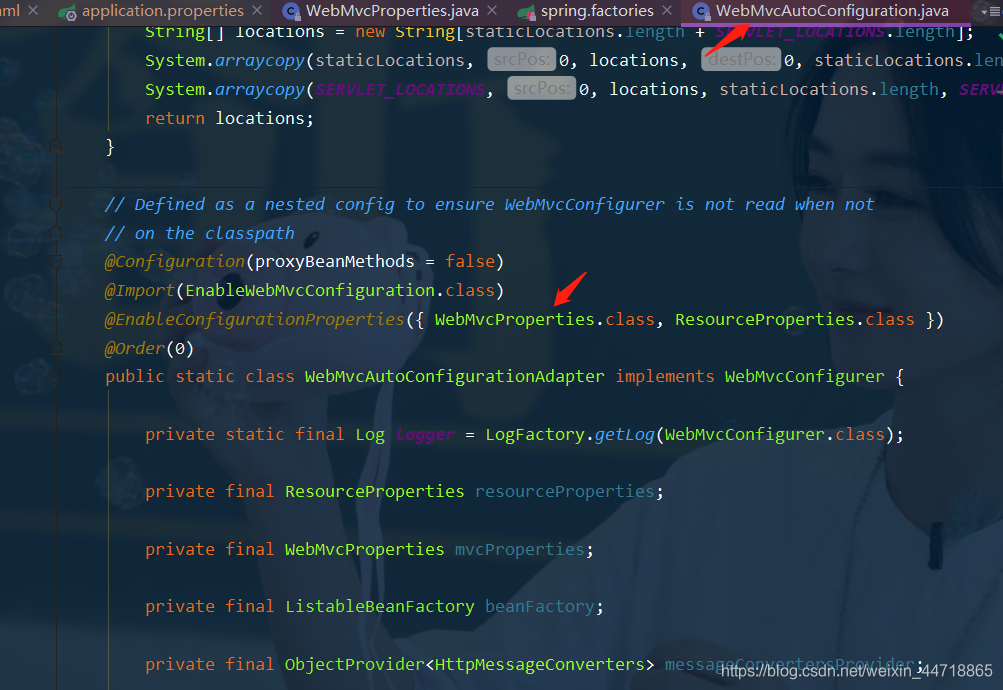
- 例如在配置文件中输入
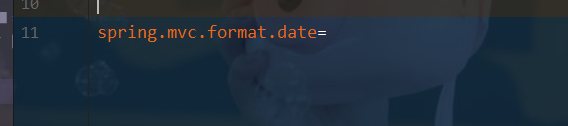
- 点进去查看代码
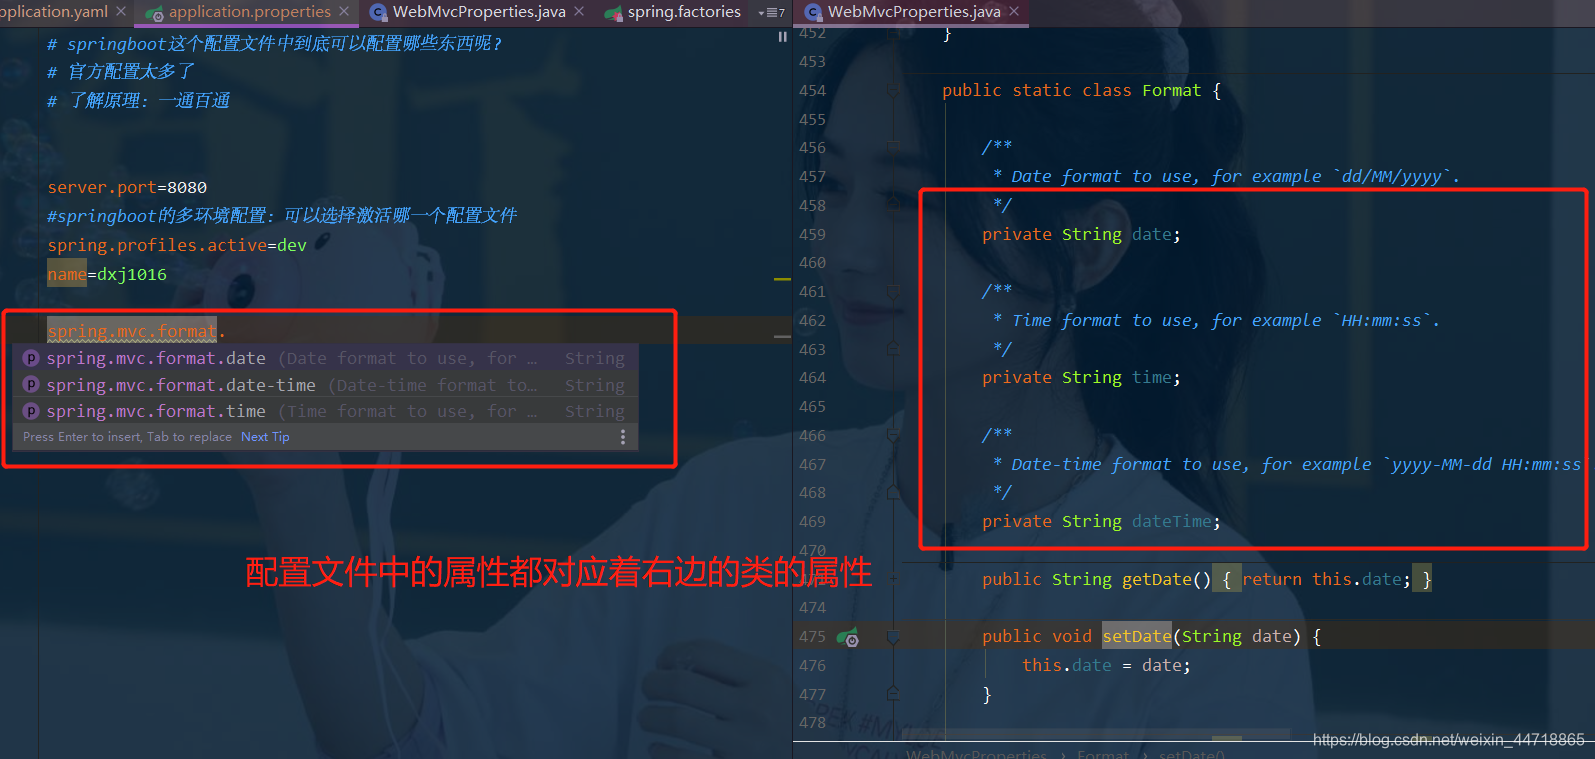
- 可以发现进入了一个WebMvcProperties.java的类中。而且这个类的属性跟配置文件中的属性对应。
- 到spring.factories文件中搜索WebMVC出来一个点进去看看
一句话总结 :根据当前不同的条件判断,决定这个配置类是否生效!
- 一但这个配置类生效;这个配置类就会给容器中添加各种组件;
- 这些组件的属性是从对应的properties类中获取的,这些类里面的每一个属性又是和配置文件绑定的;
- 所有在配置文件中能配置的属性都是在xxxxProperties类中封装着;
- 配置文件能配置什么就可以参照某个功能对应的这个属性类
8.2、精髓
- SpringBoot启动会加载大量的自动配置类
- 我们看我们需要的功能有没有在SpringBoot默认写好的自动配置类当中;
- 我们再来看这个自动配置类中到底配置了哪些组件;(只要我们要用的组件存在在其中,我们就不需要再手动配置了)
- 给容器中自动配置类添加组件的时候,会从properties类中获取某些属性。我们只需要在配置文件中指定这些属性的值即可
- xxxxAutoConfigurartion:自动配置类;给容器中添加组件
- xxxxProperties:封装配置文件中相关属性;
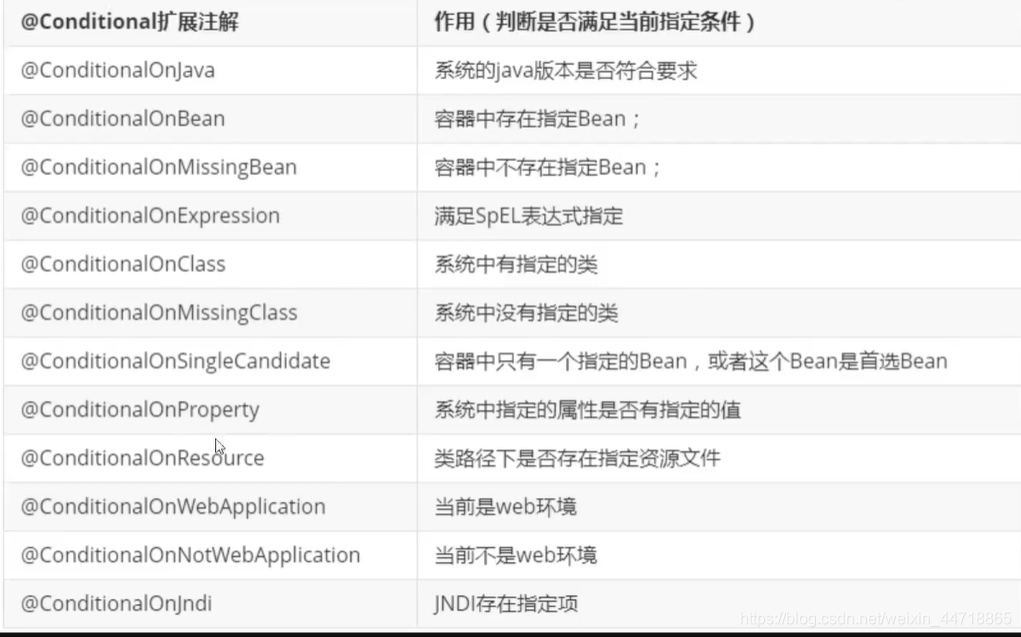
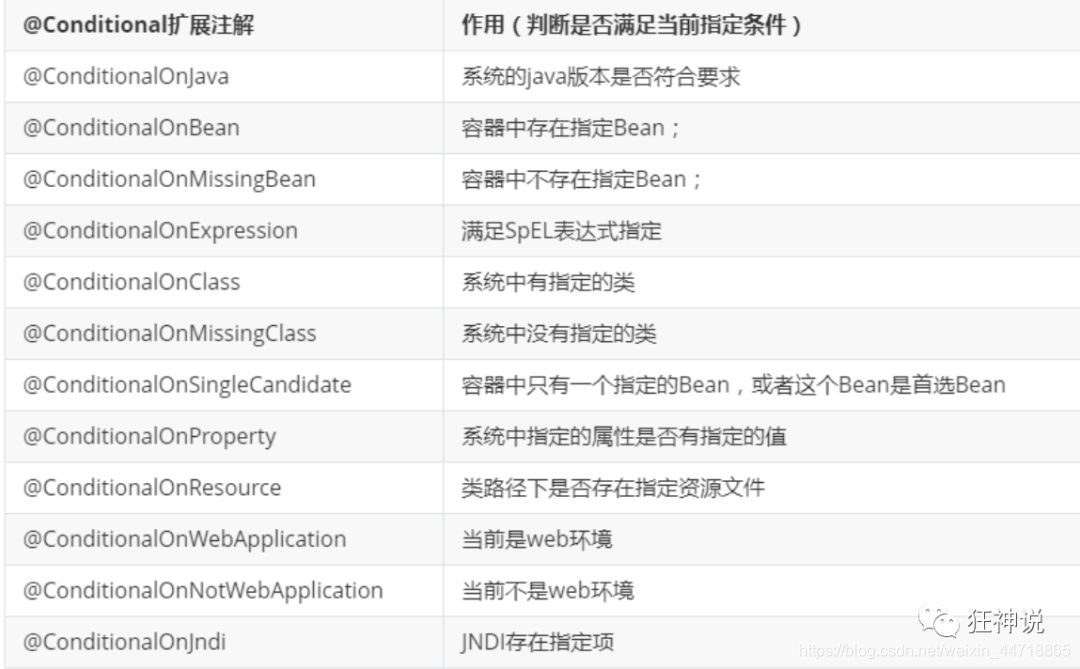
8.3、了解:@Conditional
- 了解完自动装配的原理后,我们来关注一个细节问题,自动配置类必须在一定的条件下才能生效;
- @Conditional派生注解(Spring注解版原生的@Conditional作用)
- 作用:必须是@Conditional指定的条件成立,才给容器中添加组件,配置配里面的所有内容才生效;
- 那么多的自动配置类,必须在一定的条件下才能生效;也就是说,我们加载了这么多的配置类,但不是所有的都生效了。
- 我们怎么知道哪些自动配置类生效?
- 我们可以通过启用 debug=true属性;来让控制台打印自动配置报告,这样我们就可以很方便的知道哪些自动配置类生效;
#开启springboot的调试类
debug=true
- Positive matches:(自动配置类启用的:正匹配)
- Negative matches:(没有启动,没有匹配成功的自动配置类:负匹配)
- Unconditional classes: (没有条件的类)
9、自定义Starter
- 我们分析完毕了源码以及自动装配的过程,我们可以尝试自定义一个启动器来玩玩!
- 启动器模块是一个 空 jar 文件,仅提供辅助性依赖管理,这些依赖可能用于自动装配或者其他类库;
命名归约:
-
官方命名:
- 前缀:spring-boot-starter-xxx
- 比如:spring-boot-starter-web…
-
自定义命名:
- xxx-spring-boot-starter
- 比如:mybatis-spring-boot-starter
9.1、编写启动器
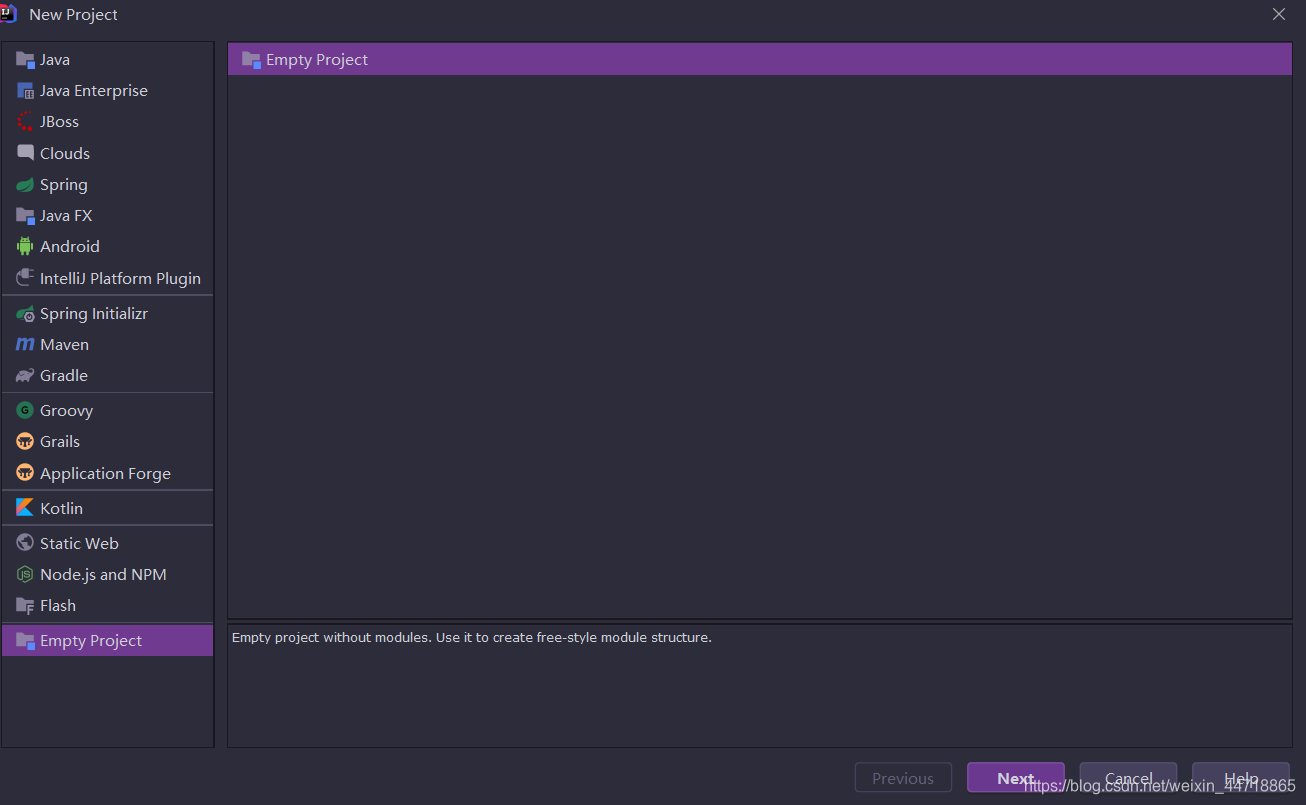
1、在IDEA中新建一个空项目 spring-boot-starter-diy
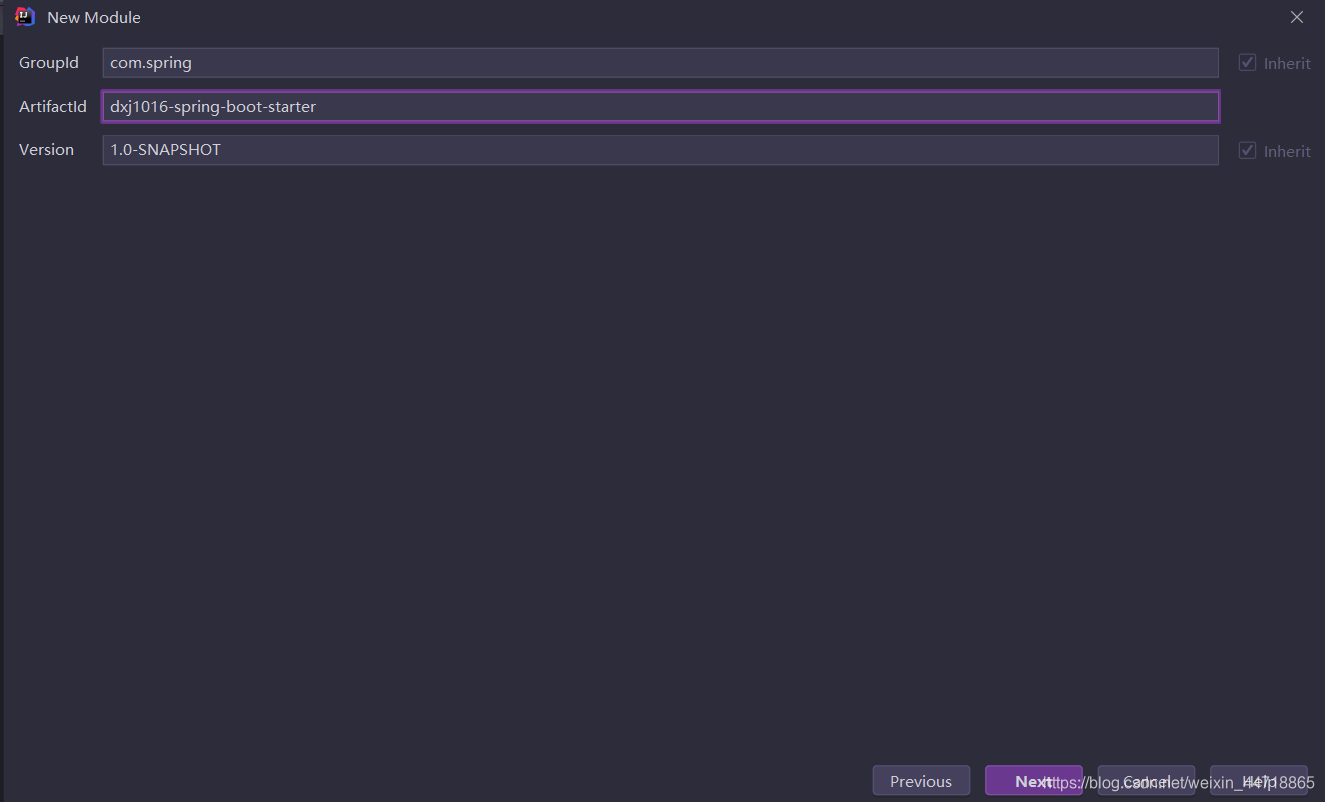
2、新建一个普通Maven模块:kuang-spring-boot-starter
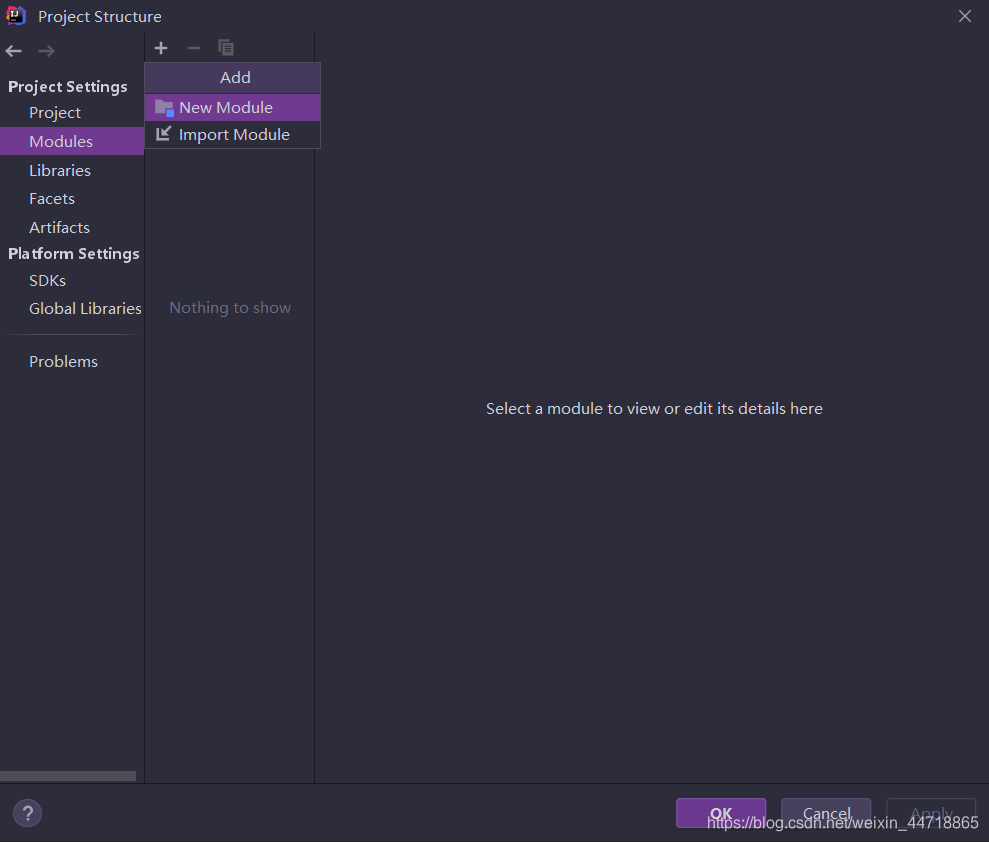
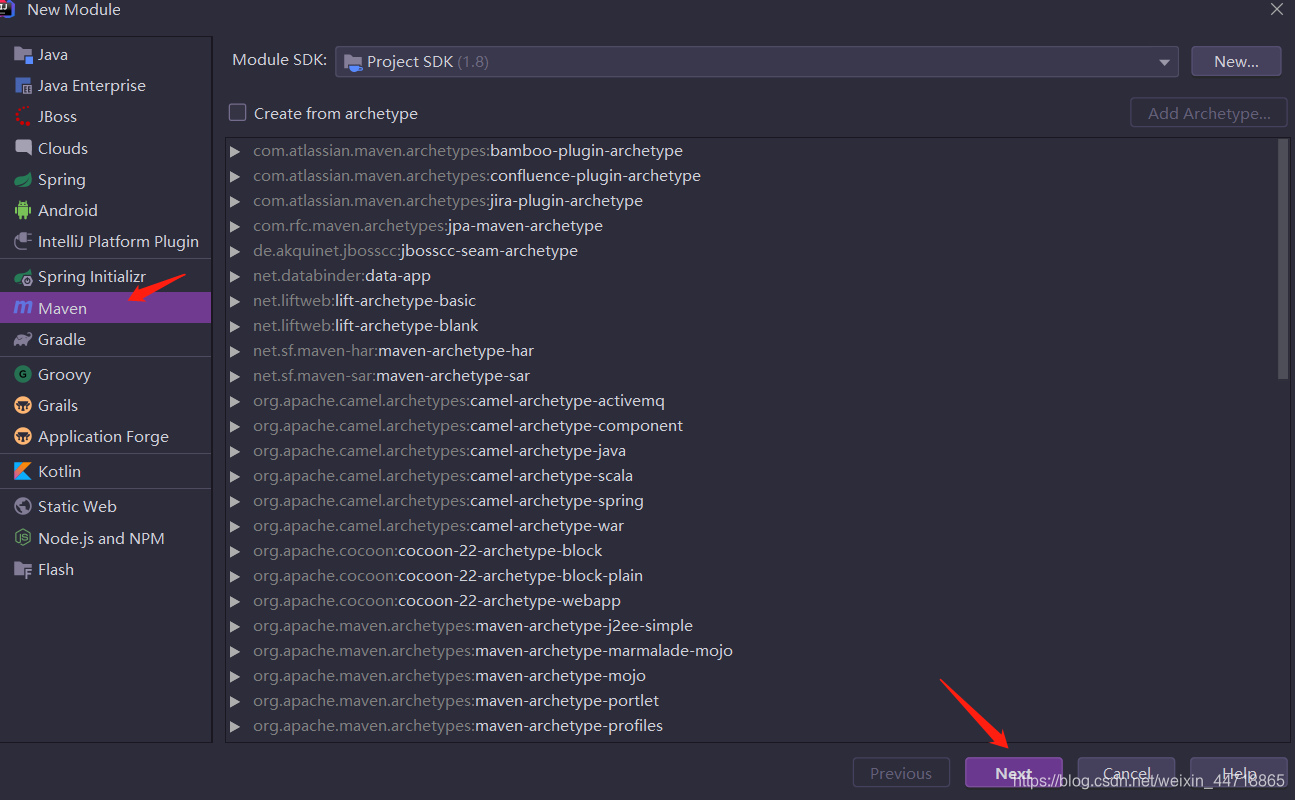
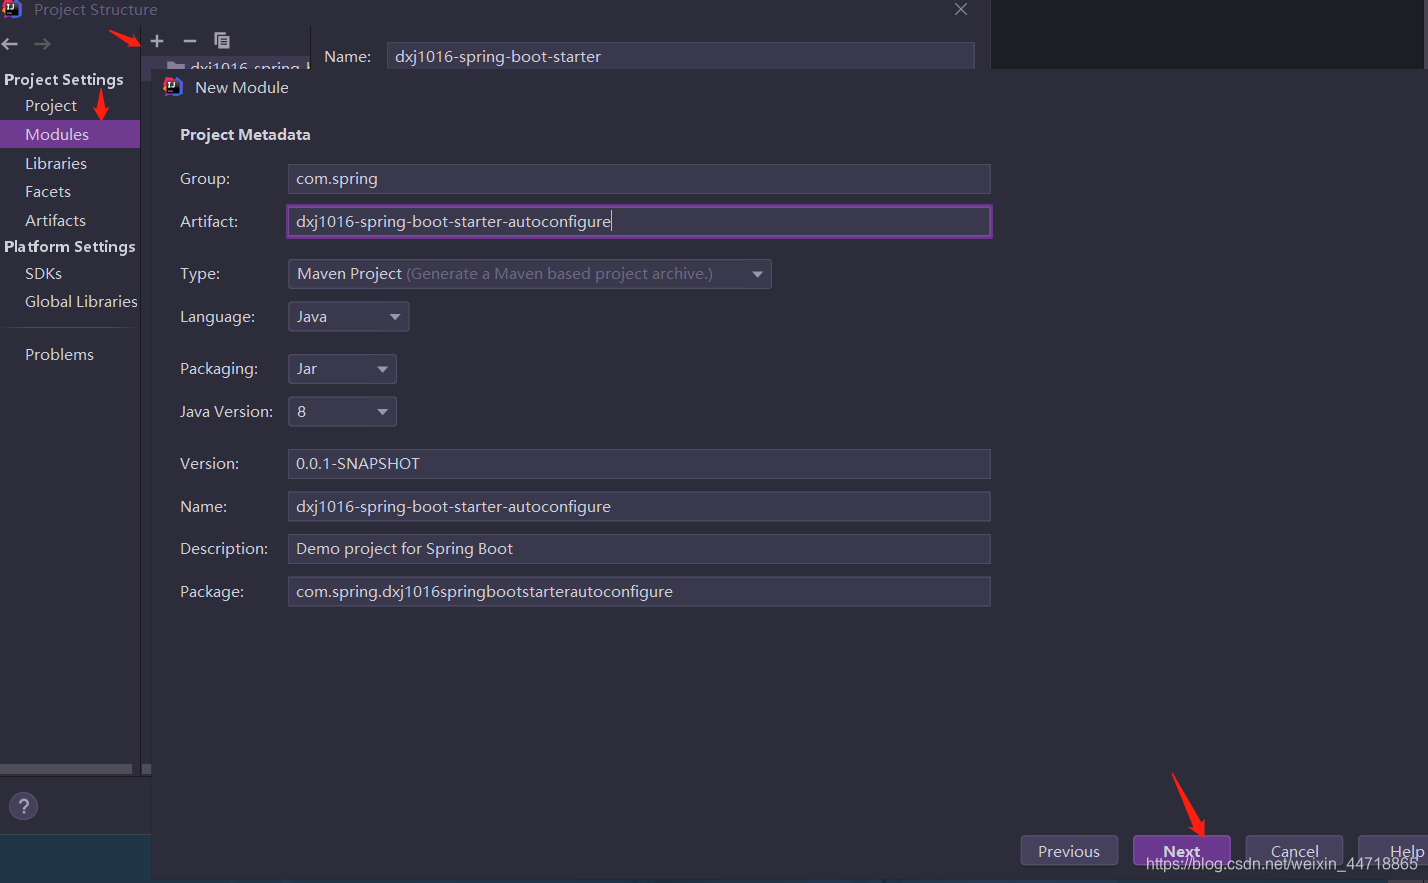
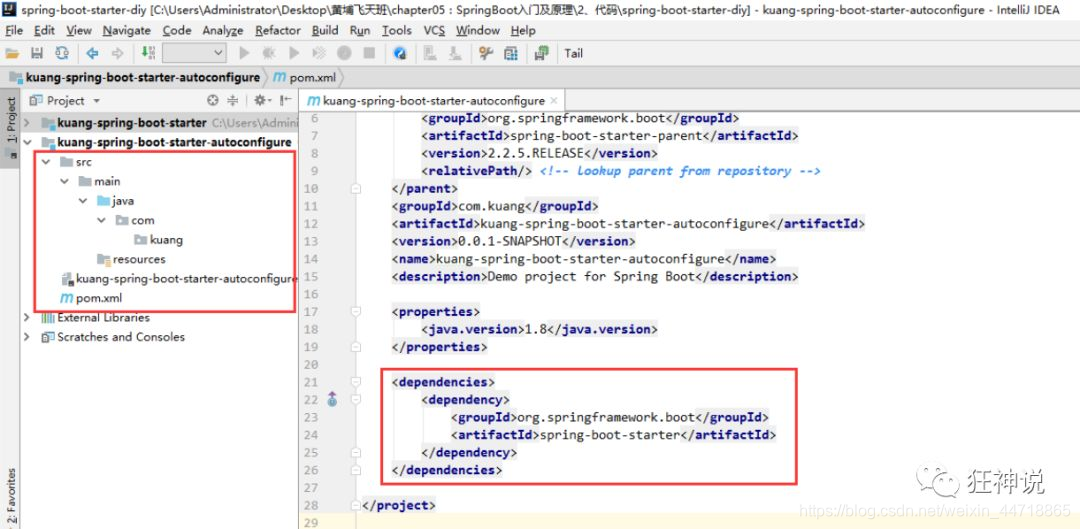
3、新建一个Springboot模块:kuang-spring-boot-starter-autoconfigure
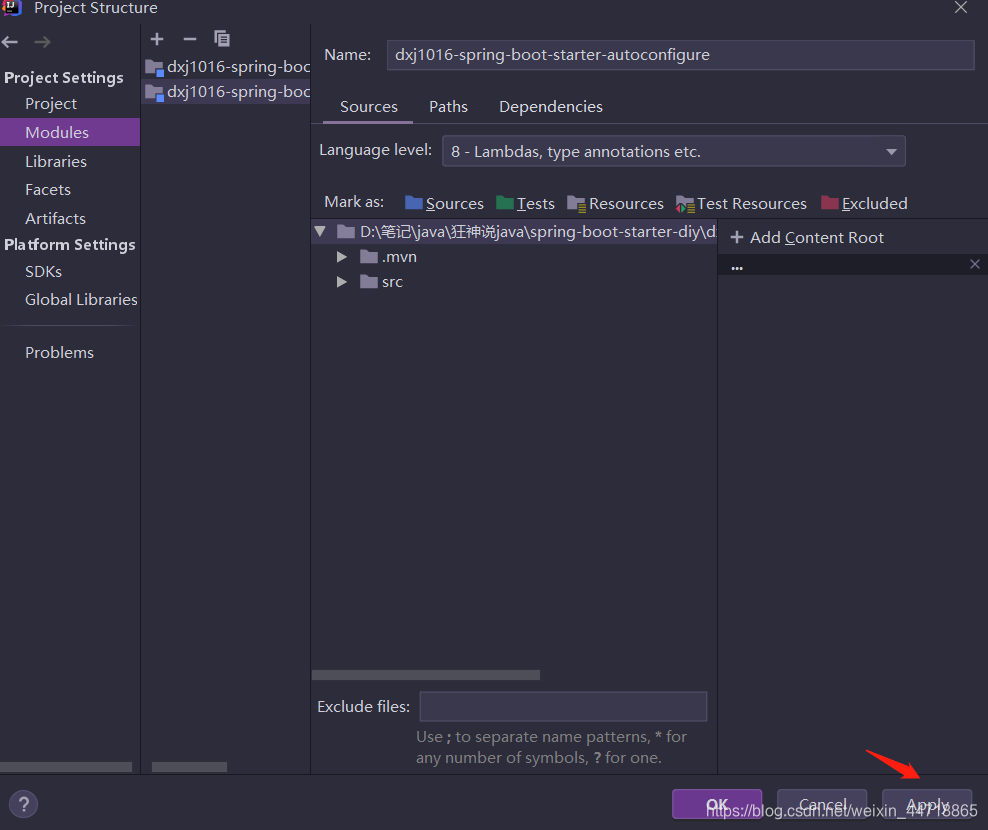
4、点击apply即可,基本结构

5、在我们的 starter 中 导入 autoconfigure 的依赖!
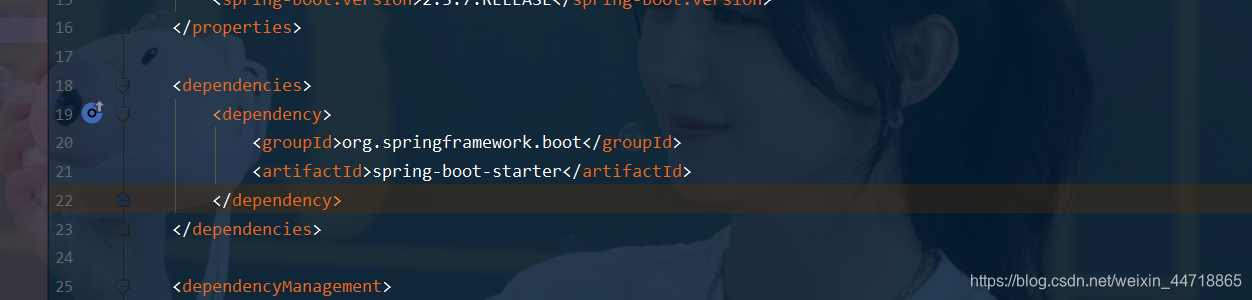
<!-- 启动器 -->
<dependencies>
  <!--  引入自动配置模块 -->
        <dependency>
            <groupId>com.spring</groupId>
            <artifactId>dxj1016-spring-boot-starter-autoconfigure</artifactId>
            <version>0.0.1-SNAPSHOT</version>
        </dependency>
</dependencies>
6、将 autoconfigure 项目下多余的文件都删掉,Pom中只留下一个 starter,这是所有的启动器基本配置!
7、我们编写一个自己的服务
package com.kuang;

public class HelloService {

    HelloProperties helloProperties;

    public HelloProperties getHelloProperties() {
        return helloProperties;
    }

    public void setHelloProperties(HelloProperties helloProperties) {
        this.helloProperties = helloProperties;
    }

    public String sayHello(String name){
        return helloProperties.getPrefix() + name + helloProperties.getSuffix();
    }

}
8、编写HelloProperties 配置类
package com.kuang;

import org.springframework.boot.context.properties.ConfigurationProperties;

// 前缀 kuang.hello
@ConfigurationProperties(prefix = "kuang.hello")
public class HelloProperties {

    private String prefix;
    private String suffix;

    public String getPrefix() {
        return prefix;
    }

    public void setPrefix(String prefix) {
        this.prefix = prefix;
    }

    public String getSuffix() {
        return suffix;
    }

    public void setSuffix(String suffix) {
        this.suffix = suffix;
    }
}
9、编写我们的自动配置类并注入bean,测试!
package com.kuang;

import org.springframework.beans.factory.annotation.Autowired;
import org.springframework.boot.autoconfigure.condition.ConditionalOnWebApplication;
import org.springframework.boot.context.properties.EnableConfigurationProperties;
import org.springframework.context.annotation.Bean;
import org.springframework.context.annotation.Configuration;

@Configuration
@ConditionalOnWebApplication //web应用生效
@EnableConfigurationProperties(HelloProperties.class)
public class HelloServiceAutoConfiguration {

    @Autowired
    HelloProperties helloProperties;

    @Bean
    public HelloService helloService(){
        HelloService service = new HelloService();
        service.setHelloProperties(helloProperties);
        return service;
    }

}
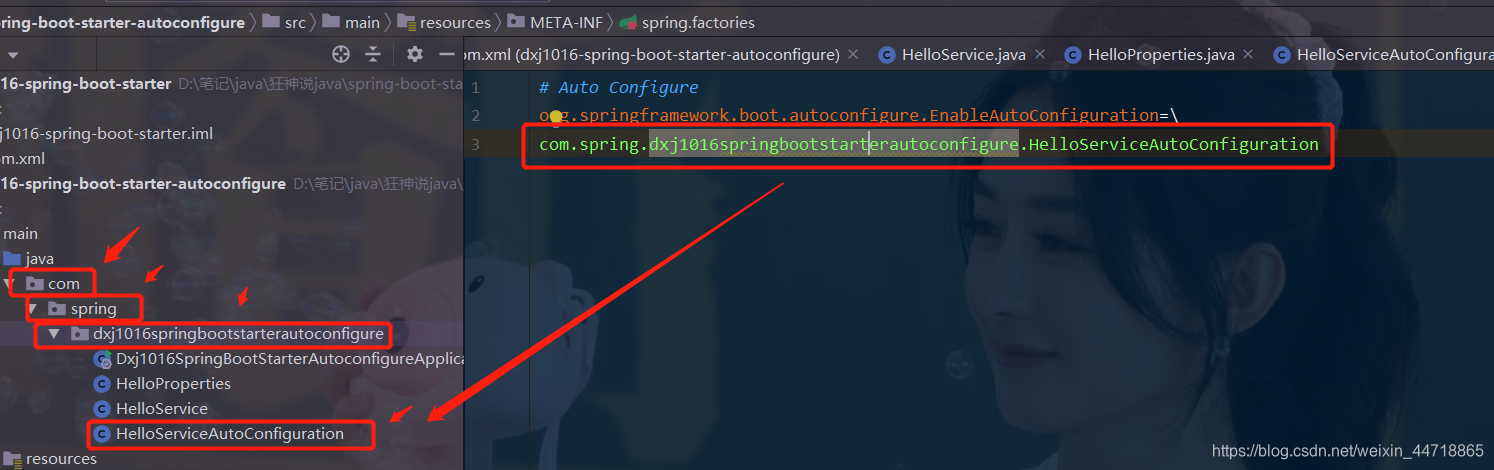
10、在resources编写一个自己的 META-INF\spring.factories。
# Auto Configure
org.springframework.boot.autoconfigure.EnableAutoConfiguration=\
com.spring.dxj1016springbootstarterautoconfigure.HelloServiceAutoConfiguration
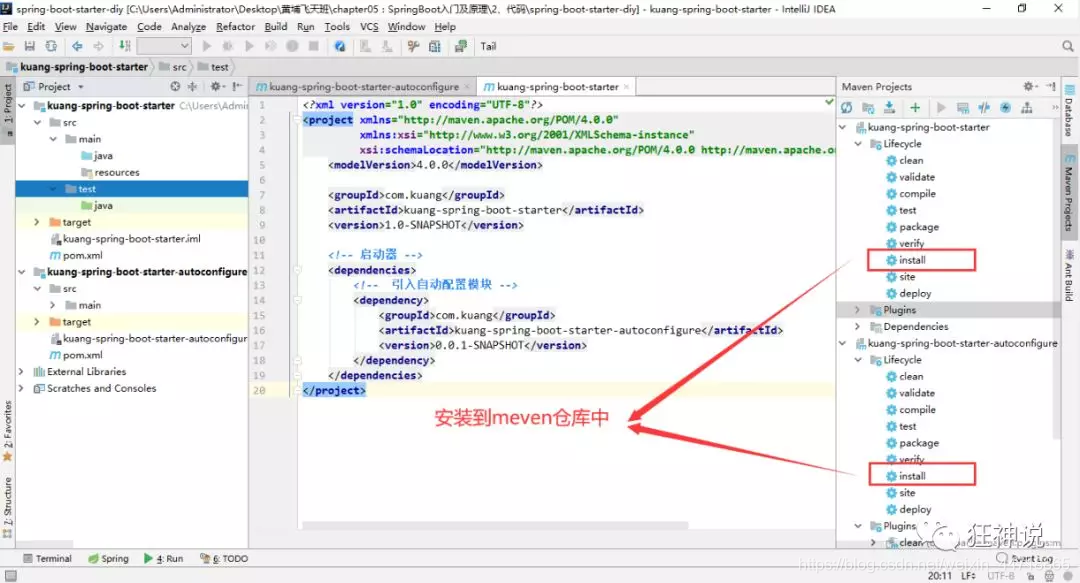
11、编写完成后,可以安装到maven仓库中!
2.9.2、新建项目测试我们自己写的启动器
1、新建一个SpringBoot 项目
2、导入我们自己写的启动器
<dependency>
    <groupId>com.spring</groupId>
    <artifactId>dxj1016-spring-boot-starter</artifactId>
    <version>1.0-SNAPSHOT</version>
</dependency>
3、编写一个 HelloController 进行测试我们自己的写的接口!
package com.spring.controller;
@RestController
public class HelloController {
@Autowired
HelloService helloService;
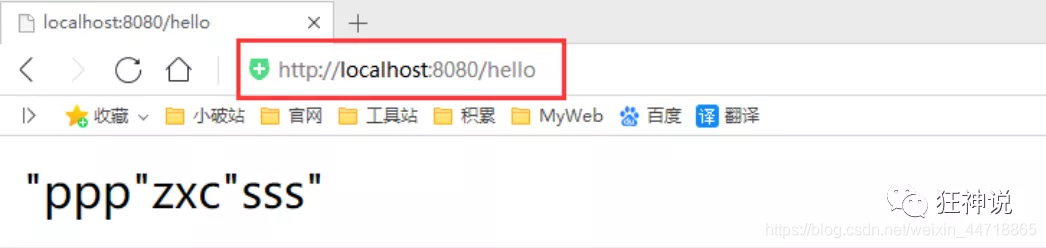
@RequestMapping("/hello")
public String hello(){
return helloService.sayHello("zxc");
}
}
4、编写配置文件 application.properties
kuang.hello.prefix="ppp"
kuang.hello.suffix="sss"
5、启动项目进行测试,结果成功 !


 7364
7364


 被折叠的 条评论
为什么被折叠?
被折叠的 条评论
为什么被折叠?
 到【灌水乐园】发言


