


 本文介绍了MongoDB5.0及以上版本启动时遇到的非法指令、childprocess失败、配置服务器和添加节点错误,重点讲解了如何通过setDefaultRWConcern调整写入安全级别以及处理openfiles限制。还提到节点异常关闭后的数据修复方法和注意事项。
1. mongodb启动时显示 Illegal instruction (core dumped)
mongodb 5.0之后(包括5.0) 开始使用需要使用 AVX 指令集

2.启动时报错 ERROR: child process failed, exited with 1
通过指令 bin/mongod --repair 或 ./bin/mongod -f configs/mongodb.conf --repair查看报错信息
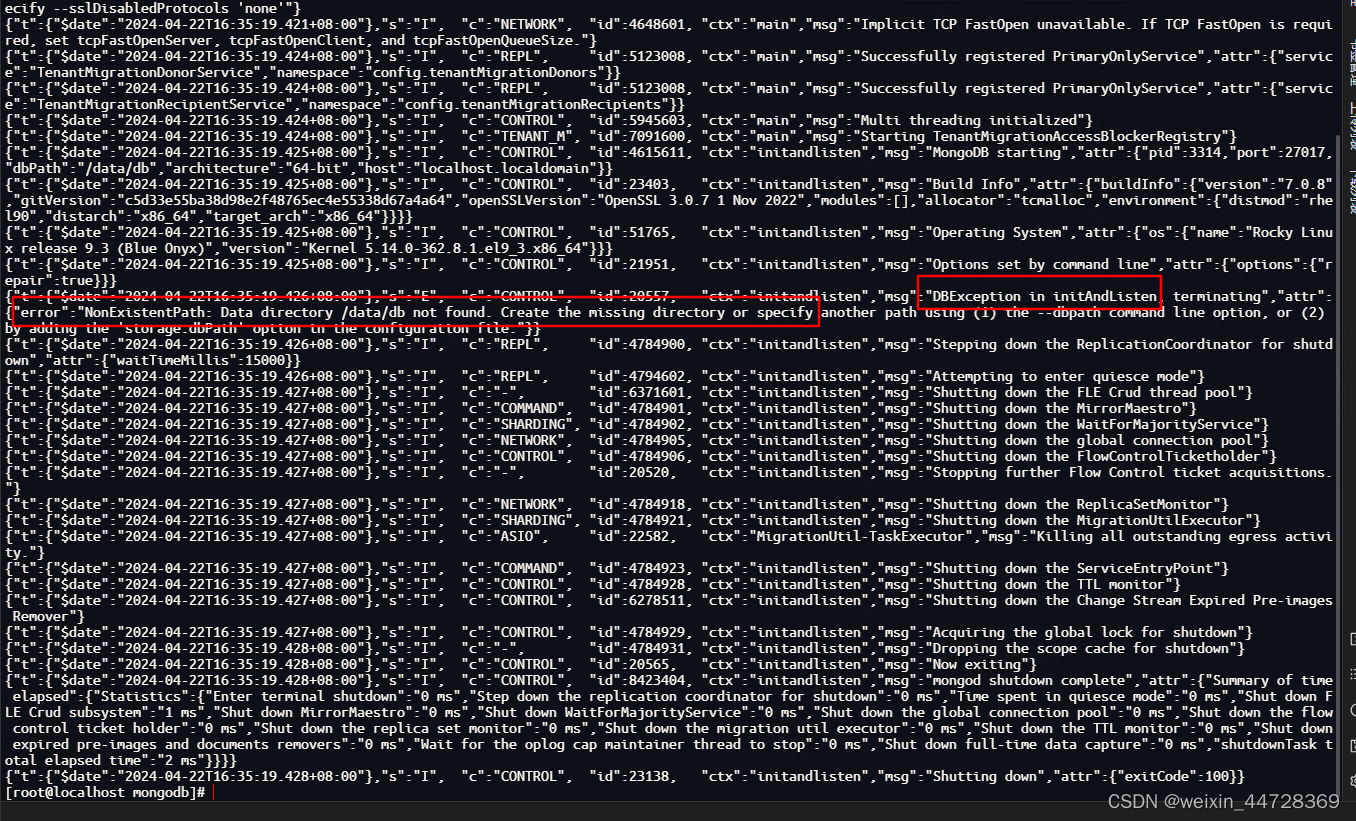
根据报错信息进行修改
3. 配置服务器添加节点时报错
Reconfig attempted to install a config that would change the implicit defaul... Use the setDefaultRWConcern command to set a cluster-wide write concern and try the reconfig again
解决方法,修改默认读写关注配置
官网修改地址
db.adminCommand({
  "setDefaultRWConcern" : 1,
  "defaultWriteConcern" : {
    "w" : 2
  }
})
选项信息
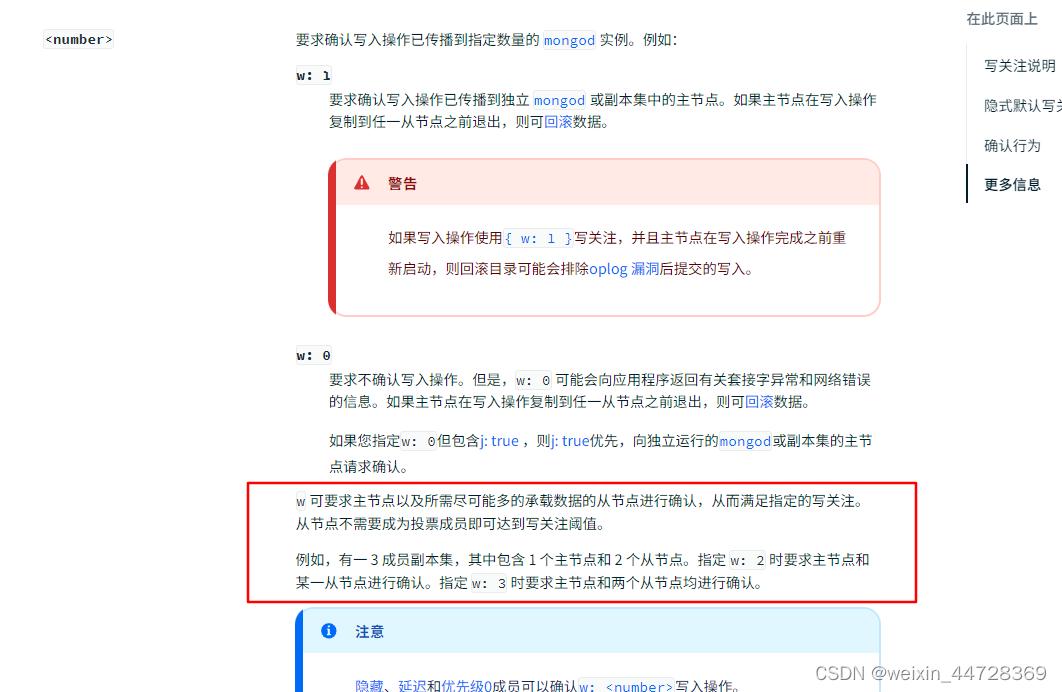
“w” : 1 只要主节点写入成功,就直接返回成功的响应,而不管副节点的同步情况
“w” : majority 超过节点半数【(节点数+1)/2】写入成功,才返回成功响应
“w” : 0 不等待任何节点确认写操作,只需写入到内存就返回成功,这是最低级别的写安全级别,这个配置可以提供写入性能,但也有一定的风险
“w” : 等待指定数量的节点确认写成功
其他注意: 配置服务器不能有裁决节点(7.0.8版本测试所得)
路由添加分片集群时报错
Cannot add ***/*** as a shard since the implicit default write concern on this shard is set to {w : 1}, because number of arbiters in the shard's configuration caused the number of writable voting members not to be strictly more than the voting majority. Change the shard configuration or set the cluster-wide write concern using the setDefaultRWConcern command and try again.
在 mongos 实例中 我们使用命令 db.adminCommand({ “getDefaultRWConcern”: 1 }) 可以查看到当前mongos 默认设置的写入安全机制defaultWriteConcern,默认是 majority (多数确认),这是mongodb5.0后开始的默认设置 ,这意味着当进行写操作时,至少要有超过大多数的数据节点确认写操作成功,才会返回成功的响应,目前我们是3个节点,mongo系统定义的一半节点数是 (3+1)/2=2,需要超过2,也就是至少要有3个节点写入成功才行,但是我们设置了一个 仲裁节点,导致3个shard节点中,只有2个可写数据的节点,怎么也不会写成功了,所以导致失败
解决方法,将写入安全级别调低,在路由上使用以下命令
db.adminCommand({ "setDefaultRWConcern" : 1, "defaultWriteConcern" : { "w" : 1 }})
4. 节点异常关闭后无法重启
- 删除data/db下的mongod.lock文件,再启动
- 如果还是启动失败
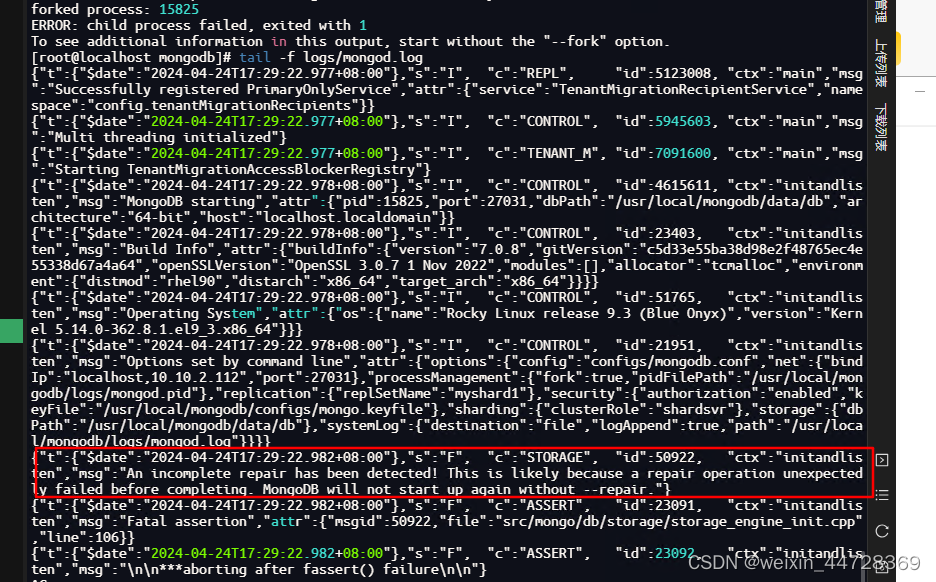
An incomplete repair has been detected! This is likely because a repair operation unexpectedly failed before completing. MongoDB will not start up again without --repair.
//修复数据
mongod --dbpath db目录 --repair
尝试删除storage.bson文件
```
//删除db目录里面的storage.bson
rm -rf db目录/storage.bson
```
5.注意设置服务器**open files,防止出现报错"error":“Too many open files”}**
查看配置当前open files信息
ulimit -a
修改
 sudo su
 ulimit -n 102400
# 临时修改(仅当前窗口有效)
以下全局有效(需重启)
 vim /etc/security/limits.conf

# 添加以下配置

* soft nofile 102400

* hard nofile 102400
例如:
# - chroot - change root to directory (Debian-specific)
#
#<domain> <type> <item> <value>
#

#* soft core 0
#root hard core 100000
#* hard rss 10000
#@student hard nproc 20
#@faculty soft nproc 20
#@faculty hard nproc 50
#ftp hard nproc 0
#ftp - chroot /ftp
#@student - maxlogins 4


* soft nofile 102400
* hard nofile 102400

# End of file


 254
254


 被折叠的 条评论
为什么被折叠?
被折叠的 条评论
为什么被折叠?
 到【灌水乐园】发言


