


未修改前效果

一、创建实例:Student,并构造有参和无参方法
public class Student implements Serializable {
    private int id;
    private String name;
    private int score;

    public Student(int id,String name,int score) {
        this.id = id;
        this.name = name;
        this.score = score;
    }

    public Student(){

    }
二、pom文件中引入fastjson
<dependency>
     <groupId>com.alibaba</groupId>
     <artifactId>fastjson</artifactId>
     <version>1.2.46</version>
</dependency>
三、创建RedisConfig,修改RedisTemplate中序列化配置
@Slf4j
@Configurable
public class RedisConfig {

    @Bean
    public RedisTemplate<String, Serializable> redisTemplate(RedisConnectionFactory redisConnectionFactory) {
        RedisTemplate redisTemplate = new RedisTemplate();
        StringRedisSerializer stringRedisSerializer = new StringRedisSerializer();
        redisTemplate.setConnectionFactory(redisConnectionFactory);
        // 设置value的序列化规则和 key的序列化规则
        redisTemplate.setValueSerializer(stringRedisSerializer);
        redisTemplate.setKeySerializer(stringRedisSerializer);
        redisTemplate.setKeySerializer(stringRedisSerializer);
        redisTemplate.setHashValueSerializer(stringRedisSerializer);
        //value序列化
        redisTemplate.setValueSerializer(new FastJsonRedisSerializer<>(Object.class));
        redisTemplate.afterPropertiesSet();
        log.info("redisTemplate: "+redisTemplate);
        return redisTemplate;
    }
}
四、在Application主类中配置RedisConfig(@Import)
@SpringBootApplication(exclude= {DataSourceAutoConfiguration.class})
@ComponentScan("com.example.demo")
@Import(RedisConfig.class)
public class DemoApplication {

    public static void main(String[] args) {
        SpringApplication.run(DemoApplication.class, args);
    }

}
五、测试效果
ValueOperations:spring提供操作redis的类。
@Slf4j
@RunWith(SpringRunner.class)
@SpringBootTest(classes = DemoApplication.class)
public class RedisConfigTest {

    @Autowired
    private RedisTemplate redisTemplate;

    @Test
    public void test1(){
        Student student = new Student(2,"张三",28);
        ValueOperations<String, Student> operations=redisTemplate.opsForValue();
        operations.set("student2",student);
        log.info("成功---"+operations.get("student2").toString());
    }
}
运行结果:
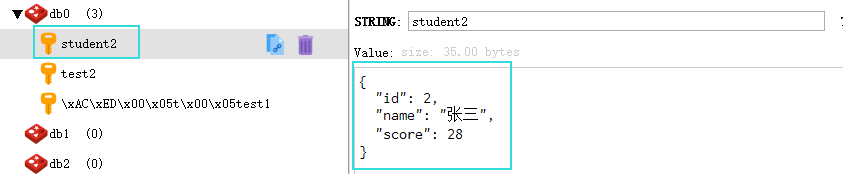
六、利用RedisDesktopManager查看效果,成功。
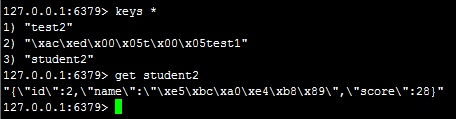
也可以在liunx中查看,这里中文乱码是因为我没有修改liunx配置。


 183
183


 被折叠的 条评论
为什么被折叠?
被折叠的 条评论
为什么被折叠?
 到【灌水乐园】发言


