


1. 导入依赖
        <dependency>
            <groupId>io.springfox</groupId>
            <artifactId>springfox-swagger2</artifactId>
            <version>2.9.2</version>
        </dependency>
        <!-- https://mvnrepository.com/artifact/io.springfox/springfox-swagger-ui -->
        <dependency>
            <groupId>io.springfox</groupId>
            <artifactId>springfox-swagger-ui</artifactId>
            <version>2.9.2</version>
        </dependency>
要注意版本问题。一开始我是用3.0版本,访问swagger报404,也没有弹窗,换成2.9.2版本就自动好了。
2. 整合Swagger2
@Configuration   //加入配置类
@EnableSwagger2  //开启swagger2
public class SwaggerConfig {
}
到此,springboot整合swagger2就结束了,现在去浏览器访问http://localhost:8080/swagger-ui.htm就能打开swagger主页面。

还可能遇到一种问题,弹窗问题。

这种是因为SpringBoot屏蔽了静态资源,需要在配置类中加入此段代码
@Configuration
@EnableSwagger2//这里注意,此类要继承WebMvcConfigurationSupport类
public class SwaggerConfig extends WebMvcConfigurationSupport {

    @Override
    protected void addResourceHandlers(ResourceHandlerRegistry registry) {
        // 解决静态资源无法访问
        registry.addResourceHandler("/**").addResourceLocations("classpath:/static/");
        // 解决swagger无法访问
        registry.addResourceHandler("/swagger-ui.html").addResourceLocations("classpath:/META-INF/resources/");
        // 解决swagger的js文件无法访问
        registry.addResourceHandler("/webjars/**").addResourceLocations("classpath:/META-INF/resources/webjars/");

    }
}
3. 配置Swagger
刚才只是整合了Swagger,它显示的是默认页面,我们需要按照自己的项目来配置Swagger。
    @Bean
    public Docket docket(){//配置swagger就是自定义Docket Bean
		//返回一个新建的Docket对象,他需要一个ApiInfo对象
        return new Docket(DocumentationType.SWAGGER_2).apiInfo(apiInfo())
    }

	/*返回一个ApiInfo对象
	ApiInfo类没有set方法,只能通过构造器新建
		ApiInfo(String title, String description, String version, String termsOfServiceUrl, Contact contact, String license, String licenseUrl, Collection<VendorExtension> vendorExtensions) {
*/
    private ApiInfo apiInfo(){
    	//作者信息
        Contact contact=new Contact("Liwz","http://localhost:8081/","979391150@qq.com");

        return new ApiInfo(
                "Liwz的API文档",//title
                "这是用来开发员工管理系统的API文档",//description
                "v1.0",//version
                "http://www.liwz.top",//termsOfServiceUrl
                contact,//contact
                "Apache 2.0",//license
                "http://www.liwz.top",//licenseUrl
                new ArrayList<>()
                 );
    }
访问查看效果。

4. 设置多个Docket
在页面右上角可以看见类似于分组的下拉框

可以继续在配置文件中设置多个Docket,并通过groupName方法,设置在右上角下拉框中显示的名字。
    @Bean
    public Docket docket(){

        return new Docket(DocumentationType.SWAGGER_2).apiInfo(apiInfo()).groupName("A");
    }

    @Bean
    public Docket docket1(){

        return new Docket(DocumentationType.SWAGGER_2).apiInfo(apiInfo()).groupName("B");
    }

    @Bean
    public Docket docket2(){

        return new Docket(DocumentationType.SWAGGER_2).apiInfo(apiInfo()).groupName("C");
    }
查看效果

5. 设置扫描的路径
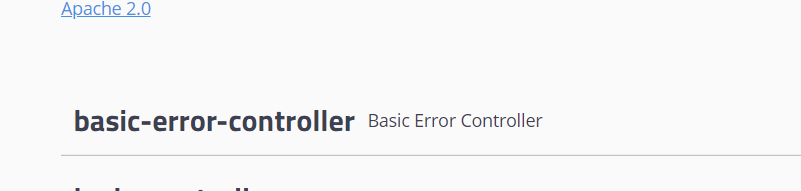
可以看到默认的配置,扫描了所有的配置,连Springboot的基本error都扫描到了,我们并不需要,可以继续在Config类的具体的Docket中设置。
@Bean
    public Docket docket(){
		/*RequestHandlerSelectors实现类有多个方法
		basePackage()基于包
		none()一个也不扫描
		any()扫描所有

		*/
        return new Docket(DocumentationType.SWAGGER_2).apiInfo(apiInfo())
        .groupName("A")
		.select()
		.apis(RequestHandlerSelectors.basePackage("com.example.springboot.controller"))
		.build()
    }
6. 给Model或者Controller加中文注释
Model:
@ApiModel("用户实体类")
@Data
public class User implements Serializable {

    @ApiModelProperty("用户表主键ID")
    private int userId;
    @ApiModelProperty("账号")
    private String account;
    @ApiModelProperty("用户名")
    private String userName;
    @ApiModelProperty("密码")
    private String password;
    @ApiModelProperty("新密码")
    private String newPwd;
    @ApiModelProperty("性别")
    private int gender;
    @ApiModelProperty("邮箱")
    private String email;
    @ApiModelProperty("电话")
    private String phone;
    @ApiModelProperty("部门")
    private Department department;
    @ApiModelProperty("生日")
    private Date birth;
    @ApiModelProperty("部门Id")
    private int deptId;
    @ApiModelProperty("头像存储路径")
    private String fileName;

}
查看效果

Controller:
@ApiOperation("登录")
    @RequestMapping("/login")
    public Result<?> login(@ApiParam("用户") @RequestBody User user, HttpSession session) {
        User resultUser=userService.login(user);
        if(resultUser!=null){
            String token= UUID.randomUUID()+"";
            Map<String,Object> map=new HashMap<String,Object>();
            tokenUtil.set(token,resultUser, Duration.ofMinutes(30L));
            map.put("token",token);
            map.put("user",resultUser);

            return Result.success(map);
        }else{
            return Result.error("450","用户账号或密码错误!");
        }

    }
效果

7. 使用
在具体的接口右上角,有一个 Try it out按钮
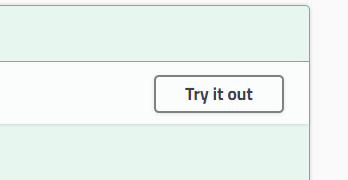
点击一下,在具体的参数列表中输入参数即可。

点击Excute,执行即可。


 1046
1046


 被折叠的 条评论
为什么被折叠?
被折叠的 条评论
为什么被折叠?
 到【灌水乐园】发言


