


目录
运行页面:localhost:80/swagger-ui.html
swagger-ui皮肤:地址http://localhost:8080/swagger-ui.html
bootstrap-ui皮肤:地址http://localhost:8080/doc.html
Layui-ui皮肤:地址http://localhost:8080/docs.html
mg-ui皮肤:地址http://localhost:8080/document.html
【狂神说Java】一小时掌握Swagger技术_哔哩哔哩_bilibili
Swagger2
导入依赖:
<!-- https://mvnrepository.com/artifact/io.springfox/springfox-swagger2 -->
<dependency>
  <groupId>io.springfox</groupId>
  <artifactId>springfox-swagger2</artifactId>
  <version>2.9.2</version>
</dependency>

<!-- https://mvnrepository.com/artifact/io.springfox/springfox-swagger-ui -->
<dependency>
  <groupId>io.springfox</groupId>
  <artifactId>springfox-swagger-ui</artifactId>
  <version>2.9.2</version>
</dependency>
开启配置类:最简配置
@Configuration
@EnableSwagger2
public class SwaggerConfig {
}
配置类:自定义文档说明
@Configuration
@EnableSwagger2
public class SwaggerConfig {
//配置了Swagger的Docket的bean实例
@Bean
public Docket createDocket() {
return new Docket(DocumentationType.SWAGGER_2)
.apiInfo(apiInfo());
}
//配置Swagger信息=apiInfo
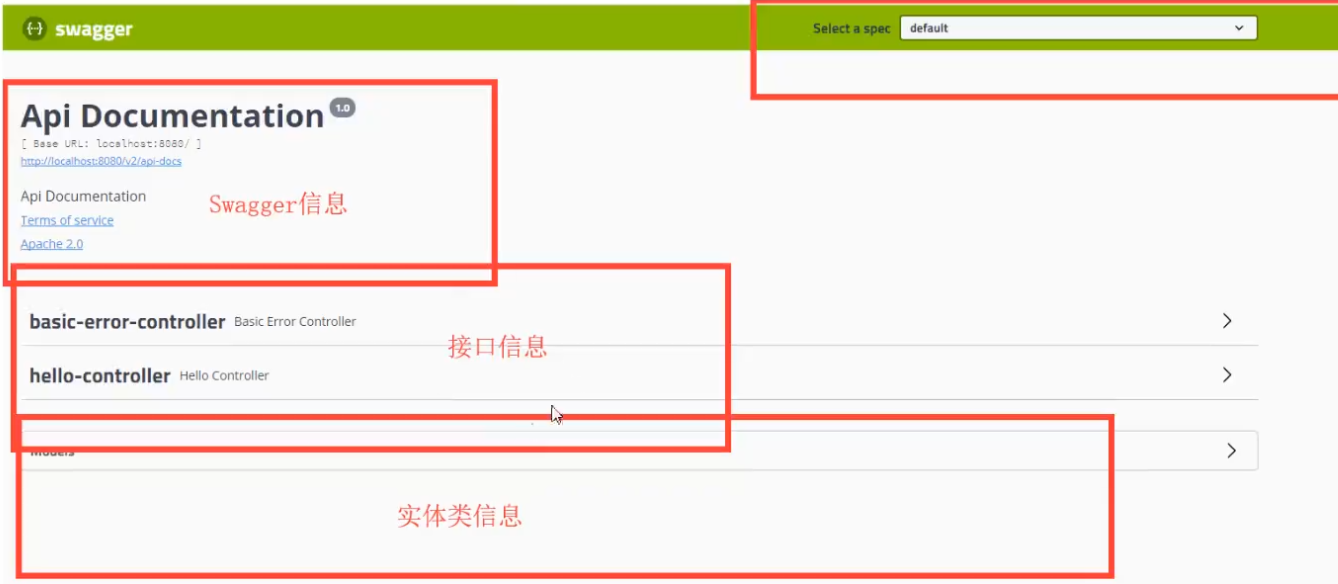
private ApiInfo apiInfo() {
// 作者信息
Contact contact = new Contact("cyl", "https://blog.csdn.net/weixin_44765388", "");
return new ApiInfo(
"狂神学习日记",
"Api Documentation",
"v1.0",
"urn:tos",
contact,
"Apache 2.0",
"http://www.apache.org/licenses/LICENSE-2.0",
new ArrayList());
}
}Swagger配置扫描接口
@Bean
public Docket createRestApiForWeb() {
    return new Docket(DocumentationType.OAS_30)
            .apiInfo(apiInfo())
            .groupName("后台管理接口")
            .select()
            /**
             * RequestHandlerSelectors:配置要扫描接口的方式
             * basePackage:指定要扫描的包
             * any():扫描全部
             * none():不扫描
             */
            .apis(RequestHandlerSelectors.basePackage("com.ks.controller"))
            /**
             * paths():过滤什么路径
             * PathSelectors.any()
             * PathSelectors.none()
             * PathSelectors.ant("/kuang/**"):包路径
             * PathSelectors.regex():正则匹配
             */
            .paths((s) -> {
                //过滤掉wx的接口
                if (s.indexOf("wx") != -1) {
                    return false;
                }
                return true;
            })
            .build();
}
运行页面:localhost:80/swagger-ui.html
Swagger3
依赖注入:
<dependency>
  <groupId>io.springfox</groupId>
  <artifactId>springfox-boot-starter</artifactId>
</dependency>
开启配置类:接口分组
@Configuration
@EnableOpenApi // 开启swagger3
public class SwaggerConfig {

    @Bean
    public Docket createDocket() {
        // DocumentationType.OAS_30
        return new Docket(DocumentationType.OAS_30)
                .groupName("分组名称")
                .apiInfo(apiInfo());
    }

    //swagger分组
    @Bean
    public Docket docket1(){
        return new Docket(DocumentationType.OAS_30).groupName("group1");
    }
    @Bean
    public Docket docket2(){
        return new Docket(DocumentationType.OAS_30).groupName("group2");
    }
    @Bean
    public Docket docket3(){
        return new Docket(DocumentationType.OAS_30).groupName("group3");
    }

}
生产环境不允许访问接口文档两种方式
@Profile({"dev"}) //仅允许dev环境访问
@Configuration
@EnableOpenApi
public class SwaggerConfig {
}
@Configuration
@EnableOpenApi // 开启swagger3
public class SwaggerConfig {
@Bean
public Docket docket1(){
Profiles profiles = Profiles.of("dev","test");
boolean flag = environment.acceptsProfiles(profiles);
return new Docket(DocumentationType.OAS_30)
.enable(flag)
.groupName("group1");
}
}运行页面:localhost:80/doc.html
knief4j增强
导入依赖:
<dependency>
  <groupId>com.github.xiaoymin</groupId>
  <artifactId>knife4j-spring-boot-starter</artifactId>
  <version>3.0.2</version>
</dependency>
开启knief4j增强
@EnableKnife4j // 开启knief4j
@Configuration
@EnableOpenApi
public class SwaggerConfig {
}
开启之后可以导出接口文档
皮肤
swagger-ui皮肤:地址http://localhost:8080/swagger-ui.html

<dependency>
<groupId>io.springfox</groupId>
<artifactId>springfox-swagger-ui</artifactId>
<version>2.9.2</version>
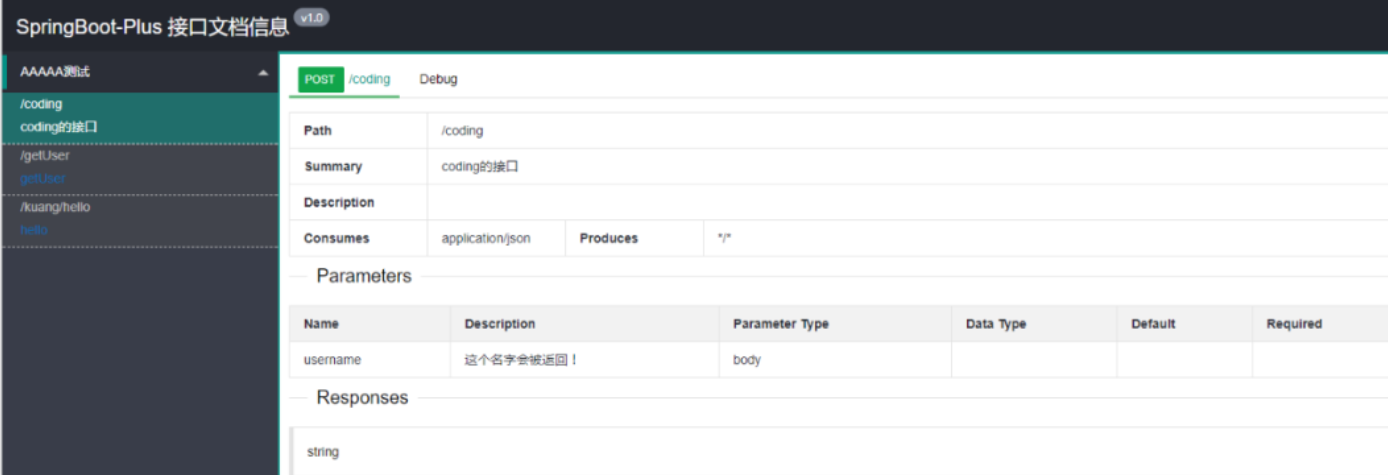
</dependency>bootstrap-ui皮肤:地址http://localhost:8080/doc.html

<!-- 引入swagger-bootstrap-ui包 /doc.html-->
<dependency>
    <groupId>com.github.xiaoymin</groupId>
    <artifactId>swagger-bootstrap-ui</artifactId>
    <version>1.9.1</version>
</dependency>
Layui-ui皮肤:地址http://localhost:8080/docs.html
<!-- 引入swagger-ui-layer包 /docs.html-->
<dependency>
    <groupId>com.github.caspar-chen</groupId>
    <artifactId>swagger-ui-layer</artifactId>
    <version>1.1.3</version>
</dependency>
mg-ui皮肤:地址http://localhost:8080/document.html
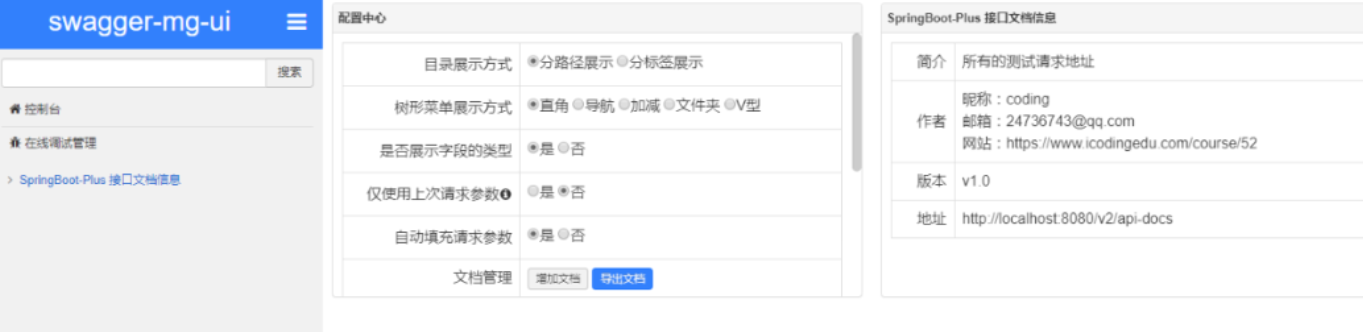
<!-- 引入swagger-ui-layer包 /document.html-->
<dependency>
    <groupId>com.zyplayer</groupId>
    <artifactId>swagger-mg-ui</artifactId>
    <version>1.0.6</version>
</dependency>


 3466
3466


 被折叠的 条评论
为什么被折叠?
被折叠的 条评论
为什么被折叠?
 到【灌水乐园】发言


