


第一步、创建系统用户实体类:
@Data
public class SysUser {
private Long id;
private String userName;
private String passWord;
private Date createTime;
private Integer userAge;
private String remark;
}
第二步、创建系统用户持久层;
@Mapper
public interface SysUserDao extends BaseMapper<SysUser> {
}
第三步
public interface SysUserService {
}

@Service("SysUserService")
public class SysUserServiceImp extends ServiceImpl<SysUserDao, SysUser> implements SysUserService {

}
第四步、创建系统用户控制层;
@RestController
public class SysUserController {

    @Autowired
    SysUserServiceImp sysUserServiceImp;

    @GetMapping("/getUser")
    public SysUser getUser(Long id){
        return sysUserServiceImp.getById(id);
    }

    @PostMapping("/insertUser")
    public String insertUser(SysUser sysUser){
        sysUser.setCreateTime(new Date());
        return sysUserServiceImp.save(sysUser)?"保存成功":"保存失败";
    }

    @PutMapping("/updateUser")
    public String updateUser(SysUser sysUser){
        return sysUserServiceImp.updateById(sysUser)?"修改成功":"修改失败";
    }

    @GetMapping("/getList")
    public List<SysUser> getList(){
        return sysUserServiceImp.list();
    }
}
任务6.6:添加权限框架Spring Security
任务描述
(1)添加相关依赖;
(2)简单模式测试;
(3)添加配置测试;
(4)添加内存账号测试;
(5)添加自定义密码编解码测试;
任务实施
第一步、在项目pom.xml文件中添加依赖:
<dependency>
   <groupId>org.springframework.boot</groupId>
   <artifactId>spring-boot-starter-security</artifactId>
</dependency>
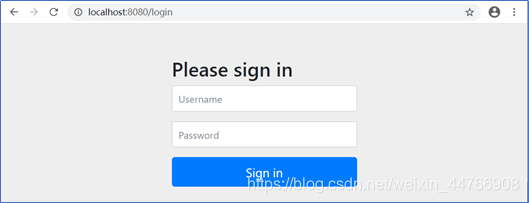
第二步、简单模式测试,直接访问http://localhost:8080/

第三步、添加配置测试,直接访问http://localhost:8080/:
(1)创建配置类:
@Configuration
@EnableWebSecurity
public class SpringSecurityConfig extends WebSecurityConfigurerAdapter {

    @Override
    protected void configure(HttpSecurity http) throws Exception {
        http.authorizeRequests()
                .antMatchers("/").permitAll()
                .anyRequest().authenticated()
                .and()
                .logout().permitAll()
                .and()
                .formLogin();
        http.csrf().disable();
    }

    @Override
    public void configure(WebSecurity web) throws Exception {
        web.ignoring().antMatchers("/js/**", "/css/**", "/images/**");
    }
}
(2)添加接口方法:
@GetMapping("/")
public String index(Long id){
    return "欢迎使用!";
}
第四步:添加内存账号测试
1)增加内存账号配置到配置类:
@Override
protected void configure(AuthenticationManagerBuilder auth) throws Exception {
auth.inMemoryAuthentication().passwordEncoder(new BCryptPasswordEncoder()).withUser("admin").password(new BCryptPasswordEncoder().encode("123456")).roles("ADMIN");
}
```@Override
protected void configure(AuthenticationManagerBuilder auth) throws Exception {
auth.inMemoryAuthentication().passwordEncoder(new BCryptPasswordEncoder()).withUser("admin").password(new BCryptPasswordEncoder().encode("123456")).roles("ADMIN");
}
## (2)访http://localhost:8080/getList ,输入账号admin,密码123456:


## 第五步、添加自定义密码编解码测试;
(1)创建自定义密码编解码类:
在这里插入代码片
public class MyPasswordEncoder implements PasswordEncoder {

    final static String ENCODER_PWD = "123456";

    @Override
    public String encode(CharSequence rawPassword) {
        return rawPassword + ENCODER_PWD;
    }

    @Override
    public boolean matches(CharSequence rawPassword, String encodedPassword) {
        return encodedPassword.equals(rawPassword+ENCODER_PWD);
    }
}
## (2)修改配置用户密码编解码方式:
@Override
protected void configure(AuthenticationManagerBuilder auth) throws Exception {
auth.inMemoryAuthentication().passwordEncoder(new MyPasswordEncoder()).withUser(“admin”).password(new MyPasswordEncoder().encode(“123456”)).roles(“ADMIN”);
}
## (3)访http://localhost:8080/getList ,输入账号admin,密码123456:


 3044
3044

 被折叠的 条评论
为什么被折叠?
被折叠的 条评论
为什么被折叠?
 到【灌水乐园】发言


