


 本文详细介绍了如何在CentOS8系统中配置本地yum源,包括从ISO镜像挂载BaseOS和AppStream,通过HTTP和FTP方式设置共享软件仓库,以及禁用防火墙和SELinux以优化软件包管理。
配置centos8本地yum源
yum的一切配置信息都存储在一个叫yum.repos.d的配置文件中,通常位于/etc/yum.repos.d目录下,在centos8光盘镜像中把yum源分成了两部分,一个是BaseOS,一个是AppStream,在centos8中,统一的ISO自动加载BaseOS和AppStream安装源存储库,已经存在于光盘链接中,只不过要分别去配置.repo文件。
首先进入yum.repos.d路径
[root@centos8 ~]# cd /etc/yum.repos.d
创建备份文件夹
[root@centos8 ~]# mkdir /bak
将系统自带的官方yum源移动到备份文件夹
[root@centos8 yum.repos.d]# mv /etc/yum.repos.d/* /bak
然后编辑本地yum源文件
[root@centos8 yum.repos.d]# vi centos8.repo
[root@centos8 yum.repos.d]# cat centos8.repo
内容如下
[c8-BaseOs]
name=centos-BasOS
baseurl=file:///mnt/BaseOS
gpgcheck=0
enabled=1

[c8-AppStream]
name=centos=-AppStream
baseurl=file:///mnt/AppStream
gpgcheck=0
enabled=1
在根目录创建挂载目录并将光盘挂载到该目录
[root@centos8 /]# mkdir mnt
[root@centos8 /]# mount /dev/sr2 /mnt
mount: /mnt: WARNING: device write-protected, mounted read-only.
通过http方式配置软件仓库
选择三台不同版本的镜像文件布置的操作系统,将其中一台服务器作为公共软件仓库,其它两台服务器可以访问当前服务器下载所需软件包,本次将centos8服务器作为共有yum源。
centos8 192.168.221.138
centos7 192.168.221.137
centos6 192.168.221.136
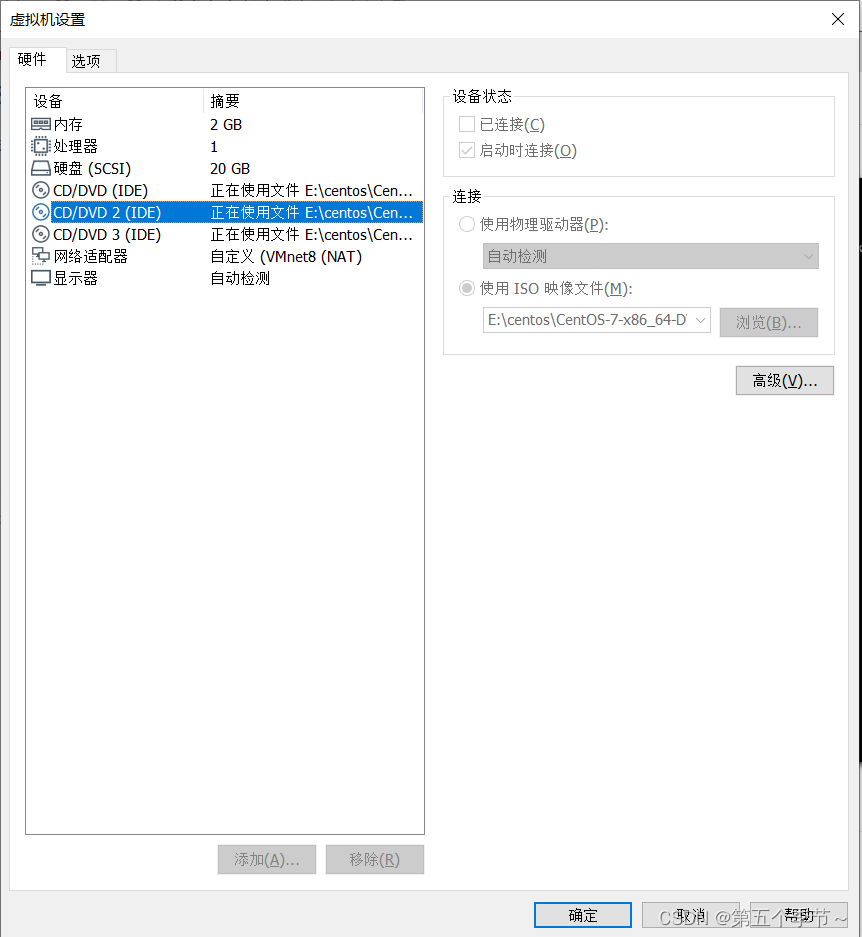
将centos7和centos6镜像都挂载到centos8中,如下图
centos8服务器配置
下载httpd软件包
[root@centos8 ~]# yum install -y httpd
启动httpd服务
[root@centos8 ~]# systemctl enable --now httpd
禁用防火墙
systemctl stop firewalld(暂时关闭)
systemctl disable firewalld(永久关闭,重启后生效)
systemctl status firewalld(查看防火墙状态
禁用selinux
setenforce 0 (临时关闭)
vi /etc/sysconfig/selinux(将selinux=enforcing改成selinux=disabled)重启后生效
下载完httpd包之后会在根目录下创建如下路径,把文件放在这个路径下就可以通过ip很方便的访问
[root@centos8 html]# pwd
/var/www/html
[root@centos8 html]#
创建如下目录用于挂载centos6和centos7的光盘
[root@centos8 html]# mkdir mnt/{6,7}/os/ -pv
创建用于挂载centos光盘的目录
[root@centos8 html]# mkdir mnt/8 -pv
创建完目录之后将对应的镜像光盘挂载到相应目录
[root@centos8 html]# mount /dev/sr0 /var/www/html/mnt/6/os
mount: /var/www/html/mnt/6/os: WARNING: device write-protected, mounted read-only.
[root@centos8 html]# mount /dev/sr1 /var/www/html/mnt/7/os
mount: /var/www/html/mnt/7/os: WARNING: device write-protected, mounted read-only.
在centos8中如果已经将光盘镜像挂载到其它路径,比如/mnt,我们需要对其重新挂载到/var/www/html/mnt/8路径下,先执行umount /mnt,取消挂载,如果出现类似“umount: /mnt: target is busy.”等字样,通常是由于待卸载磁盘正在使用,导致无法直接卸载。需要将当前使用数据盘的进程杀掉,才能卸载。
安装fuser命令
[root@centos8 ~]# yum install psmisc
查看在使用的进程
[root@centos8 ~]# fuser -mv /mnt
                     用户     进程号 权限   命令
/mnt:                root     kernel mount /mnt
                     root       1328 ..c.. bash
杀死占用的进程,并再次查看
[root@centos8 ~]# fuser -kv /mnt
                     用户     进程号 权限   命令
/mnt:                root     kernel mount /mnt
                     root       1328 ..c.. bash
[root@centos8 ~]# fuser -mv /mnt
                     用户     进程号 权限   命令
/mnt:                root     kernel mount /mnt
[root@centos8 ~]#
确认无进程连接后,使用卸载命令
[root@centos8 ~]# umount /mnt
卸载完成后重新进行挂载
[root@centos8 html]# mount /dev/sr2 /var/www/html/mnt/8
centos7服务器文件配置
禁用防火墙
systemctl stop firewalld(暂时关闭)
systemctl disable firewalld(永久关闭,重启后生效)
systemctl status firewalld(查看防火墙状态
禁用selinux
setenforce 0 (临时关闭)
vi /etc/sysconfig/selinux(将selinux=enforcing改成selinux=disabled)重启后生效
或者sed -i ‘s/^SELINUX=enforcing/SELINUX=disabled/’ /etc/selinux/config
编辑配置文件
[root@centos7 ~]# cd /etc/yum.repos.d
[root@centos7 ~]# mkdir /bak
[root@centos7 yum.repos.d]# mv /etc/yum.repos.d/* /bak
[root@centos7 yum.repos.d]# vi base.repo
[root@centos7 yum.repos.d]# cat base.repo
[base]
name=base
baseurl=http://192.168.221.138/mnt/$releasever/os
gpgcheck=0
[root@centos7 yum.repos.d]#
配置完成后检查能否使用
[root@centos7 yum.repos.d]# yum repolist
[root@centos7 yum.repos.d]# yum repolist
已加载插件:fastestmirror
Loading mirror speeds from cached hostfile
源标识                                                                                                 源名称                                                                                               状态
base/7                                                                                                 base                                                                                                 3,971
repolist: 3,971
[root@centos7 yum.repos.d]#[root@centos7 yum.repos.d]#
centos6服务器配置
关闭防火墙
service iptables stop
永久关闭防火墙chkconfig iptables off
同样编辑配置文件
[root@centos6 ~]# cd /etc/yum.repos.d/
[root@centos6 yum.repos.d]# mkdir /bak
[root@centos6 yum.repos.d]# mv * /bak
[root@centos6 yum.repos.d]# vi base.repo
[root@centos6 yum.repos.d]# cat base.repo
[root@centos6 yum.repos.d]# cat base.repo
[base]
name=base
baseurl=http://192.168.221.138/mnt/$releasever/os
gpgcheck=0
[root@centos6 yum.repos.d]#
检查是否配置成功
[root@centos6 ~]# yum repolist
[root@centos6 ~]# yum repolist
已加载插件:fastestmirror
base                                                                                                                                                                                      | 4.0 kB     00:00
base/primary_db                                                                                                                                                                           | 4.7 MB     00:00
仓库标识                                                                                                仓库名称                                                                                            状态
base                                                                                                    base                                                                                                6,713
repolist: 6,713
[root@centos6 ~]#
通过ftp方式配置软件仓库
选用两台红帽7.6服务器,ip分别为192.168.119.20和192.168.119.21,首先禁用两台服务器的防火墙和selinux,步骤参考上述centos7
192.168.119.20
在192.168.119.20上搭建ftp服务作为公用yum源
[root@jcyb1 ~]# mkdir /bak
[root@jcyb1 ~]# cd /etc/yum.repos.d/
[root@jcyb1 yum.repos.d]# mv * /bak
[root@jcyb1 yum.repos.d]# vi local.repo
[root@jcyb1 yum.repos.d]# cat local.repo
[root@jcyb1 yum.repos.d]# cat local.repo
[local]
name=local
baseurl=file:///opt/mnt
gpgcheck=0
[root@jcyb1 yum.repos.d]#
创建镜像文件挂载目录
[root@jcyb1 ~]# mkdir /opt/mnt
将镜像文件挂载到该目录
[root@jcyb1 yum.repos.d]# mount /dev/sr0 /opt/mnt
mount: /dev/sr0 写保护,将以只读方式挂载
[root@jcyb1 yum.repos.d]#
下载ftp软件包
[root@jcyb1 ~]# yum install -y vsftpd
编辑ftp配置文件
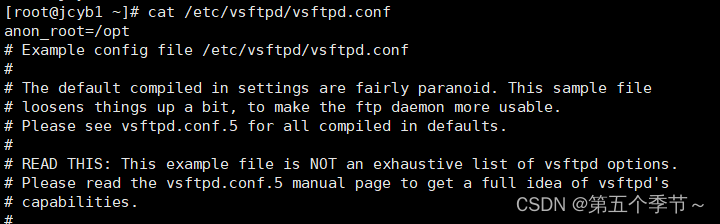
[root@jcyb1 ~]# vi /etc/vsftpd/vsftpd.conf
加上一行anon_root=/opt指定yum源访问目录
启动vsftpd服务
[root@jcyb1 ~]# systemctl start vsftpd
设置开机自启
[root@jcyb1 ~]# systemctl enable vsftpd
192.168.119.21
编辑yum源配置文件,步骤同上,内容按照如下修改
[root@jcyb2 yum.repos.d]# vi dvd.repo
[root@jcyb2 yum.repos.d]# cat dvd.repo
[dvd]
name=dvd
baseurl=ftp://192.168.119.20/mnt
gpgcheck=0

[root@jcyb2 yum.repos.d]#
检测yum源配置成功
[root@jcyb2 yum.repos.d]# yum repolist
[root@jcyb2 yum.repos.d]# yum repolist all
已加载插件:product-id, search-disabled-repos, subscription-manager
This system is not registered with an entitlement server. You can use subscription-manager to register.
源标识                                                                                              源名称                                                                                            状态
dvd                                                                                                 dvd                                                                                               启用: 5,152
repolist: 5,152
[root@jcyb2 yum.repos.d]#


 3244
3244


 被折叠的 条评论
为什么被折叠?
被折叠的 条评论
为什么被折叠?
 到【灌水乐园】发言


