


**说明:本节介绍得是 前后端不分离结构 SpringSecurity整个流程基本用法。**
一、界面流程介绍:
1、访问首页展示:
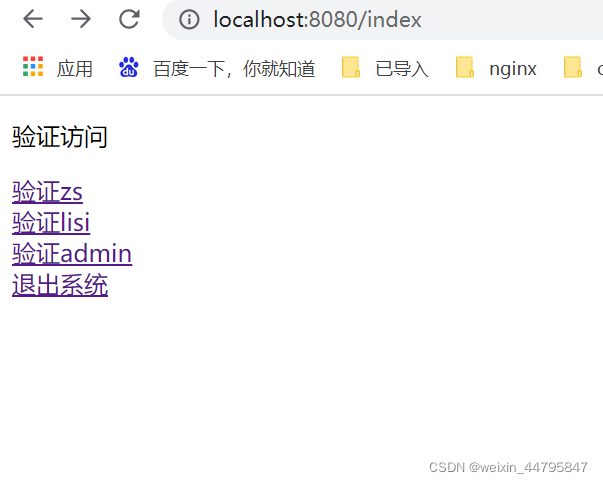
2、每个按钮的访问权限不尽相同,如:"验证zs"按钮表示 登录用户必须拥有USER的访问权限才可访问,"验证li"按钮表示 登录用户必须拥有READ的访问权限才可访问。点击按钮时,未登录,则跳转登陆界面。

3、登录成功后,再次访问,便可访问成功。

4、访问其他无权限的按钮时,报无权限。

用户不同的权限,访问不同的按钮
二、代码描述
1、数据库表结构:
- 用户表:

- 角色表:

- 用户角色关联表:

- 还可添加权限表、角色_权限表
2、service层(只写服务接口,具体实现不做介绍)
/**
 * @Author: ckw
 * @description: 用户服务
 * @date: 2022/2/10 16:07
 */
public interface SysUserService {

    /**
     * @Author: ckw
     * @description: 根据用户名查询用户
     * @date: 2022/2/10 16:07
     * @params: 用户名
     * @return 用户
     */
    SysUser getSysUserInfo(String username);

    /**
     * @Author: ckw
     * @description: 保存用户
     * @date: 2022/2/10 16:07
     * @params: 用户
     * @return 是否成功
     */
    Boolean saveSysUser(SysUser sysUser);

}


/**
 * @Author ckw
 * @Date 2022/2/8 19:54
 * @Version 1.0
 * @description: 角色服务
 */
public interface SysRoleService {

    /**
     * @Author: ckw
     * @description: 根据用户id查询用户所拥有角色
     * @date: 2022/2/10 16:09
     * @params: 用户id
     * @return 用户对应角色
     */
    List<SysRole> findRoleByUser(Integer userid);

}
3、Controller:
/**
 * @Author: ckw
 * @description: 验证码控制器
 * @date: 2022/2/10 15:00
 */
@Controller
@RequestMapping("/captcha")
public class CaptchaController {

    //定义一个值,用来生成验证码的图片
    //图像宽度 120像素
    private int width = 120;

    //图像高度 30 像素
    private int height = 30;

    //图片内容在图片的起始位置 12像素
    private  int drawY = 20;

    //文字的间隔  18像素
    private int space = 15;

    //验证码有个文字
    private int charCount = 6;

    //验证码的内容数组
    private String chars []= {"A","B","C","D","E","F",
    "G","H","I","J","K","L","M","N","O","P","T","U","V","W",
    "X","Y","Z","1","2","3","4","5","6","7","8","9","0"};


    //定义方法:生成验证码内容。 在一个图片上,写入文字
    @GetMapping("/code")
    public void makeCaptchaCode(HttpServletRequest request,HttpServletResponse response) throws IOException {

        /*
           验证码:需要在内存中绘制一个图片BufferedImage.
           向这个图片中写入文字。 把绘制好内容的图片响应给请求
         */

        //创建一个背景透明的图片,使用rgb表示颜色的
        BufferedImage image = new BufferedImage(width,height, BufferedImage.TYPE_INT_RGB);

        //获取画笔
        Graphics g  = image.getGraphics();

        //设置使用画笔是白颜色
        g.setColor(Color.white);

        //给image画板都涂成白色的
        // fillRect(矩形的起始x,矩形的起始y, 矩形的宽度,矩形的高度)
        g.fillRect(0,0,width,height);

        //画内容
        //创建一个字体
        Font font  = new Font("宋体",Font.BOLD,16);
        g.setFont(font);

        g.setColor(Color.black);
        //在画布上,写一个文字
        //参数: 文字,x,y坐标
        //g.drawString("中",10,drawY);

        StringBuffer buffer = new StringBuffer("");
        int ran = 0;
        int len = chars.length;
        for(int i=0;i<charCount;i++){
            ran  = new Random().nextInt(len);
            buffer.append(chars[ran]);
            g.setColor(makeColor());
            g.drawString(chars[ran],(i+1)*space,drawY);
        }

        //绘制干扰线
        for(int m=0;m<4;m++){
            g.setColor(makeColor());
            int dot [] = makeLineDot();
            g.drawLine(dot[0],dot[1],dot[2],dot[3]);
        }

        //把生成的验证码存储到session中
        request.getSession().setAttribute("code",buffer.toString());

        //设置没有缓冲
        response.setHeader("Pragma","no-cache");
        response.setHeader("Cache-Control","no-cache");
        response.setDateHeader("Expires",0);
        response.setContentType("image/png");
        OutputStream out = response.getOutputStream();
        /*
           RenderedImage im, 输出的图像
           String formatName, 图像的格式 jpg,jpeg, png
           ImageOutputStream output 输出到哪
         */
        ImageIO.write(image,"png",out);
        out.flush();
        out.close();

    }

    private Color makeColor(){
        Random random = new Random();
        int r = random.nextInt(255);
        int g = random.nextInt(255);
        int b = random.nextInt(255);

        return new Color(r,g,b);
    }

    private int [] makeLineDot(){
        Random random = new Random();
        int x1 = random.nextInt(width/2);
        int y1 = random.nextInt(height);
        int x2 = random.nextInt(width);
        int y2 = random.nextInt(height);
        return new int[]{x1,y1,x2,y2};

    }
}

/**
 * @Author: ckw
 * @description: 首页
 * @date: 2022/2/10 15:00
 */
@Controller
public class IndexController {

    @GetMapping("/index")
    public String toIndexHtml(){
        return "forward:/index.html";
    }
}


/**
 * @Author: ckw
 * @description: 访问
 * @date: 2022/2/10 15:00
 */
@RestController
public class MyController {

    @GetMapping(value = "/access/user",produces = "text/html;charset=utf-8")
    public String sayUser(){
        return "zs 是 user 角色";
    }

    @GetMapping(value = "/access/read",produces = "text/html;charset=utf-8")
    public String sayRead(){
        return "lisi 是 read 角色";
    }

    @GetMapping(value = "/access/admin",produces = "text/html;charset=utf-8")
    public String sayAdmin(){
        return "admin 是 user , admin 角色";
    }
}
4、实现UserDetailsService 查询用户是否存在(在这里可以设置用户的权限)
/**
 * @Author ckw
 * @Date 2022/2/8 9:01
 * @Version 1.0
 * @description: 用户详情
 */
@Service
public class UserDetailServiceImpl implements UserDetailsService {

    @Autowired
    private SysUserService sysUserService;

    @Autowired
    private SysRoleService sysRoleService;

    @Override
    public UserDetails loadUserByUsername(String username) throws UsernameNotFoundException {
        SysUser sysUserInfo = sysUserService.getSysUserInfo(username);
        if(sysUserInfo != null){
            List<SysRole> sysRoles = sysRoleService.findRoleByUser(sysUserInfo.getId());
            List<GrantedAuthority> authorityList = new ArrayList<>();
            sysRoles.forEach(role ->{
                //角色必须以ROLE_开头
                GrantedAuthority authority = new SimpleGrantedAuthority("ROLE_" +role.getName());
                authorityList.add(authority);
            });
            sysUserInfo.setAuthorities(authorityList);
        }
        return sysUserInfo;
    }
}
5、Security 核心配置类WebSecurityConfigurerAdapter
/**
 * @Author ckw
 * @Date 2022/2/7 17:09
 * @Version 1.0
 * @description: security控制管理器
 */
@Configuration //配置类
@EnableWebSecurity //启动security安全框架功能
//@EnableGlobalMethodSecurity(prePostEnabled = true) //开启基于方法的安全认证机制
public class MyWebSecurityConfig extends WebSecurityConfigurerAdapter {

    //把SuccssHandler , FailureHandler注入进来
    @Autowired
    private AuthenticationSuccessHandler successHandler;

    @Autowired
    private AuthenticationFailureHandler failureHandler;

    @Autowired
    private UserDetailsService userDetailsService;
    @Override
    protected void configure(AuthenticationManagerBuilder auth) throws Exception {
        auth.userDetailsService(userDetailsService).passwordEncoder(new BCryptPasswordEncoder());
    }

    @Override
    protected void configure(HttpSecurity http) throws Exception {
        System.out.println("=======configure HttpSecurity========== ");
        http.authorizeRequests()
                //指定那些地址可以直接访问, 和登录有关的需要进行指定
                .antMatchers("/index","/myajax.html","/login","/js/**","/captcha/**").permitAll()
                .antMatchers("/access/user/**").hasRole("USER")
                .antMatchers("/access/read/**").hasRole("READ")
                .antMatchers("/access/admin/**").hasRole("ADMIN")
                .anyRequest().authenticated()
                .and()
                .formLogin()
                .successHandler(successHandler)
                .failureHandler(failureHandler)
                .loginPage("/myajax.html")  //登录的自定义视图页面
                .loginProcessingUrl("/login") //form中登录的访问uri地址
                .and()
                //关于跨域访问的安全设置,先禁用
                .csrf().disable();

        //在框架的过滤器链条中,增加一个自定义过滤器
        http.addFilterBefore(new VerificationCodeFilter(), UsernamePasswordAuthenticationFilter.class);


    }
}
6、登录成功拦截器、登录失败拦截器
/**
 * @Author ckw
 * @Date 2022/2/8 9:01
 * @Version 1.0
 * @description: 登录成功拦截器
 */
@Component
public class MySuccessHandler implements AuthenticationSuccessHandler {
    /*
       参数:
         request : 请求对象
         response:应答对象
         authentication: spring security框架验证用户信息成功后的封装类。
     */
    @Override
    public void onAuthenticationSuccess(HttpServletRequest request,
                                        HttpServletResponse response,
                                        Authentication authentication) throws IOException, ServletException {
        //登录的用户信息验证成功后执行的方法
        response.setContentType("text/json;charset=utf-8");

        Result result = new Result();
        result.setCode(0);
        result.setError(1000);
        result.setMsg("登录成功");

        OutputStream out = response.getOutputStream();
        ObjectMapper om = new ObjectMapper();
        om.writeValue(out,result);
        out.flush();
        out.close();


    }
}


/**
 * @Author: ckw
 * @description: 登录失败拦截器
 * @date: 2022/2/10 15:04
 */
@Component
public class MyFailureHandler implements AuthenticationFailureHandler {

    private Result result;

    public Result getResult() {
        return result;
    }

    public void setResult(Result result) {
        this.result = result;
    }

    /*
           参数:
             request : 请求对象
             response:应答对象
             authentication: spring security框架验证用户信息成功后的封装类。
         */
    @Override
    public void onAuthenticationFailure(HttpServletRequest request,
                                        HttpServletResponse response,
                                        AuthenticationException e) throws IOException {
        //当框架验证用户信息失败时执行的方法
        response.setContentType("text/json;charset=utf-8");

        if( result == null){
            Result  localResult  = new Result();
            localResult.setCode(1);
            localResult.setError(1001);
            localResult.setMsg("登录失败");
            result = localResult;
        }


        OutputStream out = response.getOutputStream();
        ObjectMapper om = new ObjectMapper();
        om.writeValue(out,result );
        out.flush();
        out.close();

    }
}
7、验证码拦截器(只拦截登录接口)
/**
 * @Author ckw
 * @Date 2022/2/8 9:01
 * @Version 1.0
 * @description: 验证码拦截器
 */
public class VerificationCodeFilter extends OncePerRequestFilter {

    private MyFailureHandler failureHandler = new MyFailureHandler();
    @Override
    protected void doFilterInternal(HttpServletRequest request,
                                    HttpServletResponse response,
                                    FilterChain filterChain) throws ServletException, IOException {

        System.out.println("VerificationCodeFilter  doFilterInternal ");
        //只有是login操作,才需要这个过滤器参与验证码的使用
        String uri = request.getRequestURI();
        if( !"/login".equals(uri)){
            //过滤器正常执行,不参与验证码操作
            filterChain.doFilter(request,response);
        } else {
            //登录操作,需要验证code
            try{
                //验证:code是否正确
                verifcatioinCode(request);
                //如果验证通过,过滤器正常执行
                filterChain.doFilter(request,response);

            }catch (VerificationException e){
                Result result  = new Result();
                result.setCode(1);
                result.setError(1002);
                result.setMsg("验证码错误!!!");
                failureHandler.setResult(result);
                failureHandler.onAuthenticationFailure(request,response,e);
            }
        }
    }

    private void verifcatioinCode(HttpServletRequest request){
        HttpSession session = request.getSession();
        //获取请求中的code
        String requestCode = request.getParameter("code");
        //获取session中的code
        String sessionCode = "";

        Object attr = session.getAttribute("code");
        if(attr !=null ){
            sessionCode = (String)attr;
        }
        System.out.println("VerificationCodeFilter  doFilterInternal requestCode:"+requestCode+"|sessionCode:"+sessionCode);
        //处理逻辑
        if(!StringUtils.isEmpty(sessionCode)){
            //在session中的code, 用户看到这个code了。
            //如果能到这段代码,说明用户已经发起了登录请求的。
            //session中的现在的这个code就应该无用
            session.removeAttribute("code");
        }

        //判断code是否正确。
        if( StringUtils.isEmpty(requestCode) ||
                StringUtils.isEmpty(sessionCode) ||
                !requestCode.equals(sessionCode) ){
            //失败
            throw new VerificationException();
        }
    }
}
8、响应类
/**
 * @Author: ckw
 * @description: 结果
 * @date: 2022/2/10 15:00
 */
public class Result {
    // code=0 成功; code =1 失败
    private int code;
    //表示错误码
    private int error;
    //消息文本
    private String msg;

    public int getCode() {
        return code;
    }

    public void setCode(int code) {
        this.code = code;
    }

    public int getError() {
        return error;
    }

    public void setError(int error) {
        this.error = error;
    }

    public String getMsg() {
        return msg;
    }

    public void setMsg(String msg) {
        this.msg = msg;
    }
}
三、整体走向:
- MyWebSecurityConfig security控制管理器配置参数
- 用户登录时,先验证码拦截器拦截校验VerificationCodeFilter.doFilterInternal()
- 登录时,查询数据库UserDetailServiceImpl.loadUserByUsername()方法,对用户进行验证
- 验证成功:MySuccessHandler.onAuthenticationSuccess();验证失败:MyFailureHandler.onAuthenticationFailure()。
四、小点
- 可以设置登录无操作有效期:


- 可以自己实现token,进行校验


 1730
1730


 被折叠的 条评论
为什么被折叠?
被折叠的 条评论
为什么被折叠?
 到【灌水乐园】发言


