


步骤
1.创建一个文件夹,初始化项目和安装依赖
npm init -y
npm i @babel/parser @babel/traverse @babel/core @babel/preset-env -D
2.在项目根目录下创建src目录,并在src中创建index.js、message.js、test.js这三个文件
index.js文件:
import message from './message.js';

console.log('hello bundler');
message.js文件:
import test from './test.js';

console.log('message page');
test.js文件:
console.log('test page');
3.在项目根目录下创建bundle.js
bundle.js先留着空,下面教你们如何编写。
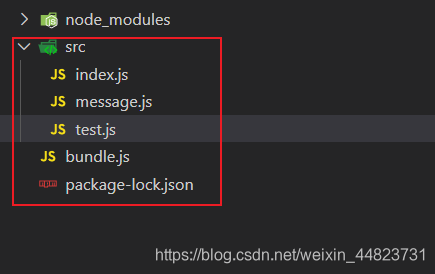
4.整个项目初始化文件图
下面开始编写bundle.js文件,思路如下:
1.编写moduleAnalyzer函数
const fs = require('fs');
const path = require('path');
const parser = require('@babel/parser');
const traverse = require('@babel/traverse').default;
const babel = require('@babel/core');
function moduleAnalyzer(entry) {
	// 读取目标文件
  const content = fs.readFileSync(entry, 'utf8');
  const dependencies = {};
  // 使用@babel/parser来帮我们生成抽象语法树
  const ast = parser.parse(content, {
    sourceType: 'module',
  });
  // 使用traverse来帮我们过滤type为ImportDeclaration的项
  traverse(ast, {
    ImportDeclaration({ node }) {
      const dirname = path.dirname(entry);
      const newFile = path.join(dirname, node.source.value);
      dependencies[node.source.value] = newFile;
    },
  });
  const { code } = babel.transformFromAst(ast, null, {
    presets: ['@babel/preset-env'],
  });
  return {
    file: entry,
    dependencies,
    code,
  };
}
const info = moduleAnalyzer('./src/index.js');
console.log(info);
思路:我们这里先对单一的文件进行分析。我们这里先对index.js进行分析。
- 想要进行分析,我们需要读取目标文件的内容。
- 我们将读取的结果交给@babel/parser插件来帮我们进行解析,解析最后返回一个抽象语法树ast。
我们打印看一下抽象语法树的主体:console.log(ast.program.body)
[ Node {
    type: 'ImportDeclaration',
    start: 0,
    end: 35,
    loc:
     SourceLocation {
       start: [Position],
       end: [Position],
       filename: undefined,
       identifierName: undefined },
    range: undefined,
    leadingComments: undefined,
    trailingComments: undefined,
    innerComments: undefined,
    extra: undefined,
    specifiers: [ [Node] ],
    source:
     Node {
       type: 'StringLiteral',
       start: 20,
       end: 34,
       loc: [SourceLocation],
       range: undefined,
       leadingComments: undefined,
       trailingComments: undefined,
       innerComments: undefined,
       extra: [Object],
       value: './message.js' } },
  Node {
    type: 'ExpressionStatement',
    start: 39,
    end: 68,
    loc:
     SourceLocation {
       start: [Position],
       end: [Position],
       filename: undefined,
       identifierName: undefined },
    range: undefined,
    leadingComments: undefined,
    trailingComments: undefined,
    innerComments: undefined,
    extra: undefined,
    expression:
     Node {
       type: 'CallExpression',
       start: 39,
       end: 67,
       loc: [SourceLocation],
       range: undefined,
       leadingComments: undefined,
       trailingComments: undefined,
       innerComments: undefined,
       extra: undefined,
       callee: [Node],
       arguments: [Array] } } ]
注:我们通过观察得知,我们的代码import message from './message.js'对应的就是type为:ImportDeclaration那个部分,我们需要我们import文件的路径
3. 我们使用@babel/traverse来帮我们更加简便的获取文件路径。
4. 将获取的路径以{相对路径:绝对路径}的形式存储到dependencies这个对象中
5. 然后使用@babel/core和@babel/preset-env这两个插件来帮助我们将es6的代码转变成es5的代码
6. 然后就返回文件路径、依赖、转变的代码出去。
2.编写makeDependenciesGraph函数:
const makeDependenciesGraph = function (entry) {
  // 用来存储每一个模块的分析结果
  const graphArray = [];
  // 将所有的模块的分析结果转成键值对的形式进行存储
  const graph = {};
  // 存储第一个(入口)模块的分析结果
  graphArray.push(moduleAnalyzer(entry));
  // 使用队列的数据结构来递归分析每一个模块
  for (let i = 0; i < graphArray.length; i++) {
    const dependencies = graphArray[i].dependencies;
    if (dependencies) {
      for (let key in dependencies) {
        graphArray.push(moduleAnalyzer(dependencies[key]));
      }
    }
  }
  // 将所有的分析结果以对象的形式存储
  graphArray.forEach((item) => {
    graph[item.file] = {
      dependencies: item.dependencies,
      code: item.code,
    };
  });
  return graph;
};
const graph = makeDependenciesGraph('./src/index.js');
console.log(graph);
- 我们moduleAnalyzer函数只能对一个模块进行分析,我们得使用队列来递归每一个模块
- 最后将graph的每一项转成对象的形式:
{文件名:{dependencies: 依赖,code: 代码}}
3.generatorCode函数:
const generatorCode = function (entry) {
  const graph = JSON.stringify(makeDependenciesGraph(entry));
  return `
    (function (graph) {
      function require(path) {
        const exports = {}
        function localRequire(relativePath) {
          return require(graph[path].dependencies[relativePath])
        }
        ((code,exports,require)=>{
          eval(code)
        })(graph[path].code,exports,localRequire)
        return exports
      }
      require('${entry}')
    })(${graph})
  `;
};
注释:generatorCode这个函数,对于js基础要求比较高。
- 代码其实就是字符串,所以我们generatorCode返回值就是字符串
- 为了防止全局变量的污染,我们会经常使用闭包。
- 由于我们需要将graph传给代码里面,所以我们需要将graph转成JSON字符串,不然在字符串中,graph就是[object Object]这样的字符串
- require方法,就是根据文件的路径,来执行文件里的代码,然后返回exports变量。require就是我们在代码写的import。
require('${entry}'):我们想要入口文件执行,我们需要手动的调用require方法,至于为什么要在${entry}这里加单引号,是因为entry是一个字符串变量。而${graph}不用加,是因为graph是一个对象。- 我们需要在require方法中申明exports变量,它是一个空对象来的,最后需要将exports中进行return出去。
- 由于用babel生成的代码中,他有调用require方法,而浏览器没有require方法,所以我们需要自己手写。
- 由于babel生成的代码中,它有调用require方法,但是他传进来的文件路径是相对于引用这个文件的相对路径,所以我们需要重写require方法,编写一个localRequire方法,然后我们将localRequire和exports等等传进去自调用函数,用require形参来接收localRequire方法,从而在里面改写require方法。
babel生成的代码,里面有require、exports,浏览器没有,所以我们需要自己手写:

完整的bundle.js的代码:
const fs = require('fs');
const path = require('path');
const parser = require('@babel/parser');
const traverse = require('@babel/traverse').default;
const babel = require('@babel/core');
function moduleAnalyzer(entry) {
  const content = fs.readFileSync(entry, 'utf8');
  const dependencies = {};
  // 抽象语法树
  const ast = parser.parse(content, {
    sourceType: 'module',
  });
  traverse(ast, {
    ImportDeclaration({ node }) {
      const dirname = path.dirname(entry);
      const newFile = path.join(dirname, node.source.value);
      dependencies[node.source.value] = newFile;
    },
  });
  const { code } = babel.transformFromAst(ast, null, {
    presets: ['@babel/preset-env'],
  });
  return {
    file: entry,
    dependencies,
    code,
  };
}
const makeDependenciesGraph = function (entry) {
  const graphArray = [];
  const graph = {};
  graphArray.push(moduleAnalyzer(entry));
  for (let i = 0; i < graphArray.length; i++) {
    const dependencies = graphArray[i].dependencies;
    if (dependencies) {
      for (let key in dependencies) {
        graphArray.push(moduleAnalyzer(dependencies[key]));
      }
    }
  }
  graphArray.forEach((item) => {
    graph[item.file] = {
      dependencies: item.dependencies,
      code: item.code,
    };
  });
  return graph;
};
const generatorCode = function (entry) {
  const graph = JSON.stringify(makeDependenciesGraph(entry));
  return `
    (function (graph) {
      function require(path) {
        const exports = {}
        function localRequire(relativePath) {
          return require(graph[path].dependencies[relativePath])
        }
        ((code,exports,require)=>{
          eval(code)
        })(graph[path].code,exports,localRequire)
        return exports
      }
      require('${entry}')
    })(${graph})
  `;
};
const code = generatorCode('./src/index.js');
console.log(code);
通过命令来进行打包:
node bundle.js
将控制台的代码复制到浏览器去控制台运行:

输出正确,那就打包成功了。
总结思路:
我们想要分析一个文件,就得读取文件的内容,读取到之后,用对应的babel来帮我们处理和获取我们想要的信息。
由于一个模块可能会包含另一个模块,我们就得对这些模块递归的分析,我们这里使用了队列的方式来递归调用,然后把分析的结构弄成图的数据结构。
最后生成代码,由于不想污染全局变量,我们就得编写自调用闭包函数,由于生成的代码会调用require方法和使用exports这个变量,所以需要我们手工的创建。由于在一个模块中,它会require(相对路径),我们就得改写require方法,通过编写localRequire方法,传进去,用require形参接收,这样就不会调用外层得require方法了。然后根据相对路径弄成绝对路径,再调用最外层得require方法。


 4190
4190


 被折叠的 条评论
为什么被折叠?
被折叠的 条评论
为什么被折叠?
 到【灌水乐园】发言


