


ELK
ELK是三个软件的合称:Elasticsearch,Logstash,Kibana.
Elasticsearch
一个近乎实时查询的全文搜索引擎。
Elasticsearch 的设计目标就是要能够处理和搜索巨量的日志数据。
Logstash
读取原始日志,并对其进行分析和过滤,然后将其转发给其他组件进行索引或存储。Logstash支持丰富的 Input 和 Output 类型,能够处理各种应用的日志。
Kibana
一个基于 JavaScript 的 Web 图形界面程序,专门用于可视化 Elasticsearch 的数据,Kibana 能够查询 Elasticsearch并通过丰富的图表展示结果,用户可以创建 Dashboard 来监控系统的日志。
日志处理流程
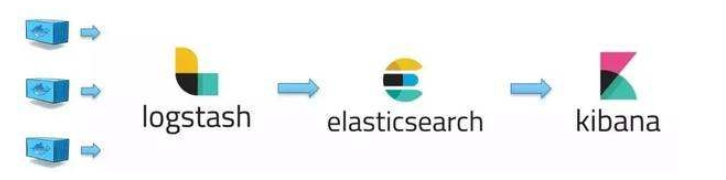
Logstash 负责从各个 Docker 容器中提取日志, Logstash将日志转发到Elasticsearch进行索引和保存,Kibana分析和可视化数据。
安装 ELK 套件
ELK帮助手册 https://hub.docker.com/r/sebp/elk/
Docker ELK使用文档
https://elk-docker.readthedocs.io/
安装条件:
Docker至少4GB内存;
Elasticsearch至少2GB内存;
防火墙开放端口;
vm.max_map_count至少需要262144
[root@localhost ~]# cat /etc/sysctl.conf
# sysctl settings are defined through files in
# /usr/lib/sysctl.d/, /run/sysctl.d/, and /etc/sysctl.d/.
#
# Vendors settings live in /usr/lib/sysctl.d/.
# To override a whole file, create a new file with the same in
# /etc/sysctl.d/ and put new settings there. To override
# only specific settings, add a file with a lexically later
# name in /etc/sysctl.d/ and put new settings there.
#
# For more information, see sysctl.conf(5) and sysctl.d(5).
vm.max_map_count = 262144
安装Docker ELK:
docker pull sebp/elk
启动堆栈,运行具有2GB堆大小的Elasticsearch和具有1GB堆大小的Logstash:
[root@localhost ~]# docker run -p 5601:5601 -p 9200:9200 -p 5044:5044 -dit -e ES_HEAP_SIZE="2g" -e  LS_HEAP_SIZE="1g"  --name elk sebp/elk
05fb458ba74e32524100749b4242851a117fc212b4335d133d39283d140b875e
5601:(Kibana web 界面)
9200:(Elasticsearch JSON 接口)
5044:(Logstash Beats界面,从Beats接受日志,如Filebeat)
浏览器访问 http://ip:5601


ELK部署与使用
安装FIlebeat
curl -L -O https://artifacts.elastic.co/downloads/filebeat/filebeat-7.7.0-x86_64.rpm
rpm -ivh  filebeat-7.3.1-x86_64.rpm
编辑配置文件/etc/filebeat/filebeat.yml
[root@localhost ~]# vim /etc/filebeat/filebeat.yml
filebeat.inputs:

# Each - is an input. Most options can be set at the input level, so
# you can use different inputs for various configurations.
# Below are the input specific configurations.

- type: log

  # Change to true to enable this input configuration.
  enabled: true

  # Paths that should be crawled and fetched. Glob based paths.
  paths:
    - /var/lib/docker/containers/*/*.log  所有容器的日志文件
    - /var/log/messages     查看httpd容器日志所在位置


setup.kibana:

  # Kibana Host
  # Scheme and port can be left out and will be set to the default (http and 5601)
  # In case you specify and additional path, the scheme is required: http://localhost:5601/path
  # IPv6 addresses should always be defined as: https://[2001:db8::1]:5601
  host: "192.168.19.130:5601"

output.elasticsearch:
  # Array of hosts to connect to.
  hosts: ["192.168.19.130:9200"]
启动elasticsearch模块
[root@localhost ~]# filebeat modules enable elasticsearch
初始化filebeat:
[root@localhost ~]# filebeat setup
启动:
[root@localhost ~]# systemctl  start filebeat.service
[root@localhost ~]# systemctl  enable filebeat.service
接下来,启动一个容器,模拟日志输出:
[root@localhost ~]# docker run busybox sh -c "while true;do echo 'this is a test';sleep 10;done;"
查看:

万能数据收集器 Fluentd
Fluentd是一个开源的数据收集器,他目前有超过500种的 plugin,可以连接各种数据源和数据输出组件。
日志处理流程:

安装Fluentd
[root@localhost ~]# docker pull fluent/fluentd
[root@localhost ~]# docker run -d -p 24224:24224/tcp -p 24224:24224/udp -v /data:/fluentd/log fluent/fluentd
fluentd会在 TCP/UDP 端口 24224上接收日子数据,日志将保存在 Host的 /data目录中。
编辑 Filebeat配置文件:
filebeat.inputs:

# Each - is an input. Most options can be set at the input level, so
# you can use different inputs for various configurations.
# Below are the input specific configurations.

- type: log

  # Change to true to enable this input configuration.
  enabled: true

  # Paths that should be crawled and fetched. Glob based paths.
  paths:
    - /data/*.log
重启服务:
[root@localhost ~]# systemctl restart filebeat
监控容器日志 启动测试:
[root@localhost ~]# docker run -d  --log-driver=fluentd  --log-opt fluentd-address=localhost:24224  --log-opt tag="con-A"  busybox sh -c "while true;do echo 'this is A';sleep 10;done;"
332d96e156d13296a1a958bc6a3e3c700eb26b19c65756fcfd894cecc296e80e
[root@localhost ~]# docker run -d  --log-driver=fluentd  --log-opt fluentd-address=localhost:24224  --log-opt tag="con-B"  busybox sh -c "while true;do echo 'this is B';sleep 10;done;"
b540c1f0f7629270b368daec211927c9f24367476996baceaf0e19db2893b02c
1 - -log-friver=fluentd 告诉 Docker 使用 Fluentd 的logging driver。
2 - -log-opt fluentd-address=localhost:24224 将容器日志发送到 Fluentd 的数据接收端口。
3 - -log-opt tag=“con-A” 在日志中添加一个可选的 atg,用于区分不同的容器。
查看:


 384
384


 被折叠的 条评论
为什么被折叠?
被折叠的 条评论
为什么被折叠?
 到【灌水乐园】发言


