


操作类型
跟selenium一样,appium也分为两种操作类型:单一操作、动作链条
单一动作:webdriver
跟selenium一样,appium中的webdriver中单独封装了一些单一、简单的操作,包括:滚动、拖拽、点击、滑动等。
源码
class ActionHelpers(webdriver.Remote):

    def scroll(self: T, origin_el: WebElement, destination_el: WebElement, duration: Optional[int] = None) -> T:
        """Scrolls from one element to another

        Args:
            origin_el: the element from which to being scrolling
            destination_el: the element to scroll to
            duration: a duration after pressing originalEl and move the element to destinationEl.
                Default is 600 ms for W3C spec. Zero for MJSONWP.

        Usage:
            driver.scroll(el1, el2)

        Returns:
            Union['WebDriver', 'ActionHelpers']: Self instance
        """

        # XCUITest x W3C spec has no duration by default in server side
        if self.w3c and duration is None:
            duration = 600

        action = TouchAction(self)
        if duration is None:
            action.press(origin_el).move_to(destination_el).release().perform()
        else:
            action.press(origin_el).wait(duration).move_to(destination_el).release().perform()
        return self

    def drag_and_drop(self: T, origin_el: WebElement, destination_el: WebElement) -> T:
        """Drag the origin element to the destination element

        Args:
            origin_el: the element to drag
            destination_el: the element to drag to

        Returns:
            Union['WebDriver', 'ActionHelpers']: Self instance
        """
        action = TouchAction(self)
        action.long_press(origin_el).move_to(destination_el).release().perform()
        return self

    def tap(self: T, positions: List[Tuple[int, int]], duration: Optional[int] = None) -> T:
        """Taps on an particular place with up to five fingers, holding for a
        certain time

        Args:
            positions: an array of tuples representing the x/y coordinates of
                the fingers to tap. Length can be up to five.
            duration: length of time to tap, in ms

        Usage:
            driver.tap([(100, 20), (100, 60), (100, 100)], 500)

        Returns:
            Union['WebDriver', 'ActionHelpers']: Self instance
        """
        if len(positions) == 1:
            action = TouchAction(self)
            x = positions[0][0]
            y = positions[0][1]
            if duration:
                action.long_press(x=x, y=y, duration=duration).release()
            else:
                action.tap(x=x, y=y)
            action.perform()
        else:
            ma = MultiAction(self)
            for position in positions:
                x = position[0]
                y = position[1]
                action = TouchAction(self)
                if duration:
                    action.long_press(x=x, y=y, duration=duration).release()
                else:
                    action.press(x=x, y=y).release()
                ma.add(action)

            ma.perform()
        return self

    def swipe(self: T, start_x: int, start_y: int, end_x: int, end_y: int, duration: int = 0) -> T:
        """Swipe from one point to another point, for an optional duration.

        Args:
            start_x: x-coordinate at which to start
            start_y: y-coordinate at which to start
            end_x: x-coordinate at which to stop
            end_y: y-coordinate at which to stop
            duration: time to take the swipe, in ms.

        Usage:
            driver.swipe(100, 100, 100, 400)

        Returns:
            Union['WebDriver', 'ActionHelpers']: Self instance
        """
        # `swipe` is something like press-wait-move_to-release, which the server
        # will translate into the correct action
        action = TouchAction(self)
        action \
            .press(x=start_x, y=start_y) \
            .wait(ms=duration) \
            .move_to(x=end_x, y=end_y) \
            .release()
        action.perform()
        return self

    def flick(self: T, start_x: int, start_y: int, end_x: int, end_y: int) -> T:
        """Flick from one point to another point.

        Args:
            start_x: x-coordinate at which to start
            start_y: y-coordinate at which to start
            end_x: x-coordinate at which to stop
            end_y: y-coordinate at which to stop

        Usage:
            driver.flick(100, 100, 100, 400)

        Returns:
            Union['WebDriver', 'ActionHelpers']: Self instance
        """
        action = TouchAction(self)
        action \
            .press(x=start_x, y=start_y) \
            .move_to(x=end_x, y=end_y) \
            .release()
        action.perform()
        return self
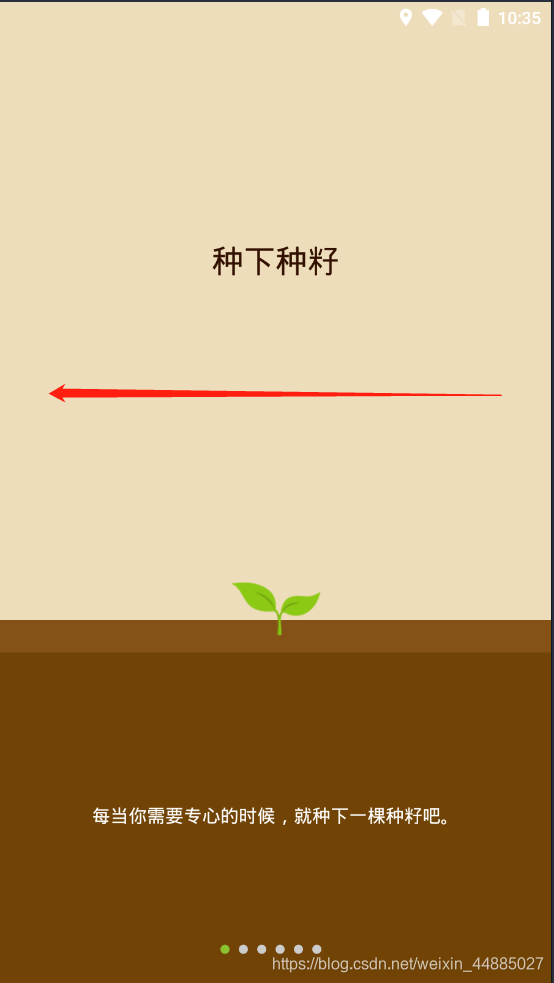
示例:滑动操作
场景
如下,需要从右往左滑动屏幕:
代码
from appium import webdriver
from APP_project_v0.swipe_function import BasePage

caps = {
  "platformName": "Android",
  "deviceName": "emulator-5554",
  "automationName": "UiAutomator1",
  "appPackage": "cc.forestapp",
  "appActivity": "cc.forestapp.applications.SplashActivity",
  "noReset": False
}
driver = webdriver.Remote(
    command_executor="http://127.0.0.1:4723/wd/hub",
    desired_capabilities=caps
)

#获取手机窗口尺寸
size = driver.get_window_size()
#单独获取手机的宽度、高度
width = size["width"]
height = size["height"]

#等待可滑屏的界面出现
import time
time.sleep(9)

#连续滑动5次
i = 0
while(i < 5):
    # 调用滑动方法,分别传入开始点的坐标及结束点的坐标
    driver.swipe(
        start_x=width * 0.9,
        start_y=height * 0.5,
        end_x=width * 0.1,
        end_y=height * 0.5
    )
    i += 1
封装
- BasePage.py
   def swipe_left(self, duration=None):
        """向左边滑动"""
        size = self.driver.get_window_size()
        # 得到一个字典
        width = size["width"]
        height = size["height"]
        # 向左滑动
        # 这个就是滑动的标准操作
        self.driver.swipe(
            start_x=width * 0.9,
            start_y=height * 0.5,
            end_x=width * 0.1,
            end_y=height * 0.5,
            duration=duration
        )

    def swipe_right(self, duration=None):
        size = self.driver.get_window_size()
        # 得到一个字典
        width = size["width"]
        height = size["height"]
        # 向左滑动
        # 这个就是滑动的标准操作
        self.driver.swipe(
            start_x=width * 0.1,
            start_y=height * 0.5,
            end_x=width * 0.9,
            end_y=height * 0.5,
            duration=duration
        )

    def swipe_up(self, duration=None):
        size = self.driver.get_window_size()
        # 得到一个字典
        width = size["width"]
        height = size["height"]
        # 向左滑动
        # 这个就是滑动的标准操作
        self.driver.swipe(
            start_x=width * 0.5,
            start_y=height * 0.9,
            end_x=width * 0.5,
            end_y=height * 0.1,
            duration=duration
        )

    def swipe_down(self, duration=None):
        size = self.driver.get_window_size()
        # 得到一个字典
        width = size["width"]
        height = size["height"]
        # 向左滑动
        # 这个就是滑动的标准操作
        self.driver.swipe(
            start_x=width * 0.5,
            start_y=height * 0.1,
            end_x=width * 0.5,
            end_y=height * 0.9,
            duration=duration
        )
- test_swipe.py
from appium import webdriver
from APP_project_v0.swipe_function import BasePage

caps = {
  "platformName": "Android",
  "deviceName": "emulator-5554",
  "automationName": "UiAutomator1",
  "appPackage": "cc.forestapp",
  "appActivity": "cc.forestapp.applications.SplashActivity",
  "noReset": False
}
driver = webdriver.Remote(
    command_executor="http://127.0.0.1:4723/wd/hub",
    desired_capabilities=caps
)
base = BasePage(driver)
import time
time.sleep(9)
i = 0
while(i < 5):
    base.swipe_right_to_left()
    i += 1

driver.swipe()
示例:键盘操作
场景
在app使用过程中,我们可能需要用到虚拟键盘中的键位,或者手机上的按钮,比如:音量+、音量-、锁屏等。
代码
在appium中,要进行键盘操作,可以调用press_keycode方法,传入一个数字,这个数字代表具体的键位。因此,当我们需要按某个按键时,需要上网去查按键所对应的数字是多少。
这里提供一篇文章可供参考:
https://blog.csdn.net/fantasyweirdo/article/details/86235206
举个例子,比如我们要按音量+,对应的键码是175:

接着就可以这样写:
#按音量+键
driver.press_keycode(175)
封装
另外还有另一种更方便的方法,我们可以封装一个类:
- Basepage.py
class Keycode():
    BACKSPACE = 8
    TAB = 9
    CLEAR = 12
    ENTER = 13
当要使用按键时,则可以直接调用这个类下面的变量:
driver.press_keycode(Keycode.ENTER)
动作链条:TouchAction
如果使用单一动作并不能完成整个操作,而需要多个连续的单一动作组合才能完成,需要使用动作链条,也就是TouchAction类。在调用时可进行链式调用:A动作().B动作().A动作().C动作().perform()
源码
class TouchAction:

    def __init__(self, driver: Optional['WebDriver'] = None):
        self._driver = driver
        self._actions: List = []

    def tap(self: T, element: Optional['WebElement'] = None, x: Optional[int]
            = None, y: Optional[int] = None, count: int = 1) -> T:
        """Perform a tap action on the element

        Args:
            element: the element to tap
            x : x coordinate to tap, relative to the top left corner of the element.
            y : y coordinate. If y is used, x must also be set, and vice versa

        Returns:
            `TouchAction`: Self instance
        """
        opts = self._get_opts(element, x, y)
        opts['count'] = count
        self._add_action('tap', opts)

        return self

    def press(self: T, el: Optional['WebElement'] = None, x: Optional[int] = None,
              y: Optional[int] = None, pressure: Optional[float] = None) -> T:
        """Begin a chain with a press down action at a particular element or point

        Args:
            el: the element to press
            x: x coordiate to press. If y is used, x must also be set
            y: y coordiate to press. If x is used, y must also be set
            pressure: [iOS Only] press as force touch. Read the description of `force` property on Apple's UITouch class
                                (https://developer.apple.com/documentation/uikit/uitouch?language=objc) for more details on possible value ranges.

        Returns:
            `TouchAction`: Self instance
        """
        self._add_action('press', self._get_opts(el, x, y, pressure=pressure))

        return self

    def long_press(self: T, el: Optional['WebElement'] = None, x: Optional[int]
                   = None, y: Optional[int] = None, duration: int = 1000) -> T:
        """Begin a chain with a press down that lasts `duration` milliseconds

        Args:
            el: the element to press
            x: x coordiate to press. If y is used, x must also be set
            y: y coordiate to press. If x is used, y must also be set
            duration: Duration to press

        Returns:
            `TouchAction`: Self instance
        """
        self._add_action('longPress', self._get_opts(el, x, y, duration))

        return self

    def wait(self: T, ms: int = 0) -> T:
        """Pause for `ms` milliseconds.

        Args:
            ms: The time to pause

        Returns:
            `TouchAction`: Self instance
        """
        if ms is None:
            ms = 0

        opts = {'ms': ms}

        self._add_action('wait', opts)

        return self

    def move_to(self: T, el: Optional['WebElement'] = None, x: Optional[int] = None, y: Optional[int] = None) -> T:
        """Move the pointer from the previous point to the element or point specified

        Args:
            el: the element to be moved to
            x: x coordiate to be moved to. If y is used, x must also be set
            y: y coordiate to be moved to. If x is used, y must also be set

        Returns:
            `TouchAction`: Self instance
        """
        self._add_action('moveTo', self._get_opts(el, x, y))

        return self

    def release(self: T) -> T:
        """End the action by lifting the pointer off the screen

        Returns:
            `TouchAction`: Self instance
        """
        self._add_action('release', {})

        return self

    def perform(self: T) -> T:
        """Perform the action by sending the commands to the server to be operated upon

        Returns:
            `TouchAction`: Self instance
        """
        if self._driver is None:
            raise ValueError('Set driver to constructor as a argument when to create the instance.')
        params = {'actions': self._actions}
        self._driver.execute(Command.TOUCH_ACTION, params)

        # get rid of actions so the object can be reused
        self._actions = []

        return self

    @property
    def json_wire_gestures(self) -> List[Dict]:
        gestures = []
        for action in self._actions:
            gestures.append(copy.deepcopy(action))
        return gestures

    def _add_action(self, action: str, options: Dict) -> None:
        gesture = {
            'action': action,
            'options': options,
        }
        self._actions.append(gesture)

    def _get_opts(self, el: Optional['WebElement'] = None, x: Optional[int] = None, y: Optional[int] = None,
                  duration: Optional[int] = None, pressure: Optional[float] = None) -> Dict[str, Union[int, float]]:
        opts = {}
        if el is not None:
            opts['element'] = el.id

        # it makes no sense to have x but no y, or vice versa.
        if x is not None and y is not None:
            opts['x'] = x
            opts['y'] = y

        if duration is not None:
            opts['duration'] = duration

        if pressure is not None:
            opts['pressure'] = pressure

        return opts
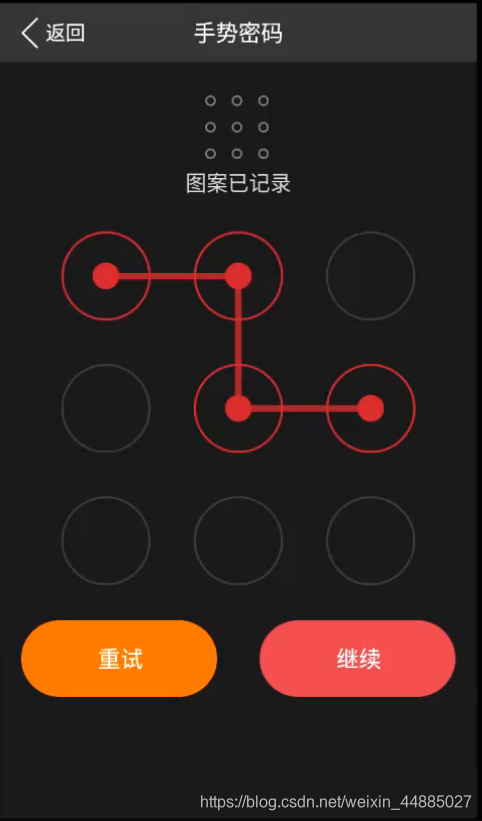
示例:多点触控
场景
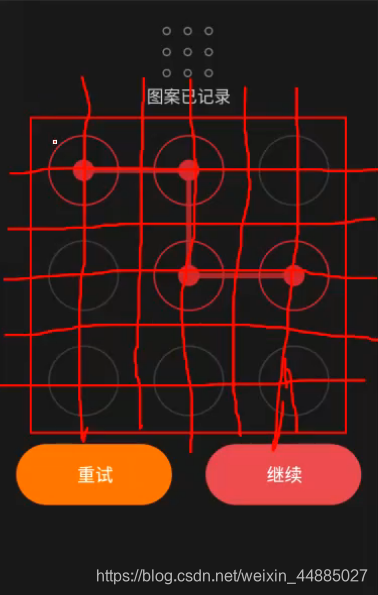
如下九宫格,需要在起始点长按,然后在屏幕上移动,直至移动到结束点松开:
这里是可以把九宫格进行切分的:
代码
from appium import webdriver
from APP_project_v0.swipe_function import BasePage
from appium.webdriver.common.touch_action import TouchAction

caps = {
  "platformName": "Android",
  "deviceName": "emulator-5554",
  "automationName": "UiAutomator1",
  "appPackage": "com.xxzb.fenwoo",
  "appActivity": "com.xxzb.fenwoo.activity.addition.WelcomeActivity",
  "noReset": False
}
driver = webdriver.Remote(
    command_executor="http://127.0.0.1:4723/wd/hub",
    desired_capabilities=caps
)

# 定位到 activity
driver.start_activity(
    app_package="com.xxzb.fenwoo",
    app_activity=".activity.user.CreateGesturePwdActivity"
)

#进入九宫格界面
time.sleep(1)
e = driver.find_element_by_id('com.xxzb.fenwoo:id/right_btn')
e.click()

#九宫格元素定位,并获取九宫格的尺寸
time.sleep(2)
e = driver.find_element_by_id("com.xxzb.fenwoo:id/gesturepwd_create_lockview")
size = element.rect

#获取九宫格宽度、高度
width = size["width"]
height = size["height"]
#获取九宫格起始点坐标
start_x = size["x"]
start_y = size["y"]

#获取九宫格中每个点的相对坐标
point_1 = {"x":start_x + width * 1 / 6 , "y": start_y + height * 1 /6}
point_2 = {"x":start_x + width * 3 / 6 , "y": start_y + height * 1 /6}
point_3 = {"x":start_x + width * 5 / 6 , "y": start_y + height * 1 /6}
point_4 = {"x":start_x + width * 1 / 6 , "y": start_y + height * 3 /6}
point_5 = {"x":start_x + width * 3 / 6 , "y": start_y + height * 3 /6}
point_6 = {"x":start_x + width * 5 / 6 , "y": start_y + height * 3 /6}
point_7 = {"x":start_x + width * 1 / 6 , "y": start_y + height * 5 /6}
point_8 = {"x":start_x + width * 3 / 6 , "y": start_y + height * 5 /6}
point_9 = {"x":start_x + width * 5 / 6 , "y": start_y + height * 5 /6}

#调用TouchAction进行操作
action = TouchAction(driver)
action.press(**point_1).wait(200).\
    move_to(**point_2).wait(200).\
    move_to(**point_5).wait(200).\
    move_to(**point_8).wait(200).\
    move_to(**point_9).release().perform()

time.sleep(3)
driver.quit()
封装
- Basepage.py
   def jiugongge(self, locator, pos: list):
        """九宫格。
        pos = [2,3,5,7]
        """
        el = self.find_element(locator)
        size = el.rect

        start_x = size["x"]
        start_y = size["y"]
        width = size["width"]
        height = size["height"]

        points = [
            {'x': start_x + width / 6 * 1, 'y': start_y + height / 6},
            {'x': start_x + width / 6 * 3, 'y': start_y + height / 6},
            {'x': start_x + width / 6 * 5, 'y': start_y + height / 6},
            {'x': start_x + width / 6 * 1, 'y': start_y + height / 6 * 3},
            {'x': start_x + width / 6 * 3, 'y': start_y + height / 6 * 3},
            {'x': start_x + width / 6 * 5, 'y': start_y + height / 6 * 3},
            {'x': start_x + width / 6 * 1, 'y': start_y + height / 6 * 5},
            {'x': start_x + width / 6 * 3, 'y': start_y + height / 6 * 5},
            {'x': start_x + width / 6 * 5, 'y': start_y + height / 6 * 5},
        ]

        touch = TouchAction(self.driver)

        # 传入的参数是从 0 开始的。
        # pos = [2,3,5,7]
        # 索引 = 位置 - 1
        touch.press(**points[pos[0] - 1]).wait(200)
        for p in pos[1:]:
            touch.move_to(**points[p - 1]).wait(200)
        touch.release().perform()
多指操作:MultiAction
如果需要多个手指进行操作,比如:放大、缩小等,就需要用到MultiAction类。
源码
class MultiAction:
    def __init__(self, driver: 'WebDriver', element: Optional['WebElement'] = None) -> None:
        self._driver = driver
        self._element = element
        self._touch_actions: List['TouchAction'] = []

    def add(self, *touch_actions: 'TouchAction') -> None:
        """Add TouchAction objects to the MultiAction, to be performed later.

        Args:
            touch_actions: one or more TouchAction objects describing a chain of actions to be performed by one finger

        Usage:
            | a1 = TouchAction(driver)
            | a1.press(el1).move_to(el2).release()
            | a2 = TouchAction(driver)
            | a2.press(el2).move_to(el1).release()
            | MultiAction(driver).add(a1, a2)

        Returns:
            `MultiAction`: Self instance
        """
        for touch_action in touch_actions:
            if self._touch_actions is None:
                self._touch_actions = []

            self._touch_actions.append(copy.copy(touch_action))

    def perform(self: T) -> T:
        """Perform the actions stored in the object.

        Usage:
            | a1 = TouchAction(driver)
            | a1.press(el1).move_to(el2).release()
            | a2 = TouchAction(driver)
            | a2.press(el2).move_to(el1).release()
            | MultiAction(driver).add(a1, a2).perform()

        Returns:
            `MultiAction`: Self instance
        """
        self._driver.execute(Command.MULTI_ACTION, self.json_wire_gestures)

        # clean up and be ready for the next batch
        self._touch_actions = []

        return self

    @property
    def json_wire_gestures(self) -> Dict[str, Union[List, str]]:
        actions = []
        for action in self._touch_actions:
            actions.append(action.json_wire_gestures)
        if self._element is not None:
            return {'actions': actions, 'elementId': self._element.id}
        return {'actions': actions}
由上面源码可以看出,每一个手指头代表一个TouchAction的对象,每个TouchAction对象都会去调用一系列的动作。
示例:放大、缩小
场景
比如说,一个图片,需要放大、缩小;一个地图,需要放大、缩小。
代码
#放大
action_1 = TouchAction(driver)
action_1.press(x=width / 2, y=height / 2).move_to(
    x=width / 2, y=height / 2 - 500).release()
action_2 = TouchAction(driver)
action_2.press(x=width / 2, y=height / 2).move_to(
    x=width / 2, y=height / 2 + 500).release()

m = MultiAction(driver)
m.add(action_1, action_2)
m.perform()


 1465
1465


 被折叠的 条评论
为什么被折叠?
被折叠的 条评论
为什么被折叠?
 到【灌水乐园】发言


