


Spring MVC介绍
Spring MVC 是Spring框架中用于Web应用开发得一个模块,是Spring提供得一个基于MVC设计模式得优秀得Web开发框架,本质上相当于servlet。在MVC设计模式中,SpringMVC作为控制器(Controller)来建立模型与视图得数据交互,是结构最清晰得MVC Model2实现,可称为一个典型得MVC框架。Spring MVC得结构比较复杂,下面我们通过搭建MVC得环境,并实现简单例子来了解Spring mvc。

Spring MVC 框架采用松耦合可插拔得组件结构,具有高度可配置性,比起其他MVC框架更具有扩展性和灵活性。此外,Spring MVC得注解驱动和对REST风格得支持,也是它得特色风格。无论是在框架设计,还是扩展性、灵活性等方面都已经全面超越了Struts2等MVC框架,并且它本身也是Spring框架的一部分,与Spring框架的整合无缝衔接,性能方面也有天生的优越性。
1.Spring MVC搭建环境
1.1Spring MVC搭建环境流程
1. 引入jar文件

以上为我maven pom配置文件导入的架包,记得版本一定要对应,否则容易引发未知错误。
- Spring MVC配置:
2.1在web.xml中配置Servlet,定义DispatcherServlet:
Spring MVC是基于Servlet得,那DispatcherServlet是整个Sping mvc框架得核心,它负责截获请求并将其分派给相应得处理器处理。首先就得进行DispatcherServlet配置,我们在web.xml中进行操作:
<web-app>
  <display-name>Archetype Created Web Application</display-name>
   <servlet>
         <servlet-name>MySpringMVC</servlet-name>
       <servlet-class>org.springframework.web.servlet.DispatcherServlet</servlet-class>
         <init-param>
           <param-name>contextConfigLocation</param-name>
         <param-value>classpath:springmvc-servlet.xml</param-value>
        </init-param>
         <load-on-startup>1</load-on-startup>
      </servlet>
       <servlet-mapping>
         <servlet-name>MySpringMVC</servlet-name>
        <url-pattern>/</url-pattern>
       </servlet-mapping>
</web-app>
在配置得时候,我们通过contextConfigLocation参数来指定Spring MVC配置文件得位置,此处使用Spring资源路径得方式进行指定(classpath:springmvc-servlet.xml)
2.2创建Spring MVC得配置文件–视图解析器
在resources目录下面新建名叫springmvc-servlet.xml得配置文件
<?xml version="1.0" encoding="UTF-8"?>
<beans xmlns="http://www.springframework.org/schema/beans"
      xmlns:xsi="http://www.w3.org/2001/XMLSchema-instance"
       xmlns:mvc="http://www.springframework.org/schema/mvc"
       xmlns:context="http://www.springframework.org/schema/context"
       xsi:schemaLocation="http://www.springframework.org/schema/beans
        http://www.springframework.org/schema/beans/spring-beans.xsd
        http://www.springframework.org/schema/context
        http://www.springframework.org/schema/context/spring-context.xsd
        http://www.springframework.org/schema/mvc
        http://www.springframework.org/schema/mvc/spring-mvc-3.0.xsd ">
     <context:component-scan base-package="com.controller"/>
     <mvc:annotation-driven />

   <!-- <bean name="/index.html" class="com.controller.IndexController"/>-->
    <!--完成视图的对应-->
    <bean class="org.springframework.web.servlet.view.InternalResourceViewResolver">
        <property name="prefix" value="/WEB-INF/jsp/" />
        <property name="suffix" value=".jsp" />
    </bean>
</beans>
Spring MVC配置文件的命名,必须和在web.xml中配置DispatcherServlet时所指定的配置文件名称一致。
3.创建Controller(处理请求得控制器,等于servlet)
在同级目录下创建controller包,创建一个名叫IndexController的层
@Controller //声明这个类为页面控制器
public class IndexController {
     //RequestMapping 表示方法与哪个请求URL来对应(此处为: /index1 )
    @RequestMapping("/index1")
    public ModelAndView index(String username){
        logger.info("welcome,"+username);
        ModelAndView mview = new ModelAndView();
        mview.addObject("username",username);
        mview.setViewName("index");
        return mview;
    }
}
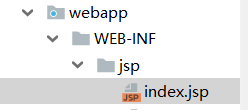
4.创建view层(我们用JSP作为视图进行测试)
在第二步我们配置了视图解析器,根据定义的prefix(前缀)–WEB-INF/jsp/和suffix(后缀).jsp,我们在WEB-INF下创建jsp包,定义index.jsp
<%@ page contentType="text/html;charset=UTF-8" language="java" %>
<%@ page isELIgnored="false" %>
<html>
<head>
    <meta http-equiv="Content-Type" content="text/html; charset=UTF-8">
    <title>Insert title here</title>
</head>
<body>
<h1>hello,SpingMvc!!</h1>
</body>
</html>
控制器IndexController返回的逻辑视图名称为index,通过视图解析器,会将视图逻辑名解析为/WEB-INF/jsp/index.jsp,得到真正的视图名。
5.部署运行(Tomcat)
前面所有工作完成后,在idea中部署tomcat

最后进行测试,在控制台输入http://localhost:8080/ch09spingmvcshili_war/index1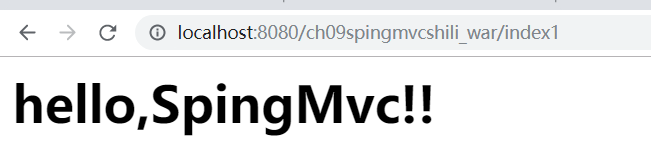
前面路径是我的项目路径,别傻乎乎的复制!!
2.Spring MVC框架的请求处理流程
下面我们通过一张图来了解下Springmvc的请求流程

- 首先用户发送到请求到前端控制器(DispatcherServlet),前端控制处理器根据请求信息(URL)来选择哪个控制器(Controller)来进行处理,并把请求委托给它
- 页面控制器接收到请求后,进行业务处理,处理完毕后返回一个ModelAndView
- 前端控制器收回控制权,然后根据返回的逻辑视图名,选择相应的真正视图,并把模型数据传入以便将视图进行渲染。
2.1Spring MVC框架的特点
- 清晰的角色划分。Spring MVC在model,view,controller方面提供了一个非常清晰的角色划分
- 灵活的配置功能。因为Spring的核心时IoC,同样在实现MVC上,也可以把各种类当作Bean来通过XML进行配置。
- 提供了大量的控制器接口和实现类。开发者可以使用Spring提供的控制器实现类,也可以自己实现控制器接口。
- 真正做到与view层的实现无关,使用更加灵活
- 国际化支持
- 面向接口编程
- Spring提供了Web应用开发的一整套流程。
2.2MVC的参数传递
前面我们搭建了MVC的环境以及实现了controller和view的映射,简单的实现了页面导航,下面我们来实现把view层的数据传递以及controller把值传给前台
    /**
     * 参数传递:controller to view = (ModelAndView)
     * @param username
     * @return
     */
    @RequestMapping("/index1")
    public ModelAndView index(String username){
        logger.info("welcome,"+username);
        ModelAndView mview = new ModelAndView();
        mview.addObject("username",username);
        mview.setViewName("index");
        return mview;
    }
控制器处理方法的返回值若为ModelAndView,则既包含视图信息,又包含模型数据信息,有了该对象之后mvc就可以使用视图对模型数据进行渲染。
这里的mview.setViewName(“index”); 表示要打开的视图页面名
mview.addObject(“username”,username); 表示添加模型数据,在index页面可以进行显示
<h1>username(key:username)- ->${username}</h1>
void setView(View view):指定一个具体的视图对象
void setViewName(View view):指定一个逻辑视图名

需要注意的是?后面的username必须对应方法名字,才能获取到,这里我们只是测试拼接,运行正确会在页面上显示,admin!!
2.2.1view层传输数据到controller
使用一个form表单做示范,例如我现在要把form表单上text得值在后台进行处理,并且把你输入得值打印到另外一个页面上进行显示:
index.jsp:
<%@ page contentType="text/html;charset=UTF-8" language="java" %>
<%@ page isELIgnored="false" %>
<html>
<head>
    <meta http-equiv="Content-Type" content="text/html; charset=UTF-8">
    <title>Input</title>
</head>
<body>
<h2>Hello World!</h2>
<form action="${pageContext.request.contextPath}/index5" method="get">
    请输入roleName:<input type="text" name="rolecode">
    <input type="submit"  value="提交">
</form>
</body>
</html>
其中${pageContext.request.contextPath}是你得项目路径,发送请求必须要加,否则找不到你的路径,/index5为访问后台控制器得路径名
    /**
     * 参数传递:前台输入值
     * @param rolecode
     * @return
     */
    @RequestMapping("/index5")
    public String index5(String rolecode, Model model){
        logger.info("welcome,rolecode :"+rolecode);
        model.addAttribute("rolecodes",rolecode);
        model.addAttribute(rolecode);
        return "indexs";
    }
方法中string类型得名字必须对应form表单上name得名字,Model模型是我们用来传输数据到前台得对象,返回indexs页面。
indexs.jsp:
<%@ page contentType="text/html;charset=UTF-8" language="java" %>
<%@ page isELIgnored="false" %>
<html>
<head>
    <meta http-equiv="Content-Type" content="text/html; charset=UTF-8">
    <title>Insert title here</title>
</head>
<body>
<h1>roleName:${rolecodes}</h1>
</body>
</html>
我们把需要得页面和后台准备好之后开始测试,启动tomcat:
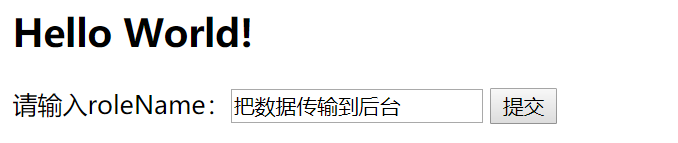
点击提交:


从这里可以看到,我们测试成功了。
3.整合SSM项目
- 导入jar包

上面为我整个项目得所有架包,文件上传得架包可以不加!!主要添加得还是spring得核心架包。 - 编写配置文件
前面我们已经会编写Springmvc得配置文件了,现在我们只需要配置Spring和mybatis得配置文件了,下面直接贴代码
mybatis-config.xml:
<?xml version="1.0" encoding="UTF-8" ?>
<!DOCTYPE configuration
        PUBLIC "-//mybatis.org//DTD Config 3.0//EN"
        "http://mybatis.org/dtd/mybatis-3-config.dtd">
<configuration>
    <!--配置mybatis的log实现log4j-->
    <settings>
        <setting name="logImpl" value="LOG4J"></setting>
    </settings>

    <typeAliases>
        <package name="com.pojo"/>
    </typeAliases>
</configuration>
和log4j.properties:
# Global logging configuration
log4j.rootLogger=DEBUG, stdout
# Console output...
log4j.appender.stdout=org.apache.log4j.ConsoleAppender
log4j.appender.stdout.layout=org.apache.log4j.PatternLayout
log4j.appender.stdout.layout.ConversionPattern=%5p [%t] - %m%n
applicationContext.xml:
<?xml version="1.0" encoding="UTF-8"?>
<beans xmlns="http://www.springframework.org/schema/beans"
       xmlns:xsi="http://www.w3.org/2001/XMLSchema-instance"
       xmlns:context="http://www.springframework.org/schema/context"
       xmlns:aop="http://www.springframework.org/schema/aop"
       xmlns:tx="http://www.springframework.org/schema/tx"
       xsi:schemaLocation="http://www.springframework.org/schema/beans
        https://www.springframework.org/schema/beans/spring-beans.xsd
         http://www.springframework.org/schema/aop
         http://www.springframework.org/schema/aop/spring-aop-4.0.xsd
         http://www.springframework.org/schema/context
         http://www.springframework.org/schema/context/spring-context-4.0.xsd
         http://www.springframework.org/schema/cache
         http://www.springframework.org/schema/cache/spring-cache.xsd
         http://www.springframework.org/schema/tx
       http://www.springframework.org/schema/tx/spring-tx-4.0.xsd ">
    <!-- 配置数据源-->
    <bean id="dataSource" class="org.apache.commons.dbcp2.BasicDataSource" destroy-method="close">
        <property name="driverClassName" value="com.mysql.cj.jdbc.Driver"></property>
        <property name="url">
            <!-- 千万注意,这里不能换行 -->
            <value><![CDATA[jdbc:mysql://127.0.0.1:3306/smbms?serverTimezone=UTC&useUnicode=true&characterEncoding=UTF-8]]></value>
        </property>
        <property name="username" value="root"></property>
        <property name="password" value="root"></property>
    </bean>
    <!-- 引入mybatis的配置文件-->
    <bean id="sqlSessionFactory" class="org.mybatis.spring.SqlSessionFactoryBean">
        <property name="dataSource" ref="dataSource"/>
        <property name="configLocation" value="classpath:mybatis-config.xml"/>
    </bean>


    <bean id="txManager" class="org.springframework.jdbc.datasource.DataSourceTransactionManager">
        <property name="dataSource" ref="dataSource" />
    </bean>

    <bean class="org.mybatis.spring.mapper.MapperScannerConfigurer">
        <property name="basePackage"  value="com.mapper"/>
    </bean>

    <context:component-scan base-package="com.biz"/>

</beans>
编写完得项目结构如图:
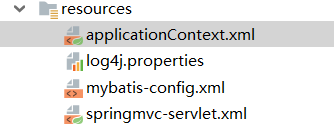
最后我们只要有在springmvc-servlet.xml中把spring导入进去
springmvc-servlet.xml:
<?xml version="1.0" encoding="UTF-8"?>
<beans xmlns="http://www.springframework.org/schema/beans"
      xmlns:xsi="http://www.w3.org/2001/XMLSchema-instance"
       xmlns:mvc="http://www.springframework.org/schema/mvc"
       xmlns:context="http://www.springframework.org/schema/context"
       xsi:schemaLocation="http://www.springframework.org/schema/beans
        http://www.springframework.org/schema/beans/spring-beans.xsd
        http://www.springframework.org/schema/context
        http://www.springframework.org/schema/context/spring-context.xsd
        http://www.springframework.org/schema/mvc
        http://www.springframework.org/schema/mvc/spring-mvc-3.0.xsd ">
    <!--导入spring文件 -->
    <import resource="classpath:applicationContext.xml"/>
     <context:component-scan base-package="com.controller"/>
     <mvc:annotation-driven />

    <!--完成视图的对应-->
    <bean class="org.springframework.web.servlet.view.InternalResourceViewResolver">
        <property name="prefix" value="/WEB-INF/jsp/" />
        <property name="suffix" value=".jsp" />
    </bean>
</beans>
这样我们得配置文件就编写成功了。
4. 运行测试
我们使用一个简单得登陆来测试ssm部署是否成功,首先编写登陆需要得mapper层和biz层,这里不做示范,下面贴上controller层得代码:
@Controller
@RequestMapping("/users")
public class UserController {
    @Autowired
    private UserBiz userBiz;

    /**
     * 进入登陆页面
     * @return
     */
    @RequestMapping("/tologin")
    public String toLogin(){
        return "login";
    }


    /**
     * 登陆方法
     * @param request
     * @param response
     * @throws IOException
     */
    @RequestMapping("userdengl")
    public void findStand(HttpServletRequest request,
                          HttpServletResponse response, HttpSession session) throws IOException {
        request.setCharacterEncoding("utf-8");
        response.setContentType("text/html;charset=utf-8");
        String name = request.getParameter("name");
        if(null==name&&name.trim().length()<=0){
            return;
        }
        String password = request.getParameter("password");
        if(null==password&&password.trim().length()<=0){
            return;
        }
        PrintWriter out = response.getWriter();
        User users = new User();
        users.setUserCode(name);
        users.setUserPassword(password);
        User user = userBiz.getUser(users);
        session.setAttribute("user",user); //把用户存进session
        out.println(JSON.toJSONString(user));
        out.close();
    }

}
前台得页面发送为ajax请求
login.jsp:
<%--
  Created by IntelliJ IDEA.
  User: lsh
  Date: 2019/10/15
  Time: 13:43
  To change this template use File | Settings | File Templates.
--%>
<%@ page contentType="text/html;charset=UTF-8" language="java" %>
<%@ page isELIgnored="false" %>
<script type="text/javascript" src="${pageContext.request.contextPath }/statis/js/jquery-1.8.3.min.js"></script>
<html>
<head>
    <title>Title</title>
</head>
<body>
<h1>论文管理系统</h1>
<form class="loginForm"   name="actionForm" id="actionForm"  method="post" >
    <input type="hidden" id="path" name="path" value="${pageContext.request.contextPath}"/>
    <div class="info">${error}</div>
    <div class="inputbox">
        <label for="user">用户名:</label>
        <input type="text" class="input-text" id="userCode" name="userCode" placeholder="请输入用户名" required/>
    </div>
    <div class="inputbox">
        <label for="mima">密码:</label>
        <input type="password" id="userPassword" name="userPassword" placeholder="请输入密码" required/>
    </div>
    <div class="subBtn">
        <input type="button" value="登录" class="degnl"/>
        <input type="reset" value="重置"/>
    </div>
</form>
</body>
<script>
    $(document).ready(function () {
       $(".degnl").click(function () {
           var path = $("#path").val();
           console.log("路径"+path);
           var name = $("#userCode").val(); //用户名
           var password = $("#userPassword").val(); //密码
           $.ajax({
               type:"POST",
               url:path+"/users/userdengl",
               data:{name:name,password:password},
               dataType:"JSON",
               success:function(data){
                   if(data!=null){
                       alert("登陆成功");
                       location.href=path+"/users/tolist";
                   }else {
                       alert("登陆失败");
                   }
               },
               error:function(data){
                   alert("出现错误");
               }
           });
       })
    });
</script>
</html>
最后我们进行测试

这样我们得smm项目部署成功,如果有什么疑问,可以私聊把项目发你!!
3.1静态资源文件得引用
我们会发现如果要引入jss文件或者css,会发现它们无法起效得,因为web.xml中得DispatcherServlet请求映射会拦截所有web容器得请求,现在我们在mvc得配置文件中进行映射:
首先在webapp下面创建静态资源包
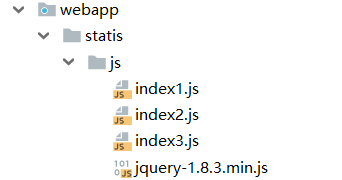
再springmvc-servlet.xml中添加:
<mvc:resources mapping="/statis/**" location="/statis/" />
--mapping:将静态资源映射到指定得路径下(/statis)
--location:本地静态资源文件所在得目录
实际引用:
<script type="text/javascript" src="${pageContext.request.contextPath }/statis/js/jquery-1.8.3.min.js"></script>
这里也必须要加项目得绝对路径!!这样就配置成功了


 253
253


 被折叠的 条评论
为什么被折叠?
被折叠的 条评论
为什么被折叠?
 到【灌水乐园】发言


