


文章目录
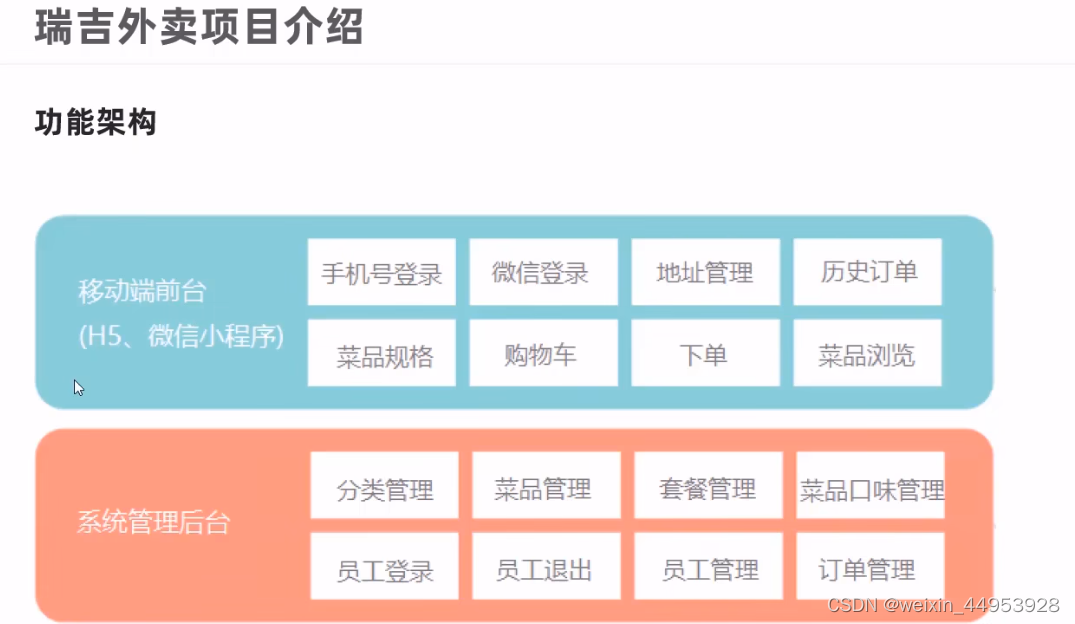
1.瑞吉外卖总体架构

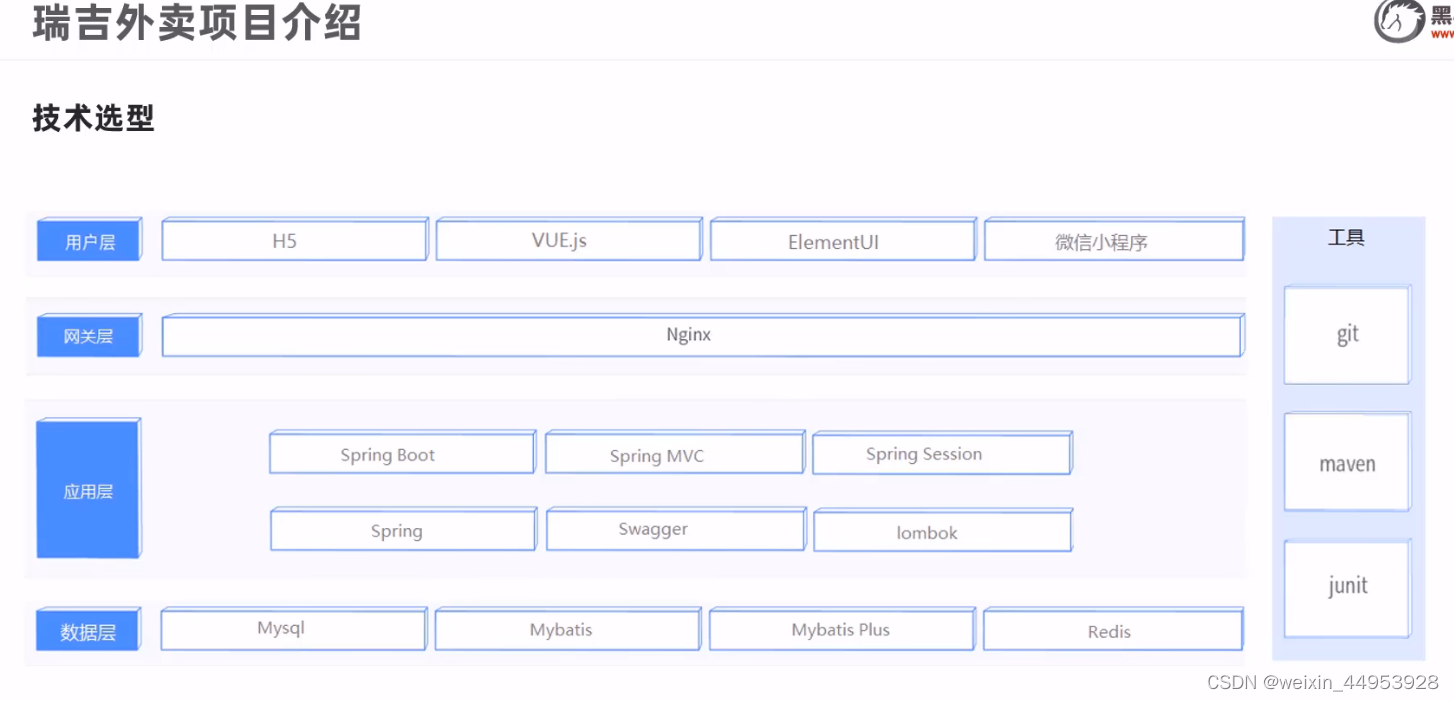

2 开发环境
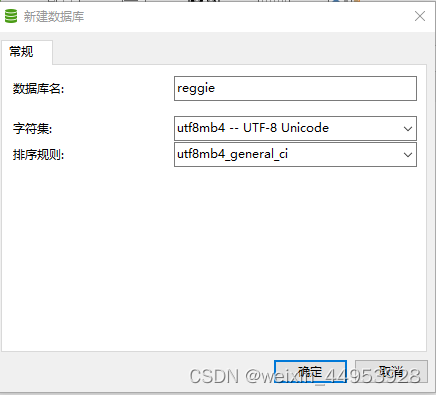
2.1 创建数据库,
创建数据库,导入:db_reggie.sql
2.2 创建后台
2.2.1 pop.xml
    <dependencies>
<!--        <dependency>-->
<!--            <groupId>org.springframework.boot</groupId>-->
<!--            <artifactId>spring-boot-starter-web</artifactId>-->
<!--        </dependency>-->
        <dependency>
            <groupId>org.mybatis.spring.boot</groupId>
            <artifactId>mybatis-spring-boot-starter</artifactId>
            <version>2.2.2</version>
        </dependency>

        <dependency>
            <groupId>mysql</groupId>
            <artifactId>mysql-connector-java</artifactId>
            <scope>runtime</scope>
        </dependency>
        <dependency>
            <groupId>org.springframework.boot</groupId>
            <artifactId>spring-boot-starter-test</artifactId>
            <scope>test</scope>
        </dependency>

        <dependency>
            <groupId>org.springframework.boot</groupId>
            <artifactId>spring-boot-starter-web</artifactId>
            <scope>compile</scope>
        </dependency>

        <dependency>
            <groupId>com.baomidou</groupId>
            <artifactId>mybatis-plus-boot-starter</artifactId>
            <version>3.4.2</version>
        </dependency>

        <dependency>
            <groupId>org.projectlombok</groupId>
            <artifactId>lombok</artifactId>
            <version>1.18.20</version>
        </dependency>

        <dependency>
            <groupId>com.alibaba</groupId>
            <artifactId>fastjson</artifactId>
            <version>1.2.76</version>
        </dependency>

        <dependency>
            <groupId>commons-lang</groupId>
            <artifactId>commons-lang</artifactId>
            <version>2.6</version>
        </dependency>

        <dependency>
            <groupId>mysql</groupId>
            <artifactId>mysql-connector-java</artifactId>
            <scope>runtime</scope>
        </dependency>

        <dependency>
            <groupId>com.alibaba</groupId>
            <artifactId>druid-spring-boot-starter</artifactId>
            <version>1.1.23</version>
        </dependency>

    </dependencies>
2.2.2 application.yml
server:
  port: 8080
spring:
  application:
    # 应用的名称,选择性配置
    name: reggie_take_out
  datasource:
    druid:
      driver-class-name: com.mysql.cj.jdbc.Driver
      url: jdbc:mysql://localhost:3306/reggie?serverTimezone=Asia/Shanghai&useUnicode=true&characterEncoding=utf-8&zeroDateTimeBehavior=convertToNull&useSSL=false&allowPublicKeyRetrieval=true
      username: root
      password: 123456

mybatis-plus:
  configuration:
    #在映射实体或者属性时,将数据库中表名和字段名中的下划线去掉,按照驼峰命名法映射
    #类似于数据库:tbl_user,而对应的使用类是TblUser
    #数据库的字段名 user_name--->userName
    map-underscore-to-camel-case: true
    # 把SQL的查询的过程输出到控制台
    log-impl: org.apache.ibatis.logging.stdout.StdOutImpl
  global-config:
    db-config:
      id-type: ASSIGN_ID
2.2.3 通用类(common)
通用返回结果类®
- 通用返回结果类,服务端响应的数据最终都会封装成此对象
package com.xiao.reggie.commom;

import lombok.Data;
import java.util.HashMap;
import java.util.Map;

//通用返回结果类,服务端响应的数据最终都会封装成此对象

@Data
public class R<T> {

    private Integer code; //编码:1成功,0和其它数字为失败

    private String msg; //错误信息

    private T data; //数据

    private Map map = new HashMap(); //动态数据

    public static <T> R<T> success(T object) {
        R<T> r = new R<T>();
        r.data = object;
        r.code = 1;
        return r;
    }

    public static <T> R<T> error(String msg) {
        R r = new R();
        r.msg = msg;
        r.code = 0;
        return r;
    }

    public R<T> add(String key, Object value) {
        this.map.put(key, value);
        return this;
    }

}
全局捕获异常(GlobalExceptionHandler)
import lombok.extern.slf4j.Slf4j;
import org.springframework.stereotype.Controller;
import org.springframework.web.bind.annotation.ControllerAdvice;
import org.springframework.web.bind.annotation.ExceptionHandler;
import org.springframework.web.bind.annotation.ResponseBody;
import org.springframework.web.bind.annotation.RestController;
import java.sql.SQLIntegrityConstraintViolationException;


//捕获所有带RestController注解和Controller注解的类的异常
@ControllerAdvice(annotations = {RestController.class, Controller.class}) //表示拦截哪些类型的controller注解
@ResponseBody
@Slf4j
public class GlobalExceptionHandler {
    /**
     * 处理SQLIntegrityConstraintViolationException异常的方法
     * @return
     */
    @ExceptionHandler(SQLIntegrityConstraintViolationException.class)
    public R<String> exceptionHandle(SQLIntegrityConstraintViolationException exception){
        log.error(exception.getMessage()); //报错记得打日志
        if (exception.getMessage().contains("Duplicate entry")){
            //获取已经存在的用户名,这里是从报错的异常信息中获取的
            String[] split = exception.getMessage().split(" ");
            String msg = split[2] + "这个用户名已经存在";
            return R.error(msg);
        }
        return R.error("未知错误");
    }


	//自定义的异常
    /**
     * 处理自定义的异常,为了让前端展示我们的异常信息,这里需要把异常进行全局捕获,然后返回给前端
     * @param exception
     * @return
     */
    @ExceptionHandler(CustomException.class)
    public R<String> exceptionHandle(CustomException exception){
        log.error(exception.getMessage()); //报错记得打日志
        //这里拿到的message是业务类抛出的异常信息,我们把它显示到前端
        return R.error(exception.getMessage());
    }

}
(JacksonObjectMapper)对象映射器:基于jackson将Java对象转为json,或者将json转为Java对象
复制了本代码,再把 WebMvcConfigurationSupport中的第二个注释去掉
package com.xiao.reggie.commom;

import com.fasterxml.jackson.databind.DeserializationFeature;
import com.fasterxml.jackson.databind.ObjectMapper;
import com.fasterxml.jackson.databind.module.SimpleModule;
import com.fasterxml.jackson.databind.ser.std.ToStringSerializer;
import com.fasterxml.jackson.datatype.jsr310.deser.LocalDateDeserializer;
import com.fasterxml.jackson.datatype.jsr310.deser.LocalDateTimeDeserializer;
import com.fasterxml.jackson.datatype.jsr310.deser.LocalTimeDeserializer;
import com.fasterxml.jackson.datatype.jsr310.ser.LocalDateSerializer;
import com.fasterxml.jackson.datatype.jsr310.ser.LocalDateTimeSerializer;
import com.fasterxml.jackson.datatype.jsr310.ser.LocalTimeSerializer;
import java.math.BigInteger;
import java.time.LocalDate;
import java.time.LocalDateTime;
import java.time.LocalTime;
import java.time.format.DateTimeFormatter;
import static com.fasterxml.jackson.databind.DeserializationFeature.FAIL_ON_UNKNOWN_PROPERTIES;

/**
 * 对象映射器:基于jackson将Java对象转为json,或者将json转为Java对象
 * 将JSON解析为Java对象的过程称为 [从JSON反序列化Java对象]
 * 从Java对象生成JSON的过程称为 [序列化Java对象到JSON]
 */
public class JacksonObjectMapper extends ObjectMapper {

    public static final String DEFAULT_DATE_FORMAT = "yyyy-MM-dd";
    public static final String DEFAULT_DATE_TIME_FORMAT = "yyyy-MM-dd HH:mm:ss";
    public static final String DEFAULT_TIME_FORMAT = "HH:mm:ss";

    public JacksonObjectMapper() {
        super();
        //收到未知属性时不报异常
        this.configure(FAIL_ON_UNKNOWN_PROPERTIES, false);

        //反序列化时,属性不存在的兼容处理
        this.getDeserializationConfig().withoutFeatures(DeserializationFeature.FAIL_ON_UNKNOWN_PROPERTIES);


        SimpleModule simpleModule = new SimpleModule()
                .addDeserializer(LocalDateTime.class, new LocalDateTimeDeserializer(DateTimeFormatter.ofPattern(DEFAULT_DATE_TIME_FORMAT)))
                .addDeserializer(LocalDate.class, new LocalDateDeserializer(DateTimeFormatter.ofPattern(DEFAULT_DATE_FORMAT)))
                .addDeserializer(LocalTime.class, new LocalTimeDeserializer(DateTimeFormatter.ofPattern(DEFAULT_TIME_FORMAT)))

                .addSerializer(BigInteger.class, ToStringSerializer.instance)
                .addSerializer(Long.class, ToStringSerializer.instance)
                .addSerializer(LocalDateTime.class, new LocalDateTimeSerializer(DateTimeFormatter.ofPattern(DEFAULT_DATE_TIME_FORMAT)))
                .addSerializer(LocalDate.class, new LocalDateSerializer(DateTimeFormatter.ofPattern(DEFAULT_DATE_FORMAT)))
                .addSerializer(LocalTime.class, new LocalTimeSerializer(DateTimeFormatter.ofPattern(DEFAULT_TIME_FORMAT)));

        //注册功能模块 例如,可以添加自定义序列化器和反序列化器
        this.registerModule(simpleModule);
    }
}
处理类:在此类中为公共字段赋值,需要实现
-BaseContext:捕获登陆用户id
(MyMetaObjecthandler和BaseContext)

package com.xiao.reggie.commom;

import com.baomidou.mybatisplus.core.handlers.MetaObjectHandler;
import lombok.extern.slf4j.Slf4j;
import org.apache.ibatis.reflection.MetaObject;
import org.springframework.stereotype.Component;

import java.time.LocalDateTime;

/**
 * 自定义元数据对象处理器
 */
@Slf4j
@Component   //注意:这个要记得交给spring容器管理,不然这个功能就没发用。。。。
//那么怎么确定你要添加的功能是不是要交给容器管理呢?就是你直接写了一个工具类或者是功能类,需要对数据库的数据或者是数据库数据的结果产生影响的时候,
// 你明明写了这样一个类,但是功能却没有生效,那么这个时候就要首先考虑是不是容器没有托管这个类
public class MyMetaObjecthandler implements MetaObjectHandler {

    /**
     * 插入操作,自动填充
     * @param metaObject
     */
    @Override
    public void insertFill(MetaObject metaObject) {
        metaObject.setValue("createTime", LocalDateTime.now());
        metaObject.setValue("updateTime",LocalDateTime.now());


//        metaObject.setValue("createUser", new Long(1));  //这里的id是不能直接获取的,所以这里先写死,后面教你怎么动态获取员工id
//        metaObject.setValue("updateUser",new Long(1));
        metaObject.setValue("createUser", BaseContext.getCurrentId());  //这里的id是不能直接获取的,所以这里先写死,后面教你怎么动态获取员工id
        metaObject.setValue("updateUser",BaseContext.getCurrentId());
    }

    /**
     * 更新操作,自动填充
     * @param metaObject
     */
    @Override
    public void updateFill(MetaObject metaObject) {
        metaObject.setValue("updateTime",LocalDateTime.now());
//        metaObject.setValue("updateUser",new Long(2));
        metaObject.setValue("updateUser",BaseContext.getCurrentId());
    }
}
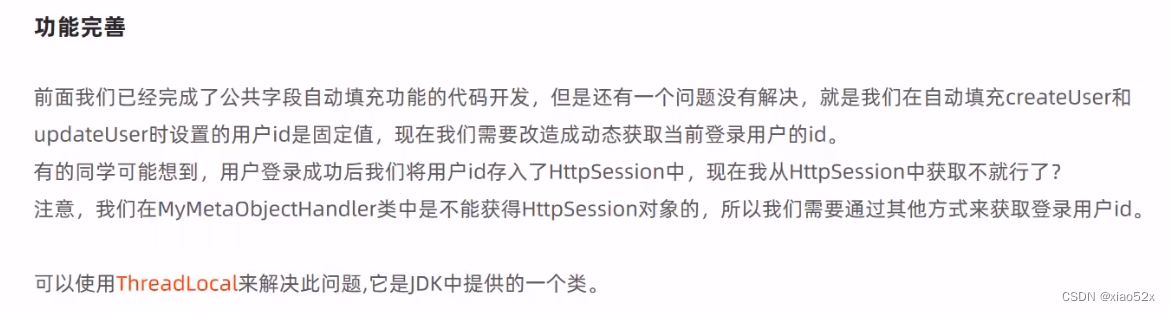
/**
 *  基于ThreadLocal封装工具类,用户保存和获取当前登录用户id
 */
public class BaseContext {
    //用来存储用户id
    private static ThreadLocal<Long> threadLocal = new ThreadLocal<>();

    /**
     * 设置值
     * @param id
     */
    public static void setCurrentId(Long id){
        threadLocal.set(id);
    }

    /**
     * 获取值
     * @return
     */
    public static Long getCurrentId(){
        return threadLocal.get();
    }

}
自定义异常
package com.xiao.reggie.commom;


/*
*自定义的业务异常
 */
//继承RuntimeException运行时异常
public class CustomException  extends RuntimeException {
    public CustomException(String message) {
        super(message);

    }
}
然后在外面前面写的GlobalExceptionHandler全局异常捕获器中添加该异常,这样就可以把相关的异常信息显示给前端操作的人员看见
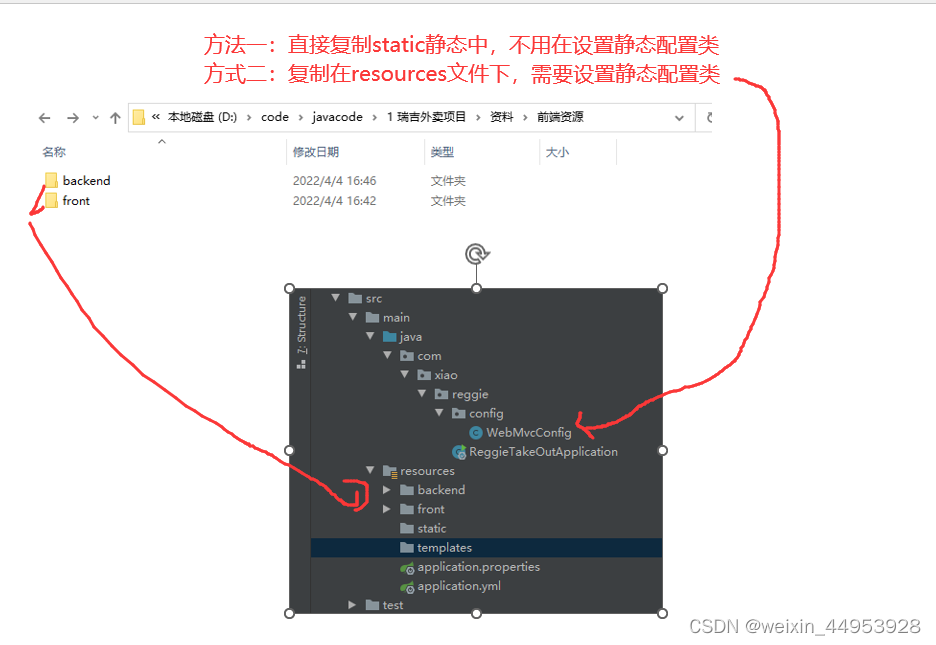
2.2.4 配置类(config)
配置类:设置静态资源映射,springboot一般默认在static文件下,如果要改变
package com.xiao.reggie.config;

import lombok.extern.slf4j.Slf4j;
import org.springframework.context.annotation.Configuration;
import org.springframework.web.servlet.config.annotation.ResourceHandlerRegistry;
import org.springframework.web.servlet.config.annotation.WebMvcConfigurationSupport;

/**
 * 配置类:设置静态资源映射,springboot一般默认在static文件下,如果要改变
 * @author LJM
 * @create 2022/4/14
 */
@Slf4j
@Configuration
public class WebMvcConfig extends WebMvcConfigurationSupport{
    /**
     * 设置资源映射
     * @param registry
     * 前面表示的是浏览器访问的请求
     * 后面表示的是要把请求映射到哪里去
     */
    @Override
    protected void addResourceHandlers(ResourceHandlerRegistry registry) {
        log.info("开始进行静态资源映射");
        //前面是前端传过来的。 classpath:对应的就是resources目录
        registry.addResourceHandler("/backend/**").addResourceLocations("classpath:/backend/");
        registry.addResourceHandler("/front/**").addResourceLocations("classpath:/front/");
    }

//    /**
//     * 写了common中后,然后写这个
//     * 扩展mvc框架的消息转换器
//     * @param converters
//     */
//    @Override
//    protected void extendMessageConverters(List<HttpMessageConverter<?>> converters) {
//        //log.info("扩展消息转换器...");
//        //创建消息转换器对象
//        MappingJackson2HttpMessageConverter messageConverter = new MappingJackson2HttpMessageConverter();
//        //设置对象转换器,底层使用Jackson将Java对象转为json
//        messageConverter.setObjectMapper(new JacksonObjectMapper());
//        //将上面的消息转换器对象追加到mvc框架的转换器集合中
//        //转换器是有优先级顺序的,这里我们把自己定义的消息转换器设置为第一优先级,所以会优先使用我们的转换器来进行相关数据进行转换,如果我们的转换器没有匹配到相应的数据来转换,那么就会去寻找第二个优先级的转换器,以此类推
//        converters.add(0,messageConverter);
//    }

}
分页插件

import com.baomidou.mybatisplus.extension.plugins.MybatisPlusInterceptor;
import com.baomidou.mybatisplus.extension.plugins.inner.PaginationInnerInterceptor;
import org.springframework.context.annotation.Bean;
import org.springframework.context.annotation.Configuration;
/**
 * 配置mybatis-plus提供的分页插件拦截器
 */

@Configuration
public class MybatisPlusConfig {
    @Bean
    public MybatisPlusInterceptor mybatisPlusInterceptor(){
        //1 创建MybatisPlusInterceptor拦截器对象
        MybatisPlusInterceptor mpInterceptor=new MybatisPlusInterceptor();
        //2 添加分页拦截器
        mpInterceptor.addInnerInterceptor(new PaginationInnerInterceptor());
        return mpInterceptor;
    }

}
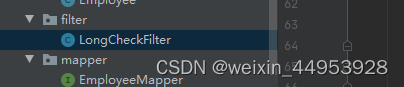
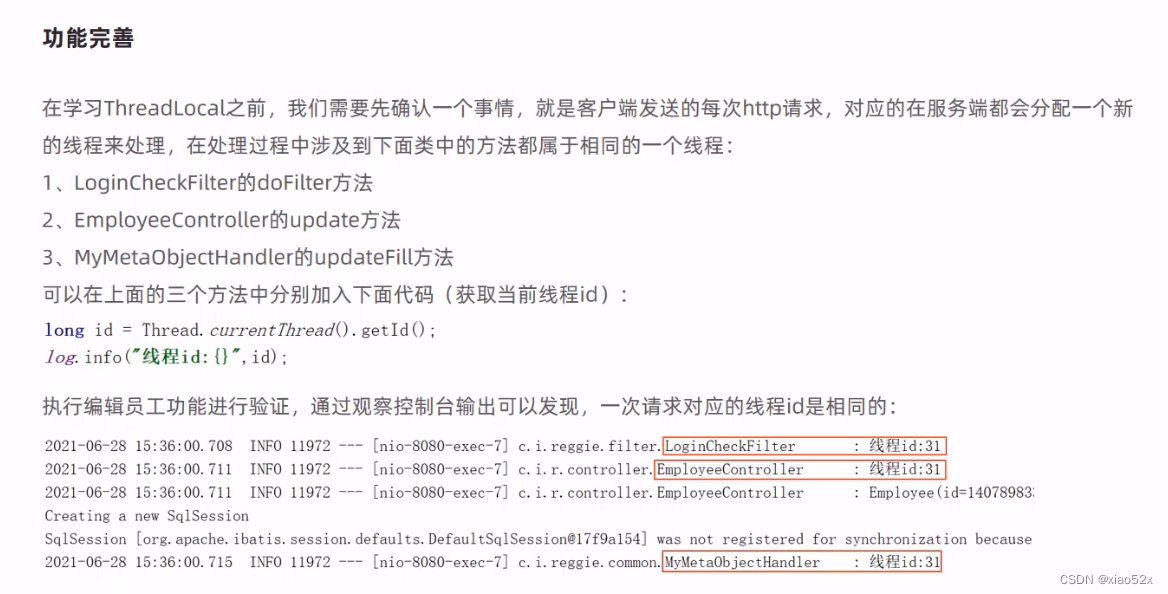
2.2.5 filter(这个文件放所有的过滤器代码)
- 过滤器:防止没有登陆就访问到页面里的内容

import com.alibaba.fastjson.JSON;
import com.xiao.reggie.commom.BaseContext;
import com.xiao.reggie.commom.R;
import lombok.extern.slf4j.Slf4j;
import org.springframework.util.AntPathMatcher;
import javax.servlet.*;
import javax.servlet.annotation.WebFilter;
import javax.servlet.http.HttpServletRequest;
import javax.servlet.http.HttpServletResponse;
import java.io.IOException;
/**
* @author LJM
* @create 2022/4/15
* 检查用户是否已经完成登陆
* filterName过滤器名字
* urlPatterns拦截的请求,这里是拦截所有的请求
*
*/
@WebFilter(filterName = "LongCheckFilter",urlPatterns = "/*")
@Slf4j
public class LongCheckFilter implements Filter{
//路径匹配器,支持通配符
public static final AntPathMatcher PATH_MATCHER = new AntPathMatcher();
@Override
public void doFilter(ServletRequest servletRequest, ServletResponse servletResponse, FilterChain filterChain) throws IOException, ServletException {
对请求和响应进行强转,我们需要的是带http的
HttpServletRequest request = (HttpServletRequest) servletRequest;
HttpServletResponse response = (HttpServletResponse) servletResponse;
// log.info("拦截到的请求:{}",request.getRequestURL());
// //对请求进行放行
// filterChain.doFilter(request,response);
//1、获取本次请求的URI
String requestURL = request.getRequestURI();
//定义不需要处理的请求路径 比如静态资源(静态页面我们不需要拦截,因为此时的静态页面是没有数据的)
String[] urls = new String[]{
"/employee/login",
"/employee/logout",
"/backend/**",
"/front/**"
};
//做调试用的
//log.info("拦截到请求:{}",requestURL);
//2、判断本次请求是否需要处理
boolean check = check(urls, requestURL);
//3、如果不需要处理,则直接放行
if(check){
//log.info("本次请求{}不需要处理",requestURL);
filterChain.doFilter(request,response);
return;
}
//4、判断登录状态,如果已登录,则直接放行
if(request.getSession().getAttribute("employee") != null){
//log.info("用户已登录,用户id为:{}",request.getSession().getAttribute("employee"));
Long emId = (Long) request.getSession().getAttribute("employee");
BaseContext.setCurrentId(emId);
filterChain.doFilter(request,response);
return;
}
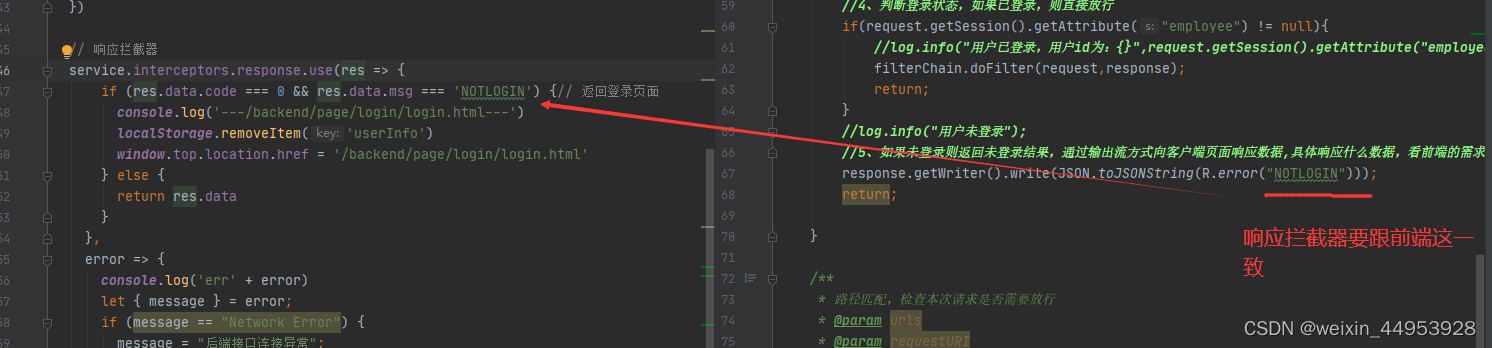
//log.info("用户未登录");
//5、如果未登录则返回未登录结果,通过输出流方式向客户端页面响应数据,具体响应什么数据,看前端的需求,然后前端会根据登陆状态做页面跳转
response.getWriter().write(JSON.toJSONString(R.error("NOTLOGIN")));
return;
}
/**
* 路径匹配,检查本次请求是否需要放行
* @param urls
* @param requestURI
* @return
*/
public boolean check(String[] urls,String requestURI){
for (String url : urls) {
//把浏览器发过来的请求和我们定义的不拦截的url做比较,匹配则放行
boolean match = PATH_MATCHER.match(url, requestURI);
if(match){
return true;
}
}
return false;
}
}
3 、前端(已经写好的前端)
3.1 导入前端
这样就可以访问
4 ,一些详细
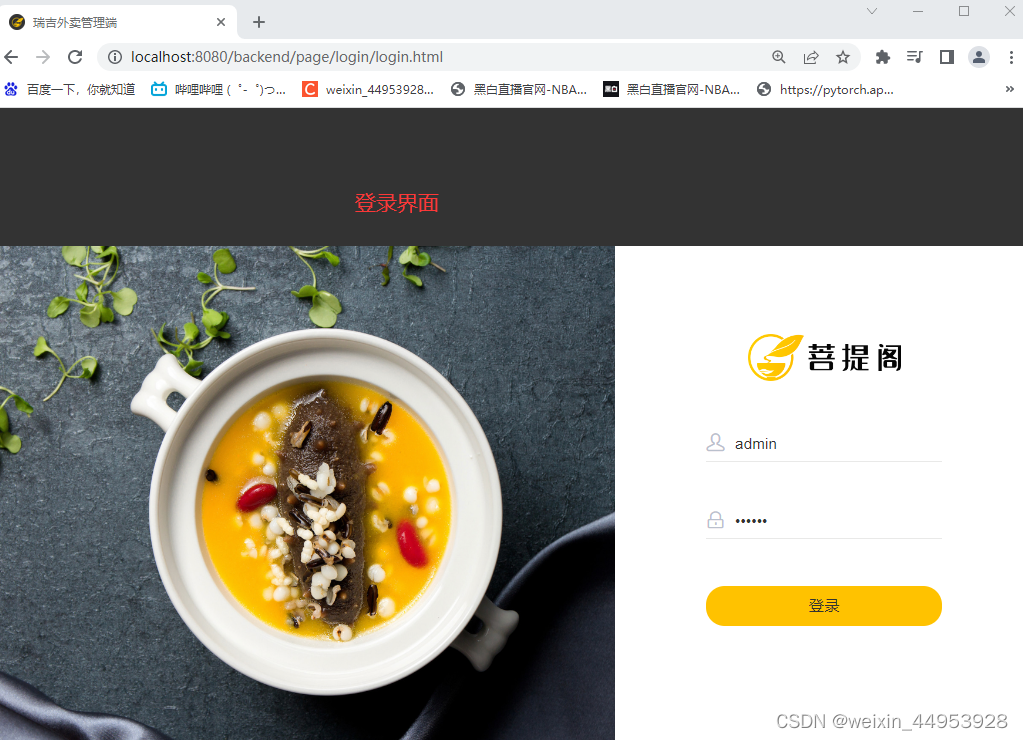
4.1 登陆功能
http://localhost:8080/backend/page/login/login.html
后端
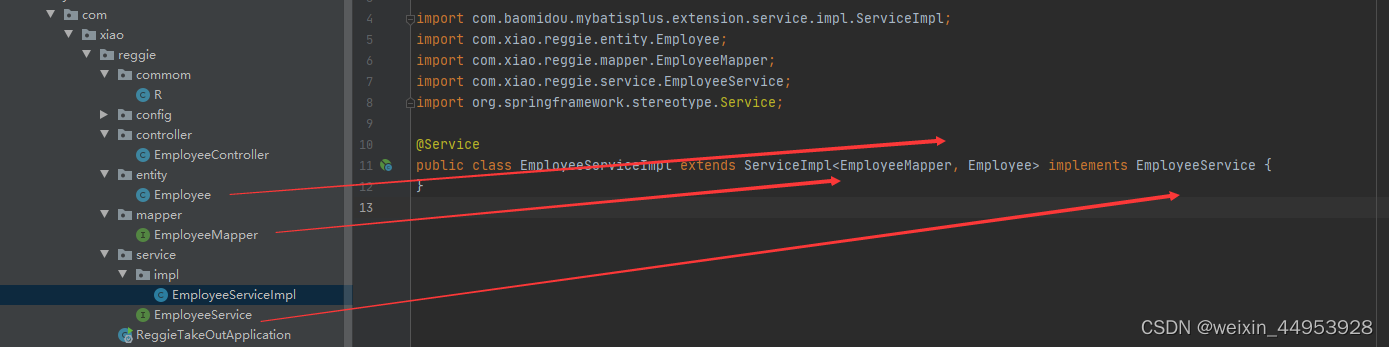
先调用使用类entity下的,(跟数据库相对应),再创建dao层(mapper),然后再创建服务层
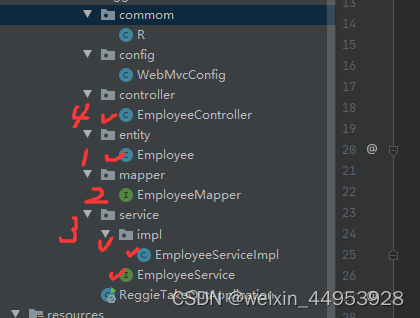
先调用使用类entity下的
import com.baomidou.mybatisplus.annotation.FieldFill;
import com.baomidou.mybatisplus.annotation.TableField;
import lombok.Data;
import java.io.Serializable;
import java.time.LocalDateTime;
@Data
public class Employee implements Serializable {
private static final long serialVersionUID = 1L;
private Long id;
private String username;
private String name;
private String password;
private String phone;
private String sex;
private String idNumber; //身份证号码,驼峰命名法
private Integer status;
private LocalDateTime createTime;
private LocalDateTime updateTime;
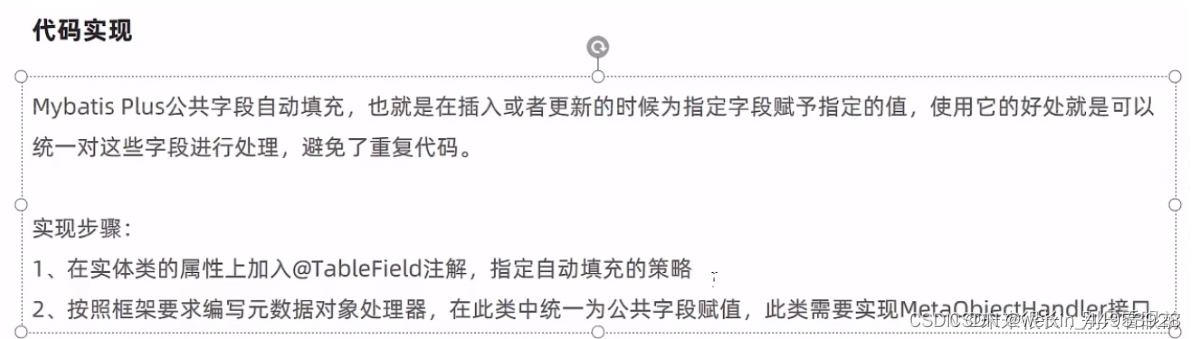
@TableField(fill = FieldFill.INSERT)
private Long createUser;
@TableField(fill = FieldFill.INSERT_UPDATE)
private Long updateUser;
}
再创建dao层(mapper)
import com.baomidou.mybatisplus.core.mapper.BaseMapper;
import com.xiao.reggie.entity.Employee;
import org.apache.ibatis.annotations.Mapper;

@Mapper
public interface EmployeeMapper extends BaseMapper<Employee> {
}
最后创建服务层(service)
- EmployeeService
import com.baomidou.mybatisplus.extension.service.IService;
import com.xiao.reggie.entity.Employee;

public interface EmployeeService extends IService<Employee> {
}
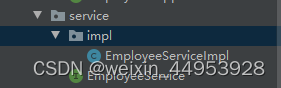
- impl 文件下的EmployeeServiceImpl
import com.baomidou.mybatisplus.extension.service.impl.ServiceImpl;
import com.xiao.reggie.entity.Employee;
import com.xiao.reggie.mapper.EmployeeMapper;
import com.xiao.reggie.service.EmployeeService;
import org.springframework.stereotype.Service;

@Service
//ServiceImpl<对应的接口类mapper层,对应的实用类>
public class EmployeeServiceImpl extends ServiceImpl<EmployeeMapper, Employee> implements EmployeeService {
}
最后创建controller
import com.baomidou.mybatisplus.core.conditions.query.LambdaQueryWrapper;
import com.xiao.reggie.commom.R;
import com.xiao.reggie.entity.Employee;
import com.xiao.reggie.service.EmployeeService;
import lombok.extern.slf4j.Slf4j;
import org.springframework.beans.factory.annotation.Autowired;
import org.springframework.util.DigestUtils;
import org.springframework.web.bind.annotation.PostMapping;
import org.springframework.web.bind.annotation.RequestBody;
import org.springframework.web.bind.annotation.RequestMapping;
import org.springframework.web.bind.annotation.RestController;
import javax.servlet.http.HttpServletRequest;
@Slf4j
@RestController
@RequestMapping("/employee")
public class EmployeeController {
@Autowired
private EmployeeService employeeService;
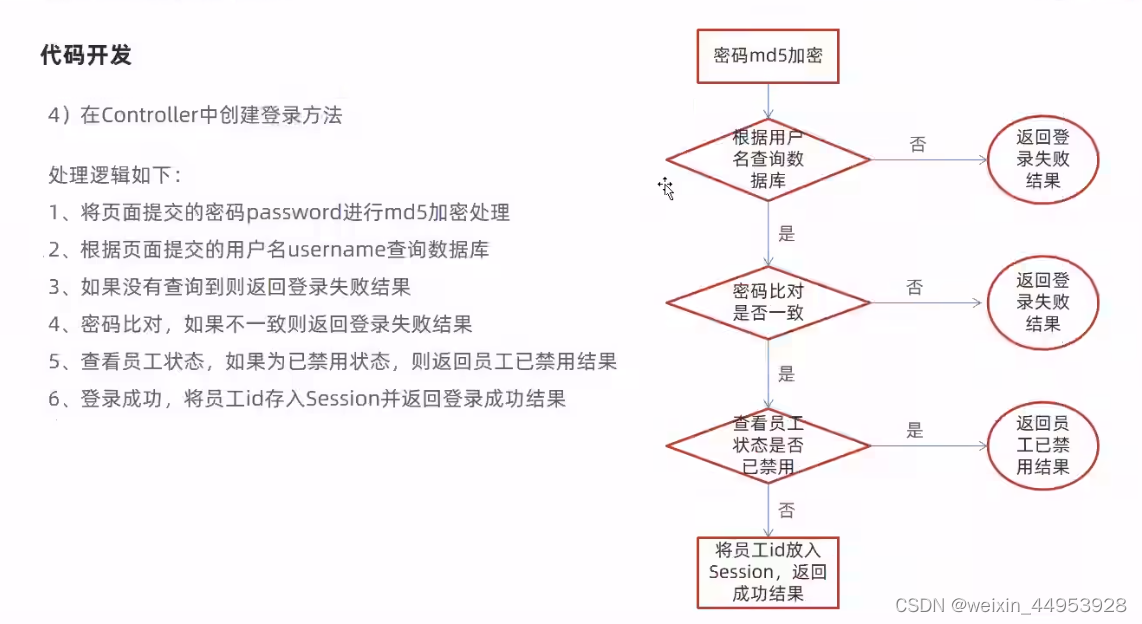
/**
* 员工登陆
* @param request
* @param employee
* @return
*/
//返回值R<>
@PostMapping("/login") //使用restful风格开发 //@RequestBody:接收前端的json数据,这个json数据是在请求体中的
public R<Employee> login(HttpServletRequest request, @RequestBody Employee employee){
//这里为什么还有接收一个request对象的数据?
//登陆成功后,我们需要从请求中获取员工的id,并且把这个id存到session中,这样我们想要获取登陆对象的时候就可以随时获取
//1、将页面提交的密码password进行md5加密处理 (数据库中的密码md5加密了)
String password = employee.getPassword();//从前端用户登录拿到的用户密码
password = DigestUtils.md5DigestAsHex(password.getBytes());//对用户密码进行加密
//2、根据页面提交的用户名username查询数据库
LambdaQueryWrapper<Employee> queryWrapper = new LambdaQueryWrapper<>();
queryWrapper.eq(Employee::getUsername,employee.getUsername());
//在设计数据库的时候我们对username使用了唯一索引,所以这里可以使用getOne方法
Employee emp = employeeService.getOne(queryWrapper);//这里的切入Wrapper是什么?
//3、如果没有查询到则返回登录失败结果
if (emp == null ){
return R.error("用户不存在");
}
//4、密码比对,如果不一致则返回登录失败结果
if (!emp.getPassword().equals(password)){
//emp.getPassword()用户存在后从数据库查询到的密码(加密状态的) password是前端用户自己输入的密码(已经加密处理)
return R.error("密码不正确");
}
//5、查看员工状态,如果为已禁用状态,则返回员工已禁用结果
if (emp.getStatus() == 0){
return R.error("账号已禁用");
}
//6、登录成功,将员工id存入Session并返回登录成功结果
request.getSession().setAttribute("employee",emp.getId());
//把从数据库中查询到的用户返回出去
return R.success(emp);
}
}
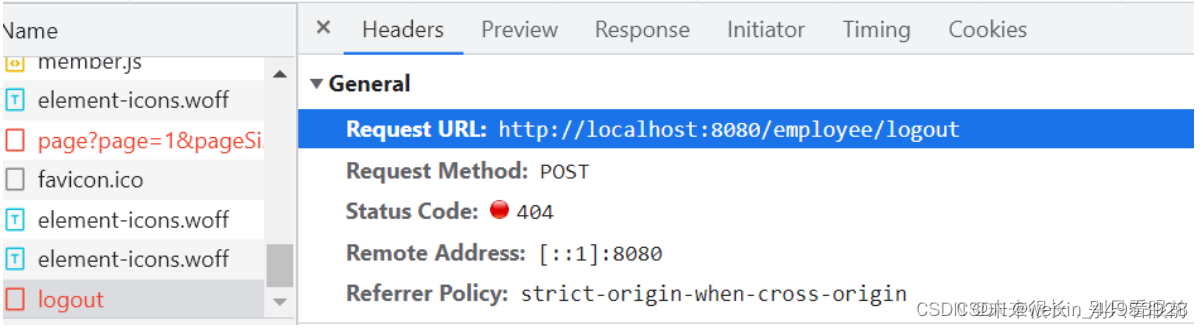
4.2 退出功能
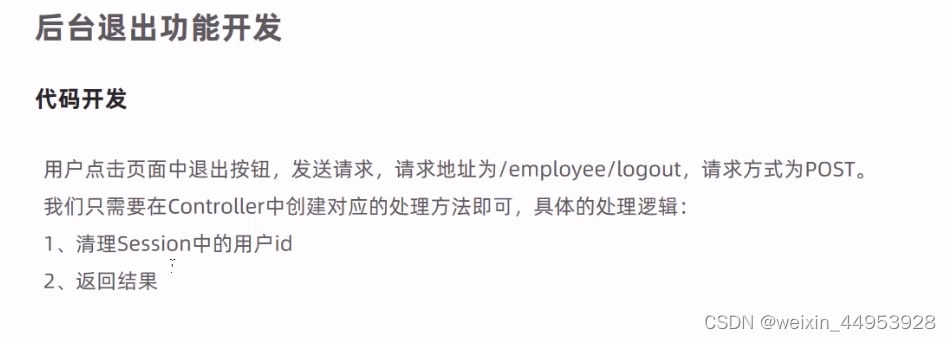
点击退出按钮,发送退出的请求:http://localhost:8080/employee/logout
跟登陆功能在一个控制器中(EmployeeController )
  /**
     * 退出功能
     * ①在controller中创建对应的处理方法来接受前端的请求,请求方式为post;
     * ②清理session中的用户id
     * ③返回结果(前端页面会进行跳转到登录页面)
     * @return
     */
    @PostMapping("/logout")
    public R<String> logout(HttpServletRequest request){
        //清理session中的用户id
        request.getSession().removeAttribute("employee");
        return R.success("退出成功");
    }
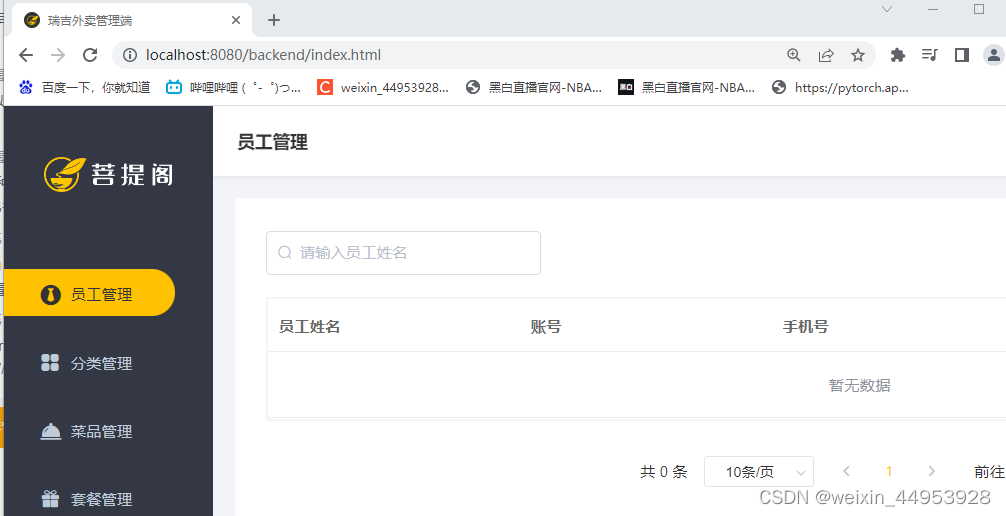
4.3 员工管理模块
4.3.1 完善登陆功能(过滤器)
问题分析:前面的登陆存在一个问题,如果用户不进行登陆,直接访问系统的首页,照样可以正常访问,这种设计是不合理的,我们希望看到的效果是只有完成了登陆后才可以访问系统中的页面,如果没有登陆则跳转到登陆页面;
那么如何实现?
答案就是使用过滤器或者是拦截器,在拦截器或者是过滤器中判断用户是否已经完成了登陆,如果没有登陆则跳转到登陆页面;
代码实现:这里使用的是过滤器;
import com.alibaba.fastjson.JSON;
import com.xiao.reggie.commom.R;
import lombok.extern.slf4j.Slf4j;
import org.springframework.util.AntPathMatcher;

import javax.servlet.*;
import javax.servlet.annotation.WebFilter;
import javax.servlet.http.HttpServletRequest;
import javax.servlet.http.HttpServletResponse;
import java.io.IOException;
/**
 * @author LJM
 * @create 2022/4/15
 * 检查用户是否已经完成登陆
 * filterName过滤器名字
 * urlPatterns拦截的请求,这里是拦截所有的请求
 *
 */

@WebFilter(filterName = "LongCheckFilter",urlPatterns = "/*")
@Slf4j
public class LongCheckFilter implements Filter{
    //路径匹配器,支持通配符
    public static final AntPathMatcher PATH_MATCHER = new AntPathMatcher();

    @Override
    public void doFilter(ServletRequest servletRequest, ServletResponse servletResponse, FilterChain filterChain) throws IOException, ServletException {
        对请求和响应进行强转,我们需要的是带http的
        HttpServletRequest request = (HttpServletRequest) servletRequest;
        HttpServletResponse response = (HttpServletResponse) servletResponse;
//        log.info("拦截到的请求:{}",request.getRequestURL());
//        //对请求进行放行
//        filterChain.doFilter(request,response);

        //1、获取本次请求的URI
        String requestURL = request.getRequestURI();
        //定义不需要处理的请求路径  比如静态资源(静态页面我们不需要拦截,因为此时的静态页面是没有数据的)
        String[] urls = new String[]{
                "/employee/login",
                "/employee/logout",
                "/backend/**",
                "/front/**"
        };

        //做调试用的
        //log.info("拦截到请求:{}",requestURL);

        //2、判断本次请求是否需要处理
        boolean check = check(urls, requestURL);
        //3、如果不需要处理,则直接放行
        if(check){
            //log.info("本次请求{}不需要处理",requestURL);
            filterChain.doFilter(request,response);
            return;
        }
        //4、判断登录状态,如果已登录,则直接放行
        if(request.getSession().getAttribute("employee") != null){
            //log.info("用户已登录,用户id为:{}",request.getSession().getAttribute("employee"));
            filterChain.doFilter(request,response);
            return;
        }
        //log.info("用户未登录");
        //5、如果未登录则返回未登录结果,通过输出流方式向客户端页面响应数据,具体响应什么数据,看前端的需求,然后前端会根据登陆状态做页面跳转
        response.getWriter().write(JSON.toJSONString(R.error("NOTLOGIN")));
        return;

    }

    /**
     * 路径匹配,检查本次请求是否需要放行
     * @param urls
     * @param requestURI
     * @return
     */
    public boolean check(String[] urls,String requestURI){
        for (String url : urls) {
            //把浏览器发过来的请求和我们定义的不拦截的url做比较,匹配则放行
            boolean match = PATH_MATCHER.match(url, requestURI);
            if(match){
                return true;
            }
        }
        return false;
    }

}
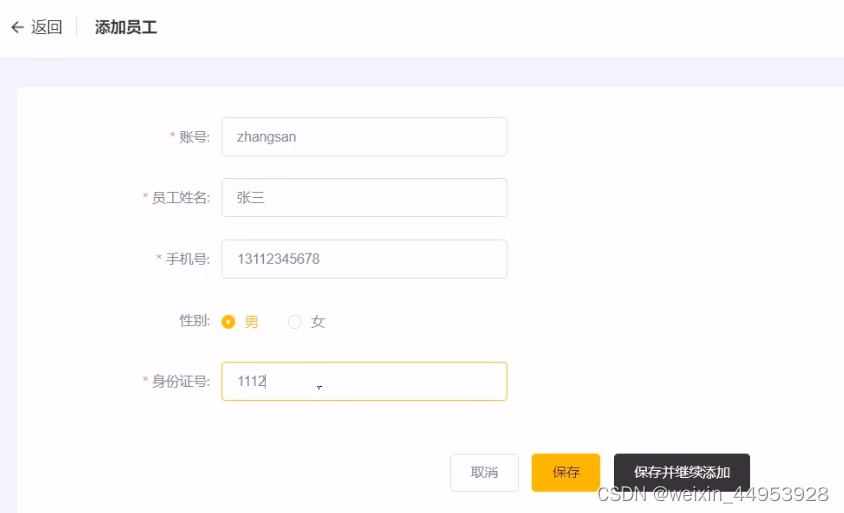
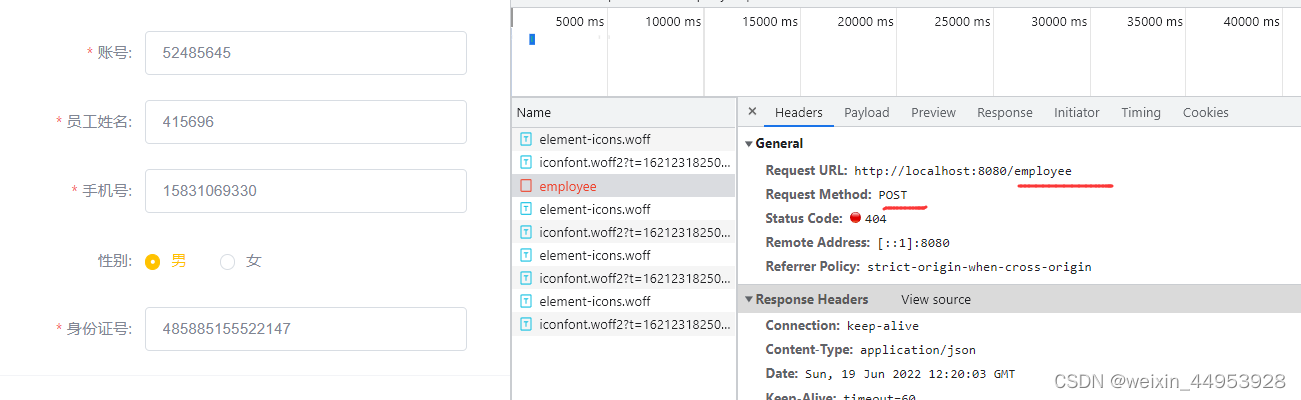
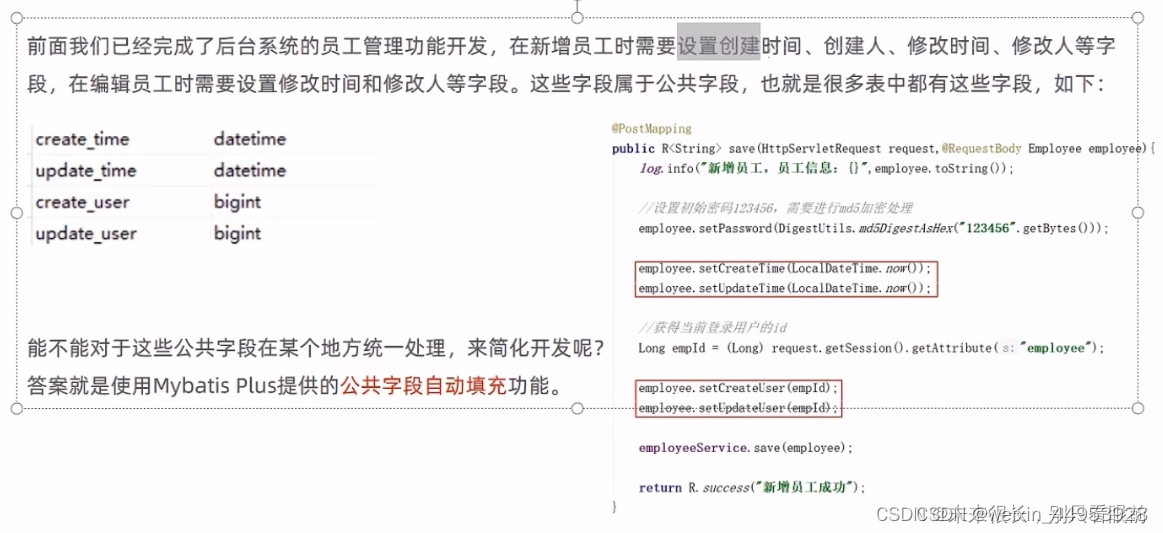
4.3.2 新增员工
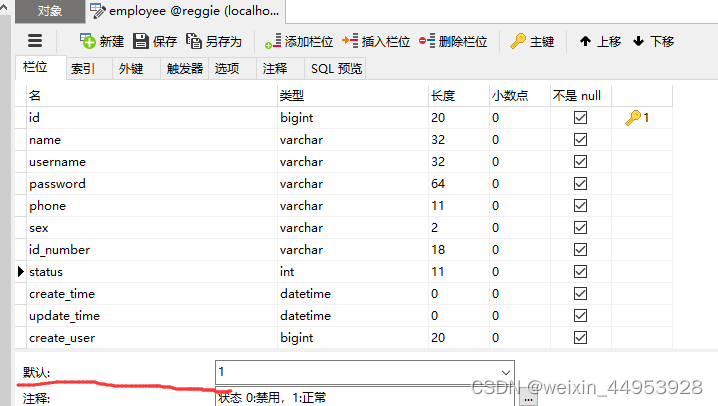
新增员工,其实就是将我们的新增页面录入的员工数据插入到employee表;注意:employee表中对username字段加入了唯一的约束,因为username是员工的登陆账号,必须是唯一的!
employee表中的status字段默认设置为1,表示员工状态可以正常登陆;

跟登陆功能在一个控制器中(EmployeeController )
 /**
     * 新增员工
     * @param employee
     * @return
     */
    @PostMapping()//因为请求就是 /employee 在类上已经写了,所以咱俩不用再写了
    public R<String> save(HttpServletRequest request,@RequestBody Employee employee){

        //对新增的员工设置初始化密码123456,需要进行md5加密处理,后续员工可以直接修改密码
        employee.setPassword(DigestUtils.md5DigestAsHex("123456".getBytes()));

        //当前的时间:LocalDateTime.now()
        employee.setCreateTime(LocalDateTime.now());
        employee.setUpdateTime(LocalDateTime.now());

        //获得当前登录用户的id
        Long empId = (Long) request.getSession().getAttribute("employee");

        employee.setCreateUser(empId); //创建人的id,就是当前用户的id(在进行添加操作的id)
        employee.setUpdateUser(empId);//最后的更新人是谁
        //mybatis提供的新增方法
        employeeService.save(employee);

        return R.success("新增员工成功");
    }

全局捕获异常
import lombok.extern.slf4j.Slf4j;
import org.springframework.stereotype.Controller;
import org.springframework.web.bind.annotation.ControllerAdvice;
import org.springframework.web.bind.annotation.ExceptionHandler;
import org.springframework.web.bind.annotation.ResponseBody;
import org.springframework.web.bind.annotation.RestController;
import java.sql.SQLIntegrityConstraintViolationException;


//捕获所有带RestController注解和Controller注解的类的异常
@ControllerAdvice(annotations = {RestController.class, Controller.class}) //表示拦截哪些类型的controller注解
@ResponseBody
@Slf4j
public class GlobalExceptionHandler {
    /**
     * 处理SQLIntegrityConstraintViolationException异常的方法
     * @return
     */
    @ExceptionHandler(SQLIntegrityConstraintViolationException.class)
    public R<String> exceptionHandle(SQLIntegrityConstraintViolationException exception){
        log.error(exception.getMessage()); //报错记得打日志
        if (exception.getMessage().contains("Duplicate entry")){
            //获取已经存在的用户名,这里是从报错的异常信息中获取的
            String[] split = exception.getMessage().split(" ");
            String msg = split[2] + "这个用户名已经存在";
            return R.error(msg);
        }
        return R.error("未知错误");
    }

}
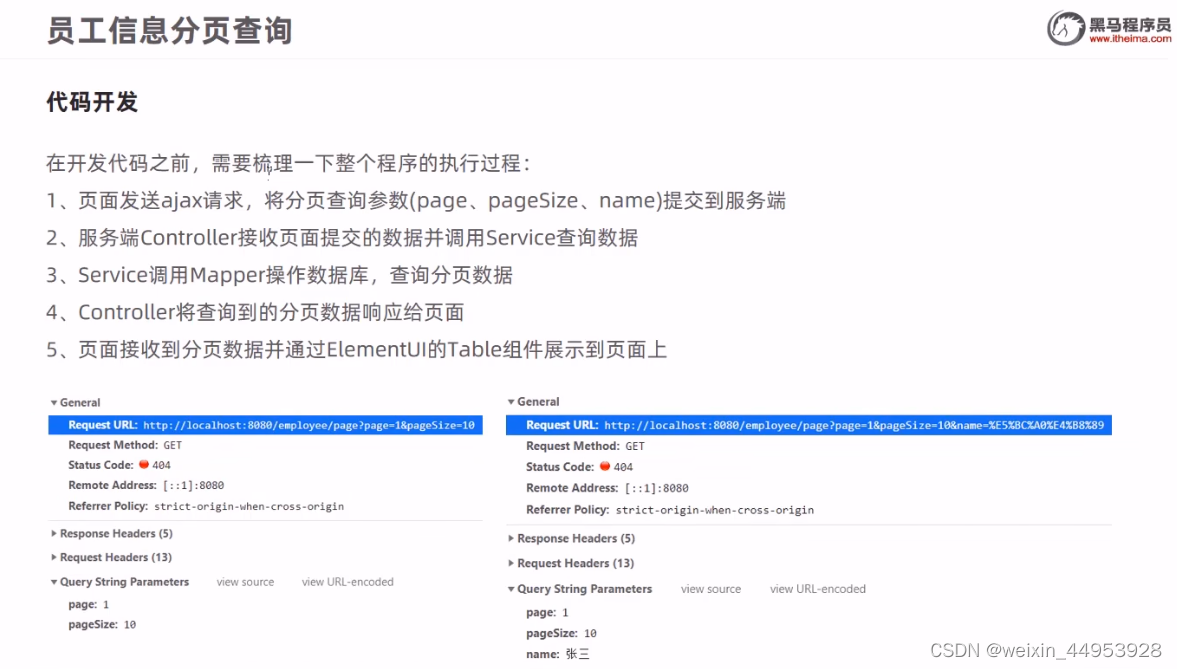
4.3.3 员工信息分页查询
分页插件
import com.baomidou.mybatisplus.extension.plugins.MybatisPlusInterceptor;
import com.baomidou.mybatisplus.extension.plugins.inner.PaginationInnerInterceptor;
import org.springframework.context.annotation.Bean;
import org.springframework.context.annotation.Configuration;
/**
 * 配置mybatis-plus提供的分页插件拦截器
 */

@Configuration
public class MybatisPlusConfig {
    @Bean
    public MybatisPlusInterceptor mybatisPlusInterceptor(){
        //1 创建MybatisPlusInterceptor拦截器对象
        MybatisPlusInterceptor mpInterceptor=new MybatisPlusInterceptor();
        //2 添加分页拦截器
        mpInterceptor.addInnerInterceptor(new PaginationInnerInterceptor());
        return mpInterceptor;
    }

}
/**
* 员工信息分页
* @param page 当前页数
* @param pageSize 当前页最多存放数据条数,就是这一页查几条数据
* @param name 根据name查询员工的信息
* @return
*/
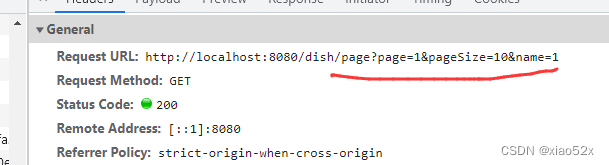
@GetMapping("/page")
public R<Page> page(int page,int pageSize,String name){
//这里之所以是返回page对象(mybatis-plus的page对象),是因为前端需要这些分页的数据(比如当前页,总页数)
//在编写前先测试一下前端传过来的分页数据有没有被我们接受到
//log.info("page = {},pageSize = {},name = {}" ,page,pageSize,name);
//构造分页构造器 就是page对象
Page pageInfo = new Page(page,pageSize);
//构造条件构造器 就是动态的封装前端传过来的过滤条件 记得加泛型
LambdaQueryWrapper<Employee> queryWrapper = new LambdaQueryWrapper();
//根据条件查询 注意这里的条件是不为空
queryWrapper.like(StringUtils.isNotEmpty(name),Employee::getName,name);
//添加一个排序条件
queryWrapper.orderByDesc(Employee::getUpdateTime);
//执行查询 这里不用封装了mybatis-plus帮我们做好了
employeeService.page(pageInfo,queryWrapper);
return R.success(pageInfo);
}
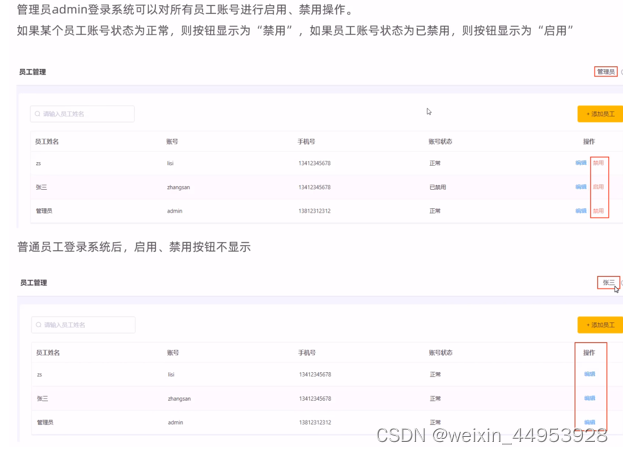
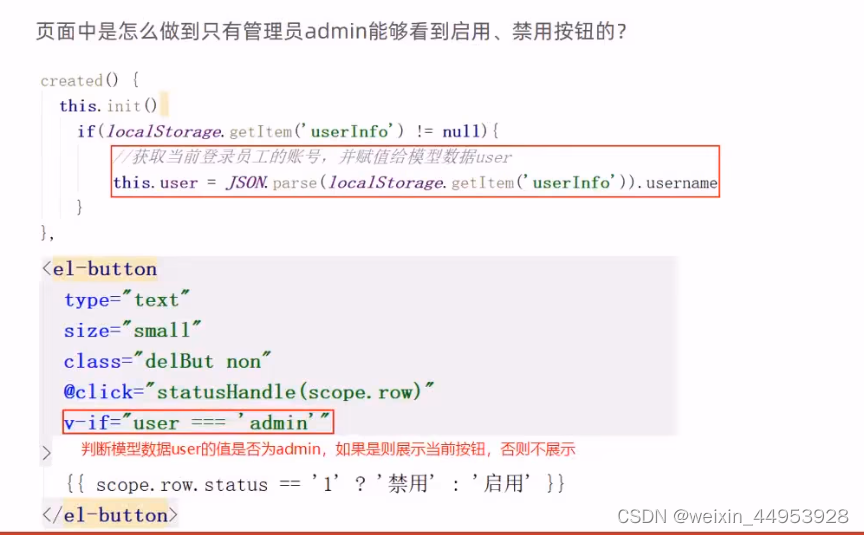
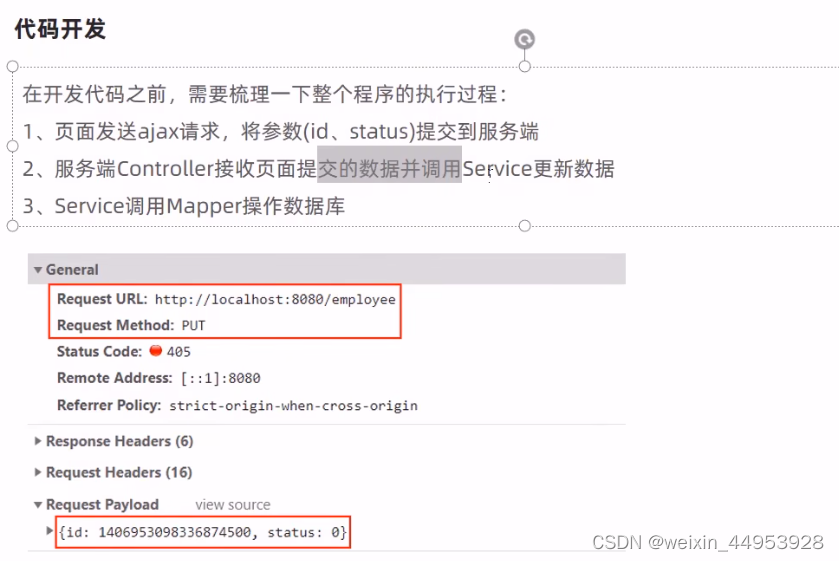
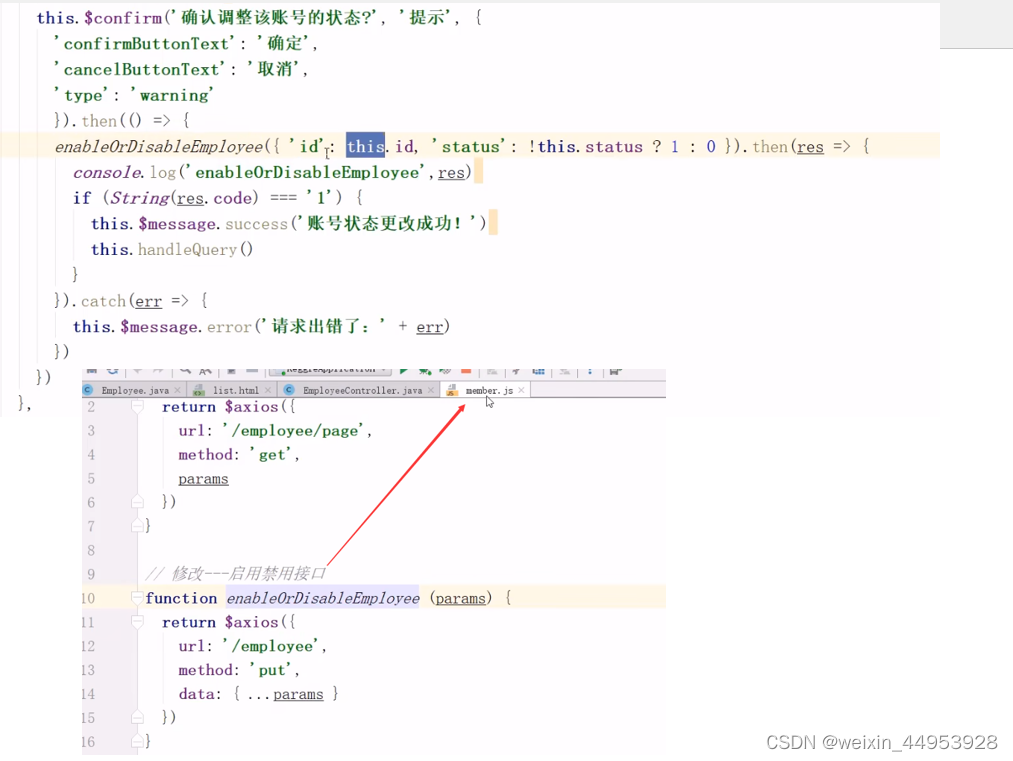
4.3.4 启用/禁用员工账号
.
/**
     * 根据id修改员工信息
     * @param employee
     * @return
     */
    @PutMapping
    public R<String> update(HttpServletRequest request,@RequestBody Employee employee){
        log.info(employee.toString());

        Long empId = (Long)request.getSession().getAttribute("employee");//获取当前登录欧诺个户的
        employee.setUpdateTime(LocalDateTime.now());
        employee.setUpdateUser(empId);
        employeeService.updateById(employee);

        return R.success("员工信息修改成功");
    }
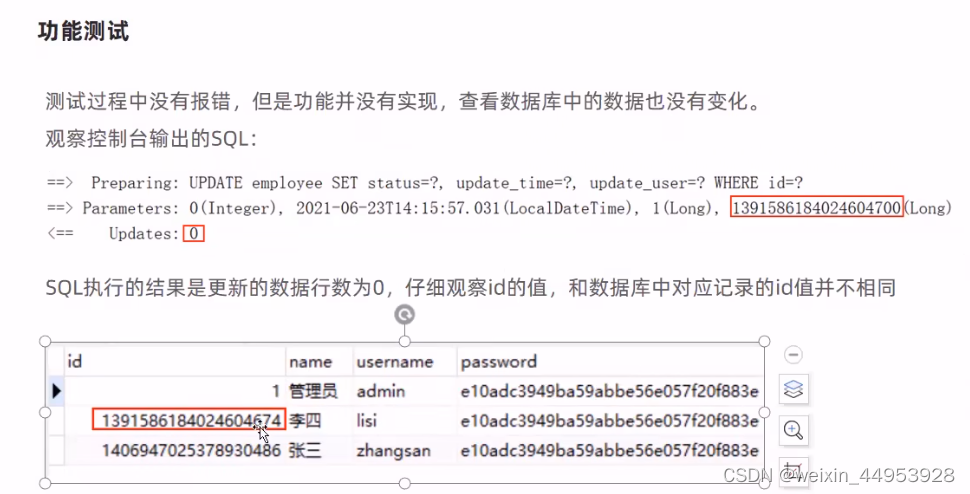
原因是:mybatis-plus对id使用了雪花算法,所以存入数据库中的id是19为长度,但是前端的js只能保证数据的前16位的数据的精度,对我们id后面三位数据进行了四舍五入,所以就出现了精度丢失;就会出现前度传过来的id和数据里面的id不匹配,就没办法正确的修改到我们想要的数据;
当然另一种解决bug的方法是:关闭mybatis-plus的雪花算法来处理ID,我们使用自增ID的策略来往数据库添加id就行;
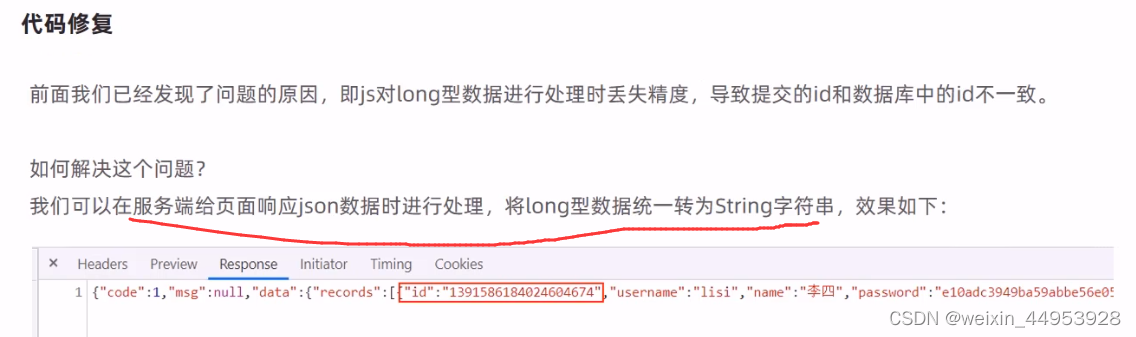
(1)
package com.xiao.reggie.commom;

import com.fasterxml.jackson.databind.DeserializationFeature;
import com.fasterxml.jackson.databind.ObjectMapper;
import com.fasterxml.jackson.databind.module.SimpleModule;
import com.fasterxml.jackson.databind.ser.std.ToStringSerializer;
import com.fasterxml.jackson.datatype.jsr310.deser.LocalDateDeserializer;
import com.fasterxml.jackson.datatype.jsr310.deser.LocalDateTimeDeserializer;
import com.fasterxml.jackson.datatype.jsr310.deser.LocalTimeDeserializer;
import com.fasterxml.jackson.datatype.jsr310.ser.LocalDateSerializer;
import com.fasterxml.jackson.datatype.jsr310.ser.LocalDateTimeSerializer;
import com.fasterxml.jackson.datatype.jsr310.ser.LocalTimeSerializer;
import java.math.BigInteger;
import java.time.LocalDate;
import java.time.LocalDateTime;
import java.time.LocalTime;
import java.time.format.DateTimeFormatter;
import static com.fasterxml.jackson.databind.DeserializationFeature.FAIL_ON_UNKNOWN_PROPERTIES;

/**
 * 对象映射器:基于jackson将Java对象转为json,或者将json转为Java对象
 * 将JSON解析为Java对象的过程称为 [从JSON反序列化Java对象]
 * 从Java对象生成JSON的过程称为 [序列化Java对象到JSON]
 */
public class JacksonObjectMapper extends ObjectMapper {

    public static final String DEFAULT_DATE_FORMAT = "yyyy-MM-dd";
    public static final String DEFAULT_DATE_TIME_FORMAT = "yyyy-MM-dd HH:mm:ss";
    public static final String DEFAULT_TIME_FORMAT = "HH:mm:ss";

    public JacksonObjectMapper() {
        super();
        //收到未知属性时不报异常
        this.configure(FAIL_ON_UNKNOWN_PROPERTIES, false);

        //反序列化时,属性不存在的兼容处理
        this.getDeserializationConfig().withoutFeatures(DeserializationFeature.FAIL_ON_UNKNOWN_PROPERTIES);


        SimpleModule simpleModule = new SimpleModule()
                .addDeserializer(LocalDateTime.class, new LocalDateTimeDeserializer(DateTimeFormatter.ofPattern(DEFAULT_DATE_TIME_FORMAT)))
                .addDeserializer(LocalDate.class, new LocalDateDeserializer(DateTimeFormatter.ofPattern(DEFAULT_DATE_FORMAT)))
                .addDeserializer(LocalTime.class, new LocalTimeDeserializer(DateTimeFormatter.ofPattern(DEFAULT_TIME_FORMAT)))

                .addSerializer(BigInteger.class, ToStringSerializer.instance)
                .addSerializer(Long.class, ToStringSerializer.instance)//将long型转换成string格式
                .addSerializer(LocalDateTime.class, new LocalDateTimeSerializer(DateTimeFormatter.ofPattern(DEFAULT_DATE_TIME_FORMAT)))
                .addSerializer(LocalDate.class, new LocalDateSerializer(DateTimeFormatter.ofPattern(DEFAULT_DATE_FORMAT)))
                .addSerializer(LocalTime.class, new LocalTimeSerializer(DateTimeFormatter.ofPattern(DEFAULT_TIME_FORMAT)));

        //注册功能模块 例如,可以添加自定义序列化器和反序列化器
        this.registerModule(simpleModule);
    }
}
import com.xiao.reggie.commom.JacksonObjectMapper;
import lombok.extern.slf4j.Slf4j;
import org.springframework.context.annotation.Configuration;
import org.springframework.http.converter.HttpMessageConverter;
import org.springframework.http.converter.json.MappingJackson2HttpMessageConverter;
import org.springframework.web.servlet.config.annotation.ResourceHandlerRegistry;
import org.springframework.web.servlet.config.annotation.WebMvcConfigurationSupport;
import java.util.List;
/**
* 配置类:设置静态资源映射,springboot一般默认在static文件下,如果要改变
* @author LJM
* @create 2022/4/14
*/
@Slf4j
@Configuration
public class WebMvcConfig extends WebMvcConfigurationSupport{
/**
* 设置资源映射
* @param registry
* 前面表示的是浏览器访问的请求
* 后面表示的是要把请求映射到哪里去
*/
@Override
protected void addResourceHandlers(ResourceHandlerRegistry registry) {
log.info("开始进行静态资源映射");
//前面是前端传过来的。 classpath:对应的就是resources目录
registry.addResourceHandler("/backend/**").addResourceLocations("classpath:/backend/");
registry.addResourceHandler("/front/**").addResourceLocations("classpath:/front/");
}
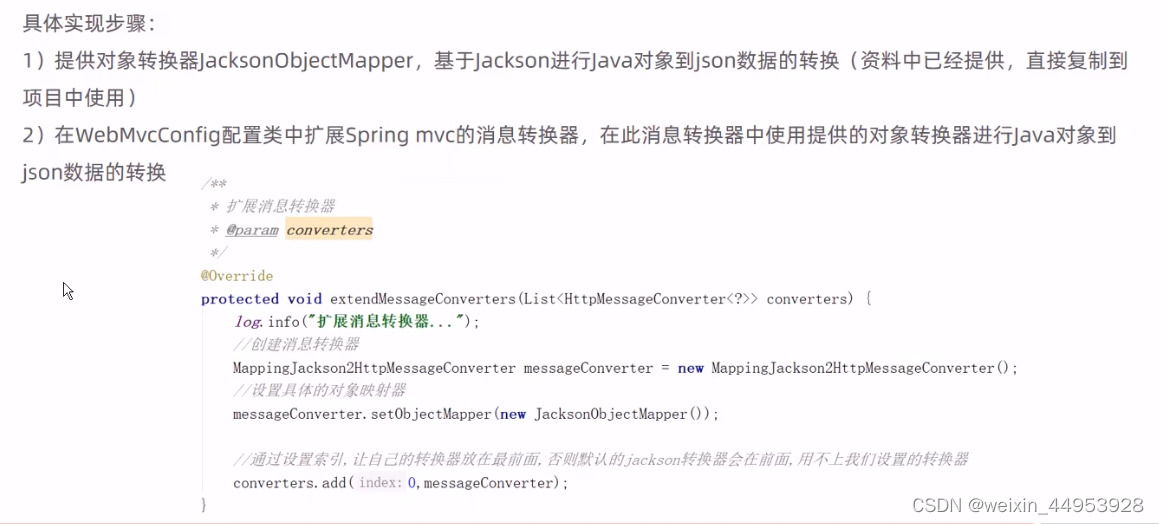
/**
* 写了common中后,然后写这个
* 扩展mvc框架的消息转换器
* @param converters
*/
@Override
protected void extendMessageConverters(List<HttpMessageConverter<?>> converters) {
//log.info("扩展消息转换器...");
//创建消息转换器对象
MappingJackson2HttpMessageConverter messageConverter = new MappingJackson2HttpMessageConverter();
//设置对象转换器,底层使用Jackson将Java对象转为json
messageConverter.setObjectMapper(new JacksonObjectMapper());
//将上面的消息转换器对象追加到mvc框架的转换器集合中
//转换器是有优先级顺序的,这里我们把自己定义的消息转换器设置为第一优先级,所以会优先使用我们的转换器来进行相关数据进行转换,如果我们的转换器没有匹配到相应的数据来转换,那么就会去寻找第二个优先级的转换器,以此类推
converters.add(0,messageConverter);
}
}
4.3.5 启用/禁用员工账号
/**
     * 根据前端传过来的员工id查询数据库进行数据会显给前端
     * @param id
     * @return
     */
    @GetMapping("/{id}")
    public R<Employee> getById(@PathVariable Long id){
        Employee employee = employeeService.getById(id);
        if (employee != null){
            return R.success(employee) ;
        }
        return R.error("没有查询到该员工信息");

    }
4.4 菜品分类管理
4.4.1 公共字段填充(这里有重点)
common中的MyMetaObjecthandler和BaseContext ,其中filter下的LongCheckFilter也要做修改
问题分析:
/**
 *  基于ThreadLocal封装工具类,用户保存和获取当前登录用户id
 */
public class BaseContext {
    //用来存储用户id
    private static ThreadLocal<Long> threadLocal = new ThreadLocal<>();

    /**
     * 设置值
     * @param id
     */
    public static void setCurrentId(Long id){
        threadLocal.set(id);
    }

    /**
     * 获取值
     * @return
     */
    public static Long getCurrentId(){
        return threadLocal.get();
    }

}
filter下的LongCheckFilter
 //4、判断登录状态,如果已登录,则直接放行
        if(request.getSession().getAttribute("employee") != null){
            //log.info("用户已登录,用户id为:{}",request.getSession().getAttribute("employee"));
            Long emId = (Long) request.getSession().getAttribute("employee");
            BaseContext.setCurrentId(emId);

            filterChain.doFilter(request,response);
            return;

        }
import com.baomidou.mybatisplus.core.handlers.MetaObjectHandler;
import lombok.extern.slf4j.Slf4j;
import org.apache.ibatis.reflection.MetaObject;
import org.springframework.stereotype.Component;

import java.time.LocalDateTime;

/**
 * 自定义元数据对象处理器
 */
@Slf4j
@Component   //注意:这个要记得交给spring容器管理,不然这个功能就没发用。。。。
//那么怎么确定你要添加的功能是不是要交给容器管理呢?就是你直接写了一个工具类或者是功能类,需要对数据库的数据或者是数据库数据的结果产生影响的时候,
// 你明明写了这样一个类,但是功能却没有生效,那么这个时候就要首先考虑是不是容器没有托管这个类
public class MyMetaObjecthandler implements MetaObjectHandler {

    /**
     * 插入操作,自动填充
     * @param metaObject
     */
    @Override
    public void insertFill(MetaObject metaObject) {
        metaObject.setValue("createTime", LocalDateTime.now());
        metaObject.setValue("updateTime",LocalDateTime.now());

//        metaObject.setValue("createUser", new Long(1));  //这里的id是不能直接获取的,所以这里先写死,后面教你怎么动态获取员工id
//        metaObject.setValue("updateUser",new Long(1));
        metaObject.setValue("createUser", BaseContext.getCurrentId());  //这里的id是不能直接获取的,所以这里先写死,后面教你怎么动态获取员工id
        metaObject.setValue("updateUser",BaseContext.getCurrentId());
    }

    /**
     * 更新操作,自动填充
     * @param metaObject
     */
    @Override
    public void updateFill(MetaObject metaObject) {
        metaObject.setValue("updateTime",LocalDateTime.now());
//        metaObject.setValue("updateUser",new Long(2));
        metaObject.setValue("updateUser",BaseContext.getCurrentId());
    }
}
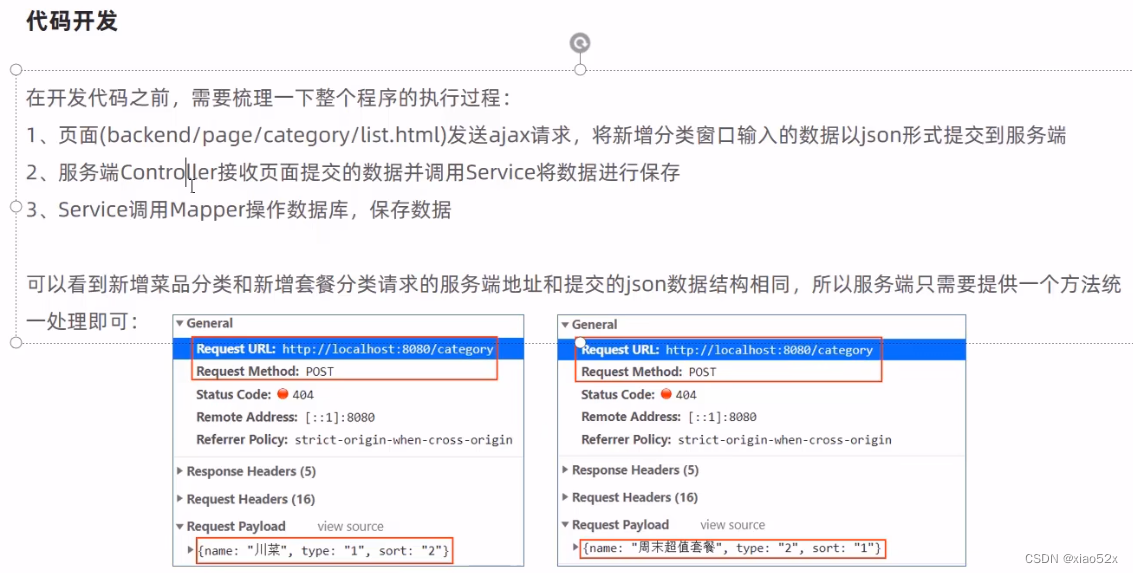
4.4.2 新增分类
- Category实体类
/**
 * 分类
 */
@Data
public class Category implements Serializable {

    private static final long serialVersionUID = 1L;

    private Long id;


    //类型 1 菜品分类 2 套餐分类
    private Integer type;


    //分类名称
    private String name;


    //顺序
    private Integer sort;


    //创建时间
    @TableField(fill = FieldFill.INSERT)
    private LocalDateTime createTime;


    //更新时间
    @TableField(fill = FieldFill.INSERT_UPDATE)
    private LocalDateTime updateTime;


    //创建人
    @TableField(fill = FieldFill.INSERT)
    private Long createUser;


    //修改人
    @TableField(fill = FieldFill.INSERT_UPDATE)
    private Long updateUser;


    //是否删除
  //  private Integer isDeleted;

}
import com.baomidou.mybatisplus.core.mapper.BaseMapper;
import com.xiao.reggie.entity.Category;
import org.apache.ibatis.annotations.Mapper;

@Mapper
public interface CategoryMapper extends BaseMapper<Category> {
}
import com.baomidou.mybatisplus.extension.service.IService;
import com.xiao.reggie.entity.Category;

public interface CategoryService extends IService<Category> {
}
import com.baomidou.mybatisplus.extension.service.impl.ServiceImpl;
import com.xiao.reggie.entity.Category;
import com.xiao.reggie.mapper.CategoryMapper;
import com.xiao.reggie.service.CategoryService;
import org.springframework.stereotype.Service;


@Service
public class CategoryServiceImpl extends ServiceImpl<CategoryMapper, Category> implements CategoryService {
}

import com.xiao.reggie.commom.R;
import com.xiao.reggie.entity.Category;
import com.xiao.reggie.service.CategoryService;
import lombok.extern.slf4j.Slf4j;
import org.springframework.beans.factory.annotation.Autowired;
import org.springframework.web.bind.annotation.PostMapping;
import org.springframework.web.bind.annotation.RequestBody;
import org.springframework.web.bind.annotation.RequestMapping;
import org.springframework.web.bind.annotation.RestController;

@Slf4j
@RestController
@RequestMapping("/category")
public class CategoryController {

    @Autowired
    private CategoryService categoryService;

    /**
     * 新增套餐分类
     * @param category
     * @return
     */
    @PostMapping
    public R<String> save(@RequestBody Category category){
        log.info("{category}" ,category);
        categoryService.save(category);
        return R.success("新增分类成功");
    }
}
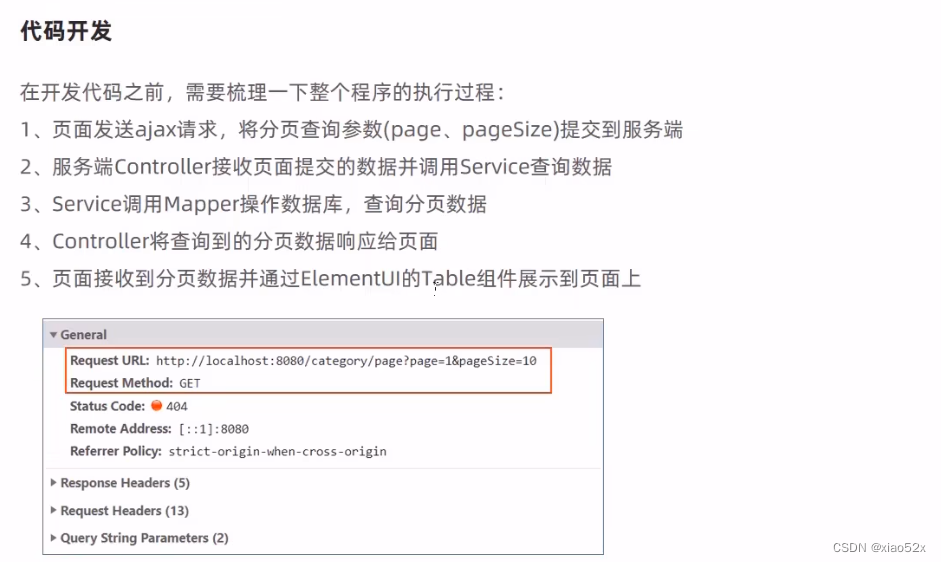
4.4.3 分页查询
  /**
     * 分页查询
     * @param page
     * @param pageSize
     * @return
     */
    @GetMapping("/page")
    public R<Page> page(int page,int pageSize){

        //创建一个分页构造器
        Page<Category> categoryPage = new Page<>(page,pageSize);
        //创建一个条件构造器  用来排序用的  注意这个条件构造器一定要使用泛型,否则使用条件查询这个方法的时候会报错
        LambdaQueryWrapper<Category> queryWrapper = new LambdaQueryWrapper();
        //添加排序条件 ,根据sort字段进行排序
        queryWrapper.orderByAsc(Category::getSort);
        categoryService.page(categoryPage,queryWrapper);
        return R.success(categoryPage);
    }
4.4.4 删除分类
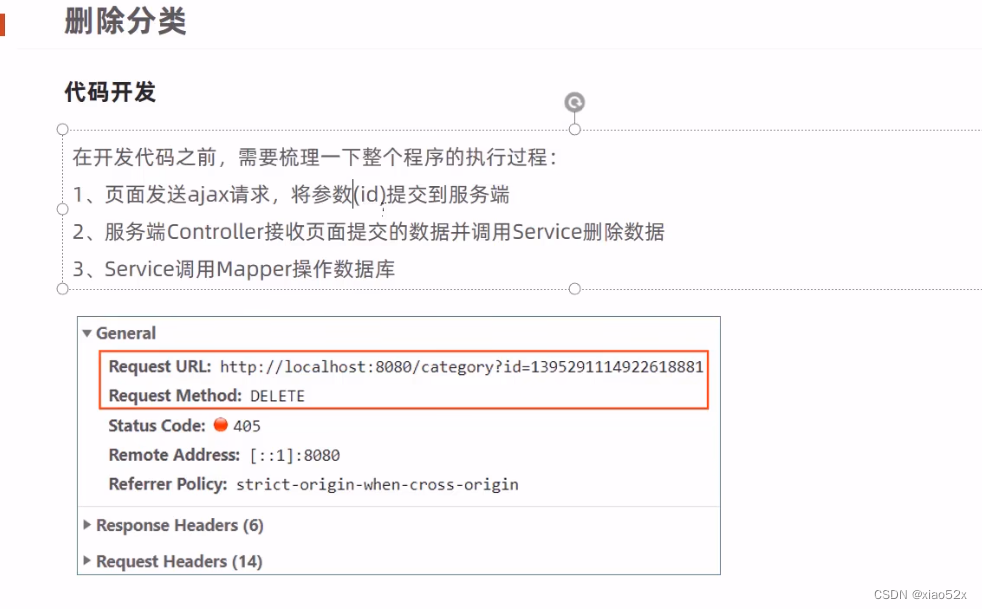
/**
     * 根据id来删除分类的数据
     * @param ids
     * @return
     */
    @DeleteMapping()
    public R<String> delete(@RequestParam("ids") Long ids){ //注意这里前端传过来的数据是ids
        categoryService.removeById(ids);
        return R.success("分类信息删除成功");
    }
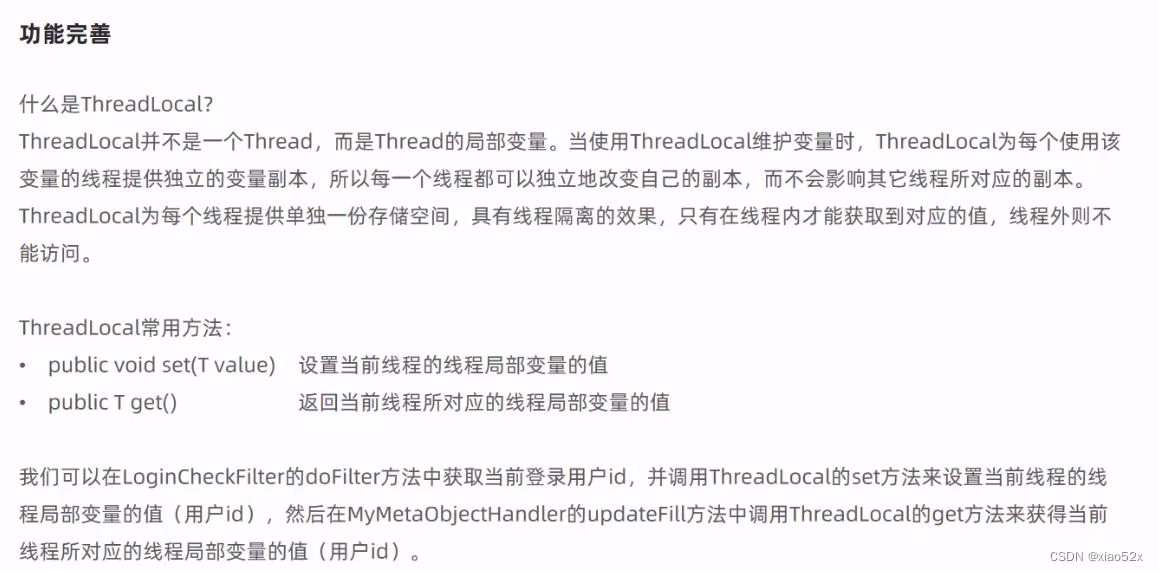
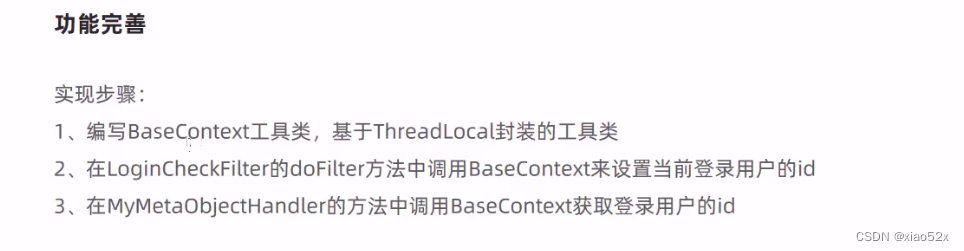
功能完善
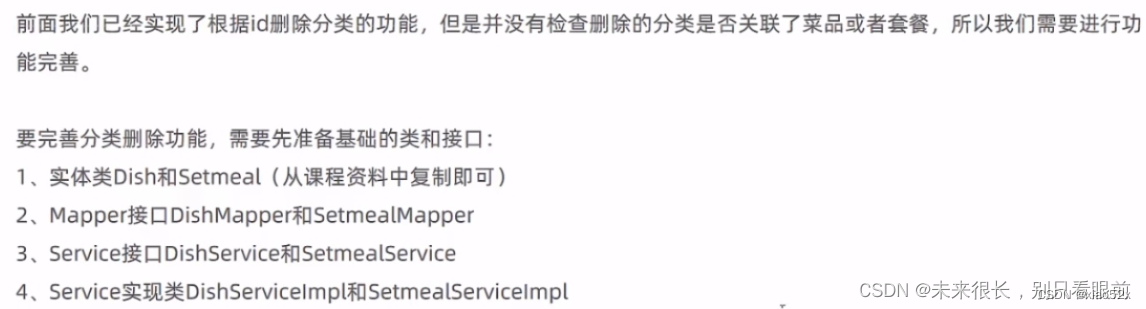
创建对应的使用类:Dish和Setmeal
package com.xiao.reggie.entity;

import com.baomidou.mybatisplus.annotation.FieldFill;
import com.baomidou.mybatisplus.annotation.IdType;
import com.baomidou.mybatisplus.annotation.TableField;
import com.baomidou.mybatisplus.annotation.TableId;
import lombok.Data;
import java.io.Serializable;
import java.math.BigDecimal;
import java.time.LocalDateTime;

/**
 菜品
 */
@Data
public class Dish implements Serializable {

    private static final long serialVersionUID = 1L;

    private Long id;

    //菜品名称
    private String name;

    //菜品分类id
    private Long categoryId;

    //菜品价格
    private BigDecimal price;

    //商品码
    private String code;

    //图片
    private String image;

    //描述信息
    private String description;

    //0 停售 1 起售
    private Integer status;

    //顺序
    private Integer sort;

    @TableField(fill = FieldFill.INSERT)
    private LocalDateTime createTime;

    @TableField(fill = FieldFill.INSERT_UPDATE)
    private LocalDateTime updateTime;

    @TableField(fill = FieldFill.INSERT)
    private Long createUser;

    @TableField(fill = FieldFill.INSERT_UPDATE)
    private Long updateUser;

    //是否删除
    private Integer isDeleted;
}
package com.xiao.reggie.entity;

import com.baomidou.mybatisplus.annotation.FieldFill;
import com.baomidou.mybatisplus.annotation.IdType;
import com.baomidou.mybatisplus.annotation.TableField;
import com.baomidou.mybatisplus.annotation.TableId;
import lombok.Data;
import java.io.Serializable;
import java.math.BigDecimal;
import java.time.LocalDateTime;

/**
 * 套餐
 */
@Data
public class Setmeal implements Serializable {
    private static final long serialVersionUID = 1L;

    private Long id;

    //分类id
    private Long categoryId;

    //套餐名称
    private String name;

    //套餐价格
    private BigDecimal price;

    //状态 0:停用 1:启用
    private Integer status;

    //编码
    private String code;

    //描述信息
    private String description;

    //图片
    private String image;

    @TableField(fill = FieldFill.INSERT)
    private LocalDateTime createTime;

    @TableField(fill = FieldFill.INSERT_UPDATE)
    private LocalDateTime updateTime;

    @TableField(fill = FieldFill.INSERT)
    private Long createUser;

    @TableField(fill = FieldFill.INSERT_UPDATE)
    private Long updateUser;

    //是否删除
    private Integer isDeleted;
}
创建对应的mapper:DishMapper和 SetmealMapper
package com.xiao.reggie.mapper;

import com.baomidou.mybatisplus.core.mapper.BaseMapper;
import com.xiao.reggie.entity.Dish;
import org.apache.ibatis.annotations.Mapper;


@Mapper
public interface DishMapper extends BaseMapper<Dish> {
}

//SetmealMapper
package com.xiao.reggie.mapper;

import com.baomidou.mybatisplus.core.mapper.BaseMapper;
import com.xiao.reggie.entity.Setmeal;
import org.apache.ibatis.annotations.Mapper;

@Mapper
public interface SetmealMapper extends BaseMapper<Setmeal> {

}
创建service
package com.xiao.reggie.service;

import com.baomidou.mybatisplus.extension.service.IService;
import com.xiao.reggie.entity.Dish;

public interface DishService extends IService<Dish> {
}

package com.xiao.reggie.service;

import com.baomidou.mybatisplus.extension.service.IService;
import com.xiao.reggie.entity.Setmeal;

public interface SetmealService extends IService<Setmeal> {
}
package com.xiao.reggie.service.impl;

import com.baomidou.mybatisplus.extension.service.impl.ServiceImpl;
import com.xiao.reggie.entity.Dish;
import com.xiao.reggie.mapper.DishMapper;
import com.xiao.reggie.service.DishService;
import org.springframework.stereotype.Service;

@Service
public class DishServiceImpl extends ServiceImpl<DishMapper, Dish> implements DishService {
}

package com.xiao.reggie.service.impl;
import com.baomidou.mybatisplus.extension.service.impl.ServiceImpl;
import com.xiao.reggie.entity.Setmeal;
import com.xiao.reggie.mapper.SetmealMapper;
import com.xiao.reggie.service.SetmealService;
import org.springframework.stereotype.Service;

@Service
public class SetmealServiceImpl extends ServiceImpl<SetmealMapper, Setmeal> implements SetmealService {
}
添加自定义的service方法:(就是我们需要的业务mybatis没有提供,所以就需要自己另外在service创建新的方法,并且在相关的业务中实现)
package com.xiao.reggie.service;

import com.baomidou.mybatisplus.extension.service.IService;
import com.xiao.reggie.entity.Category;

public interface CategoryService extends IService<Category> {

    //在CategoryService中定义自己需要的方法,直接写就行
    void remove(Long id);
}
在CategoryService实现类中重写该方法:
package com.xiao.reggie.service.impl;

import com.baomidou.mybatisplus.core.conditions.query.LambdaQueryWrapper;
import com.baomidou.mybatisplus.extension.service.impl.ServiceImpl;
import com.xiao.reggie.commom.CustomException;
import com.xiao.reggie.entity.Category;
import com.xiao.reggie.entity.Dish;
import com.xiao.reggie.entity.Setmeal;
import com.xiao.reggie.mapper.CategoryMapper;
import com.xiao.reggie.service.CategoryService;
import com.xiao.reggie.service.DishService;
import com.xiao.reggie.service.SetmealService;
import org.springframework.beans.factory.annotation.Autowired;
import org.springframework.stereotype.Service;


@Service
public class CategoryServiceImpl extends ServiceImpl<CategoryMapper, Category> implements CategoryService {
    @Autowired
    private DishService dishService; //关联菜品
    @Autowired
    private SetmealService setmealService;//套餐

    /**
     * 根据id删除 分类,删除之前需要进行判断是否有关联数据
     * @param id
     */
    @Override
    public void remove(Long id) {
        LambdaQueryWrapper<Dish> dishLambdaQueryWrapper = new LambdaQueryWrapper<>();
        //添加查询条件
        dishLambdaQueryWrapper.eq(Dish::getCategoryId,id);
        //注意:这里使用count方法的时候一定要传入条件查询的对象,否则计数会出现问题,计算出来的是全部的数据的条数
        int count = dishService.count(dishLambdaQueryWrapper);

        //查询当前分类是否关联了菜品,如果已经管理,直接抛出一个业务异常
        if (count > 0){
            //已经关联了菜品,抛出一个业务异常
            throw new CustomException("当前分类项关联了菜品,不能删除");
        }

        //查询当前分类是否关联了套餐,如果已经管理,直接抛出一个业务异常
        LambdaQueryWrapper<Setmeal> setmealLambdaQueryWrapper = new LambdaQueryWrapper<>();
        setmealLambdaQueryWrapper.eq(Setmeal::getCategoryId,id);
        //注意:这里使用count方法的时候一定要传入条件查询的对象,否则计数会出现问题,计算出来的是全部的数据的条数
        int setmealCount = setmealService.count(setmealLambdaQueryWrapper);
        if (setmealCount > 0){
            //已经关联了套餐,抛出一个业务异常
            throw new CustomException("当前分类项关联了套餐,不能删除");
        }

        //正常删除
        super.removeById(id);

    }
}
自定义异常类,因为这里需要抛异常了:
package com.xiao.reggie.commom;


/*
*自定义的业务异常
 */
//继承RuntimeException运行时异常
public class CustomException  extends RuntimeException {
    public CustomException(String message) {
        super(message);

    }
}
然后在外面前面写的GlobalExceptionHandler全局异常捕获器中添加该异常,这样就可以把相关的异常信息显示给前端操作的人员看见
  //然后在外面前面写的GlobalExceptionHandler全局异常捕获器中添加该异常,这样就可以把相关的异常信息显示给前端操作的人员看见

    /**
     * 处理自定义的异常,为了让前端展示我们的异常信息,这里需要把异常进行全局捕获,然后返回给前端
     * @param exception
     * @return
     */
    @ExceptionHandler(CustomException.class)
    public R<String> exceptionHandle(CustomException exception){
        log.error(exception.getMessage()); //报错记得打日志
        //这里拿到的message是业务类抛出的异常信息,我们把它显示到前端
        return R.error(exception.getMessage());
    }
4.4.5 修改分类
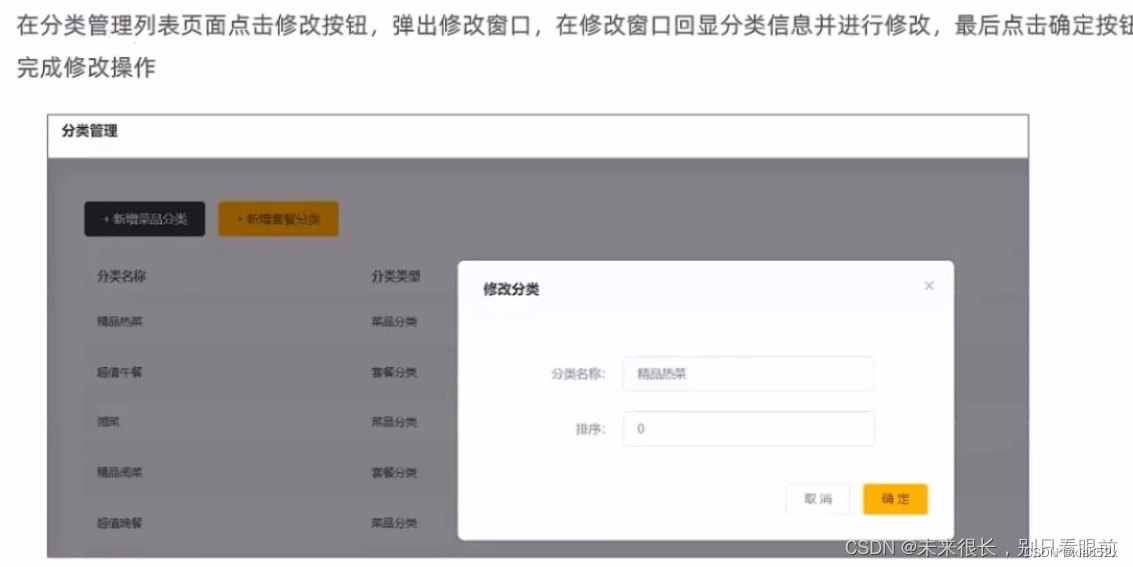
  /**
     * 根据id修改分类
     * @param category
     * @return
     */
    @PutMapping
    public R<String> update(@RequestBody Category category){
        categoryService.updateById(category);
        return R.success("修改分类信息成功");
    }
记得在对应的实体类加上公共字段的值设置:前面我们配置了这个,所以这里只需要加注解就行;
     //创建时间
    @TableField(fill = FieldFill.INSERT)
    private LocalDateTime createTime;

    //更新时间
    @TableField(fill = FieldFill.INSERT_UPDATE)
    private LocalDateTime updateTime;

    //创建人
    @TableField(fill = FieldFill.INSERT)
    private Long createUser;

    //修改人
    @TableField(fill = FieldFill.INSERT_UPDATE)
    private Long updateUser;
4.5 菜品管理的业务功能
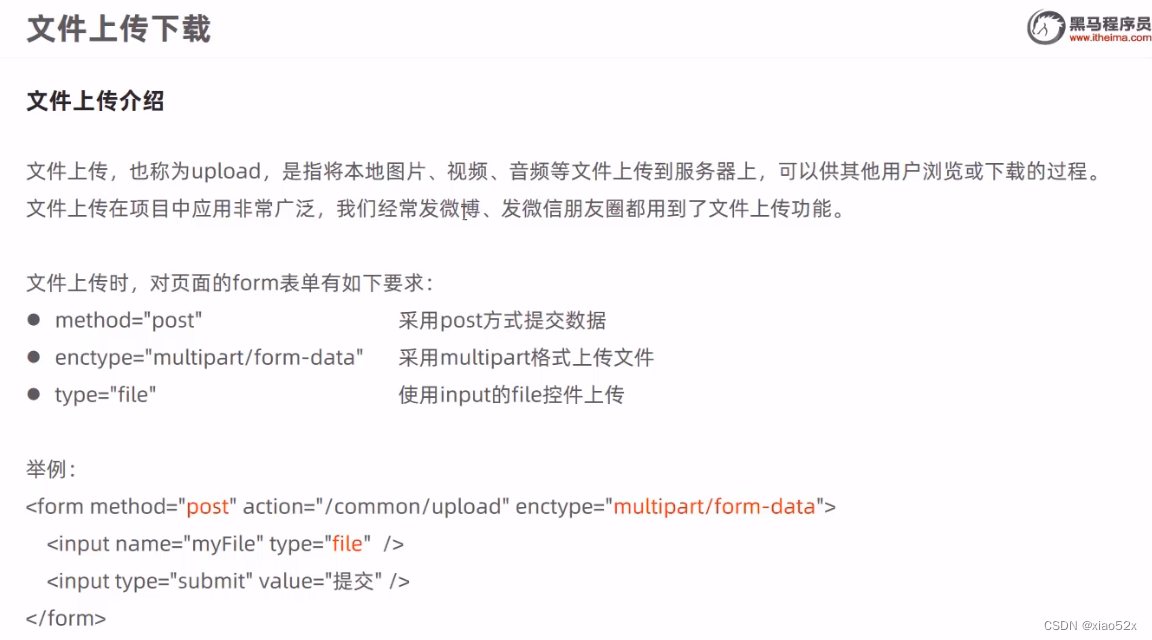
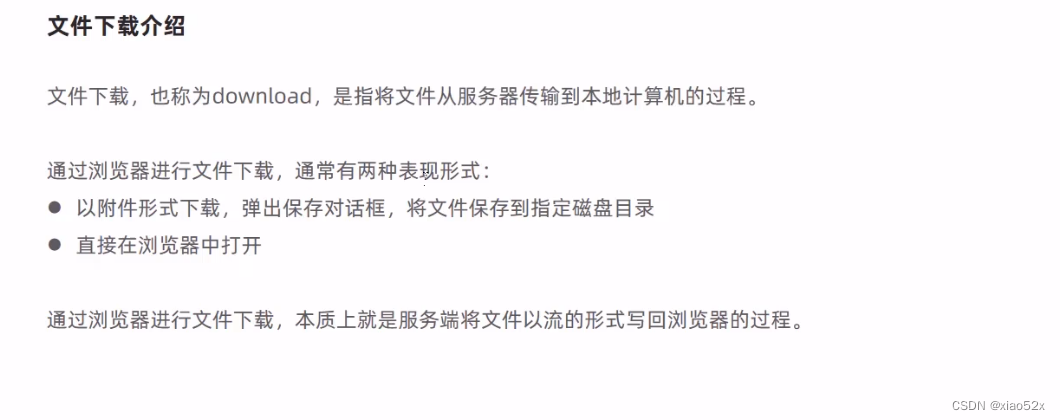
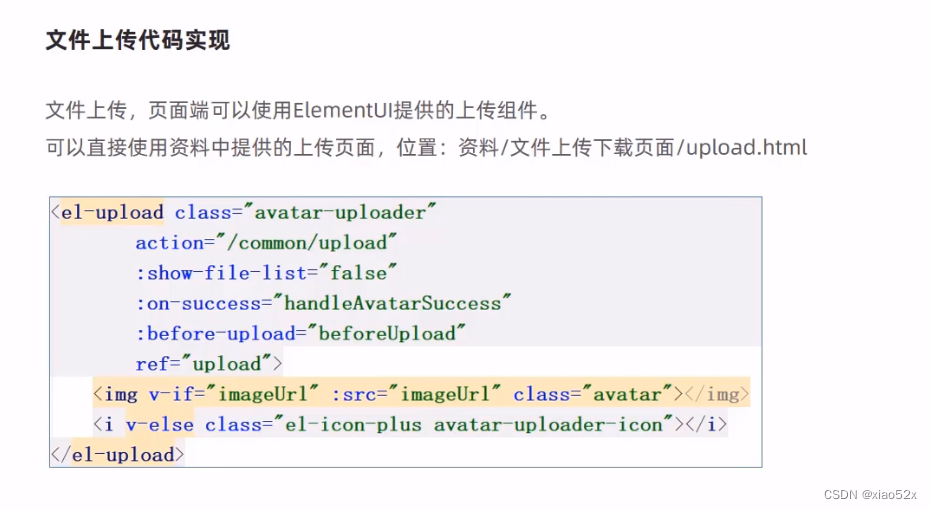
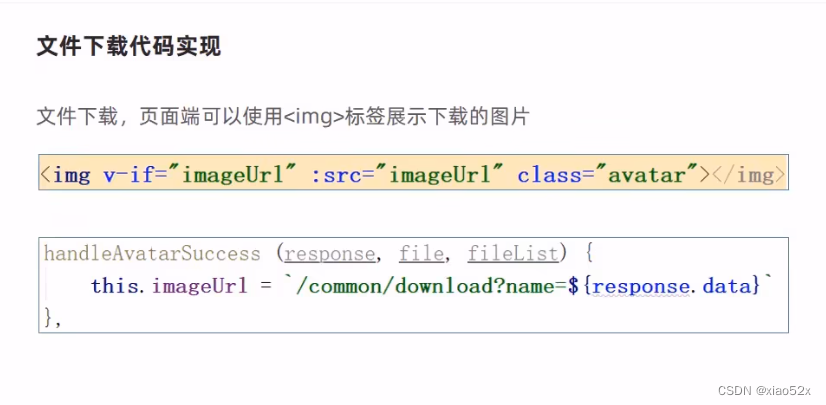
4.5.1 文件上传和下载

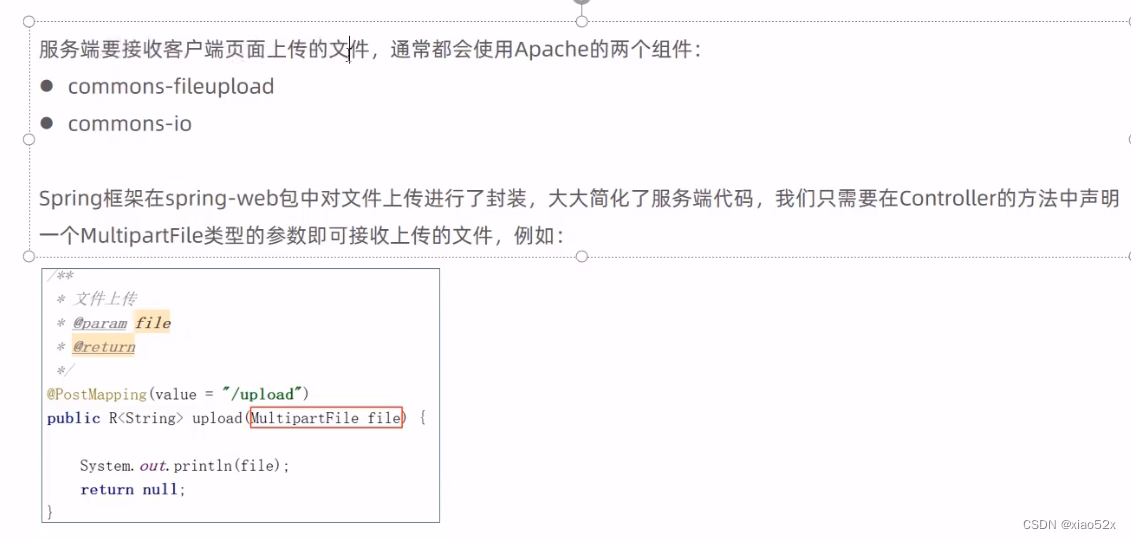
yml配置文件:配置上传图片的存储位置;
reggie:
  path: E:\reggie\
CommonController
package com.xiao.reggie.controller;
import com.xiao.reggie.commom.R;
import org.springframework.beans.factory.annotation.Value;
import org.springframework.web.bind.annotation.GetMapping;
import org.springframework.web.bind.annotation.PostMapping;
import org.springframework.web.bind.annotation.RequestMapping;
import org.springframework.web.bind.annotation.RestController;
import org.springframework.web.multipart.MultipartFile;
import javax.servlet.ServletOutputStream;
import javax.servlet.http.HttpServletResponse;
import java.io.File;
import java.io.FileInputStream;
import java.io.IOException;
import java.util.UUID;
/**
* 文件上传和下载
*/
@RestController
@RequestMapping("/common")
public class CommonController {
@Value("${reggie.path}") //保存的文件夹,引用的application.yml
private String basePath;
/**
* 文件的上传
* @param file
* @return
*/
@PostMapping("/upload")
public R<String> upload(MultipartFile file){
//这个file是一个临时文件,需要转存到指定位置,否则本次请求完成后临时文件会删除
//拿到文件的原始名
String originalFilename = file.getOriginalFilename();
//拿到文件的后缀名 比如 .png .jpg
String suffix = originalFilename.substring(originalFilename.lastIndexOf("."));
//使用uuid生成的作为文件名的一部分,这样可以防止文件名相同造成的文件覆盖
String fileName = UUID.randomUUID().toString() + suffix;
//创建一个目录对象,看传文件的时候,接收文件的目录存不存在
File dir = new File(basePath);
if (!dir.exists()){
//文件目录不存在,直接创建一个目录
dir.mkdirs();
}
try {
//把前端传过来的文件进行转存
file.transferTo(new File(basePath + fileName));
}catch (IOException e){
e.printStackTrace();
}
return R.success(fileName);
}
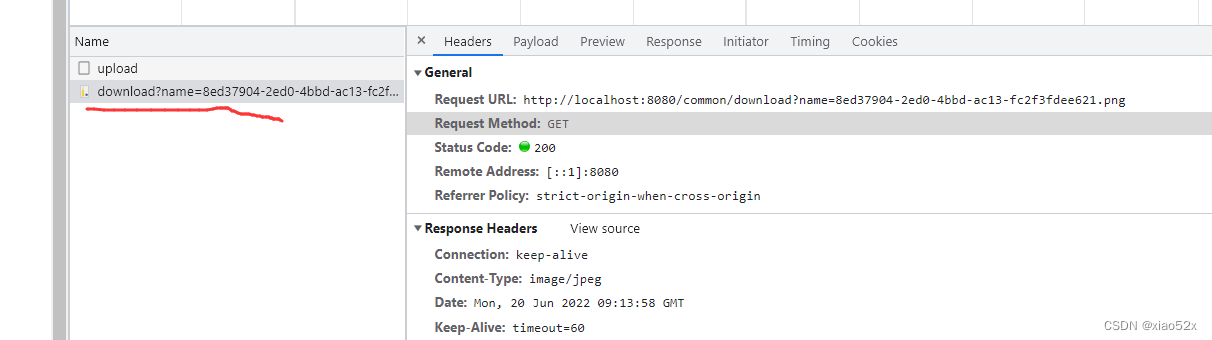
/**
* 文件的下载
* @param name
* @return
*/
@GetMapping("/download")
public void download(String name, HttpServletResponse response){
try {
//输入流,通过输入流读取文件内容 这里的name是前台用户需要下载的文件的文件名
//new File(basePath + name) 是为了从存储图片的地方获取用户需要的图片对象
FileInputStream fileInputStream = new FileInputStream(new File(basePath + name));
//输出流,通过输出流将文件写回浏览器
ServletOutputStream outputStream = response.getOutputStream();
//设置写回去的文件类型
response.setContentType("image/jpeg");
//定义缓存区,准备读写文件
int len = 0 ;
byte[] buff = new byte[1024];
while ((len = fileInputStream.read(buff)) != -1){
outputStream.write(buff,0,len);
outputStream.flush();
}
//关流
outputStream.close();
fileInputStream.close();
}catch (Exception e){
e.printStackTrace();
}
}
}
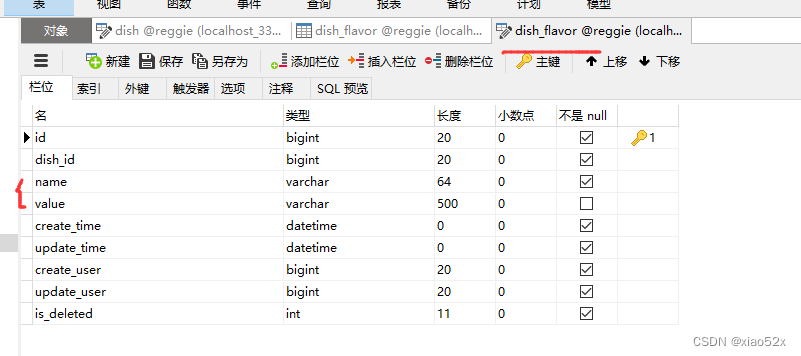
4.5.2 新增菜品
实体类
import com.baomidou.mybatisplus.annotation.FieldFill;
import com.baomidou.mybatisplus.annotation.IdType;
import com.baomidou.mybatisplus.annotation.TableField;
import com.baomidou.mybatisplus.annotation.TableId;
import lombok.Data;
import java.io.Serializable;
import java.time.LocalDateTime;

/**
菜品口味
 */
@Data
public class DishFlavor implements Serializable {

    private static final long serialVersionUID = 1L;

    private Long id;


    //菜品id
    private Long dishId;


    //口味名称
    private String name;


    //口味数据list
    private String value;


    @TableField(fill = FieldFill.INSERT)
    private LocalDateTime createTime;


    @TableField(fill = FieldFill.INSERT_UPDATE)
    private LocalDateTime updateTime;


    @TableField(fill = FieldFill.INSERT)
    private Long createUser;


    @TableField(fill = FieldFill.INSERT_UPDATE)
    private Long updateUser;


    //是否删除
    private Integer isDeleted;

}
编写controller:

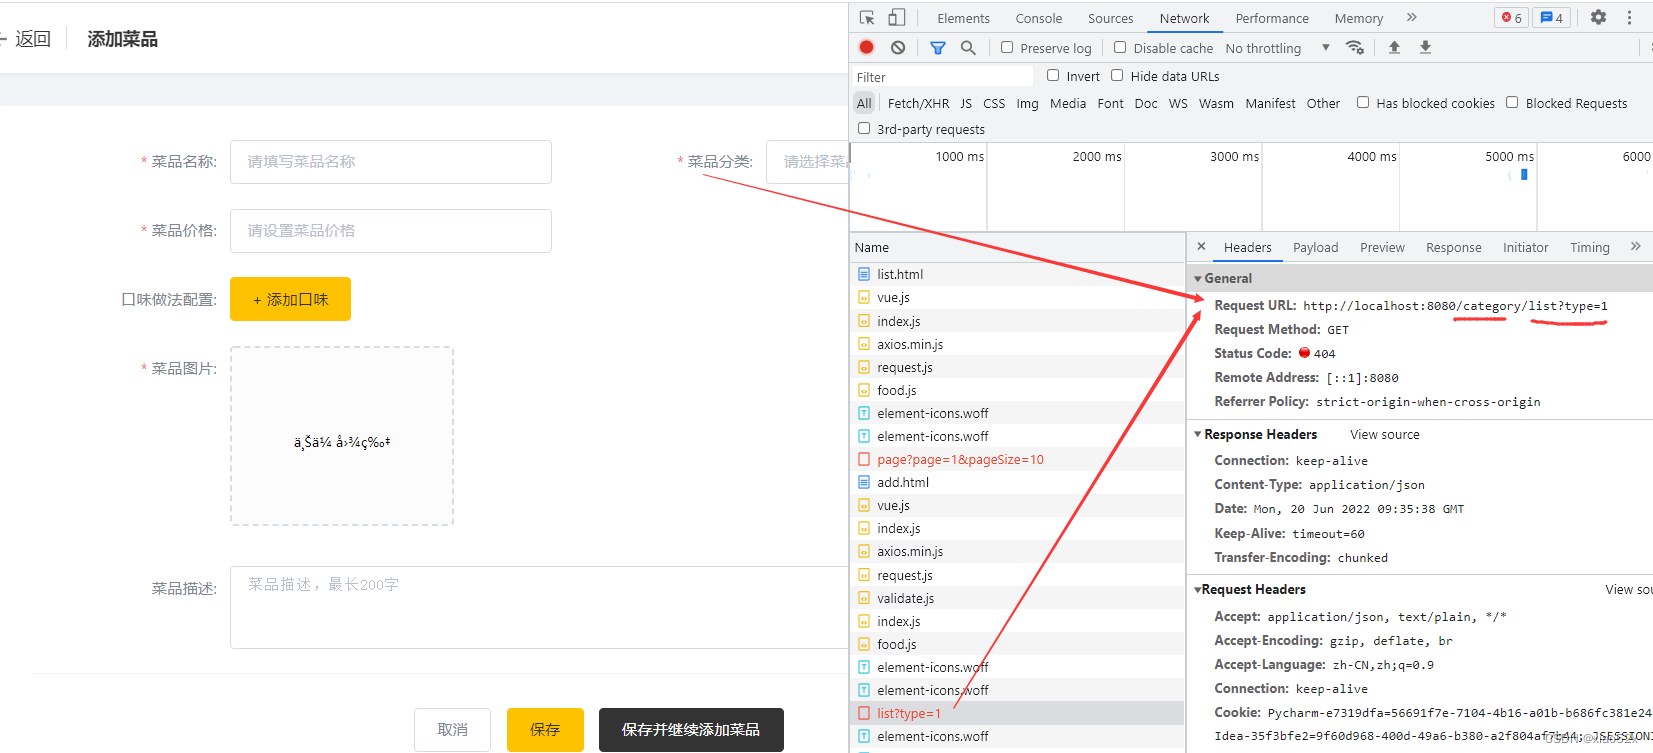
// 获取菜品分类列表
const getCategoryList = (params) => {
  return $axios({
    url: '/category/list',
    method: 'get',
    params
  })
}

if (res.code === 1) {
     this.dishList = res.data   //这里就相当于把所有的category对象的数据赋值给dishList
   }

这是菜品分类和数据双向绑定的前端代码:  我们返回的是一个集合,
</el-form-item>
          <el-form-item
            label="菜品分类:"
            prop="categoryId"
          >
            <el-select
              v-model="ruleForm.categoryId"
              placeholder="请选择菜品分类"
            >
              <el-option v-for="(item,index) in dishList" :key="index" :label="item.name" :value="item.id" />
            </el-select>
          </el-form-item>
在CategoryController书写查询代码,不过这里的返回值和参数接收值可能和自己想的有点不一样。。。这个的返回值和参数值 值得多思考一下; 这里之所以返回list集合,是因为这个要展示的数据是引用类型的数据集,集合可以存放任意类型的数据;
 /**
     * 根据条件查询分类数据
     * @param category
     * @return
     */
    @GetMapping("/list")
    //这个接口接收到参数其实就是一个前端传过来的type,这里之所以使用Category这个类来接受前端的数据,是为了以后方便
    //因为这个Category类里面包含了type这个数据,返回的数据多了,你自己用啥取啥就行
    private R<List<Category>> list(Category category){
        //条件构造器
        LambdaQueryWrapper<Category> queryWrapper = new LambdaQueryWrapper();
        //添加查询条件
        queryWrapper.eq(category.getType() != null,Category::getType,category.getType());
        //添加排序条件  使用两个排序条件,如果sort相同的情况下就使用更新时间进行排序
        queryWrapper.orderByAsc(Category::getSort).orderByDesc(Category::getUpdateTime);
        List<Category> list = categoryService.list(queryWrapper);

        return R.success(list);
    }

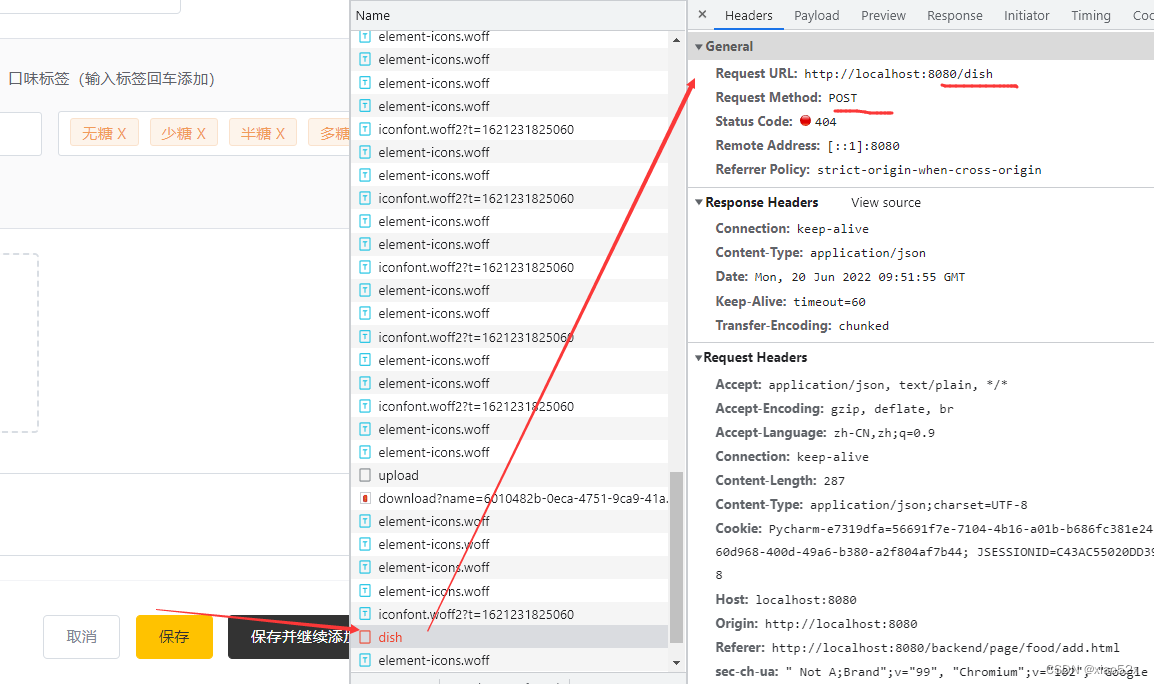

接收页面提交的数据(涉及两张表)
点击保存按钮的时候,把前端的json数据提交到后台,后台接收数据,对数据进行处理;要与两张表打交道,一个是dish一个是dish_flavor表;
先用前端页面向后端发一次请求,看看前端具体的请求是什么,我们好写controller;然后再看前端提交携带的参数是什么,我们好选择用什么类型的数据来接收!!!
看下图:这是前端传过来的具体参数,我们需要什么参数类型来接收这些数据就大概知道了;因为这里传过来的参数比较复杂,所以这里有两种方式进行封装,第一:创建与这些数据对应的实体类(dto) ,第二使用map来接收;
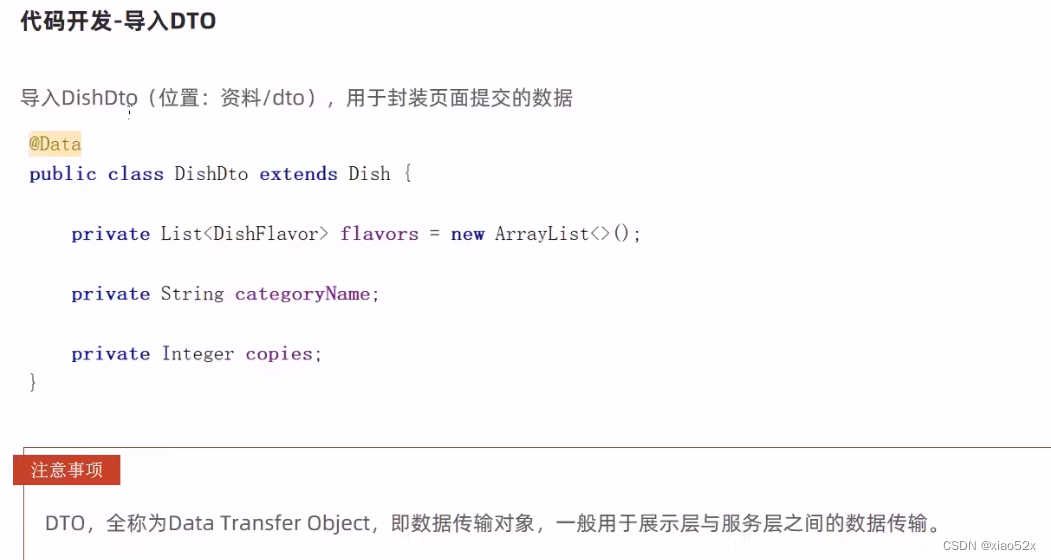

package com.xiao.reggie.dto;

import com.xiao.reggie.entity.Dish;
import com.xiao.reggie.entity.DishFlavor;
import lombok.Data;
import java.util.ArrayList;
import java.util.List;

@Data
public class DishDto extends Dish {

    private List<DishFlavor> flavors = new ArrayList<>();

    private String categoryName;

    private Integer copies;
}

前端关键代码:
<el-button
  type="primary"
  @click="submitForm('ruleForm')"
>
  保存
</el-button>

let params = {...this.ruleForm}
// params.flavors = this.dishFlavors
params.status = this.ruleForm ? 1 : 0
params.price *= 100   //存到数据库的时候是以分为单位,所以这里x100
params.categoryId = this.ruleForm.categoryId
params.flavors = this.dishFlavors.map(obj => ({ ...obj, value: JSON.stringify(obj.value) }))


if (this.actionType == 'add') {
     delete params.id
     addDish(params).then(res => {
     if (res.code === 1) {
     this.$message.success('菜品添加成功!')
     if (!st) {
     this.goBack()
      } else {   ....


// 新增接口
const addDish = (params) => {
  return $axios({
    url: '/dish',
    method: 'post',
    data: { ...params }
  })
}
后端代码:
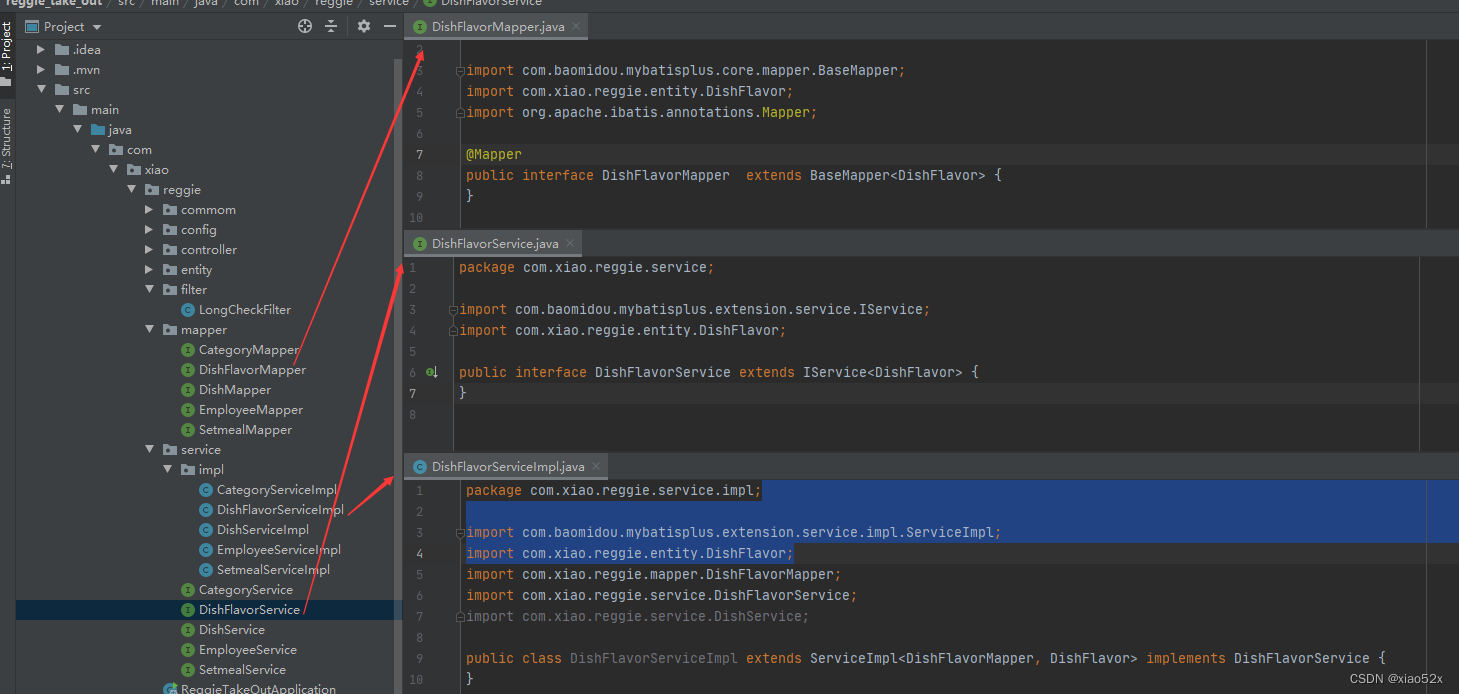
在DishService中新增一个方法:
package com.xiao.reggie.service;

import com.baomidou.mybatisplus.extension.service.IService;
import com.xiao.reggie.dto.DishDto;
import com.xiao.reggie.entity.Dish;

public interface DishService extends IService<Dish> {

    //新增菜品,同时插入菜品对应的口味数据,需要同时操作两张表:dish  dish_flavor
    void saveWithFlavor(DishDto dishDto);
}
相关的实现:
@Service
public class DishServiceImpl extends ServiceImpl<DishMapper, Dish> implements DishService {

    @Autowired
    private DishFlavorService dishFlavorService;
    /**
     * 新增菜品同时保存对应的口味数据
     * @param dishDto
     */
    @Override
    @Transactional //涉及到对多张表的数据进行操作,需要加事务,需要事务生效,需要在启动类加上事务注解生效
    public void saveWithFlavor(DishDto dishDto) {
        //保存菜品的基本信息到菜品表dish中
        this.save(dishDto);
        Long dishId = dishDto.getId();

        //为了把dishId  set进flavors表中
        //拿到菜品口味
        List<DishFlavor> flavors = dishDto.getFlavors();
        //这里对集合进行赋值 可以使用循环或者是stream流
        flavors = flavors.stream().map((item) ->{
            //拿到的这个item就是这个DishFlavor集合
            item.setDishId(dishId);
            return item; //记得把数据返回去
        }).collect(Collectors.toList()); //把返回的集合搜集起来,用来被接收

        //把菜品口味的数据到口味表 dish_flavor  注意dish_flavor只是封装了name value 并没有封装dishId(从前端传过来的数据发现的,然而数据库又需要这个数据)
        dishFlavorService.saveBatch(dishDto.getFlavors()); //这个方法是批量保存
    }
}
在启动类开启事务: 加上这个注解就行 @EnableTransactionManagement
import lombok.extern.slf4j.Slf4j;
import org.springframework.boot.SpringApplication;
import org.springframework.boot.autoconfigure.SpringBootApplication;
import org.springframework.boot.web.servlet.ServletComponentScan;
import org.springframework.transaction.annotation.EnableTransactionManagement;

@Slf4j //提供日志
@ServletComponentScan
@EnableTransactionManagement  //开启事物的支持
@SpringBootApplication
public class ReggieTakeOutApplication {
    public static void main(String[] args) {
        SpringApplication.run(ReggieTakeOutApplication.class, args);
        //控制台上输出日志
        log.info("项目启动成功");
    }

}
controller 层的代码:
package com.xiao.reggie.controller;


import com.xiao.reggie.commom.R;
import com.xiao.reggie.dto.DishDto;
import com.xiao.reggie.service.DishService;
import lombok.extern.slf4j.Slf4j;
import org.springframework.beans.factory.annotation.Autowired;
import org.springframework.web.bind.annotation.PostMapping;
import org.springframework.web.bind.annotation.RequestBody;
import org.springframework.web.bind.annotation.RequestMapping;
import org.springframework.web.bind.annotation.RestController;

@RestController
@RequestMapping("/dish")
@Slf4j
public class DishController {

    @Autowired
    private DishService dishService;

    /**
     * 新增菜品
     * @param dishDto
     * @return
     */
    @PostMapping
    public R<String> save(@RequestBody DishDto dishDto){ //前端提交的是json数据的话,我们在后端就要使用这个注解来接收参数,否则接收到的数据全是null
        dishService.saveWithFlavor(dishDto);
        return R.success("新增菜品成功");
    }

}
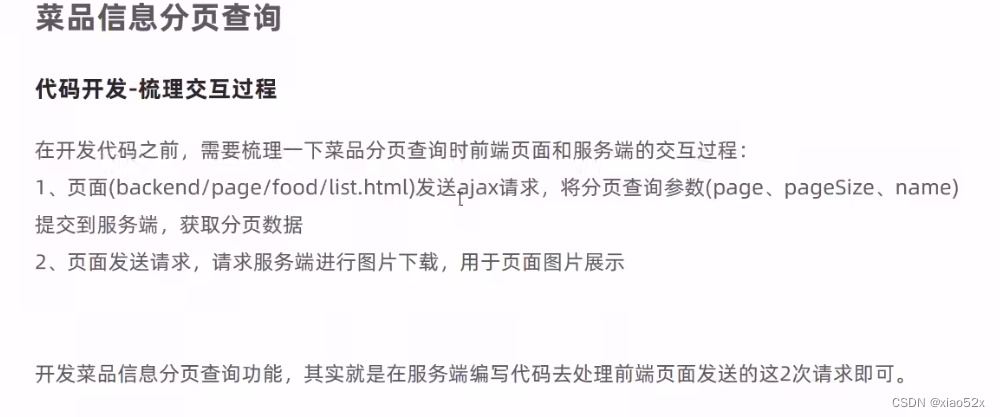
4.5.3 菜品信息分页查询(功能完善里面的代码要熟悉,有集合泛型的转换,对象copy)
功能完善:引入了DishDto
package com.itheima.reggie.dto;

import com.itheima.reggie.entity.Dish;
import com.itheima.reggie.entity.DishFlavor;
import lombok.Data;
import java.util.ArrayList;
import java.util.List;

@Data
public class DishDto extends Dish {

    private List<DishFlavor> flavors = new ArrayList<>();

    private String categoryName;

    private Integer copies; //后面用的
}
/**
     * 菜品信息分页查询
     * @param page
     * @param pageSize
     * @param name
     * @return
     */
    @GetMapping("/page")
    public R<Page> page(int page,int pageSize,String name){

        //构造一个分页构造器对象
        Page<Dish> dishPage = new Page<>(page,pageSize);
        Page<DishDto> dishDtoPage = new Page<>(page,pageSize);
        //上面对dish泛型的数据已经赋值了,这里对DishDto我们可以把之前的数据拷贝过来进行赋值

        //构造一个条件构造器
        LambdaQueryWrapper<Dish> queryWrapper = new LambdaQueryWrapper<>();
        //添加过滤条件 注意判断是否为空  使用对name的模糊查询
        queryWrapper.like(name != null,Dish::getName,name);
        //添加排序条件  根据更新时间降序排
        queryWrapper.orderByDesc(Dish::getUpdateTime);
        //去数据库处理分页 和 查询
        dishService.page(dishPage,queryWrapper);

 		 //对象拷贝  使用框架自带的工具类,第三个参数是不拷贝到属性
        BeanUtils.copyProperties(dishPage,dishDtoPage,"records");

        //获取到dish的所有数据 records属性是分页插件中表示分页中所有的数据的一个集合
        List<Dish> records = dishPage.getRecords();

        List<DishDto> list = records.stream().map((item) ->{
            //对实体类DishDto进行categoryName的设值

            DishDto dishDto = new DishDto();
            //这里的item相当于Dish  对dishDto进行除categoryName属性的拷贝
            BeanUtils.copyProperties(item,dishDto);
            //获取分类的id
            Long categoryId = item.getCategoryId();
            //通过分类id获取分类对象
            Category category = categoryService.getById(categoryId);
            if ( category != null){
                //设置实体类DishDto的categoryName属性值
                String categoryName = category.getName();
                dishDto.setCategoryName(categoryName);
            }
            return dishDto;
        }).collect(Collectors.toList());

        //对象拷贝  使用框架自带的工具类,第三个参数是不拷贝到属性
    //    BeanUtils.copyProperties(dishPage,dishDtoPage,"records");
        dishDtoPage.setRecords(list);
        //因为上面处理的数据没有分类的id,这样直接返回R.success(dishPage)虽然不会报错,但是前端展示的时候这个菜品分类这一数据就为空
        //所以进行了上面的一系列操作
        return R.success(dishDtoPage);
    }
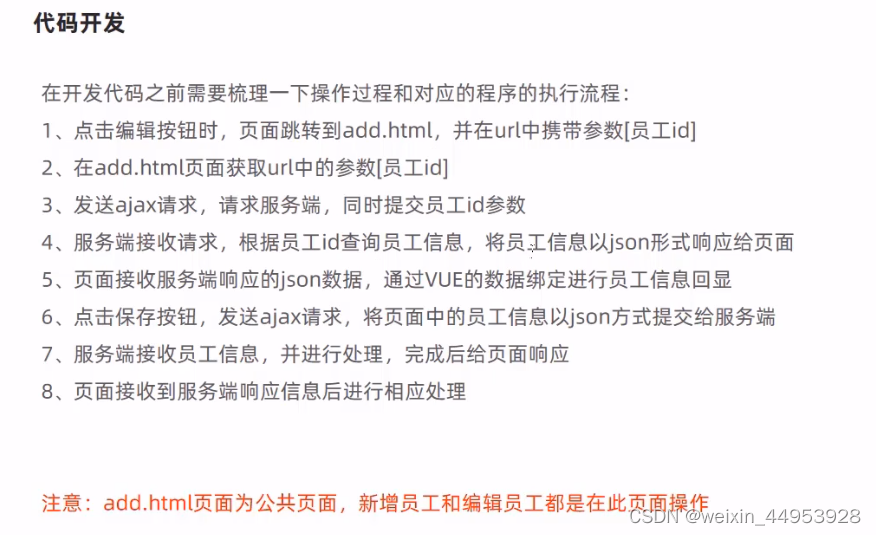
4.5.3 修改菜品(回显和保存修改都是两张表)
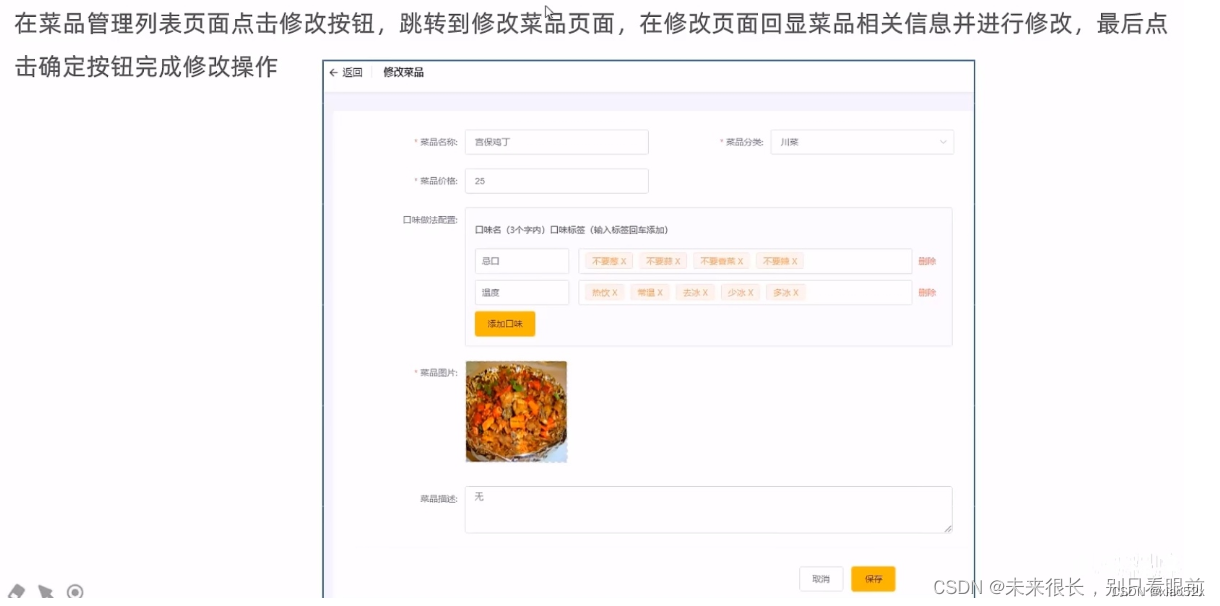
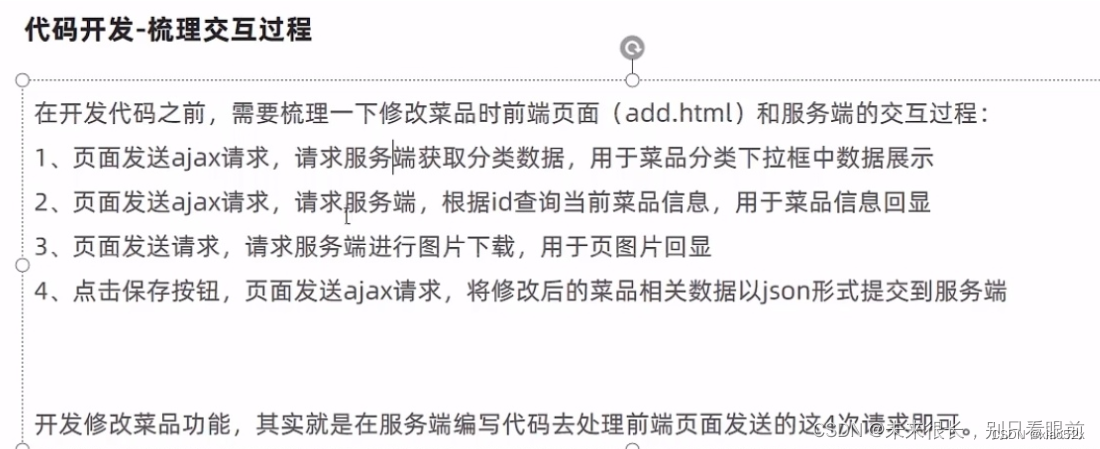
第一次交互的后端代码已经完成了;菜品分类的信息前面做新增菜品的时候就已经完成了,这里前端发一个相关接口的请求就行;
第三次交互,图片的下载前面也已经写了,所以前端直接发生请求就行;
菜品信息的回显和保存修改:(重点):
在service添加自己要实现的方法:
package com.xiao.reggie.service;

import com.baomidou.mybatisplus.extension.service.IService;
import com.xiao.reggie.dto.DishDto;
import com.xiao.reggie.entity.Dish;

public interface DishService extends IService<Dish> {

    //新增菜品,同时插入菜品对应的口味数据,需要同时操作两张表:dish  dish_flavor
    void saveWithFlavor(DishDto dishDto);

    //根据id来查询菜品信息和对应的口味信息
    DishDto getByIdWithFlavor(Long id);

    //更新菜品信息同时还更新对应的口味信息
    void updateWithFlavor(DishDto dishDto);
}
方法的实现:
package com.xiao.reggie.service.impl;

import com.baomidou.mybatisplus.core.conditions.query.LambdaQueryWrapper;
import com.baomidou.mybatisplus.extension.service.impl.ServiceImpl;
import com.xiao.reggie.dto.DishDto;
import com.xiao.reggie.entity.Dish;
import com.xiao.reggie.entity.DishFlavor;
import com.xiao.reggie.mapper.DishMapper;
import com.xiao.reggie.service.DishFlavorService;
import com.xiao.reggie.service.DishService;
import org.springframework.beans.BeanUtils;
import org.springframework.beans.factory.annotation.Autowired;
import org.springframework.stereotype.Service;
import org.springframework.transaction.annotation.Transactional;

import java.util.List;
import java.util.stream.Collectors;

@Service
public class DishServiceImpl extends ServiceImpl<DishMapper, Dish> implements DishService {

    @Autowired
    private DishFlavorService dishFlavorService;
    /**
     * 新增菜品同时保存对应的口味数据
     * @param dishDto
     */
    @Override
    @Transactional //涉及到对多张表的数据进行操作,需要加事务,需要事务生效,需要在启动类加上事务注解生效
    public void saveWithFlavor(DishDto dishDto) {
        //保存菜品的基本信息到菜品表dish中
        this.save(dishDto);
        Long dishId = dishDto.getId();

        //为了把dishId  set进flavors表中
        //拿到菜品口味
        List<DishFlavor> flavors = dishDto.getFlavors();
        //这里对集合进行赋值 可以使用循环或者是stream流
        flavors = flavors.stream().map((item) ->{
            //拿到的这个item就是这个DishFlavor集合
            item.setDishId(dishId);
            return item; //记得把数据返回去
        }).collect(Collectors.toList()); //把返回的集合搜集起来,用来被接收

        //把菜品口味的数据到口味表 dish_flavor  注意dish_flavor只是封装了name value 并没有封装dishId(从前端传过来的数据发现的,然而数据库又需要这个数据)
        dishFlavorService.saveBatch(dishDto.getFlavors()); //这个方法是批量保存
    }


    /**
     * 根据id来查询菜品信息和对应的口味信息
     * @param id
     * @return
     */
    @Override
    public DishDto getByIdWithFlavor(Long id) {
        //查询菜品的基本信息  从dish表查询
        Dish dish = this.getById(id);

        //查询当前菜品对应的口味信息,从dish_flavor查询  条件查询
        LambdaQueryWrapper<DishFlavor> queryWrapper = new LambdaQueryWrapper<>();
        queryWrapper.eq(DishFlavor::getDishId,dish.getId());
        List<DishFlavor> flavors = dishFlavorService.list(queryWrapper);

        //然后把查询出来的flavors数据set进行 DishDto对象
        DishDto dishDto = new DishDto();
        //把dish表中的基本信息copy到dishDto对象,因为才创建的dishDto里面的属性全是空
        BeanUtils.copyProperties(dish,dishDto);
        dishDto.setFlavors(flavors);

        return dishDto;
    }

    @Override
    @Transactional
    public void updateWithFlavor(DishDto dishDto) {
        //更新dish表的基本信息  因为这里的dishDto是dish的子类
        this.updateById(dishDto);

        //更新口味信息---》先清理再重新插入口味信息
        //清理当前菜品对应口味数据---dish_flavor表的delete操作
        LambdaQueryWrapper<DishFlavor> queryWrapper = new LambdaQueryWrapper();
        queryWrapper.eq(DishFlavor::getDishId,dishDto.getId());
        dishFlavorService.remove(queryWrapper);

        //添加当前提交过来的口味数据---dish_flavor表的insert操作
        List<DishFlavor> flavors = dishDto.getFlavors();

        //下面这段流的代码我注释,然后测试,发现一次是报dishId没有默认值(先测),两次可以得到结果(后测,重新编译过,清除缓存过),相隔半个小时
        //因为这里拿到的flavorsz只有name和value(这是在设计数据封装的问题),不过debug测试的时候发现有时候可以拿到全部数据,有时候又不可以...  所以还是加上吧。。。。。
        flavors = flavors.stream().map((item) -> {
            item.setDishId(dishDto.getId());
            return item;
        }).collect(Collectors.toList());

        dishFlavorService.saveBatch(flavors);

    }
}
DishController:controller 层的编写:
   /**
     * 根据id来查询菜品信息和对应的口味信息
     * @param id
     * @return
     */
    @GetMapping("/{id}")
    public R<DishDto> get(@PathVariable Long id){  //这里返回什么数据是要看前端需要什么数据,不能直接想当然的就返回Dish对象
        DishDto dishDto = dishService.getByIdWithFlavor(id);
        return R.success(dishDto);
    }

    /**
     * 根据id修改分类
     */
    @PutMapping
    public R<String> update(@RequestBody DishDto dishDto){
        log.info(dishDto.toString());

        dishService.updateWithFlavor(dishDto);
        return R.success("修改分类信息成功");
    }
需要自己单独实现的功能
4.6 套餐管理


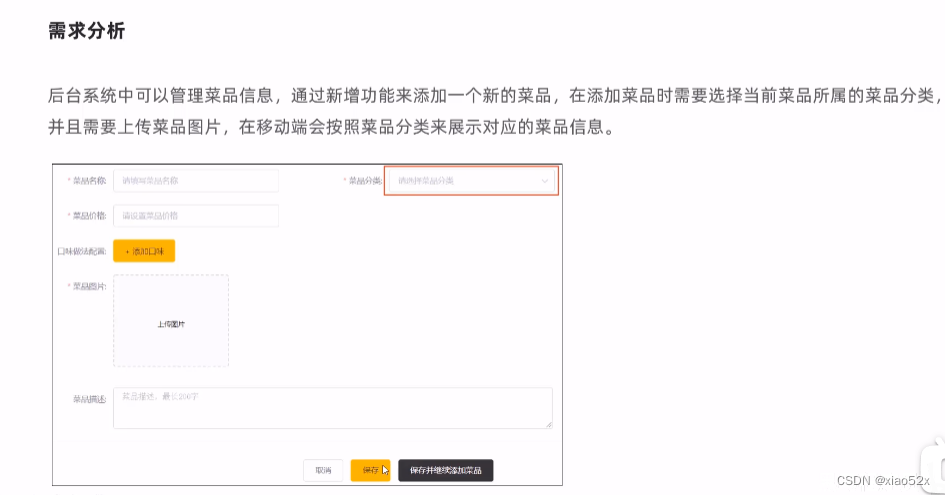
4.6.1 新增套餐管理
需求分析:

entity类
package com.xiao.reggie.entity;
import com.baomidou.mybatisplus.annotation.FieldFill;
import com.baomidou.mybatisplus.annotation.IdType;
import com.baomidou.mybatisplus.annotation.TableField;
import com.baomidou.mybatisplus.annotation.TableId;
import lombok.Data;
import java.io.Serializable;
import java.math.BigDecimal;
import java.time.LocalDateTime;
/**
* 套餐
*/
@Data
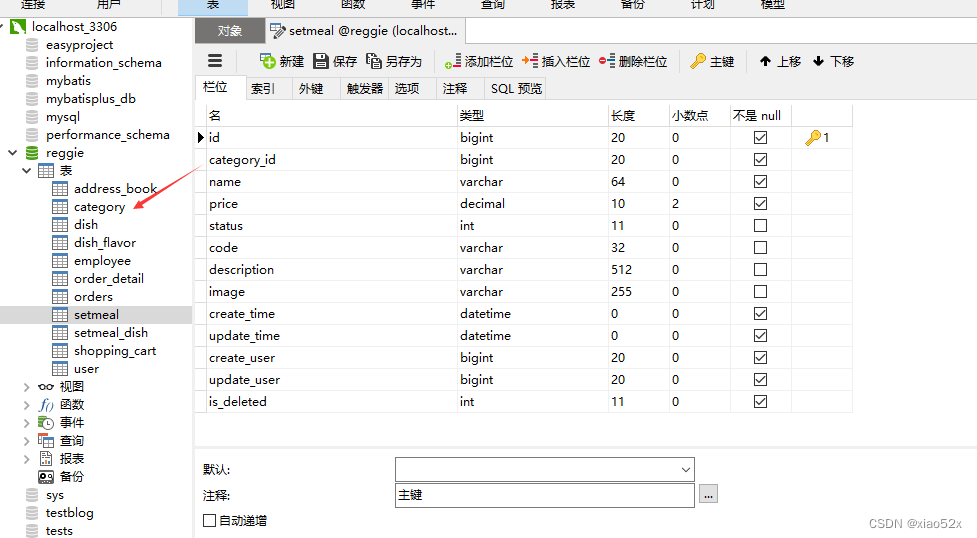
public class Setmeal implements Serializable {
private static final long serialVersionUID = 1L;
private Long id;
//分类id
private Long categoryId;
//套餐名称
private String name;
//套餐价格
private BigDecimal price;
//状态 0:停用 1:启用
private Integer status;
//编码
private String code;
//描述信息
private String description;
//图片
private String image;
@TableField(fill = FieldFill.INSERT)
private LocalDateTime createTime;
@TableField(fill = FieldFill.INSERT_UPDATE)
private LocalDateTime updateTime;
@TableField(fill = FieldFill.INSERT)
private Long createUser;
@TableField(fill = FieldFill.INSERT_UPDATE)
private Long updateUser;
//是否删除
private Integer isDeleted;
}
package com.xiao.reggie.entity;
import com.baomidou.mybatisplus.annotation.FieldFill;
import com.baomidou.mybatisplus.annotation.TableField;
import lombok.Data;
import java.io.Serializable;
import java.math.BigDecimal;
import java.time.LocalDateTime;
/**
* 套餐菜品关系
*/
@Data
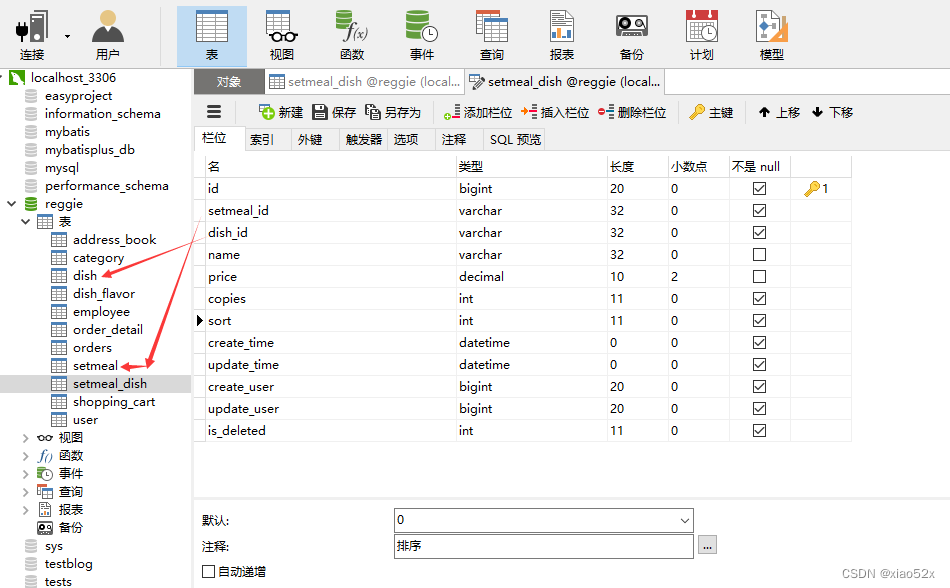
public class SetmealDish implements Serializable {
private static final long serialVersionUID = 1L;
private Long id;
//套餐id
private Long setmealId;
//菜品id
private Long dishId;
//菜品名称 (冗余字段)
private String name;
//菜品原价
private BigDecimal price;
//份数
private Integer copies;
//排序
private Integer sort;
@TableField(fill = FieldFill.INSERT)
private LocalDateTime createTime;
@TableField(fill = FieldFill.INSERT_UPDATE)
private LocalDateTime updateTime;
@TableField(fill = FieldFill.INSERT)
private Long createUser;
@TableField(fill = FieldFill.INSERT_UPDATE)
private Long updateUser;
//是否删除
private Integer isDeleted;
}
Mapper类
package com.xiao.reggie.mapper;

import com.baomidou.mybatisplus.core.mapper.BaseMapper;
import com.xiao.reggie.entity.Setmeal;
import org.apache.ibatis.annotations.Mapper;

@Mapper
public interface SetmealMapper extends BaseMapper<Setmeal> {

}

package com.xiao.reggie.mapper;

import com.baomidou.mybatisplus.core.mapper.BaseMapper;
import com.xiao.reggie.entity.SetmealDish;
import org.apache.ibatis.annotations.Mapper;

@Mapper
public interface SetmealDishMapper extends BaseMapper<SetmealDish> {
}
Service
package com.xiao.reggie.service;

import com.baomidou.mybatisplus.extension.service.IService;
import com.xiao.reggie.entity.Setmeal;

public interface SetmealService extends IService<Setmeal> {
}

package com.xiao.reggie.service;

import com.baomidou.mybatisplus.extension.service.IService;
import com.xiao.reggie.entity.SetmealDish;

public interface SetmealDishService extends IService<SetmealDish> {
}
package com.xiao.reggie.service.impl;

import com.baomidou.mybatisplus.extension.service.impl.ServiceImpl;
import com.xiao.reggie.entity.Setmeal;
import com.xiao.reggie.mapper.SetmealMapper;
import com.xiao.reggie.service.SetmealService;
import org.springframework.stereotype.Service;

@Service
public class SetmealServiceImpl extends ServiceImpl<SetmealMapper, Setmeal> implements SetmealService {
}

package com.xiao.reggie.service.impl;

import com.baomidou.mybatisplus.extension.service.impl.ServiceImpl;
import com.xiao.reggie.entity.SetmealDish;
import com.xiao.reggie.mapper.SetmealDishMapper;
import com.xiao.reggie.service.SetmealDishService;
import org.springframework.stereotype.Service;

@Service
public class SetmealDishServiceImpl extends ServiceImpl<SetmealDishMapper, SetmealDish> implements SetmealDishService {
}
SetmealDto
package com.xiao.reggie.dto;

import com.xiao.reggie.entity.Setmeal;
import com.xiao.reggie.entity.SetmealDish;
import lombok.Data;
import java.util.List;

@Data
public class SetmealDto extends Setmeal {

    private List<SetmealDish> setmealDishes;

    private String categoryName;
}


在DishController书写代码:
  /**
     * 根据条件查询对应的菜品数据
     * @param dish
     * @return
     */
    @GetMapping("/list")
    public R<List<Dish>> list(Dish dish){ //会自动映射的
        //这里可以传categoryId,但是为了代码通用性更强,这里直接使用dish类来接受(因为dish里面是有categoryId的),以后传dish的其他属性这里也可以使用
        //构造查询条件
        LambdaQueryWrapper<Dish> queryWrapper = new LambdaQueryWrapper<>();
        queryWrapper.eq(dish.getCategoryId() != null ,Dish::getCategoryId,dish.getCategoryId());
        //添加条件,查询状态为1(起售状态)的菜品
        queryWrapper.eq(Dish::getStatus,1);

        //添加排序条件
        queryWrapper.orderByAsc(Dish::getSort).orderByDesc(Dish::getUpdateTime);

        List<Dish> list = dishService.list(queryWrapper);
        return R.success(list);
    }
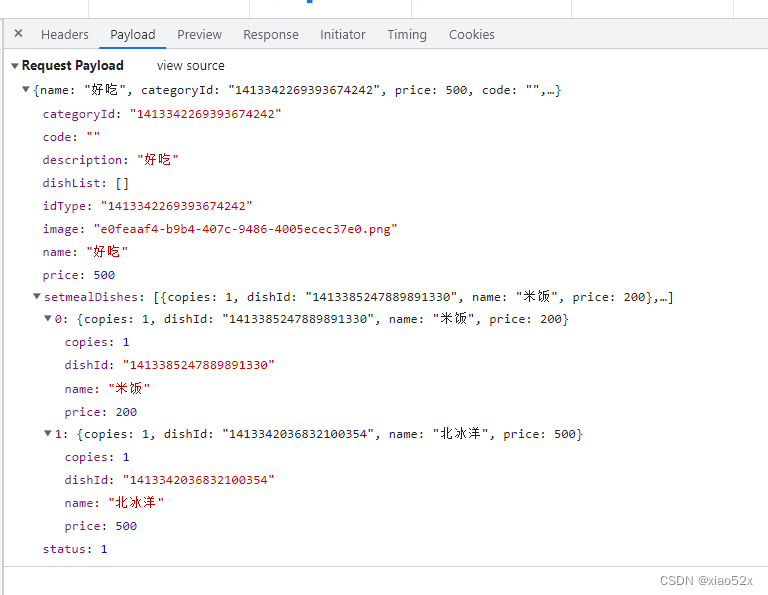
根据前端传过来的数据我们可以在后端确定我们需要在后端使用什么来接受前端的参数;
编写controller:上面的dishList,我们数据库并不需要这个数据,所以接收数据的实体类没有dishList这个属性也没有关系,前端传过来的数据都是自动映射到接收数据的实体类的属性上的,没有对应起来就不会映射。
- SetmealService中添加自定义的方法:
package com.xiao.reggie.service;

import com.baomidou.mybatisplus.extension.service.IService;
import com.xiao.reggie.dto.SetmealDto;
import com.xiao.reggie.entity.Setmeal;

public interface SetmealService extends IService<Setmeal> {
    /**
     * 新增套餐,同时需要保存套餐和菜品的关联关系
     * @param setmealDto
     */
    void saveWithDish(SetmealDto setmealDto);
}
SetmealServiceImpl中添加此方法
@Autowired
    SetmealDishService setmealDishService;

    /**
     * 新增套餐,同时需要保存套餐和菜品的关联关系
     * @param setmealDto
     */
    @Transactional
    @Override
    public void saveWithDish(SetmealDto setmealDto) {
        //保存套餐的基本信息,操作setmeal,执行insert
        this.save(setmealDto);
        log.info(setmealDto.toString()); //查看一下这个套餐的基本信息是什么

        //保存套餐和菜品的关联信息,操作setmeal_dish ,执行insert操作
        List<SetmealDish> setmealDishes = setmealDto.getSetmealDishes();
        //注意上面拿到的setmealDishes是没有setmeanlId这个的值的,通过debug可以发现
        setmealDishes.stream().map((item)->{
            item.setSetmealId(setmealDto.getId());
            return item; //这里返回的就是集合的泛型
        }).collect(Collectors.toList());

        setmealDishService.saveBatch(setmealDishes); //批量保存
    }
- 涉及两张表的操作:套餐表和菜品表;SetmealController
/*
*套餐管理
*/
@Slf4j
@RestController
@RequestMapping("/setmeal")
public class SetmealController {
@Autowired
private SetmealDishService setmealDishService;
@Autowired
private SetmealService setmealService;
/**
* 新增套餐
* 涉及两张表的操作:套餐表和菜品表;
* @param setmealDto
* @return
*/
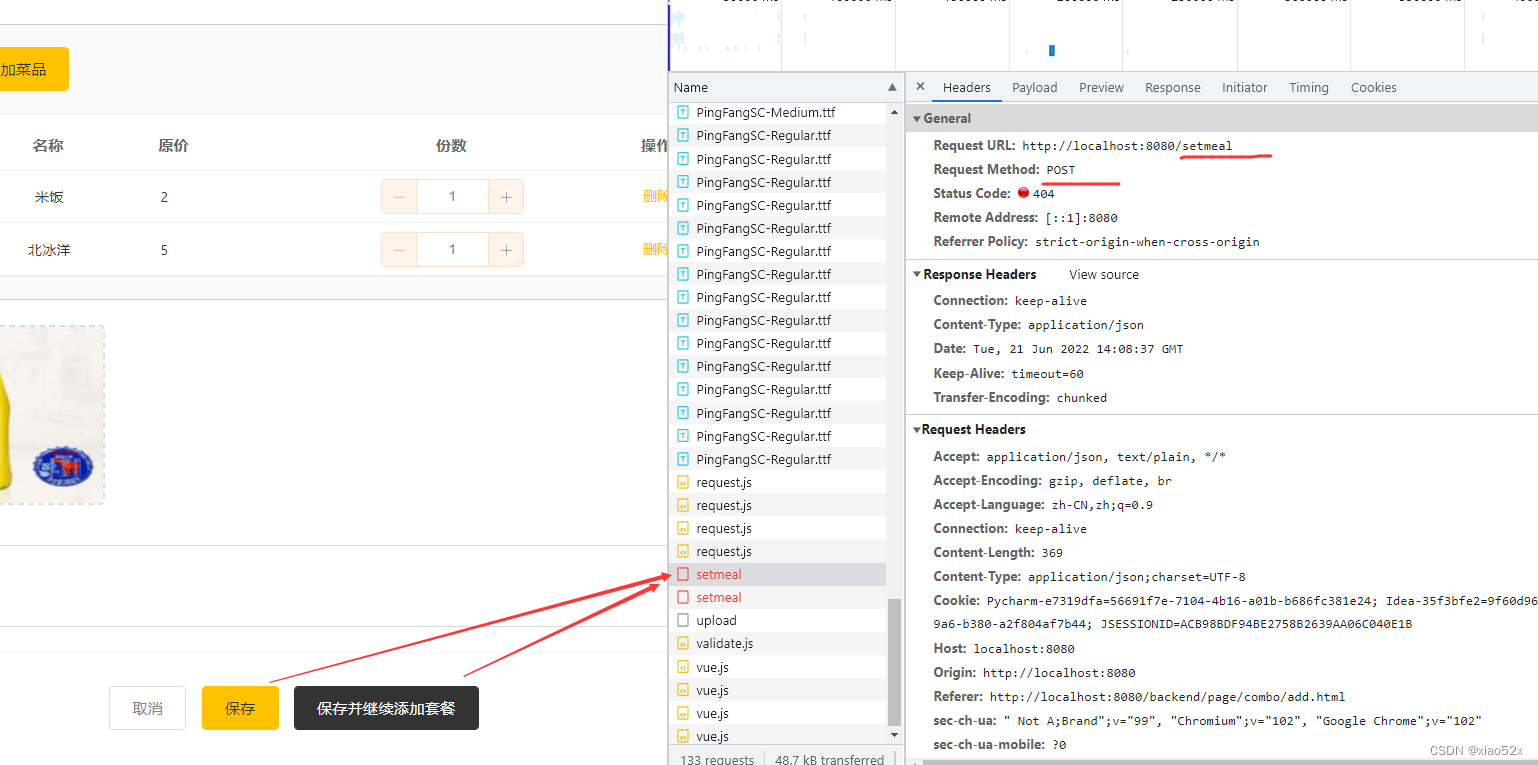
@PostMapping
public R<String> save(@RequestBody SetmealDto setmealDto){
setmealService.saveWithDish(setmealDto);
return R.success("新增套餐成功");
}
}
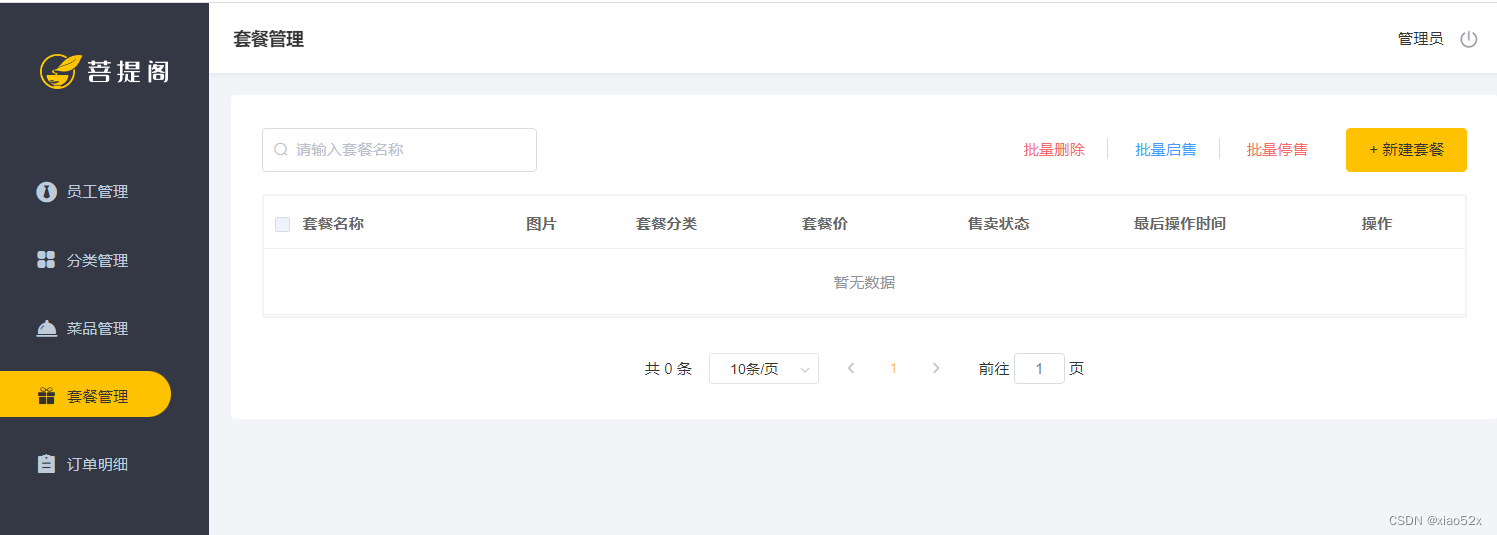
4.6.2 套餐信息分页查询
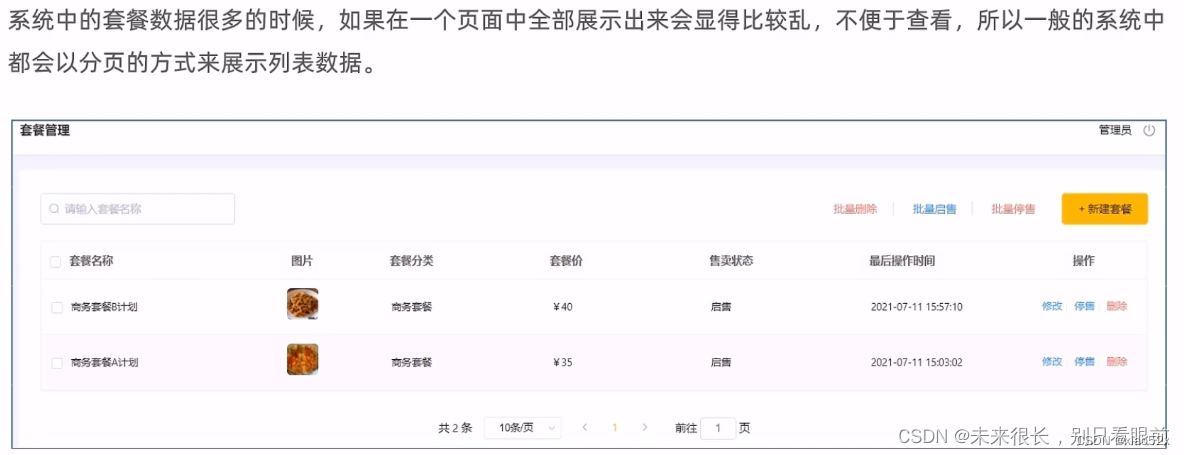
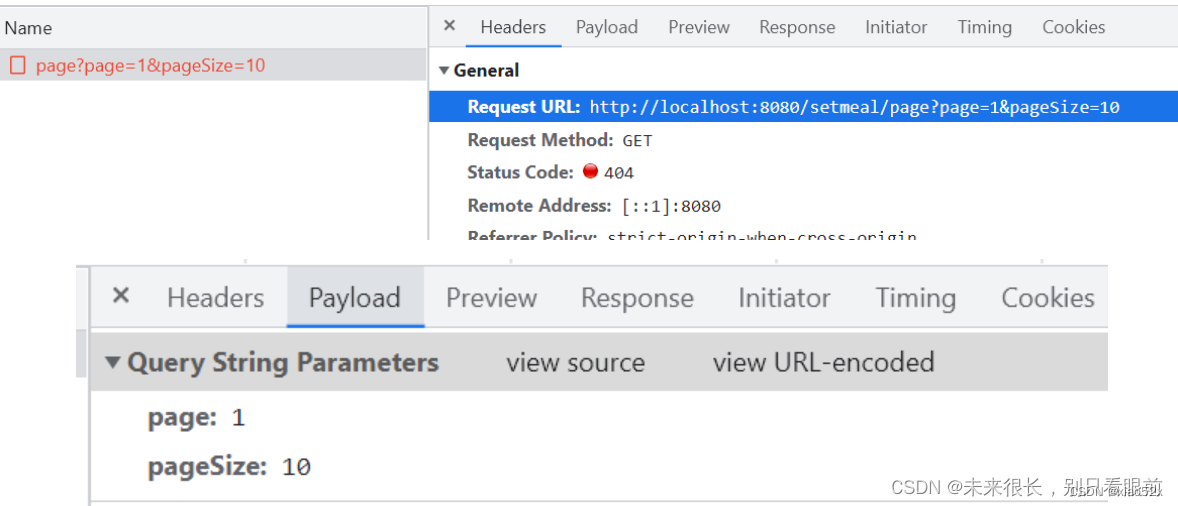
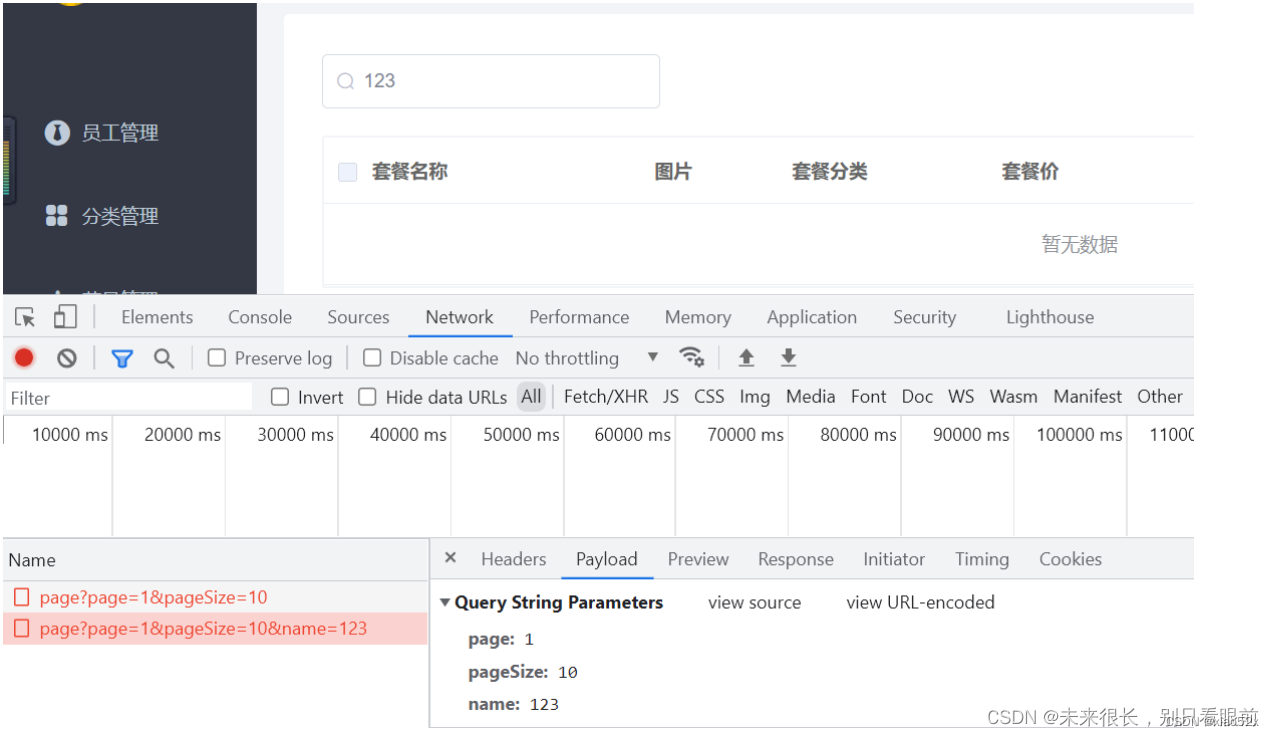
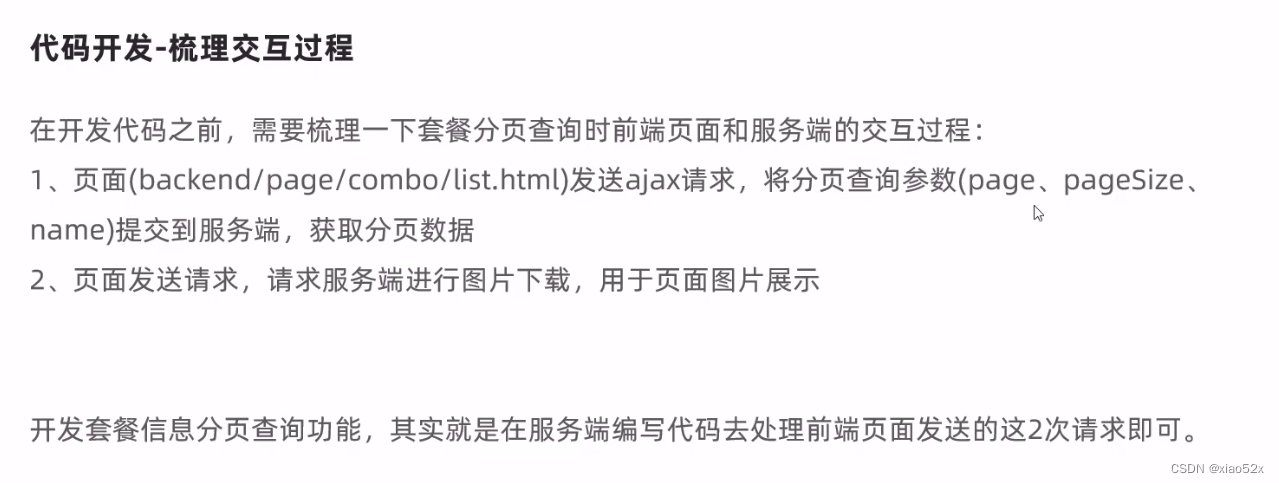
SetmealController:controller层代码编写:
/**
 * 套餐分页查询
 * @param page
 * @param pageSize
 * @param name
 * @return
 */
@GetMapping("/page")
public R<Page> page(int page, int pageSize, String name){

    //分页构造器对象
    Page<Setmeal> pageInfo = new Page<>(page,pageSize);
    //构造条件查询对象
    LambdaQueryWrapper<Setmeal> queryWrapper = new LambdaQueryWrapper<>();
    //添加查询条件,根据name进行like模糊查询
    queryWrapper.like(name != null,Setmeal::getName,name);
    //添加排序条件,根据更新时间降序排列
    queryWrapper.orderByDesc(Setmeal::getUpdateTime);
    setmealService.page(pageInfo,queryWrapper);

    /**
     * 注意如果这里直接返回R.success(pageInfo),
     * 虽然不会报错但是分页的数据的套餐分类的名字是显示不了的;
     * 因为这个分页的泛型是Setmeal,Setmeal只封装了f分类的Id categoryId,没有分类的名称 name
     * 所以又需要进行name的获取和设值
     */
    return R.success(pageInfo);
}
/**
 * 套餐分页查询
 * @param page
 * @param pageSize
 * @param name
 * @return
 */
@GetMapping("/page")
public R<Page> page(int page, int pageSize, String name){

    //分页构造器对象
    Page<Setmeal> pageInfo = new Page<>(page,pageSize);
    Page<SetmealDto> dtoPage = new Page<>(page,pageSize);

    //构造条件查询对象
    LambdaQueryWrapper<Setmeal> queryWrapper = new LambdaQueryWrapper<>();
    //添加查询条件,根据name进行like模糊查询
    queryWrapper.like(name != null,Setmeal::getName,name);
    //添加排序条件,根据更新时间降序排列
    queryWrapper.orderByDesc(Setmeal::getUpdateTime);
    setmealService.page(pageInfo,queryWrapper);

    //对象的拷贝  注意这里要把分页数据的全集合records给忽略掉
    BeanUtils.copyProperties(pageInfo,dtoPage,"records");
    List<Setmeal> records = pageInfo.getRecords();

    //对records对象进行处理然后封装好赋值给list
    List<SetmealDto> list = records.stream().map((item)->{
        SetmealDto setmealDto = new SetmealDto();

        //对setmealDto进行除categoryName的属性进行拷贝(因为item里面没有categoryName)
        BeanUtils.copyProperties(item,setmealDto);

        //获取分类id  通过分类id获取分类对象  然后再通过分类对象获取分类名
        Long categoryId = item.getCategoryId();

        //根据分类id获取分类对象  判断是否为null
        Category category = categoryService.getById(categoryId);

        if (category != null){
            String categoryName = category.getName();
            setmealDto.setCategoryName(categoryName);
        }
        return setmealDto;
    }).collect(Collectors.toList());
    dtoPage.setRecords(list);

    return R.success(dtoPage);
}
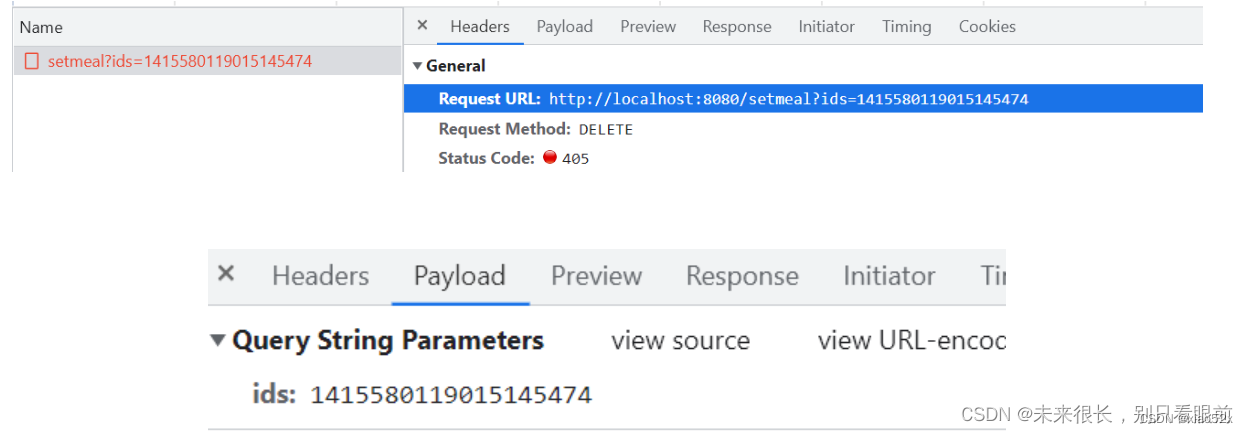
4.6.3 删除套餐
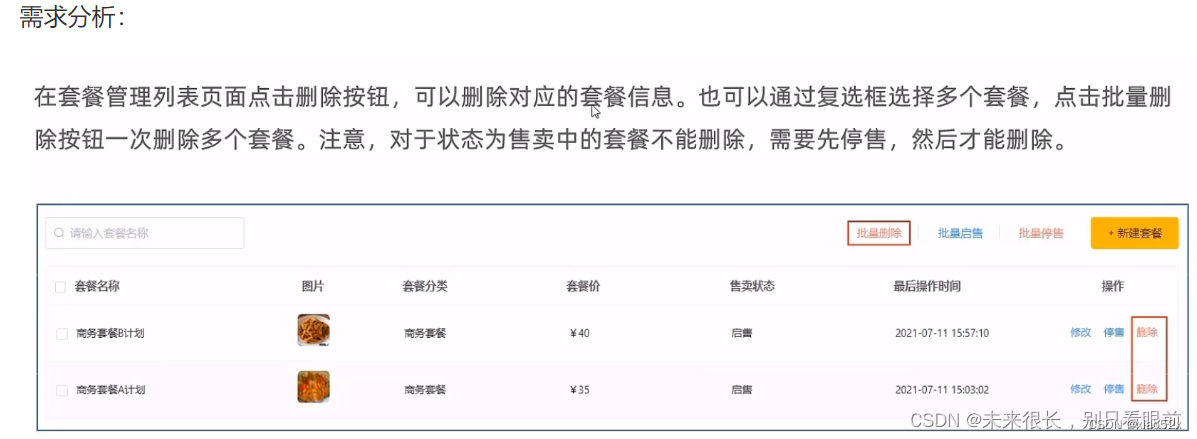
单个套餐删除前端发的请求和携带的参数:
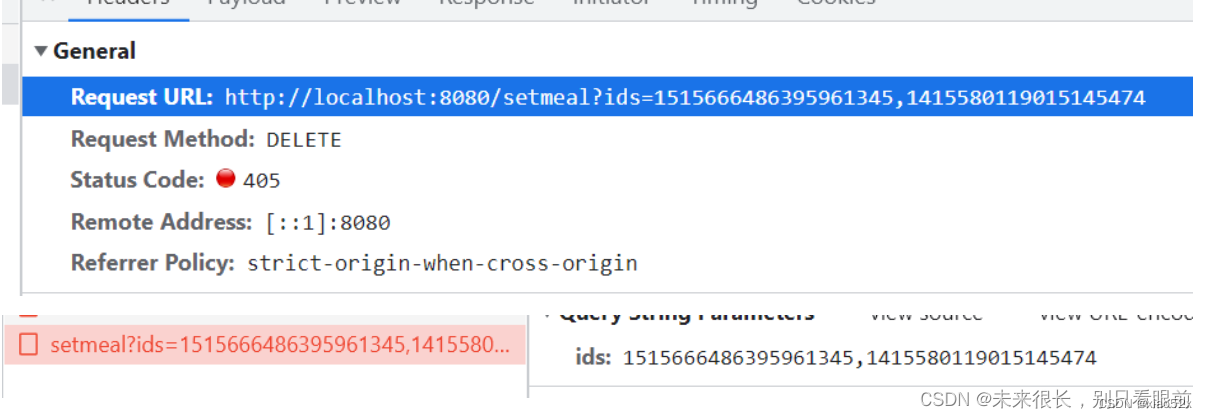
套餐批量删除前端发的请求和携带的参数:
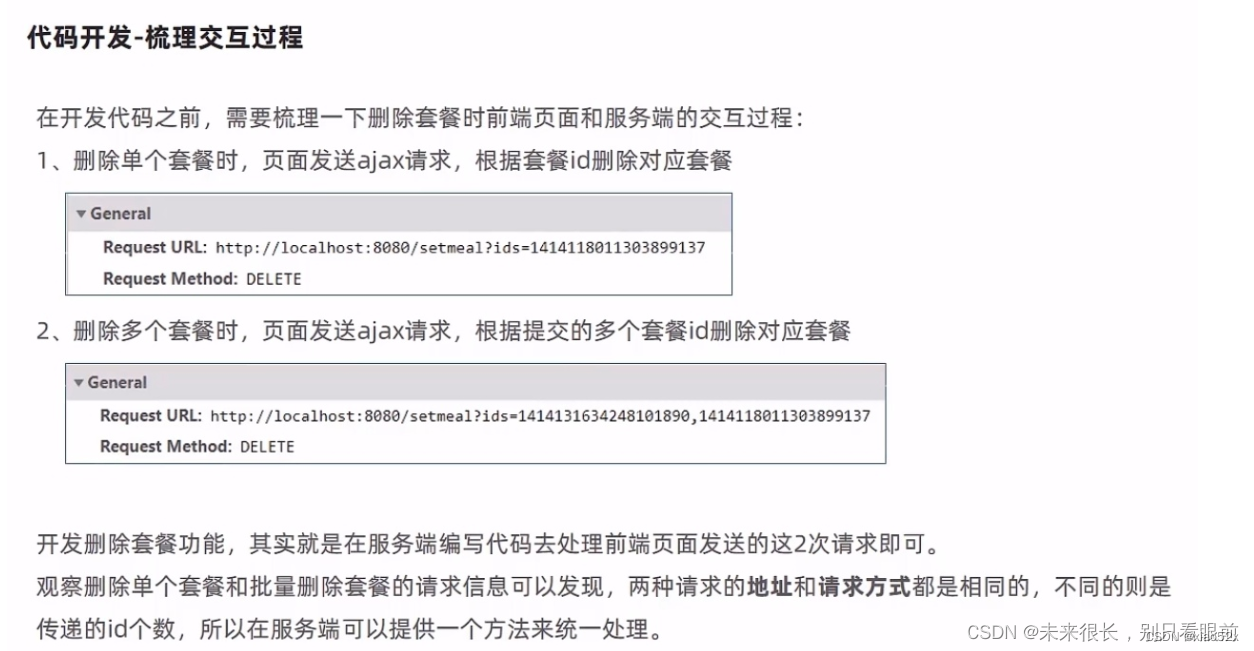
controller层开发
在SetmealService中添加自定义的方法:
/**
 * 删除套餐,同时需要删除套餐和菜品的关联数据
 * @param ids
 */
void removeWithDish(List<Long> ids);
/**
 * 删除套餐,同时需要删除套餐和菜品的关联数据
 * @param ids
 */
@Override
@Transactional
public void removeWithDish(List<Long> ids) {
    //sql语句应该是这样的:select count(*) setmeal where id in () and status = 1;
    //查询套餐的状态,看是否可以删除
    LambdaQueryWrapper<Setmeal> queryWrapper = new LambdaQueryWrapper();
    queryWrapper.in(Setmeal::getId,ids);
    queryWrapper.eq(Setmeal::getStatus,1);
    int count = this.count(queryWrapper);
    //如果不能删除,抛出一个业务异常
    if (count > 0){
        throw new CustomException("套餐正在售卖中,不能删除");
    }
    //如果可以删除,先删除套餐表中的数据--setmeal
    this.removeByIds(ids);
    //删除关系表中的数据--setmeal_dish
    //delete from setmeal_dish where setmeal_id in (1,2,3)
    LambdaQueryWrapper<SetmealDish> lambdaQueryWrapper = new LambdaQueryWrapper();
    lambdaQueryWrapper.in(SetmealDish::getSetmealId,ids);
    setmealDishService.remove(lambdaQueryWrapper);
}

SetmealController
      /**
     * 套餐批量删除和单个删除
     * @return
     */
    @DeleteMapping
    public R<String> delete(@RequestParam("ids") List<Long> ids){
        log.info("ids:{]",ids);

        setmealService.removeWithDish(ids);
        return R.success("套餐数据删除成功");
    }
4.6.4 其他待完善功能(启售停售、修改)
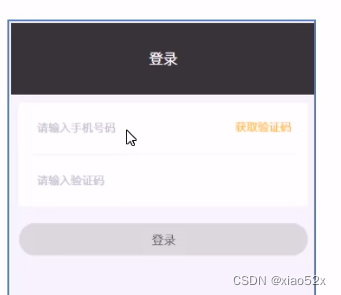
4.7 手机验证码登录(移动端)
4.7.1短信发送
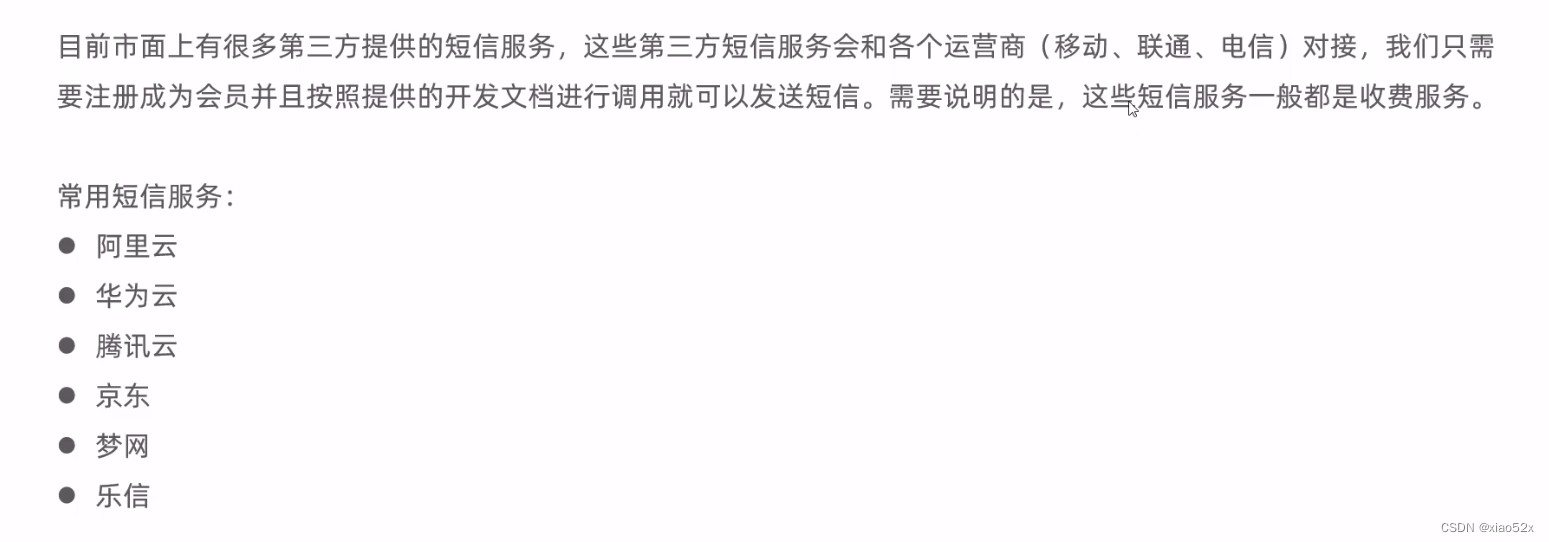
这里使用的是阿里云短信,但是吧,对于个人来说,几乎是申请不到短信的模板签名,所以这里只能大概介绍一下怎么使用阿里云发送短信,具体调用阿里云短信服务的Java代码也会给出;

4.7.2 短信验证码登陆

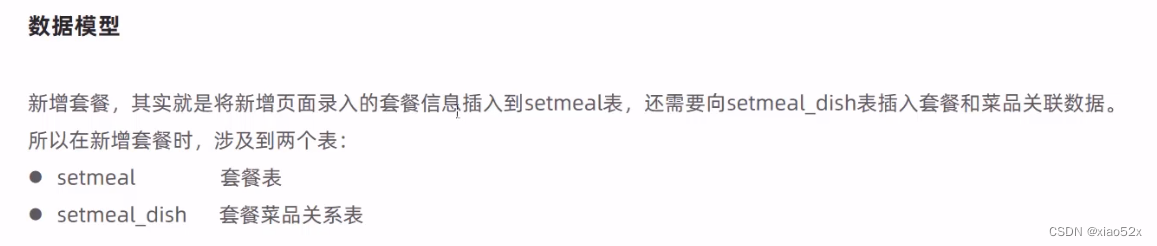
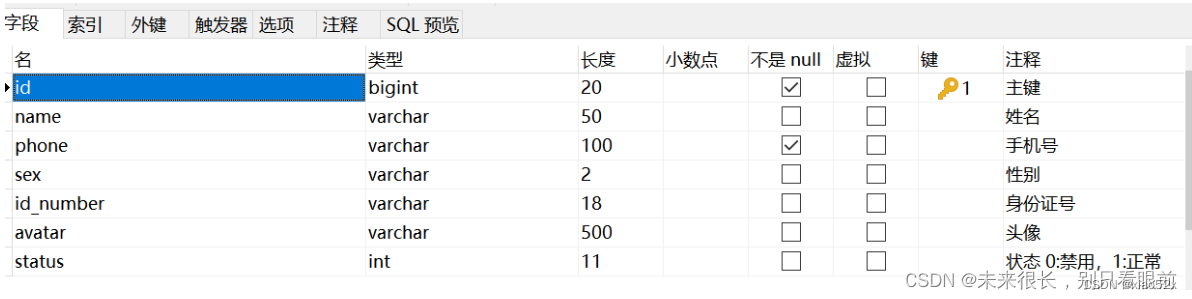
数据模型:
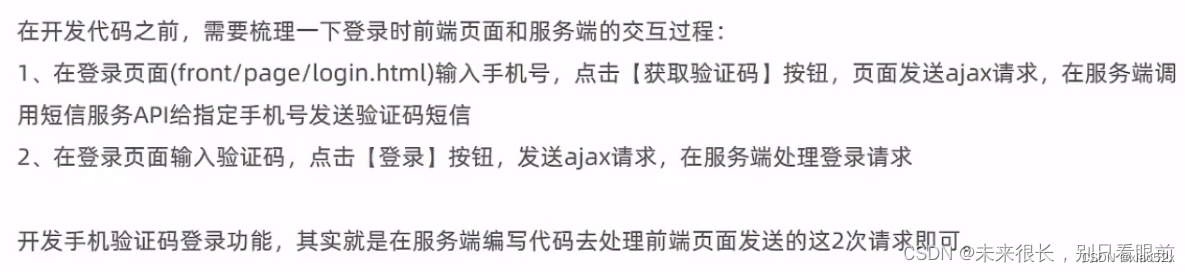
前后端交互过程:
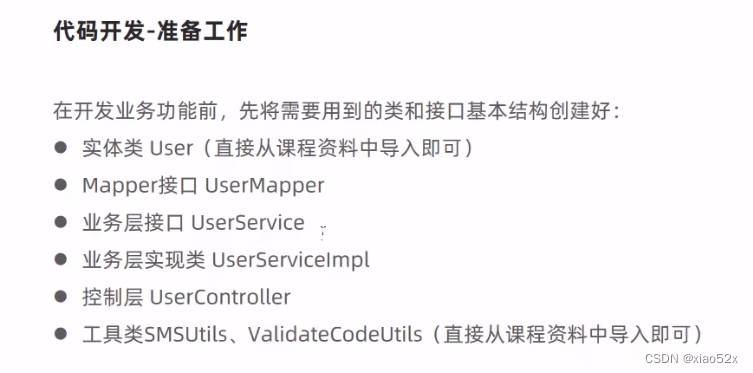
导入user实体类;创建userMapper: 创建service:实现service:
package com.xiao.reggie.entity;

import lombok.Data;
import java.time.LocalDateTime;
import java.util.Date;
import java.util.List;
import java.io.Serializable;
import com.baomidou.mybatisplus.annotation.IdType;
import com.baomidou.mybatisplus.annotation.TableId;
/**
 * 用户信息
 */
@Data
public class User implements Serializable {

    private static final long serialVersionUID = 1L;

    private Long id;


    //姓名
    private String name;


    //手机号
    private String phone;


    //性别 0 女 1 男
    private String sex;


    //身份证号
    private String idNumber;


    //头像
    private String avatar;


    //状态 0:禁用,1:正常
    private Integer status;
}
package com.xiao.reggie.mapper;

import com.baomidou.mybatisplus.core.mapper.BaseMapper;
import com.xiao.reggie.entity.User;
import org.apache.ibatis.annotations.Mapper;

@Mapper
public interface UserMapper extends BaseMapper<User> {
}
package com.xiao.reggie.service;

import com.baomidou.mybatisplus.extension.service.IService;
import com.xiao.reggie.entity.User;

public interface UserService extends IService<User> {
}
package com.xiao.reggie.service.impl;

import com.baomidou.mybatisplus.extension.service.impl.ServiceImpl;
import com.xiao.reggie.entity.User;
import com.xiao.reggie.mapper.UserMapper;
import com.xiao.reggie.service.UserService;
import org.springframework.stereotype.Service;

@Service
public class UserServiceImpl extends ServiceImpl<UserMapper,User> implements UserService {
}
导入工具类:

package com.xiao.reggie.utils;

import com.aliyuncs.DefaultAcsClient;
import com.aliyuncs.IAcsClient;
import com.aliyuncs.dysmsapi.model.v20170525.SendSmsRequest;
import com.aliyuncs.dysmsapi.model.v20170525.SendSmsResponse;
import com.aliyuncs.exceptions.ClientException;
import com.aliyuncs.profile.DefaultProfile;

/**
 * 短信发送工具类
 */
public class SMSUtils {

	/**
	 * 发送短信
	 * @param signName 签名
	 * @param templateCode 模板
	 * @param phoneNumbers 手机号
	 * @param param 参数
	 */
	public static void sendMessage(String signName, String templateCode,String phoneNumbers,String param){
		DefaultProfile profile = DefaultProfile.getProfile("cn-hangzhou", "", "");
		IAcsClient client = new DefaultAcsClient(profile);

		SendSmsRequest request = new SendSmsRequest();
		request.setSysRegionId("cn-hangzhou");
		request.setPhoneNumbers(phoneNumbers);
		request.setSignName(signName);
		request.setTemplateCode(templateCode);
		request.setTemplateParam("{\"code\":\""+param+"\"}");
		try {
			SendSmsResponse response = client.getAcsResponse(request);
			System.out.println("短信发送成功");
		}catch (ClientException e) {
			e.printStackTrace();
		}
	}

}
package com.xiao.reggie.utils;

import java.util.Random;

/**
 * 随机生成验证码工具类
 */
public class ValidateCodeUtils {
    /**
     * 随机生成验证码
     * @param length 长度为4位或者6位
     * @return
     */
    public static Integer generateValidateCode(int length){
        Integer code =null;
        if(length == 4){
            code = new Random().nextInt(9999);//生成随机数,最大为9999
            if(code < 1000){
                code = code + 1000;//保证随机数为4位数字
            }
        }else if(length == 6){
            code = new Random().nextInt(999999);//生成随机数,最大为999999
            if(code < 100000){
                code = code + 100000;//保证随机数为6位数字
            }
        }else{
            throw new RuntimeException("只能生成4位或6位数字验证码");
        }
        return code;
    }

    /**
     * 随机生成指定长度字符串验证码
     * @param length 长度
     * @return
     */
    public static String generateValidateCode4String(int length){
        Random rdm = new Random();
        String hash1 = Integer.toHexString(rdm.nextInt());
        String capstr = hash1.substring(0, length);
        return capstr;
    }
}
短信验证码登陆
http://localhost:8080/front/page/login.html

发送验证码(给的资料有点残缺,这里修改了)
注意这个资料有点残缺,补全:
在longin.html中找到这个获取验证码的方法,把一行注释,然后添加一行代码一行;
getCode(){
    this.form.code = ''
    const regex = /^(13[0-9]{9})|(15[0-9]{9})|(17[0-9]{9})|(18[0-9]{9})|(19[0-9]{9})$/;
    if (regex.test(this.form.phone)) {
        this.msgFlag = false
        //this.form.code = (Math.random()*1000000).toFixed(0)
        sendMsgApi({phone:this.form.phone})  //添加的
    }else{
        this.msgFlag = true
    }
},
在login.js中添加一个方法:
function sendMsgApi(data){
    return $axios({
        'url':'/user/sendMsg',
        'method':'post',
        data
    })
}
在登陆拦截器LongCheckFilter中添加新的白名单:
并且在里面继续添加一个手机端登陆状态的放行判断:
String[] urls = new String[]{
        "/employee/login",
        "/employee/logout",
        "/backend/**",
        "/front/**",
        "/common/**",
        "/user/sendMsg", //移动端发送短信
        "/user/login"  // 移动端登陆
};

//4-2判断移动端登录状态,如果已登录,则直接放行
        if(request.getSession().getAttribute("user") != null){
            //log.info("用户已登录,用户id为:{}",request.getSession().getAttribute("user"));
            //把用户id存储到本地的threadLocal
            Long userId = (Long) request.getSession().getAttribute("user");
            BaseContext.setCurrentId(userId);


            filterChain.doFilter(request,response);
            return;
        }
UserController :编写controller:
@Slf4j
@RestController
@RequestMapping("/user")
public class UserController {
    @Autowired
    private UserService userService;

    /**
     * 发送手机短信验证码
     * @param user
     * @return
     */
    @PostMapping("/sendMsg")
    public R<String> sendMsg(@RequestBody User user, HttpSession session){
        //获取手机号
        String phone = user.getPhone();
        if (StringUtils.isNotEmpty(phone)){
            //随机生成的4为验证码
            Integer integerCode = ValidateCodeUtils.generateValidateCode(4);
            String code = integerCode.toString();

            log.info("code={}",code);
            //调用阿里云提供的短信服务api完成发送短信  这里个人用户申请不了阿里云短信服务的签名,所以这里在后台输出了
            //SMSUtils.sendMessage("","","","");

            //把验证码存起来  这里使用session来存放验证码,当然也可以存到redis
            session.setAttribute(phone,code);
            return R.success("手机验证码发送成功");
        }

        return R.error("手机验证码发送失败");
    }
}
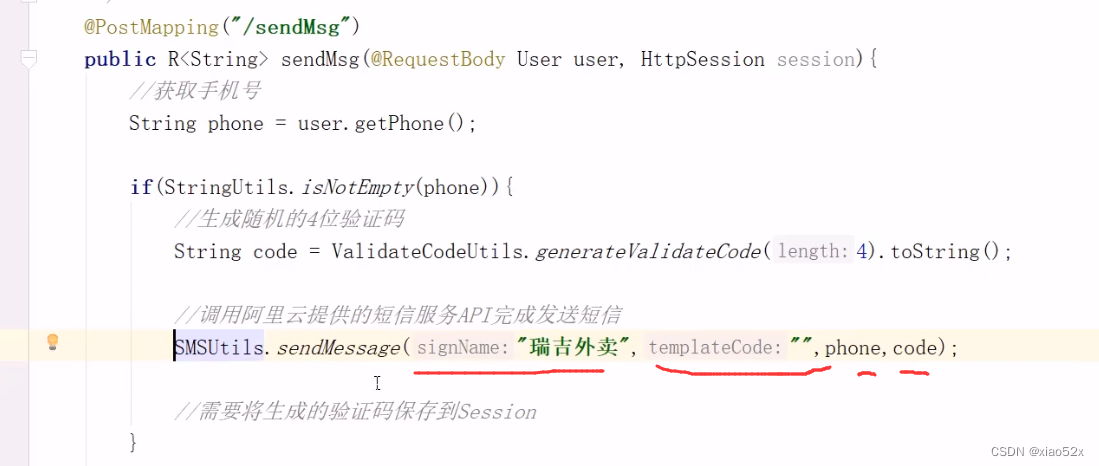
功能测试:访问手机端,输入手机号,看能不能在后台打印验证码;
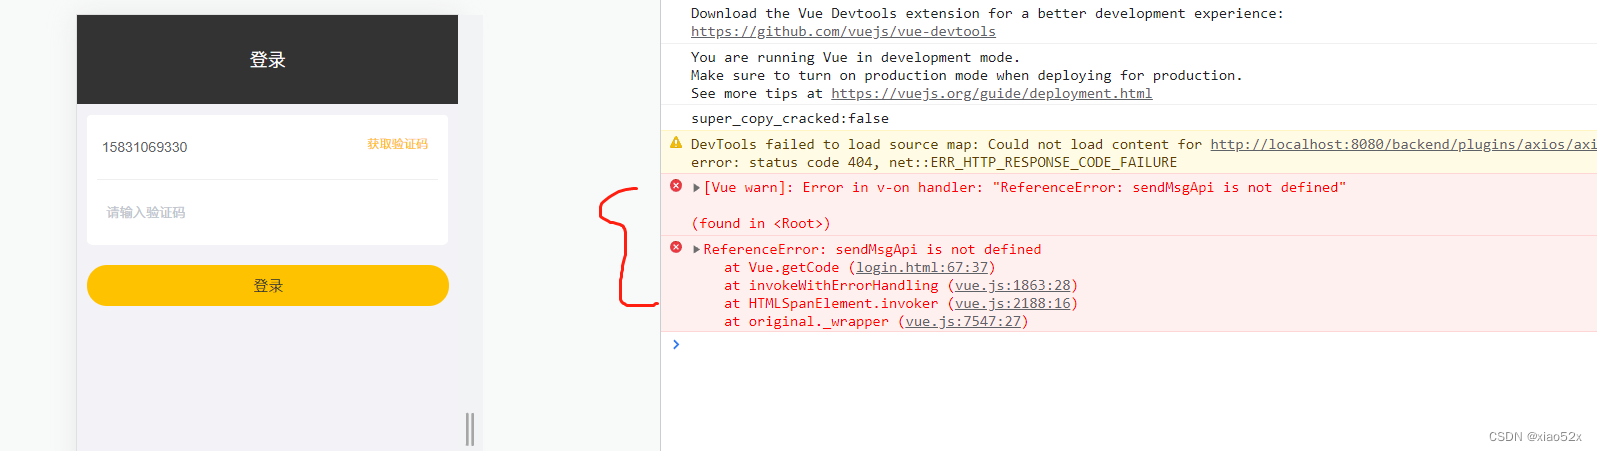
如果谷歌浏览器报这样的错误的,清楚缓存。换个浏览器会正常

4.7.2 使用验证码登陆(使用map接收数据)
注意:测试的时候发现前端页面明明填了验证码,发现验证码并没有被携带在前端的请求参数中,所以后端也没有拿到验证码这个数据,一看就是前端发请求的地方的参数携带少了;修改一下参数就行;
async btnLogin(){
    if(this.form.phone && this.form.code){
        this.loading = true

        //const res = await loginApi({phone:this.form.phone})  这里是资料给的代码
        const res = await loginApi(this.form)  //这里是自己加的

        ....
}
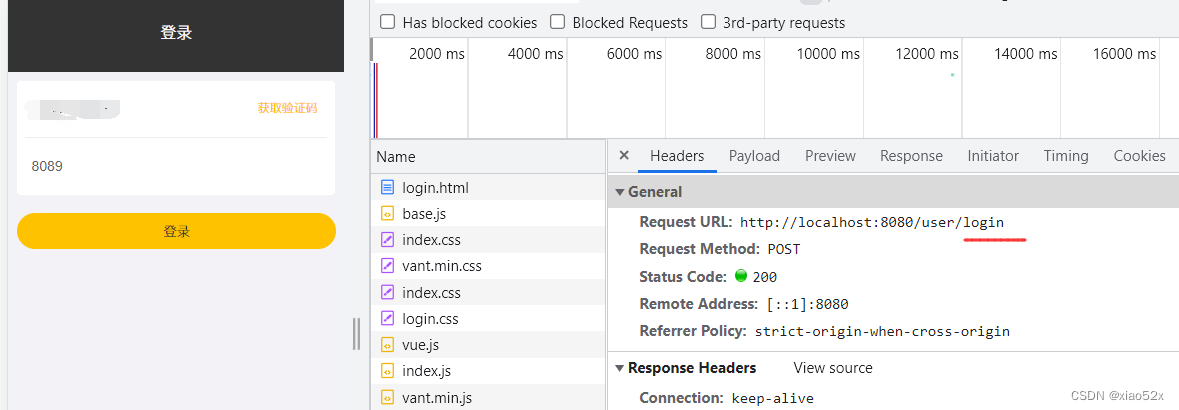
controller层代码:
/**
 * 移动端用户登录
 * @param map
 * @param session
 * @return
 */
@PostMapping("/login")
public R<User> login(@RequestBody Map map, HttpSession session){
	//map 获取的内容 {phone=15801096550, code=8089}
    //log.info(map.toString());

    //获取手机号
    String phone = map.get("phone").toString();

    //获取验证码
    String code = map.get("code").toString();

    //从Session中获取保存的验证码
    Object codeInSession = session.getAttribute(phone);

    //进行验证码的比对(页面提交的验证码和Session中保存的验证码比对)
    if(codeInSession != null && codeInSession.equals(code)){
        //如果能够比对成功,说明登录成功

        LambdaQueryWrapper<User> queryWrapper = new LambdaQueryWrapper<>();
        queryWrapper.eq(User::getPhone,phone);
        //根据用户的手机号去用户表获取用户
        User user = userService.getOne(queryWrapper);
        if(user == null){
            //判断当前手机号对应的用户是否为新用户,如果是新用户就自动完成注册
            user = new User();
            user.setPhone(phone);
            user.setStatus(1); //可设置也可不设置,因为数据库我们设置了默认值
            //注册新用户
            userService.save(user);
        }
        //这一行容易漏。。保存用户登录状态
        session.setAttribute("user",user.getId()); //在session中保存用户的登录状态,这样才过滤器的时候就不会被拦截了
        return R.success(user);
    }
    return R.error("登录失败");
}
功能测试:验证码正确后跳转到手机端;
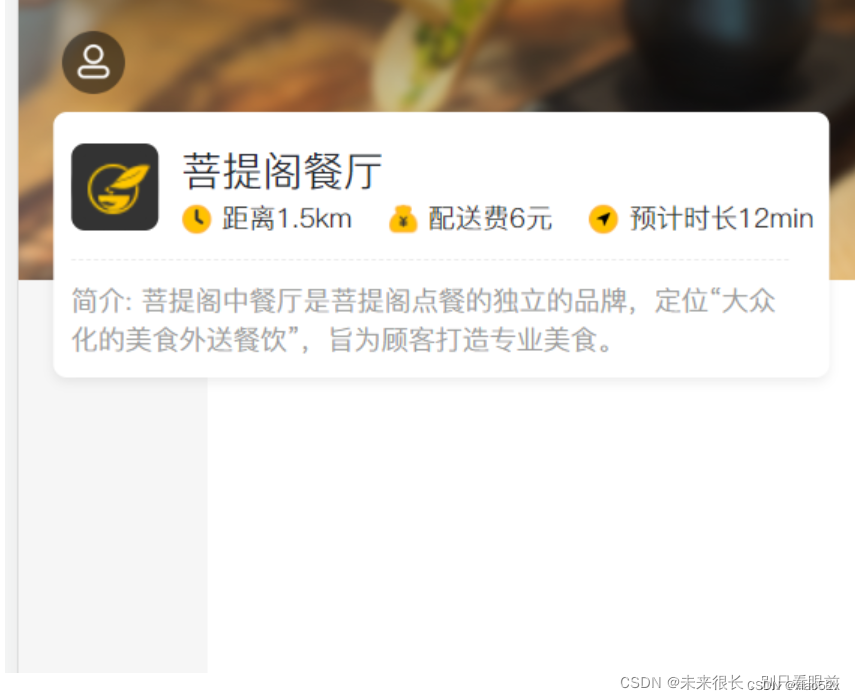
4.8 移动端开发
4.8.1 导入用户地址簿类:
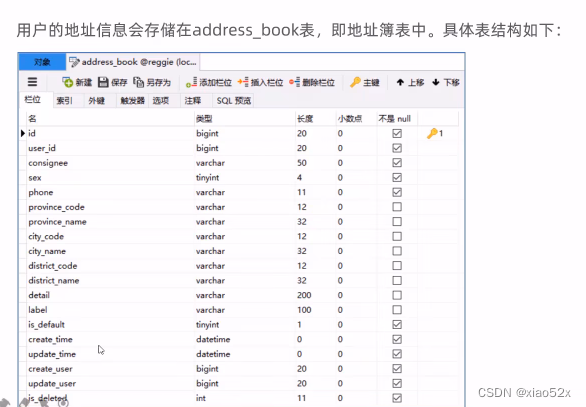
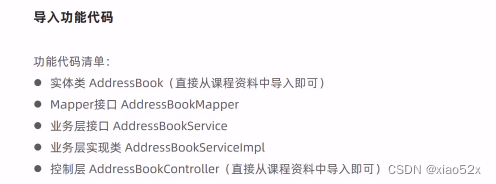
代码开发:
准备工作,导入AddressBook实体类,检查一下实体类的属性是否和数据库中的表字段一一对应;
实体类:
package com.xiao.reggie.entity;

import com.baomidou.mybatisplus.annotation.FieldFill;
import com.baomidou.mybatisplus.annotation.TableField;
import lombok.Data;
import java.io.Serializable;
import java.time.LocalDateTime;

/**
 * 地址簿
 */
@Data
public class AddressBook implements Serializable {

    private static final long serialVersionUID = 1L;

    private Long id;


    //用户id
    private Long userId;


    //收货人
    private String consignee;


    //手机号
    private String phone;


    //性别 0 女 1 男
    private String sex;


    //省级区划编号
    private String provinceCode;


    //省级名称
    private String provinceName;


    //市级区划编号
    private String cityCode;


    //市级名称
    private String cityName;


    //区级区划编号
    private String districtCode;


    //区级名称
    private String districtName;


    //详细地址
    private String detail;


    //标签
    private String label;

    //是否默认 0 否 1是
    private Integer isDefault;

    //创建时间
    @TableField(fill = FieldFill.INSERT)
    private LocalDateTime createTime;


    //更新时间
    @TableField(fill = FieldFill.INSERT_UPDATE)
    private LocalDateTime updateTime;


    //创建人
    @TableField(fill = FieldFill.INSERT)
    private Long createUser;


    //修改人
    @TableField(fill = FieldFill.INSERT_UPDATE)
    private Long updateUser;


    //是否删除
    private Integer isDeleted;
}
创建mapper:
package com.xiao.reggie.mapper;

import com.baomidou.mybatisplus.core.mapper.BaseMapper;
import com.xiao.reggie.entity.AddressBook;
import org.apache.ibatis.annotations.Mapper;
import org.apache.ibatis.annotations.Select;

import java.util.List;

@Mapper
public interface AddressBookMapper extends BaseMapper<AddressBook> {

}
service实现类:
package com.xiao.reggie.service;

import com.baomidou.mybatisplus.extension.service.IService;
import com.xiao.reggie.entity.AddressBook;

public interface AddressBookService extends IService<AddressBook> {

}
package com.xiao.reggie.service.impl;

import com.baomidou.mybatisplus.extension.service.impl.ServiceImpl;
import com.xiao.reggie.entity.AddressBook;
import com.xiao.reggie.mapper.AddressBookMapper;
import com.xiao.reggie.service.AddressBookService;
import org.springframework.stereotype.Service;

@Service
public class AddressBookServiceImpl extends ServiceImpl<AddressBookMapper, AddressBook> implements AddressBookService {

}
controller层编写:
package com.xiao.reggie.controller;

import com.baomidou.mybatisplus.core.conditions.query.LambdaQueryWrapper;
import com.baomidou.mybatisplus.core.conditions.update.LambdaUpdateWrapper;
import com.baomidou.mybatisplus.extension.plugins.pagination.Page;

import com.xiao.reggie.commom.BaseContext;
import com.xiao.reggie.commom.R;
import com.xiao.reggie.entity.AddressBook;
import com.xiao.reggie.service.AddressBookService;
import lombok.extern.slf4j.Slf4j;
import org.springframework.beans.factory.annotation.Autowired;
import org.springframework.util.CollectionUtils;
import org.springframework.web.bind.annotation.*;

import java.util.List;

/**
 * 地址簿管理
 */
@Slf4j
@RestController
@RequestMapping("/addressBook")
public class AddressBookController {

    @Autowired
    private AddressBookService addressBookService;

    /**
     * 新增
     */
    @PostMapping
    public R<AddressBook> save(@RequestBody AddressBook addressBook) {
        addressBook.setUserId(BaseContext.getCurrentId());
        log.info("addressBook:{}", addressBook);
        addressBookService.save(addressBook);
        return R.success(addressBook);
    }

    /**
     * 设置默认地址
     */
    @PutMapping("default")
    public R<AddressBook> setDefault(@RequestBody AddressBook addressBook) {
        log.info("addressBook:{}", addressBook);
        LambdaUpdateWrapper<AddressBook> wrapper = new LambdaUpdateWrapper<>();
        wrapper.eq(AddressBook::getUserId, BaseContext.getCurrentId());
        wrapper.set(AddressBook::getIsDefault, 0);
        //SQL:update address_book set is_default = 0 where user_id = ?
        addressBookService.update(wrapper);

        addressBook.setIsDefault(1);
        //SQL:update address_book set is_default = 1 where id = ?
        addressBookService.updateById(addressBook);
        return R.success(addressBook);
    }

    /**
     * 根据id查询地址
     */
    @GetMapping("/{id}")
    public R get(@PathVariable Long id) {
        AddressBook addressBook = addressBookService.getById(id);
        if (addressBook != null) {
            return R.success(addressBook);
        } else {
            return R.error("没有找到该对象");
        }
    }

    /**
     * 查询默认地址
     */
    @GetMapping("default")
    public R<AddressBook> getDefault() {
        LambdaQueryWrapper<AddressBook> queryWrapper = new LambdaQueryWrapper<>();
        queryWrapper.eq(AddressBook::getUserId, BaseContext.getCurrentId());
        queryWrapper.eq(AddressBook::getIsDefault, 1);

        //SQL:select * from address_book where user_id = ? and is_default = 1
        AddressBook addressBook = addressBookService.getOne(queryWrapper);

        if (null == addressBook) {
            return R.error("没有找到该对象");
        } else {
            return R.success(addressBook);
        }
    }

    /**
     * 查询指定用户的全部地址
     */
    @GetMapping("/list")
    public R<List<AddressBook>> list(AddressBook addressBook) {
        addressBook.setUserId(BaseContext.getCurrentId());
        log.info("addressBook:{}", addressBook);

        //条件构造器
        LambdaQueryWrapper<AddressBook> queryWrapper = new LambdaQueryWrapper<>();
        queryWrapper.eq(null != addressBook.getUserId(), AddressBook::getUserId, addressBook.getUserId());
        queryWrapper.orderByDesc(AddressBook::getUpdateTime);

        //SQL:select * from address_book where user_id = ? order by update_time desc
        return R.success(addressBookService.list(queryWrapper));
    }
}
功能测试:
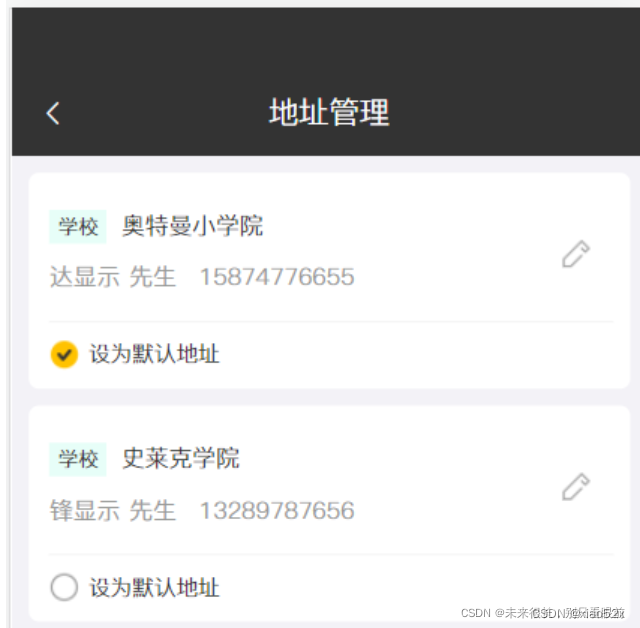
4.8.1 菜品展示
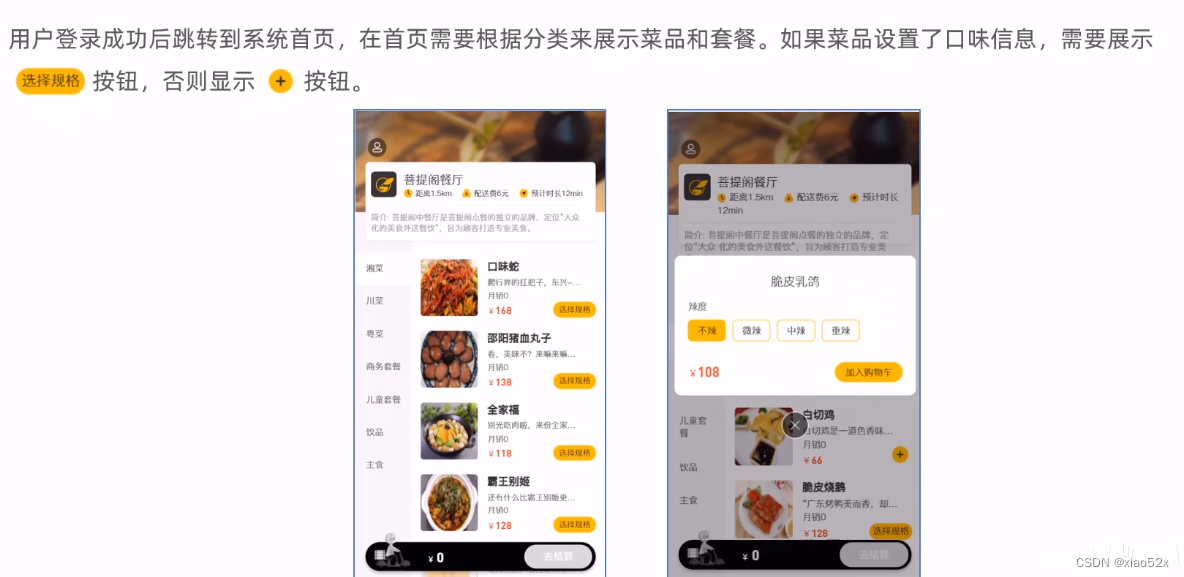
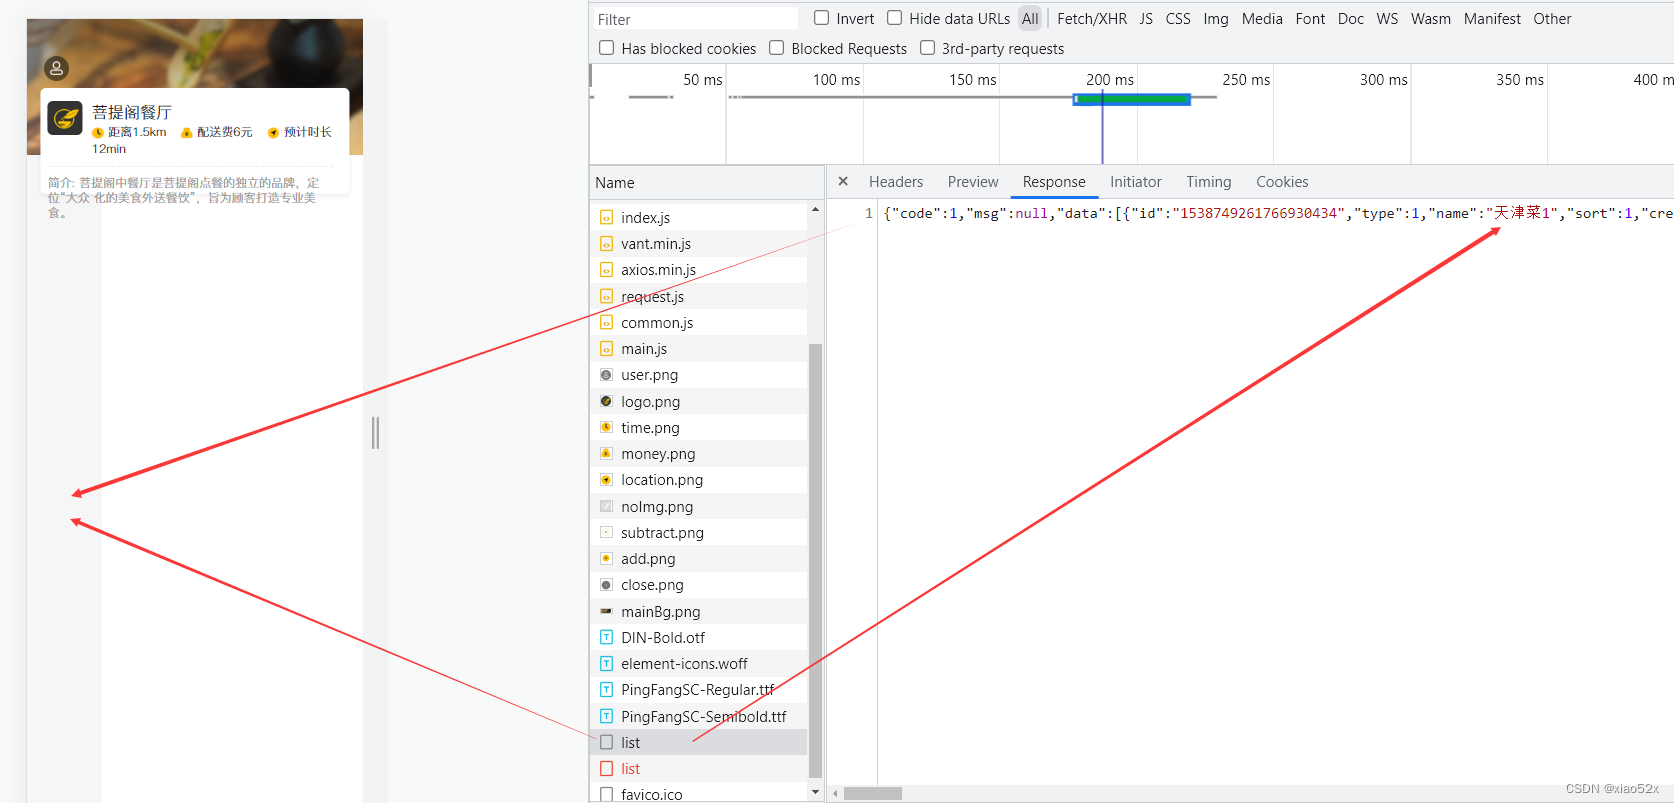
前端重点代码:
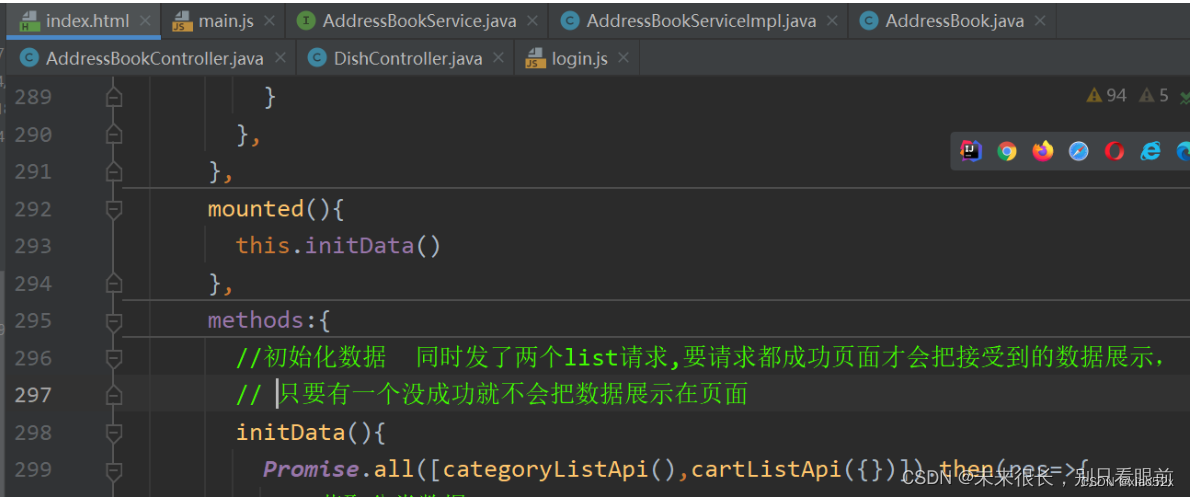
main.js
//获取所有的菜品分类
function categoryListApi() {
    return $axios({
      'url': '/category/list',
      'method': 'get',
    })
  }

//获取购物车内商品的集合
function cartListApi(data) {
    return $axios({
        'url': '/shoppingCart/list',
        'method': 'get',
        params:{...data}
    })
}
我们发现前端的展示页面中请求到了category的数据,服务器也响应了数据给前端页面,但是我们也看见了手机端并没有展示相关的套餐数据;这是因为在加载页面的时候,前端一共发了两个list请求,具体的请求看上面的前端代码,请求购物车信息的请求返回404,所以导致category的数据也没有被展示;
这里我们先在其他地方静态的接收购物车的请求,这样就可以先显示category的数据;先用假数据测试一下:
修改购物车的请求地址,
main.js
//获取购物车内商品的集合
function cartListApi(data) {
    return $axios({
        //'url': '/shoppingCart/list',
        'url':'/front/cartData.json',
        'method': 'get',
        params:{...data}
    })
}
cartData.json的假数据
// 假数据文件
{"code":1,"msg":null,"data":[],"map":{}}
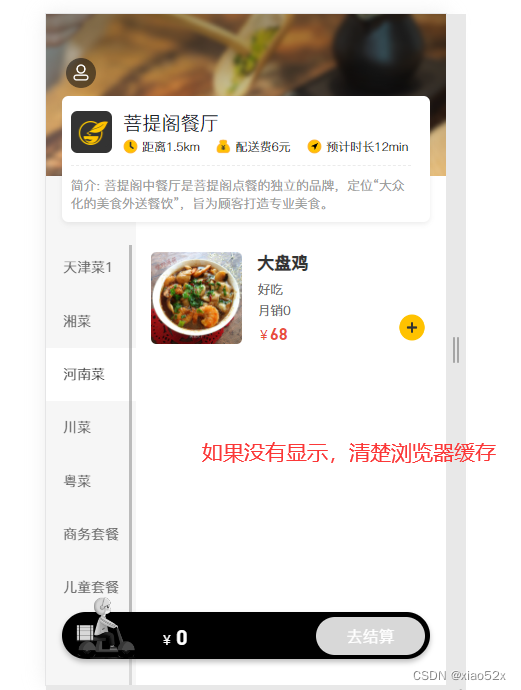
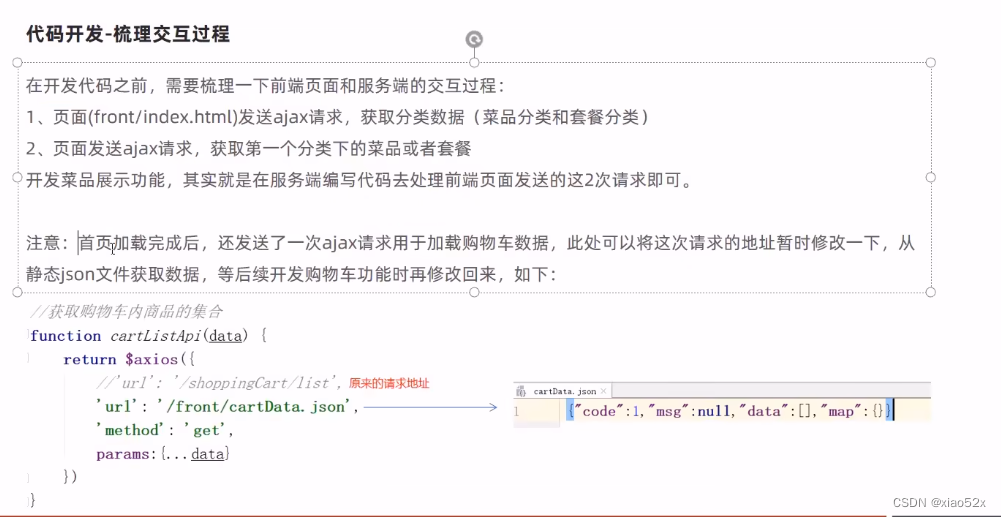
但是我们也发现了bug,就是展示的菜品没有对应的口味信息,比如甜度,辣度。。。我们之前是添加过相关的口味数据的;
这是因为我们在请求获取菜品信息的时候,我们返回的数据是R<List> ,Dish这个类是没有相关的口味信息的,所以即便前端请求了这个口味的信息,但是后端是没有给它返回的,所以体现在前端就是口味信息没有展示出来;所以我们需要对DishController中的list接口进行修改;
DishController中的list接口进行修改
//方法改造
@GetMapping("/list")
public R<List<DishDto>> list(Dish dish){ //会自动映射的
    //这里可以传categoryId,但是为了代码通用性更强,这里直接使用dish类来接受(因为dish里面是有categoryId的),以后传dish的其他属性这里也可以使用
    //构造查询条件
    LambdaQueryWrapper<Dish> queryWrapper = new LambdaQueryWrapper<>();
    queryWrapper.eq(dish.getCategoryId() != null ,Dish::getCategoryId,dish.getCategoryId());
    //添加条件,查询状态为1(起售状态)的菜品
    queryWrapper.eq(Dish::getStatus,1);

    //添加排序条件
    queryWrapper.orderByAsc(Dish::getSort).orderByDesc(Dish::getUpdateTime);
    List<Dish> list = dishService.list(queryWrapper);

    //进行集合的泛型转化
    List<DishDto> dishDtoList = list.stream().map((item) ->{
        DishDto dishDto = new DishDto();
        //为一个新的对象赋值,一定要考虑你为它赋过几个值,否则你自己都不知道就返回了null的数据
        //为dishDto对象的基本属性拷贝
        BeanUtils.copyProperties(item,dishDto);
        Long categoryId = item.getCategoryId();
        Category category = categoryService.getById(categoryId);
        if (category != null){
            String categoryName = category.getName();
            dishDto.setCategoryName(categoryName);
        }
        //为dishdto赋值flavors属性
        //当前菜品的id
        Long dishId = item.getId();
        //创建条件查询对象
        LambdaQueryWrapper<DishFlavor> lambdaQueryWrapper = new LambdaQueryWrapper();
        lambdaQueryWrapper.eq(DishFlavor::getDishId,dishId);
        //select * from dish_flavor where dish_id = ?
        //这里之所以使用list来条件查询那是因为同一个dish_id 可以查出不同的口味出来,就是查询的结果不止一个
        List<DishFlavor> dishFlavorList = dishFlavorService.list(lambdaQueryWrapper);
        dishDto.setFlavors(dishFlavorList);

        return dishDto;
    }).collect(Collectors.toList());

    return R.success(dishDtoList);
}
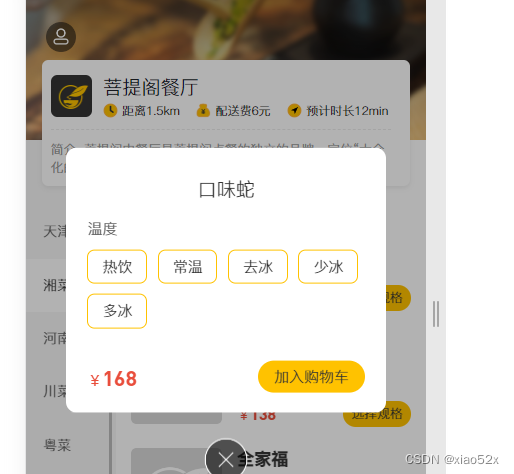
4.8.2 套餐展示
套餐展示的前端请求地址和携带的参数:
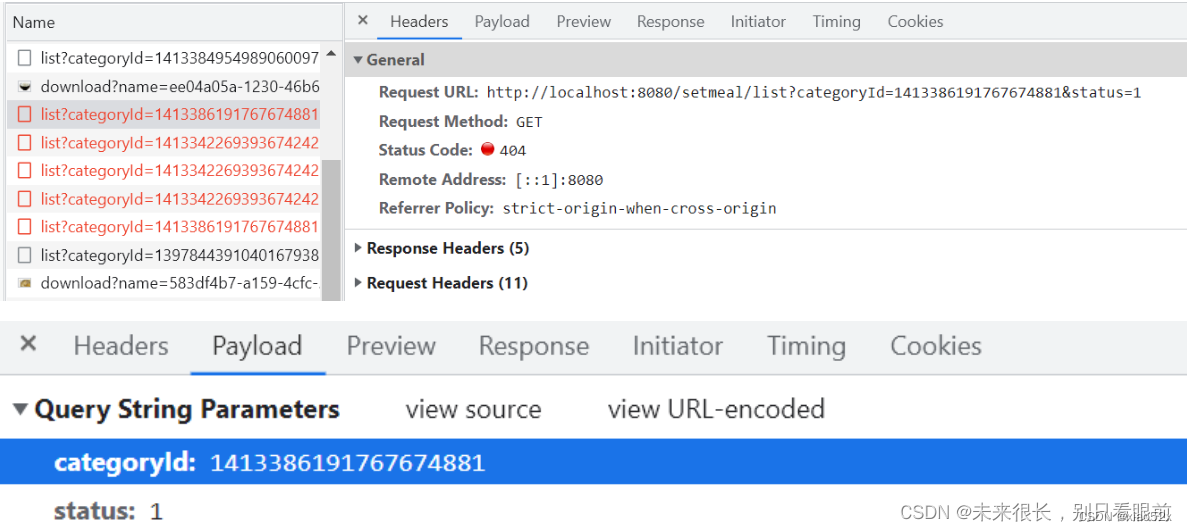
在SetmealController中添加相应的方法来接收前端的请求:
    /**
     * 根据条件查询套餐数据
     * @param setmeal
     * @return
     */
    @GetMapping("/list")
    public R<List<Setmeal>> list(Setmeal setmeal){
        LambdaQueryWrapper<Setmeal> queryWrapper = new LambdaQueryWrapper<>();
        queryWrapper.eq(setmeal.getCategoryId()!=null,Setmeal::getCategoryId,setmeal.getCategoryId());
        queryWrapper.eq(setmeal.getStatus()!=null,Setmeal::getStatus,setmeal.getStatus());
        queryWrapper.orderByDesc(Setmeal::getUpdateTime);
        List<Setmeal> list = setmealService.list(queryWrapper);
        return R.success(list);

    }
4.8.3 购物车(添加菜品和套餐进购物车)
数据模型: 购物车对应的数据表为shopping_cart,具体结构如下:从资料中导入相关的实体类就行
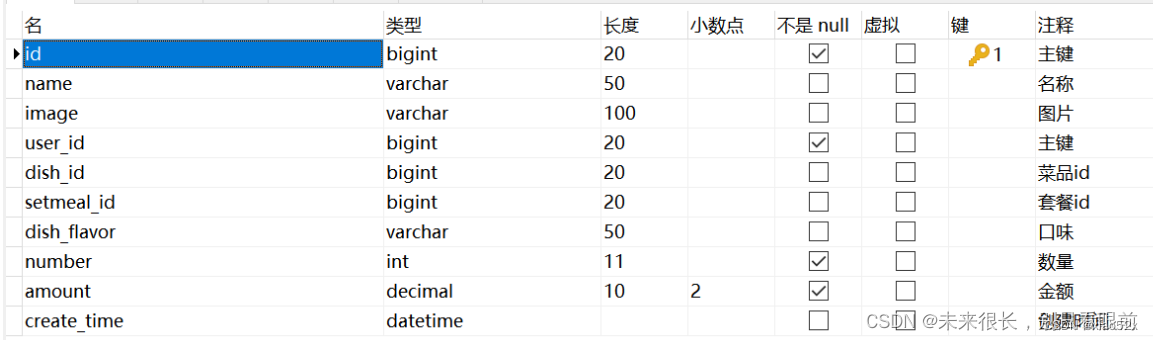
代码开发:
加入购物车功能:
加入购物车的前端请求和携带的参数:
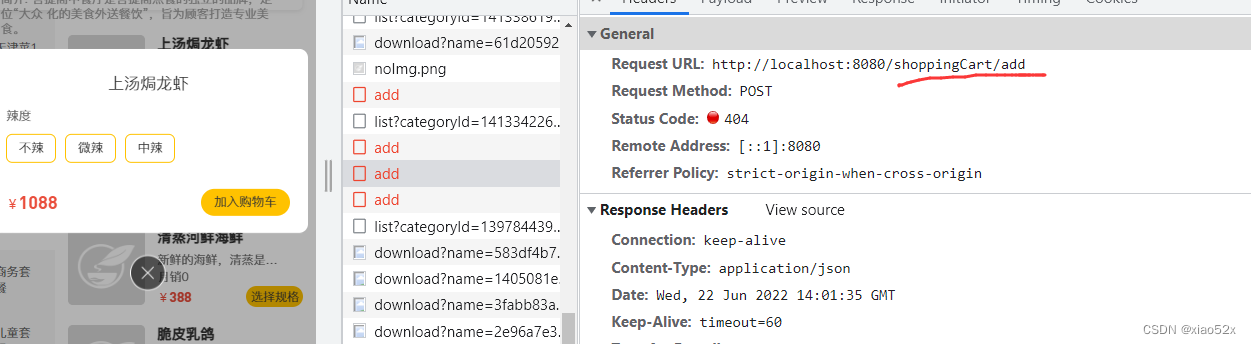
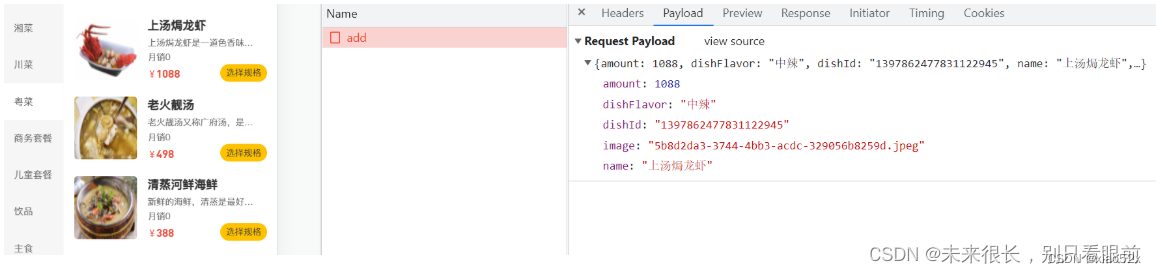
开发准备工作:
导入实体类ShoppingCart;
package com.xiao.reggie.entity;

import lombok.Data;
import java.io.Serializable;
import java.math.BigDecimal;
import java.time.LocalDateTime;

/**
 * 购物车
 */
@Data
public class ShoppingCart implements Serializable {

    private static final long serialVersionUID = 1L;

    private Long id;

    //名称
    private String name;

    //用户id
    private Long userId;

    //菜品id
    private Long dishId;

    //套餐id
    private Long setmealId;

    //口味
    private String dishFlavor;

    //数量
    private Integer number;

    //金额
    private BigDecimal amount;

    //图片
    private String image;

    private LocalDateTime createTime;
}
创建对应的mapper:
import com.baomidou.mybatisplus.core.mapper.BaseMapper;
import com.xiao.reggie.entity.ShoppingCart;
import org.apache.ibatis.annotations.Mapper;


@Mapper
public interface ShoppingCartMapper extends BaseMapper<ShoppingCart> {
}
创建service:
import com.baomidou.mybatisplus.extension.service.IService;
import com.xiao.reggie.entity.ShoppingCart;

public interface ShoppingCartService extends IService<ShoppingCart> {
}
import com.baomidou.mybatisplus.extension.service.impl.ServiceImpl;
import com.xiao.reggie.entity.ShoppingCart;
import com.xiao.reggie.mapper.ShoppingCartMapper;
import com.xiao.reggie.service.ShoppingCartService;
import org.springframework.stereotype.Service;


@Service
public class ShoppingCartServiceImpl extends ServiceImpl<ShoppingCartMapper, ShoppingCart> implements ShoppingCartService {
}
ShoppingCartController:controller层开发:
package com.xiao.reggie.controller;

import com.baomidou.mybatisplus.core.conditions.query.LambdaQueryWrapper;
import com.xiao.reggie.commom.BaseContext;
import com.xiao.reggie.commom.R;
import com.xiao.reggie.entity.ShoppingCart;
import com.xiao.reggie.service.ShoppingCartService;
import lombok.extern.slf4j.Slf4j;
import org.springframework.beans.factory.annotation.Autowired;
import org.springframework.web.bind.annotation.PostMapping;
import org.springframework.web.bind.annotation.RequestBody;
import org.springframework.web.bind.annotation.RequestMapping;
import org.springframework.web.bind.annotation.RestController;

@Slf4j
@RestController
@RequestMapping("/shoppingCart")
public class ShoppingCartController {

    @Autowired
    private ShoppingCartService shoppingCartService;

    /**
     * 添加购物车
     * @param shoppingCart
     * @return
     */
    @PostMapping("/add")
    public R<ShoppingCart> add(@RequestBody ShoppingCart shoppingCart){
        log.info("购物车数据:{}",shoppingCart);

        //先设置用户id,指定当前是哪个用户的购物车数据  因为前端没有传这个id给我们,但是这个id又非常重要(数据库这个字段不能为null),
        // 所以要想办法获取到,我们在用户登录的时候就已经保存了用户的id
        Long currentId = BaseContext.getCurrentId();
        shoppingCart.setUserId(currentId);

        Long dishId = shoppingCart.getDishId();

        LambdaQueryWrapper<ShoppingCart> queryWrapper = new LambdaQueryWrapper<>();
        queryWrapper.eq(ShoppingCart::getUserId,currentId);

        if (dishId != null){
            //添加到购物车的是菜品
            queryWrapper.eq(ShoppingCart::getDishId,dishId);
        }else {
            //添加到购物车的是套餐
            queryWrapper.eq(ShoppingCart::getSetmealId,shoppingCart.getSetmealId());
        }

        //查询当前菜品是否或者是套餐是否在购物车中
        //SQL:select * from shopping_cart where user_id = ? and dish_id/setmeal_id = ?
        ShoppingCart cartServiceOne = shoppingCartService.getOne(queryWrapper);

        if (cartServiceOne != null) {
            //如果已经存在,就在原来的数量基础上加一
            Integer number = cartServiceOne.getNumber();
            cartServiceOne.setNumber(number+1);
            shoppingCartService.updateById(cartServiceOne);
        }else {
            //如果不存在,则添加到购物车,数量默认是1
            shoppingCart.setNumber(1);
            shoppingCartService.save(shoppingCart);
            cartServiceOne = shoppingCart;
        }
        return R.success(cartServiceOne);
    }

}
功能测试:
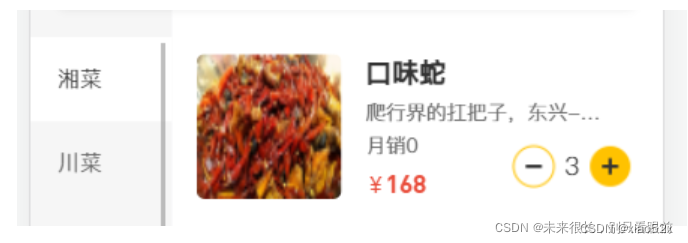
不过这个只能把菜品或者是套餐加入到购物车,那个减号点了是没效果的;
4.8.3 查看购物车
把相关的前端请求地址给改掉, 不再请求假数据,至于存放假数据的json文件是否删除,看你自己,删不删都没什么影响;
//获取购物车内商品的集合
function cartListApi(data) {
    return $axios({
        'url': '/shoppingCart/list',
        //'url':'/front/cartData.json',
        'method': 'get',
        params:{...data}
    })
}
注意:一定要有用户的概念,不同用户看到的购物车是不一样的!!!
ShoppingCartController
/**
 * 查看购物车
 * @return
 * 前端没有传数据给我们,这里就不用接收了
 */
@GetMapping("/list")
public R<List<ShoppingCart>> list(){
    LambdaQueryWrapper<ShoppingCart> queryWrapper = new LambdaQueryWrapper<>();
    queryWrapper.eq(ShoppingCart::getUserId,BaseContext.getCurrentId());
    queryWrapper.orderByAsc(ShoppingCart::getCreateTime);
    List<ShoppingCart> list = shoppingCartService.list(queryWrapper);

    return R.success(list);
}
功能测试:
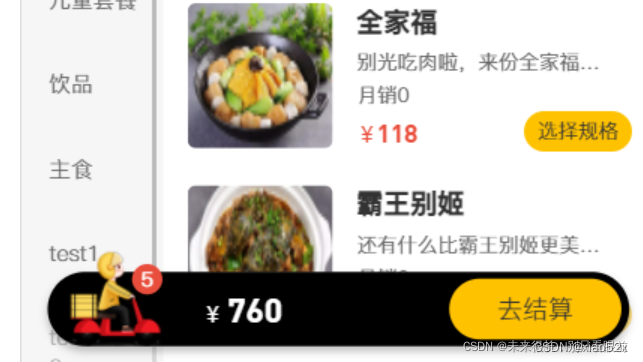
4.8.4 清空购物车
/**
 * 清空购物车
 * @return
 */
@DeleteMapping("/clean")
public R<String> clean(){

    //sql:delete from shopping_cart where userId =?
    LambdaQueryWrapper<ShoppingCart> queryWrapper = new LambdaQueryWrapper<>();
    queryWrapper.eq(ShoppingCart::getUserId,BaseContext.getCurrentId());
    shoppingCartService.remove(queryWrapper);

    return R.success("清空购物车成功");

}
4.8.5 减少购物车点菜品或者套餐
前端请求: http://localhost:8080/shoppingCart/sub
请求方式:post
携带参数可能是dish_id 也可能是 setmealId,所以我们需要实体类shoppingCart来接收;
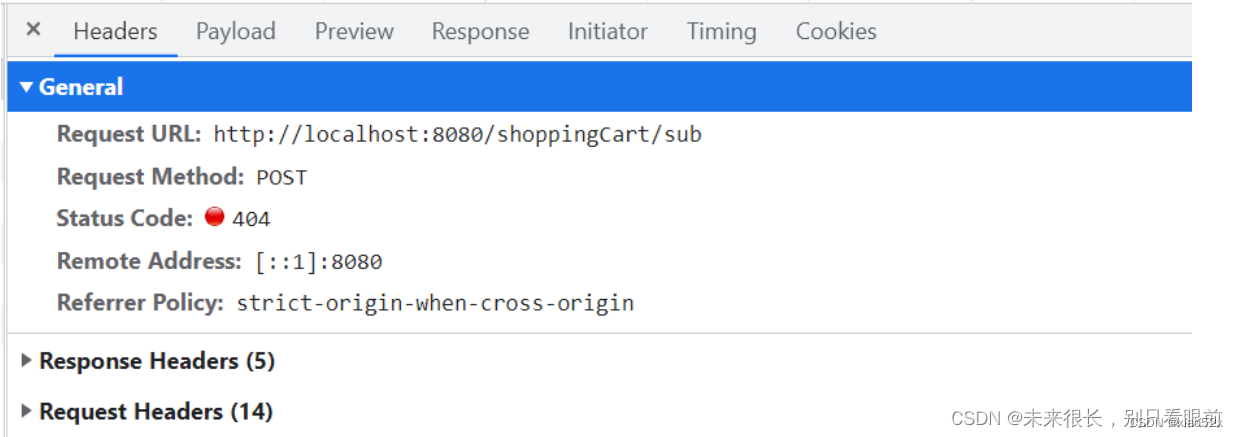
遇到的bug: 就是购物车里面的菜品和套餐的数量可能会减少至负数!!!所以这里我们要在入库前做一次判断;把数据库的该字段设置为无符号字段,所以当num数小于0的时候就会报错(500接口异常),但是左下角的小购物车还是会显示菜品为0,所以在后端的代码也要进行判断操作;
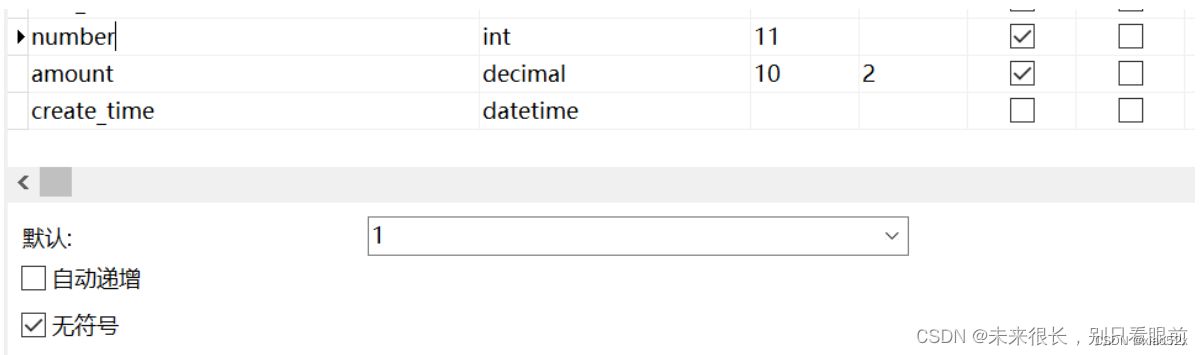
在ShoppingCartController中添加下面的接口方法来接收请求:(这个是修改了一次的代码,思路用的是评论区一个老哥提供的思路)
    /**
     * 客户端的套餐或者是菜品数量减少设置
     * 没必要设置返回值
     * @param shoppingCart
     */
    @PostMapping("/sub")
    @Transactional
    public R<ShoppingCart> sub(@RequestBody ShoppingCart shoppingCart){

        Long dishId = shoppingCart.getDishId();
        LambdaQueryWrapper<ShoppingCart> queryWrapper = new LambdaQueryWrapper<>();

        //代表数量减少的是菜品数量
        if (dishId != null){
            //通过dishId查出购物车对象
            queryWrapper.eq(ShoppingCart::getDishId,dishId);
            //这里必须要加两个条件,否则会出现用户互相修改对方与自己购物车中相同套餐或者是菜品的数量
            queryWrapper.eq(ShoppingCart::getUserId,BaseContext.getCurrentId());
            ShoppingCart cart1 = shoppingCartService.getOne(queryWrapper);
            cart1.setNumber(cart1.getNumber()-1);
            Integer LatestNumber = cart1.getNumber();
            if (LatestNumber > 0){
                //对数据进行更新操作
                shoppingCartService.updateById(cart1);
            }else if(LatestNumber == 0){
                //如果购物车的菜品数量减为0,那么就把菜品从购物车删除
                shoppingCartService.removeById(cart1.getId());
            }else if (LatestNumber < 0){
                return R.error("操作异常");
            }

            return R.success(cart1);
        }

        Long setmealId = shoppingCart.getSetmealId();
        if (setmealId != null){
            //代表是套餐数量减少
            queryWrapper.eq(ShoppingCart::getSetmealId,setmealId).eq(ShoppingCart::getUserId,BaseContext.getCurrentId());
            ShoppingCart cart2 = shoppingCartService.getOne(queryWrapper);
            cart2.setNumber(cart2.getNumber()-1);
            Integer LatestNumber = cart2.getNumber();
            if (LatestNumber > 0){
                //对数据进行更新操作
                shoppingCartService.updateById(cart2);
            }else if(LatestNumber == 0){
                //如果购物车的套餐数量减为0,那么就把套餐从购物车删除
                shoppingCartService.removeById(cart2.getId());
            }else if (LatestNumber < 0){
                return R.error("操作异常");
            }
            return R.success(cart2);
        }
            //如果两个大if判断都进不去
            return R.error("操作异常");
    }
4.9 用户订单
4.9.1 用户下单功能
需求分析:
注意:这里只是把用户的支付订单保存到数据库,因为真正的支付功能是需要去申请支付资质的,个人用户很难申请到;
数据模型:用户下单业务对应的数据表为order表和order_detail表:
order:订单表;
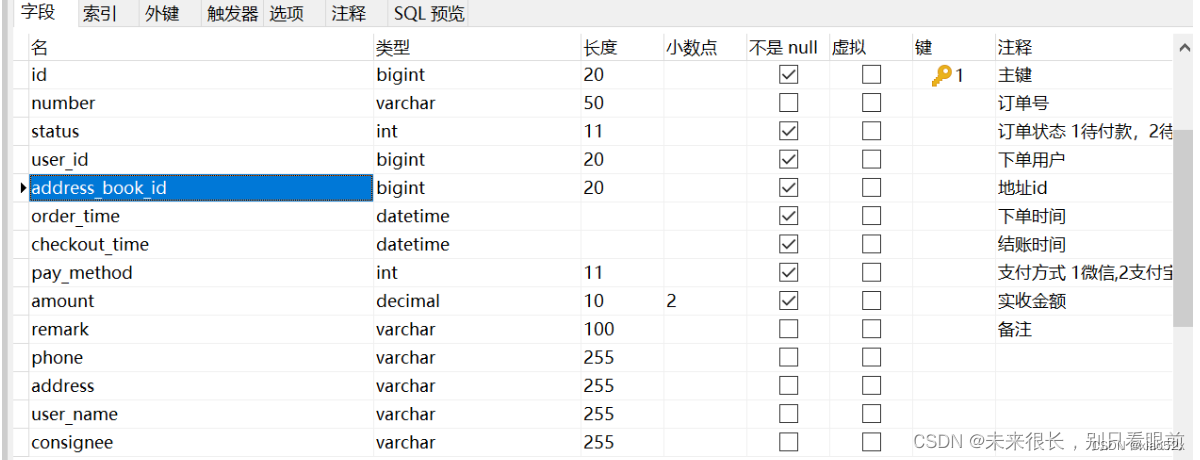
order_detail:订单明细表;

代码开发:
前端和服务器的交互过程:
第一次交互:
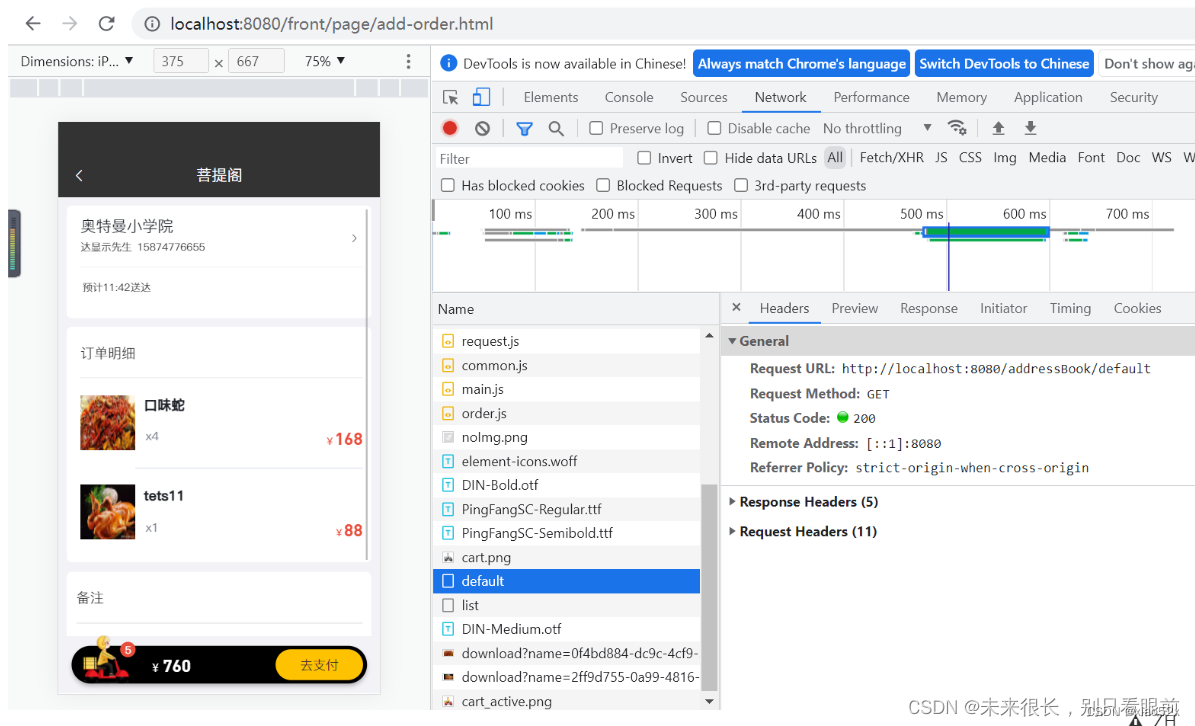
然后点击去支付:然后前端就会发生http://localhost:8080/order/submit这个请求;并且携带三个参数:一个是地址,一个是字符方式,一个是客户的备注;
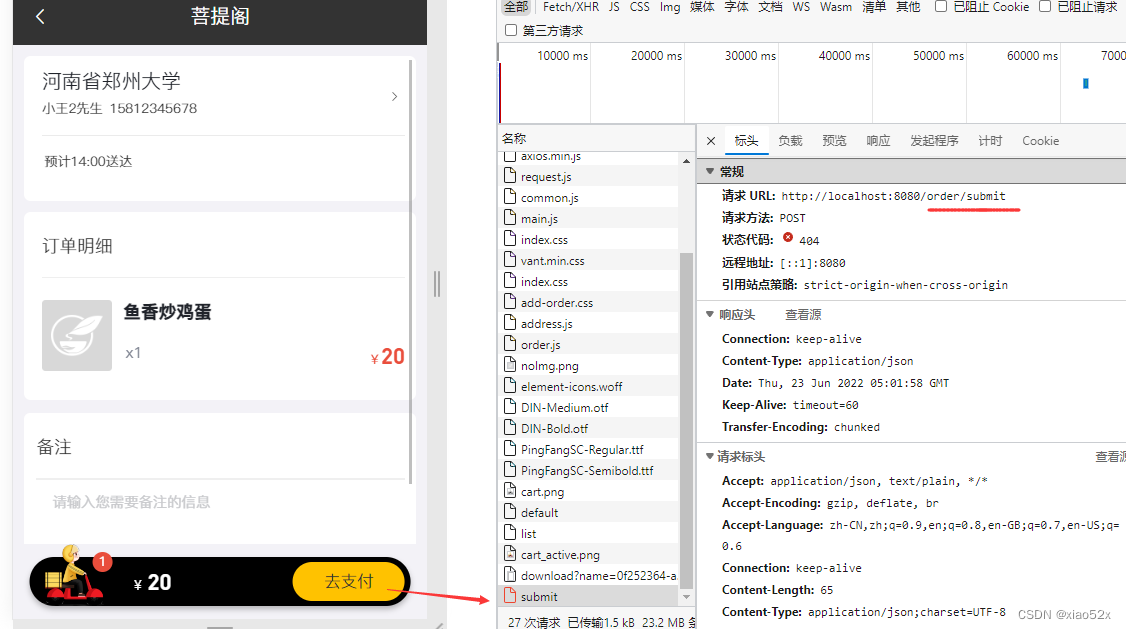
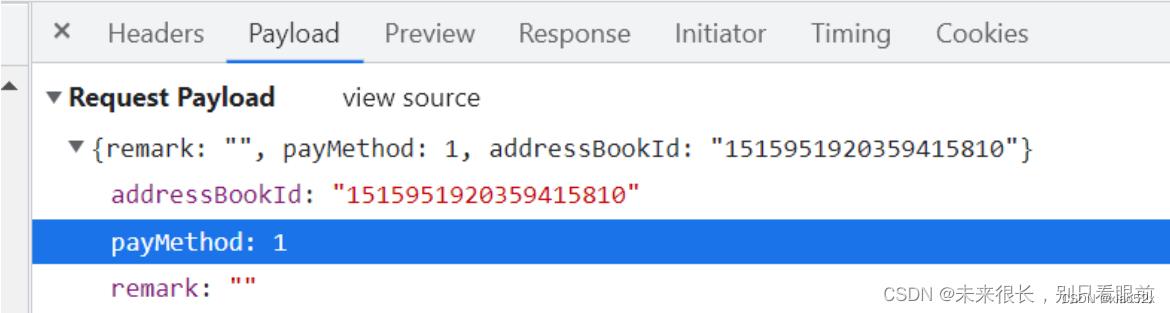
开发准备工作:
导入实体类:orders,order_details
package com.xiao.reggie.entity;

import lombok.Data;
import java.io.Serializable;
import java.math.BigDecimal;
import java.time.LocalDateTime;

/**
 * 订单
 */
@Data
public class Orders implements Serializable {

    private static final long serialVersionUID = 1L;

    private Long id;

    //订单号
    private String number;

    //订单状态 1待付款,2待派送,3已派送,4已完成,5已取消
    private Integer status;


    //下单用户id
    private Long userId;

    //地址id
    private Long addressBookId;


    //下单时间
    private LocalDateTime orderTime;


    //结账时间
    private LocalDateTime checkoutTime;


    //支付方式 1微信,2支付宝
    private Integer payMethod;


    //实收金额
    private BigDecimal amount;

    //备注
    private String remark;

    //用户名
    private String userName;

    //手机号
    private String phone;

    //地址
    private String address;

    //收货人
    private String consignee;
}
package com.xiao.reggie.entity;

import com.baomidou.mybatisplus.annotation.IdType;
import com.baomidou.mybatisplus.annotation.TableId;
import lombok.Data;
import java.io.Serializable;
import java.math.BigDecimal;

/**
 * 订单明细
 */
@Data
public class OrderDetail implements Serializable {

    private static final long serialVersionUID = 1L;

    private Long id;

    //名称
    private String name;

    //订单id
    private Long orderId;


    //菜品id
    private Long dishId;


    //套餐id
    private Long setmealId;


    //口味
    private String dishFlavor;


    //数量
    private Integer number;

    //金额
    private BigDecimal amount;

    //图片
    private String image;
}
创建mapper:
import com.baomidou.mybatisplus.core.mapper.BaseMapper;
import com.xiao.reggie.entity.Orders;
import org.apache.ibatis.annotations.Mapper;

@Mapper
public interface OrderMapper extends BaseMapper<Orders> {
}
import com.baomidou.mybatisplus.core.mapper.BaseMapper;
import com.xiao.reggie.entity.OrderDetail;
import org.apache.ibatis.annotations.Mapper;

@Mapper
public interface OrderDetailMapper extends BaseMapper<OrderDetail> {
}
创建service及其实现:
import com.baomidou.mybatisplus.extension.service.IService;
import com.xiao.reggie.entity.Orders;

public interface OrderService extends IService<Orders> {
	/**
	 * 用户下单
	 * @param orders
	 */
	public void submit(Orders orders);
}
import com.baomidou.mybatisplus.extension.service.IService;
import com.xiao.reggie.entity.OrderDetail;

public interface OrderDetailService extends IService<OrderDetail> {
}
import com.baomidou.mybatisplus.extension.service.impl.ServiceImpl;
import com.xiao.reggie.entity.Orders;
import com.xiao.reggie.mapper.OrderMapper;
import com.xiao.reggie.service.OrderService;
import org.springframework.stereotype.Service;

@Service
public class OrderServiceImpl extends ServiceImpl<OrderMapper, Orders> implements OrderService {
}
import com.baomidou.mybatisplus.extension.service.impl.ServiceImpl;
import com.xiao.reggie.entity.OrderDetail;
import com.xiao.reggie.mapper.OrderDetailMapper;
import com.xiao.reggie.service.OrderDetailService;
import org.springframework.stereotype.Service;

@Service
public class OrderDetailServiceImpl extends ServiceImpl<OrderDetailMapper, OrderDetail> implements OrderDetailService {
}
controller层开发:
前端请求的地址和携带的参数前面已经分析过了;
/*
*订单
 */

@Slf4j
@RestController
@RequestMapping("/order")
public class OrderController {
    @Autowired
    private OrderService orderService;

    /**
     * 用户下单
     * @param orders
     * @return
     */
    @PostMapping("/submit")
    public R<String> submit(@RequestBody Orders orders){
    	log.info("订单数据:{}",orders);
        orderService.submit(orders);
        return R.success("下单成功");
    }
}


 5559
5559


 被折叠的 条评论
为什么被折叠?
被折叠的 条评论
为什么被折叠?
 到【灌水乐园】发言


