


electron-update自动更新electron项目
1. 引入
npm install electron-update --save
2.配置electron-builder
配置publish属性后打包会生成.yml文件,里面有对应的版本信息(必须配置),我们要做的就是把打包后的最新版本的.yml文件和exe安装包放在对应的服务器上,接着eletron-update就是检查当前版本与服务器中.yml文件中的版本号是否一致。
		appId: "com.example.app",
        productName: "XXXX", //项目名,也是生成的安装文件名,即aDemo.exe
        copyright: "Copyright © 2020", //版权信息
        directories: {
          output: "./dist", //输出文件路径
        },
        "publish": [
          {
            "provider": "generic",
            "url": "http://XXXXX.com",// 更新服务器地址,存放版本安装的服务器文件夹
          }
        ],

3.项目中做交互
3.1引入
import { autoUpdater } from "electron-updater";
3.2设置服务器地址
autoUpdater.setFeedURL(url) // 这里的url就是上面的服务器版本包文件夹地址
3.3对更新添加监听事件
利用sendUpdateMessage函数,从主进程向渲染进程发送对应的状态信息
 	/**
     * 以下添加对应监听事件
     * 为了防止丢失this,以下使用箭头而不是funtion
     */
    autoUpdater.on("error", (error) => {
      this.sendUpdateMessage({
        cmd: "error",
        message: error,
      });
    });
    // 当监听到开始检测更新事件
    autoUpdater.on("checking-for-update", (message) => {

      this.sendUpdateMessage({
        cmd: "checking-for-update",
        message: message,
      });
    });
    // 当监听到发现可用更新事件
    autoUpdater.on("update-available", (message) => {
      this.sendUpdateMessage({
        cmd: "update-available",
        message: message,
      });
    });
    // 当监听到没有可用更新事件
    autoUpdater.on("update-not-available", (message) => {
      this.sendUpdateMessage({
        cmd: "update-not-available",
        message: message,
      });
    });
    // 当监听到更新下载进度事件
    autoUpdater.on("download-progress", (progressObj) => {
      this.sendUpdateMessage({
        cmd: "download-progress",
        message: progressObj,
      });
    });
    // 当监听到下载完成事件
    autoUpdater.on(
      "update-downloaded",
      (event, releaseNotes, releaseName, releaseDate, updateUrl) => {
        this.sendUpdateMessage({
          cmd: "update-downloaded",
          message: {
            releaseNotes,
            releaseName,
            releaseDate,
            updateUrl,
          },
        });
        // 退出并安装更新包,此处可以独立出来做个手动确认更新操作,我这里是下载完成后自动重新应用更新
        autoUpdater.quitAndInstall();
      }
    );
	 /**
	   * @author viga
	   * 主进程向渲染发送信息
	   * @text 需要传送的信息,这里是放置对应的回调信息
	   */
	  sendUpdateMessage(text) {
	  	// 这里的mainWindow就是构建应用时的BrowserWindow实例
	    this.mainWindow.webContents.send("message", text);
	  }
3.4检查更新
autoUpdater.checkForUpdates(); 检查更新后如果有新版本会自动下载文件,如果需要不自动下载,添加autoUpdater.autoDownload = false 即可
3.5在渲染进程添加信息监听事件
ipcRenderer.on("message", (e, arg) => {
	// 中间可以做对应的处理,比如显示更新窗口
      switch (arg.cmd) {
        case "update-not-available":
          // 此处放置对应信息的处理操作
          break;
        case "checking-for-update":

          break;
        case "download-progress":

          break;
        case "update-downloaded":

          break;
        default:null

      }
    });
总结
利用electron-builder打包,配置publish使得打包后能生成版本号,将对应的.yml文件和exe安装包放置在服务器下(放在哪看自己).
使用electron-update库来实现自动更新,配置版本包存放地址,然后添加对应的更新监听事件,在每个事件中放置对应的操作。
以下是个人应用效果,仅供参考
构建一个类存放更新相关代码,效果是通过按钮手动更新,所以在constructor中只添加了事件的监听,还没有启动检查更新,
包含2个属性和3个处理函数
import { autoUpdater } from "electron-updater";
/**
 * @author viga
 * 客户端版本检查类
 */
class Q_VersionUpdate {
  constructor(mainWindow, url) {
    /**
     * @author viga
     * 对象构建时触发的constructor
     * @mainWindow  BrowserWindow实例
     * @url 版本包服务器地址
     */
    this.mainWindow = mainWindow;
    this.url = url;

    /**
     * 设置版本包服务器地址
     */
    this.setUpdateUrl();

    /**
     * 以下添加对应监听事件
     * 为了防止丢失this,以下使用箭头而不是funtion
     */
    autoUpdater.on("error", (error) => {
      this.sendUpdateMessage({
        cmd: "error",
        message: error,
      });
    });
    // 当监听到开始检测更新事件
    autoUpdater.on("checking-for-update", (message) => {

      this.sendUpdateMessage({
        cmd: "checking-for-update",
        message: message,
      });
    });
    // 当监听到发现可用更新事件
    autoUpdater.on("update-available", (message) => {
      this.sendUpdateMessage({
        cmd: "update-available",
        message: message,
      });
    });
    // 当监听到没有可用更新事件
    autoUpdater.on("update-not-available", (message) => {
      this.sendUpdateMessage({
        cmd: "update-not-available",
        message: message,
      });
    });
    // 当监听到更新下载进度事件
    autoUpdater.on("download-progress", (progressObj) => {
      this.sendUpdateMessage({
        cmd: "download-progress",
        message: progressObj,
      });
    });
    // 当监听到下载完成事件
    autoUpdater.on(
      "update-downloaded",
      (event, releaseNotes, releaseName, releaseDate, updateUrl) => {
        this.sendUpdateMessage({
          cmd: "update-downloaded",
          message: {
            releaseNotes,
            releaseName,
            releaseDate,
            updateUrl,
          },
        });
        // 退出并安装更新包,此处可以独立出来做个手动确认更新操作,我这里是下载完成后自动重新应用更新
        autoUpdater.quitAndInstall();
      }
    );
  }

  /**
   * @author viga
   * 设置版本包地址
   */
  setUpdateUrl() {
    autoUpdater.setFeedURL(this.url);
  }

  /**
   * @author viga
   * 主进程向渲染发送信息
   * @text 需要传送的信息,这里是放置对应的回调信息
   */
  sendUpdateMessage(text) {
    this.mainWindow.webContents.send("message", text);
  }

  /**
   * @author viga
   * 检查更新
   */
  checkForUpdates() {
    autoUpdater.checkForUpdates();
  }
}
export { Q_VersionUpdate };
在入口文件中引入
import { Q_VersionUpdate } from "./utils/version";

import { UPDATE_HOST } from './utils/host' // 我的版本包存放地址

const isDevelopment = process.env.NODE_ENV !== "production";
let win;
let q_update
protocol.registerSchemesAsPrivileged([
  { scheme: "app", privileges: { secure: true, standard: true } },
]);
// 创建窗口
function createWindow(url = "") {
  win = new BrowserWindow({
    width: 1480,
    height: 860,
    frame: false,
    webPreferences: {
      webSecurity: false,
      nodeIntegration: true,
      enableRemoteModule: true,
    },
  });
  if (process.env.WEBPACK_DEV_SERVER_URL) {
    win.loadURL(process.env.WEBPACK_DEV_SERVER_URL);
    if (!process.env.IS_TEST) win.webContents.openDevTools();
  } else {
    createProtocol("app");
    win.webContents.openDevTools();
    // 跳转窗口
    win.loadURL("app://./index.html" + "#" + url);
  }
  win.on("closed", () => {
    win = null;
  });
  // 以上内容可以不看
  // 构造实例,在构造的同时已经添加了对应监听函数和服务器地址配置,具体可以了解class
  q_update = new Q_VersionUpdate(win,UPDATE_HOST)
}
在页面添加检查更新事件,利用ipcRenderer,从渲染进程向主进程发送更新通知
// 检查更新
    handleCheckUpdate() {
      ipcRenderer.send("check2update");
    },
主进程添加接受check2update事件,接收后调用类中的检查更新功能,此时我们在3.3中添加的监听事件会对渲染进程发送对应的更新信息
// 检查更新信息接收
ipcMain.on("check2update", function() {
  q_update.checkForUpdates()
});
在页面中对监听的信息做处理,根据个人情况进行处理
mounted() {
ipcRenderer.on("message", (e, arg) => {
switch (arg.cmd) {
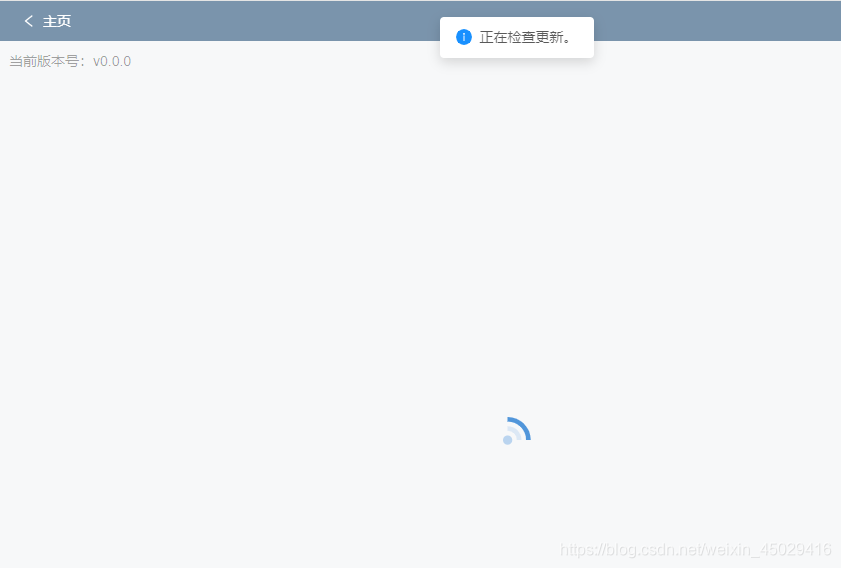
case "update-not-available":
that.$message.success("已经是最新版本。");
break;
case "checking-for-update":
that.$message.info("正在检查更新。");
break;
case "download-progress":
this.updataInfo = arg.message;
break;
case "update-downloaded":
that.$message.success("下载完成,即将自动更新。");
break;
default:
this.checking = false;
}
});
},
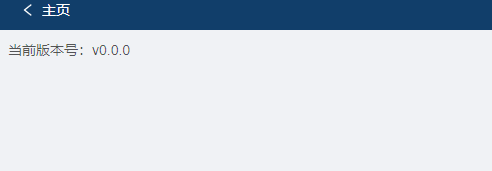
效果
打包,打包后将文件放置服务器下

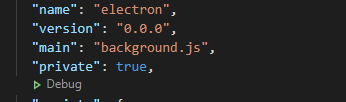
修改本地package中的version为0.0.0 再打包,安装
手动更新

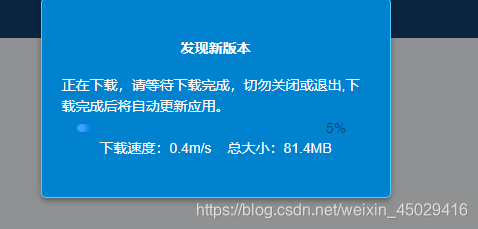
成功 下载完成后自动打开安装包


 1874
1874

 被折叠的 条评论
为什么被折叠?
被折叠的 条评论
为什么被折叠?
 到【灌水乐园】发言


