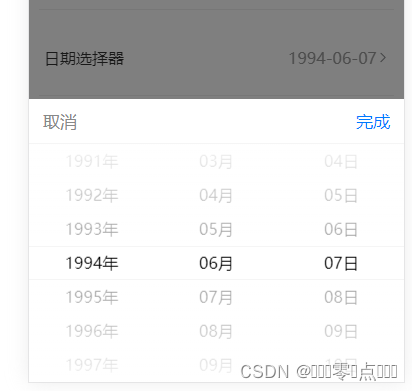
uniapp自带的选择日期的使用

年月日的下拉框
在这里插入图片描述

直接看代码

<view class="uni-title uni-common-pl">日期选择器</view>
		<view class="uni-list">
			<view class="uni-list-cell">
				<view class="uni-list-cell-left">
					当前选择
				</view>
				<view class="uni-list-cell-db">
					<picker mode="date" :value="date" :start="startDate" :end="endDate" @change="bindDateChange">
						<view class="uni-input">{{date}}</view>
					</picker>
				</view>
			</view>
		</view>
	<script>
export default {
    data() {
        const currentDate = this.getDate({
            format: true
        })
        return {
            date: currentDate,//默认设置的时间 此处可以从后台获取
        }
    },
    computed: {
        startDate() {
            return this.getDate('start');
        },
        endDate() {
            return this.getDate('end');
        }
    },
    methods: {
  
        bindDateChange: function(e) {
            this.date = e.detail.value
        },
        
        //获取当前的日子
        getDate(type) {
            const date = new Date();
            let year = date.getFullYear();
            let month = date.getMonth() + 1;
            let day = date.getDate();

            if (type === 'start') {
                year = year - 60;
            } else if (type === 'end') {
                year = year + 2;
            }
            month = month > 9 ? month : '0' + month;
            day = day > 9 ? day : '0' + day;
            return `${year}-${month}-${day}`;
        }
    }
}
</script>
  • 9
    点赞
  • 9
    收藏
    觉得还不错? 一键收藏
  • 0
    评论
Uniapp中,你可以使用picker组件来实现日期选择器功能。以下是一个示例代码: ``` <picker mode="date" :value="date" fields="month" :start="startDate" :end="endDate" @change="bindDateChange"> <view>{{ date }}</view> </picker> <script> function getDate(type) { const date = new Date(); let year = date.getFullYear(); let month = date.getMonth() + 1; let day = date.getDate(); if (type === 'start') { year = year - 10; } else if (type === 'end') { year = year + 10; } month = month > 9 ? month : '0' + month; return `${year}-${month}`; } export default { data() { return { date: getDate({ format: true }), startDate: getDate('start'), endDate: getDate('end'), }; }, methods: { bindDateChange(e) { this.date = e.detail.value.substr(0, 7); this.time = this.date; this.page = 1; this.list = []; this.index(); }, }, }; </script> ``` 在上述代码中,你可以看到picker组件的用法。通过设置fields属性为"month",你只能选择年月。如果想要选择年,则可以将fields属性设置为"year"。默认情况下,picker组件可以选择年月日格式。如果你希望同时显示每天,你可以将标签中的fields="month"删除,并在getDate函数中修改返回值为`${year}-${month}-${day}`。这样就可以实现日期选择器的功能了。<span class="em">1</span><span class="em">2</span><span class="em">3</span> #### 引用[.reference_title] - *1* *2* *3* [uniapp日期选择器](https://blog.csdn.net/m0_61672533/article/details/127693169)[target="_blank" data-report-click={"spm":"1018.2226.3001.9630","extra":{"utm_source":"vip_chatgpt_common_search_pc_result","utm_medium":"distribute.pc_search_result.none-task-cask-2~all~insert_cask~default-1-null.142^v93^chatsearchT3_1"}}] [.reference_item style="max-width: 100%"] [ .reference_list ]

“相关推荐”对你有帮助么?

  • 非常没帮助
  • 没帮助
  • 一般
  • 有帮助
  • 非常有帮助
提交
评论
添加红包

请填写红包祝福语或标题

红包个数最小为10个

红包金额最低5元

当前余额3.43前往充值 >
需支付:10.00
成就一亿技术人!
领取后你会自动成为博主和红包主的粉丝 规则
hope_wisdom
发出的红包
实付
使用余额支付
点击重新获取
扫码支付
钱包余额 0

抵扣说明:

1.余额是钱包充值的虚拟货币,按照1:1的比例进行支付金额的抵扣。
2.余额无法直接购买下载,可以购买VIP、付费专栏及课程。

余额充值