


使用qml来构建一个界面是非常便捷的,熟悉其中组件的使用,构建一个界面就不是难事。
首先来看如何快速的创建一个计算器的基础界面;
先新建一个qt quick项目,运行可以得到一个空白的窗口,根据自己设计的计算器来设计大小和布局按钮,这里就按电脑自带的计算器界面来进行设计和布局,先看电脑的计算器窗口如下:(大概标准按如下设计)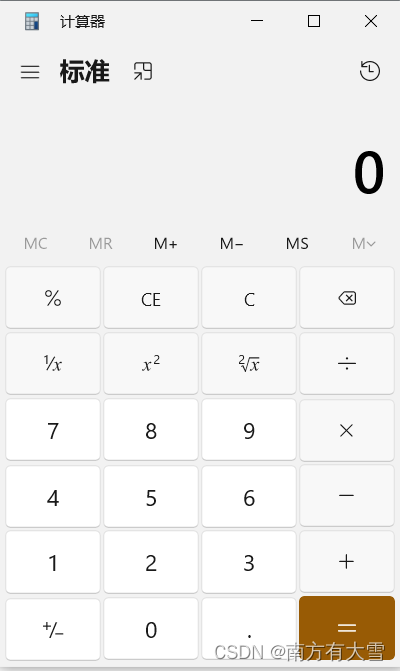
先进行简单的计算器设计,只包含加减乘除四种运算;
main.qml
import QtQuick 2.9
import QtQuick.Window 2.2
import QtQuick.Controls 2.2

Window {
    visible: true
    width: 400
    height: 640
    title: qsTr("计算器")

    property string txtString: ""


    //用于显示输入的键值和得出的运行结果
    Rectangle {
        id:textDisp;

        width:parent.width;
        height:0.4*parent.height;
        anchors.top:parent.top;
        anchors.left: parent.left;
        color: "#fcfcd5";

        Text {
            text: txtString;
            font.pixelSize: 25;
            wrapMode: Text.WrapAnywhere;
        }
    }

    //放置按钮区域
    Rectangle{
        id:btnArea;
        width:parent.width;
        height:parent.height - textDisp.height - 10;
        anchors.top:textDisp.bottom;
        anchors.topMargin: 5;
        anchors.left: parent.left;
        border.width: 1;

        property int heightTmp: height / 4;
        property int fontSize: 20;

        Column {
            anchors.fill: parent;
            spacing: 5;

            Row {
                height: btnArea.heightTmp - 5;
                width:parent.width - 5;
                spacing: 5;
                Button {
                    id:seven
                    text: "7";
                    height:parent.height;
                    font.pixelSize: btnArea.fontSize
                    onClicked: {
                        txtString += "7";
                    }
                }
                Button {
                    id:eight
                    text: "8"
                    height:parent.height;
                    font.pixelSize: btnArea.fontSize
                    onClicked: {
                        txtString += "8";
                    }
                }
                Button {
                    id:night
                    text: "9"
                    height:parent.height;
                    font.pixelSize: btnArea.fontSize
                    onClicked: {
                        txtString += "9";
                    }

                }
                Button {
                    id:ride
                    text: "×";
                    height:parent.height;
                    font.pixelSize: btnArea.fontSize
                    onClicked: {
                        txtString += "×";
                    }
                }
            }

            Row {
                height: btnArea.heightTmp;
                width:parent.width;
                spacing: 5;
                Button {
                    id:four
                    text: "4";
                    height:parent.height;
                    font.pixelSize: btnArea.fontSize
                    onClicked: {
                        txtString += "4";
                    }
                }
                Button {
                    id:five
                    text: "5"
                    height:parent.height;
                    font.pixelSize: btnArea.fontSize
                    onClicked: {
                        txtString += "5";
                    }
                }
                Button {
                    id:six
                    text: "6"
                    height:parent.height;
                    font.pixelSize: btnArea.fontSize
                    onClicked: {
                        txtString += "6";
                    }

                }
                Button {
                    id:add
                    text: "-";
                    height:parent.height;
                    font.pixelSize: btnArea.fontSize
                    onClicked: {
                        txtString += "-";
                    }

                }
            }


            Row {
                height: btnArea.heightTmp;
                width:parent.width;
                spacing: 5;
                Button {
                    id:one
                    text: "1";
                    height:parent.height;
                    font.pixelSize: btnArea.fontSize
                    onClicked: {
                        txtString += "1";
                    }
                }
                Button {
                    id:two
                    text: "2"
                    height:parent.height;
                    font.pixelSize: btnArea.fontSize
                    onClicked: {
                        txtString += "2";
                    }
                }
                Button {
                    id:three
                    text: "3"
                    height:parent.height;
                    font.pixelSize: btnArea.fontSize
                    onClicked: {
                        txtString += "3";
                    }

                }
                Button {
                    id:sub
                    text: "+";
                    height:parent.height;
                    font.pixelSize: btnArea.fontSize
                    onClicked: {
                        txtString += "+";
                    }

                }
            }

            Row {
                height: btnArea.heightTmp;
                width:parent.width;
                spacing: 5;
                Button {
                    id:divide
                    text: "÷";
                    height:parent.height;
                    font.pixelSize: btnArea.fontSize
                    onClicked: {
                        txtString += "÷";
                    }
                }
                Button {
                    id:zero
                    text: "0"
                    height:parent.height;
                    font.pixelSize: btnArea.fontSize
                    onClicked: {
                        txtString += "0";
                    }
                }
                Button {
                    id:clean
                    text: "Clean"
                    height:parent.height;
                    font.pixelSize: btnArea.fontSize
                    onClicked: {
                        txtString = "";
                    }

                }
                Button {
                    id:eq
                    text: "=";
                    height:parent.height;
                    font.pixelSize: btnArea.fontSize
                    onClicked: {
                        sum();
                    }

                }
            }
        }
    }

    function sum()
    {
        //判断是否包含字符 str.indexOf();
        var sum = 0;
        var array;

        //拆分字符串
        if(txtString.indexOf("+") !== -1)
        {
             array = txtString.split("+");
            for(var i = 0; i < array.length; i++)
            {
                sum += parseInt(array[i], 10);
            }
        }

        if(txtString.indexOf("-") !== -1)
        {
             array = txtString.split("-");
            for(var i = 0; i < array.length; i++)
            {
                if(i === 0)
                    sum = parseInt(array[i], 10);
                else
                    sum -= parseInt(array[i], 10);
            }
        }

        if(txtString.indexOf("÷") !== -1)
        {
            sum = 1;
             array = txtString.split("÷");
            for(var i = 0; i < array.length; i++)
            {
                for(var i = 0; i < array.length; i++)
                {
                    if(i === 0)
                        sum = parseInt(array[i], 10);
                    else
                        sum /= parseInt(array[i], 10);
                }
            }
        }

        if(txtString.indexOf("×") !== -1)
        {
            sum = 1;
             array = txtString.split("×");
            for(var i = 0; i < array.length; i++)
            {
                sum *= parseInt(array[i], 10);
            }
        }

        txtString = sum;
    }


}
效果截图:
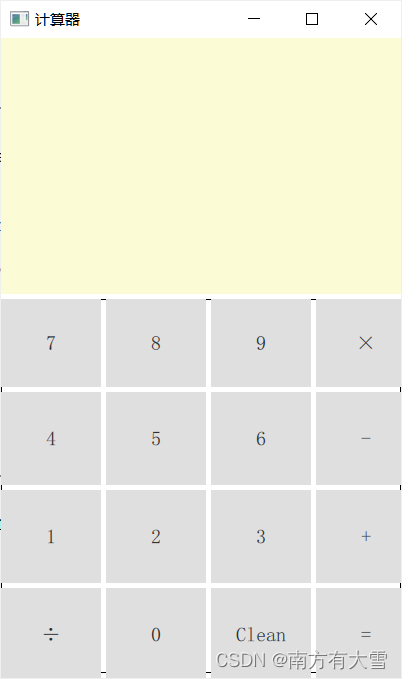
目前只完成了简单的运算,对于复合运算,包含小数,正负数的运算还没有实现,接下来继续实现关于其他运算的方法,界面目前有点丑,但不影响使用,后续再进行优化;
目前是将运算过程和界面内容都放在qml中来实现的,对于逻辑运算是使用的Javascript来进行的,但是qml被创建出来的目的不是如此,将c++和qml解耦出来是更希望用qml做界面设计,而使用c++做后端逻辑运算以及数据处理;这里就将这部分代码调整一下,使用c++来做运算逻辑过程,qml单纯的只做界面设计展示,当然对于一下简单的项目,界面与逻辑不复杂的设计,再qml即实现ui和后端逻辑的设计也无可厚非。
qt是提供一个类来进行表达式运算的,直接将表达式传入就可以获取输出的值,这个表达式的解析算法就不需要自己来实现了,挺方便的,有时间也可以自己去实现这个算法。
qt提供实现计算表达式的类是一个qt的script模块,要想使用这个模块需要先在.pro文件里面加上:
QT += script
基本用法很简单,创建QScriptEngine并调用器evaluate()函数,将要计算的表达式作为参数传递,返回的值就是求取的值。关于这个类的其他功能就不说了,下面来看引入c++之后的qt代码:
先添加一个自定义的Calc的类,calc.cpp和calc.h两个文件
calc.cpp
#include "calc.h"
#include <QDebug>
#include <QScriptEngine>


Calc::Calc(QObject *parent) : QObject(parent)
{

}

QString Calc::getValue(QString inputStr)
{
    if(inputStr.isEmpty())
        return "";
    qDebug() << "输入的表达式:" << inputStr;
    QScriptEngine myEngine;
    QScriptValue value = myEngine.evaluate(inputStr);

    m_value = value.toString();
    qDebug() << "得出的计算结果:" << m_value;
    return m_value;
}
calc.h
#ifndef CALC_H
#define CALC_H

#include <QObject>

class Calc : public QObject
{
    Q_OBJECT
public:
    explicit Calc(QObject *parent = nullptr);

    Q_INVOKABLE QString getValue(QString inputStr);

signals:

public slots:

private:
    QString m_value;
};

#endif // CALC_H
然后main文件里面注册该c++类到qml,使qml文件可以调用该类提供的函数。
再main.cpp里面添加这两行代码:
#include “calc.h"

void main()
{
		***
    //注册c++类到qml
    qmlRegisterType<Calc>("C2Qml", 1, 0, "Calc");
    ***
}
改动一下main.qml文件,去掉js写的技术方法,引入c++类:
main.qml
import QtQuick 2.9
import QtQuick.Window 2.2
import QtQuick.Controls 2.2
import C2Qml 1.0

Window {
    visible: true
    width: 400
    height: 640
    title: qsTr("计算器")

    property string txtString: ""

    Calc {
        id:calc;
    }


    //用于显示输入的键值和得出的运行结果
    Rectangle {
        id:textDisp;

        width:parent.width;
        height:0.4*parent.height;
        anchors.top:parent.top;
        anchors.left: parent.left;
        color: "#fcfcd5";

        Text {
            text: txtString;
            font.pixelSize: 25;
            wrapMode: Text.WrapAnywhere;
        }
    }

    //放置按钮区域
    Rectangle{
        id:btnArea;
        width:parent.width;
        height:parent.height - textDisp.height - 10;
        anchors.top:textDisp.bottom;
        anchors.topMargin: 5;
        anchors.left: parent.left;
        border.width: 1;

        property int heightTmp: height / 4;
        property int fontSize: 20;

        Column {
            anchors.fill: parent;
            spacing: 5;

            Row {
                height: btnArea.heightTmp - 5;
                width:parent.width - 5;
                spacing: 5;
                Button {
                    id:seven
                    text: "7";
                    height:parent.height;
                    font.pixelSize: btnArea.fontSize
                    onClicked: {
                        txtString += "7";
                    }
                }
                Button {
                    id:eight
                    text: "8"
                    height:parent.height;
                    font.pixelSize: btnArea.fontSize
                    onClicked: {
                        txtString += "8";
                    }
                }
                Button {
                    id:night
                    text: "9"
                    height:parent.height;
                    font.pixelSize: btnArea.fontSize
                    onClicked: {
                        txtString += "9";
                    }

                }
                Button {
                    id:ride
                    text: "×";
                    height:parent.height;
                    font.pixelSize: btnArea.fontSize
                    onClicked: {
                        txtString += "*";
                    }
                }
            }

            Row {
                height: btnArea.heightTmp;
                width:parent.width;
                spacing: 5;
                Button {
                    id:four
                    text: "4";
                    height:parent.height;
                    font.pixelSize: btnArea.fontSize
                    onClicked: {
                        txtString += "4";
                    }
                }
                Button {
                    id:five
                    text: "5"
                    height:parent.height;
                    font.pixelSize: btnArea.fontSize
                    onClicked: {
                        txtString += "5";
                    }
                }
                Button {
                    id:six
                    text: "6"
                    height:parent.height;
                    font.pixelSize: btnArea.fontSize
                    onClicked: {
                        txtString += "6";
                    }

                }
                Button {
                    id:add
                    text: "-";
                    height:parent.height;
                    font.pixelSize: btnArea.fontSize
                    onClicked: {
                        txtString += "-";
                    }

                }
            }


            Row {
                height: btnArea.heightTmp;
                width:parent.width;
                spacing: 5;
                Button {
                    id:one
                    text: "1";
                    height:parent.height;
                    font.pixelSize: btnArea.fontSize
                    onClicked: {
                        txtString += "1";
                    }
                }
                Button {
                    id:two
                    text: "2"
                    height:parent.height;
                    font.pixelSize: btnArea.fontSize
                    onClicked: {
                        txtString += "2";
                    }
                }
                Button {
                    id:three
                    text: "3"
                    height:parent.height;
                    font.pixelSize: btnArea.fontSize
                    onClicked: {
                        txtString += "3";
                    }

                }
                Button {
                    id:sub
                    text: "+";
                    height:parent.height;
                    font.pixelSize: btnArea.fontSize
                    onClicked: {
                        txtString += "+";
                    }

                }
            }

            Row {
                height: btnArea.heightTmp;
                width:parent.width;
                spacing: 5;
                Button {
                    id:divide
                    text: "÷";
                    height:parent.height;
                    font.pixelSize: btnArea.fontSize
                    onClicked: {
                        txtString += "/";
                    }
                }
                Button {
                    id:zero
                    text: "0"
                    height:parent.height;
                    font.pixelSize: btnArea.fontSize
                    onClicked: {
                        txtString += "0";
                    }
                }
                Button {
                    id:clean
                    text: "Clean"
                    height:parent.height;
                    font.pixelSize: btnArea.fontSize
                    onClicked: {
                        txtString = "";
                    }

                }
                Button {
                    id:eq
                    text: "=";
                    height:parent.height;
                    font.pixelSize: btnArea.fontSize
                    onClicked: {
                        txtString = calc.getValue(txtString);
                    }
                }
            }
        }
    }
}
到这里就ok了,可以试着运行查看效果:

计算问题是解决了,接下来是关于这个界面的问题了,毫无疑问这个界面是巨丑的,后面这篇就会写如何改进这个界面,通过qml自带的组件来对这个界面的显示来进行优化和改进。


 1294
1294


 被折叠的 条评论
为什么被折叠?
被折叠的 条评论
为什么被折叠?
 到【灌水乐园】发言


