


一、单位转换问题,使用postcss-pxtorem
- 首先使用npm install postcss-pxtorem -D 进行安装
- 在vue.config.js文件下进行配置
module.exports = {
		    lintOnSave: true,
		    css: {
		        loaderOptions: {
		            postcss: {
		                plugins: [
		                    require('postcss-pxtorem')({
		                        rootValue : 37.5, // 换算的基数
		                        selectorBlackList  : ['weui','mu'], // 忽略转换正则匹配项
		                        propList   : ['*'],
		                    }),
		                ]
		            }
		        }
		    },
		}
- 设置rem函数,并在main.js中引入rem.js
 // 设置 rem 函数
	function setRem () {

	    // 320 默认大小16px; 320px = 20rem ;每个元素px基础上/16
	    let htmlWidth = document.documentElement.clientWidth || document.body.clientWidth;
	//得到html的Dom元素
	    let htmlDom = document.getElementsByTagName('html')[0];
	//设置根元素字体大小
	    htmlDom.style.fontSize= htmlWidth/20 + 'px';
	}
	// 初始化
	setRem();
	// 改变窗口大小时重新设置 rem
	window.onresize = function () {
	    setRem()
	}
二、在移动端中加入vant框架,导致单位换算问题
- 引入插件,在main.js中引入
npm install postcss-pxtorem --save-dev
npm install amfe-flexible --save-dev

import 'amfe-flexible/index'
- 在postcss.config.js文件中加入
const autoprefixer = require('autoprefixer');
const pxtorem = require('postcss-pxtorem');
module.exports = ({ file }) => {
    let remUnit
    if (file && file.dirname && file.dirname.indexOf('vant') > -1) {
        remUnit = 37.5
    } else {
        remUnit = 75
    }
    return {
        plugins: [
            autoprefixer(),
            pxtorem({
                rootValue: remUnit,
                propList: ['*'],
                selectorBlackList: ['van-circle__layer']
            })
        ]
    }
}
三、scss的全局引入
在config.js中引入
css: {
        loaderOptions: {
            scss: {
                additionalData: `@import "@/assets/css/common.scss";` //@代表src
            },
        }
},
四、axios封装
- 在config.js中加入,解决跨域的问题
devServer: {
     proxy: {
          '/api': {
              target: 'https://xiaochengxu.xicheng.com',
              ws: true,
              changeOrigin: true,
              pathRewrite: {
                  '^/api': ''
              }
          }
      }
},
-
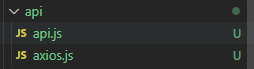
在src下创建api文件夹,创建api.js,axios.js
-
创建api.config.js 文件
 const isPro = Object.is(process.env.NODE_ENV, 'production')
 // 打包上线后的环境
 module.exports = {
     baseUrl: isPro ? 'https://xiaochengxu.xicheng.com' : 'api/'
 }
- 在axios.js 中配置
import axios from 'axios'
import apiConfig from '../../api.config'
import { useStore } from 'vuex'
import store from '../store/index'
// const store = useStore();
// 创建axios实例
const instance = axios.create({
    baseURL: apiConfig.baseUrl, // api的base_url
    timeout: 20000,                 // 请求超时时间
    headers: { 'Content-Type': 'application/json;charset=UTF-8', token: store.state.token } //token
})

// 拦截请求
instance.interceptors.request.use(config => {
    //  去除空
    const params = config.data
    for (const key in params) {
        if (params[key] === undefined || params[key] === '' || params[key] === null) {
            delete params[key]
        }
    }
    // //  添加 token
    // const token = store.state.token;
    // console.log(token)
    // token && (config.headers.token = token);
    return config
}, error => {
    return Promise.reject(error)
})
// 拦截响应
instance.interceptors.response.use(res => {
    const { code, msg } = res.data
    if (code === 500) {
        console.log(msg)
        // ElementUI.Message({
        //   message: msg,
        //   type: 'error'
        // });
    }
    return res
}, error => {
    console.log(error)
    return Promise.reject(error)
})
export default instance
- 然后在api.js中写接口方法
import instance from './axios'//引入axios文件
// 获取职位列表
export function customerCase (data) {
    return instance.post('api/position/indexShow', data)
}
// 获取企业导师列表
export function vipList (data) {
    return instance.post('api/vip/index', data)
}
// 获得简历
export function resumeList () {
    return instance.post('api/resume/getResumeListByUid')
}
- 在页面中引用


 822
822


 被折叠的 条评论
为什么被折叠?
被折叠的 条评论
为什么被折叠?
 到【灌水乐园】发言


