


使用微信小程序来实现网站的扫码登录功能
偶然间, 我发现了扫描微信小程序码就可以登录的网站, 后来也发现腾讯云的后台登录, 也是扫描一个二维码后,打开一个微信小程序后, 在小程序上点击授权,就可以登录了, 所以我就本着好奇的态度, 研究了一下这个功能是如何实现的.为此我还专门注册了一个微信小程序.
1. 准备工作
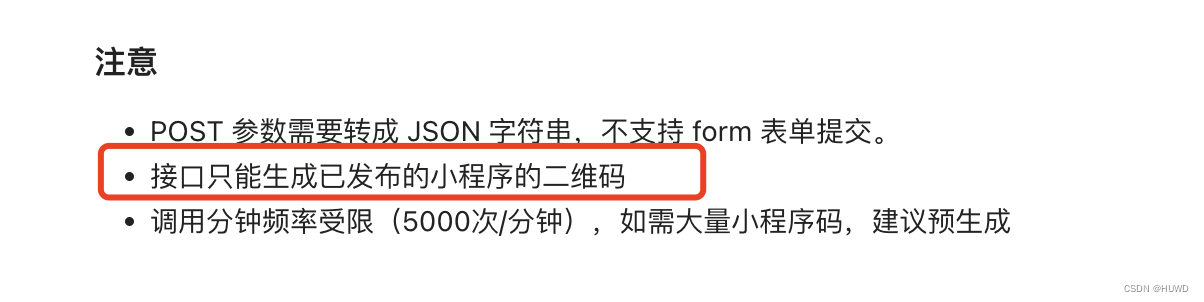
- 首先, 我们需要注册一个自己的微信小程序, 去微信公众平台 申请, 选择个人即可, 这个功能, 无法使用测试号, 因为扫描小程序跳转的页面必须是已经上线的页面 文档地址
- 我们提交填好信息后提交申请即可.
- 接下来说明所需技术栈, 我这里使用的Java语言, 我们需要会springboot, vue, 微信小程序开发.
2. 功能展示
- 手机端
1660472877413530
- pc端
2022-08-14 17.44.20
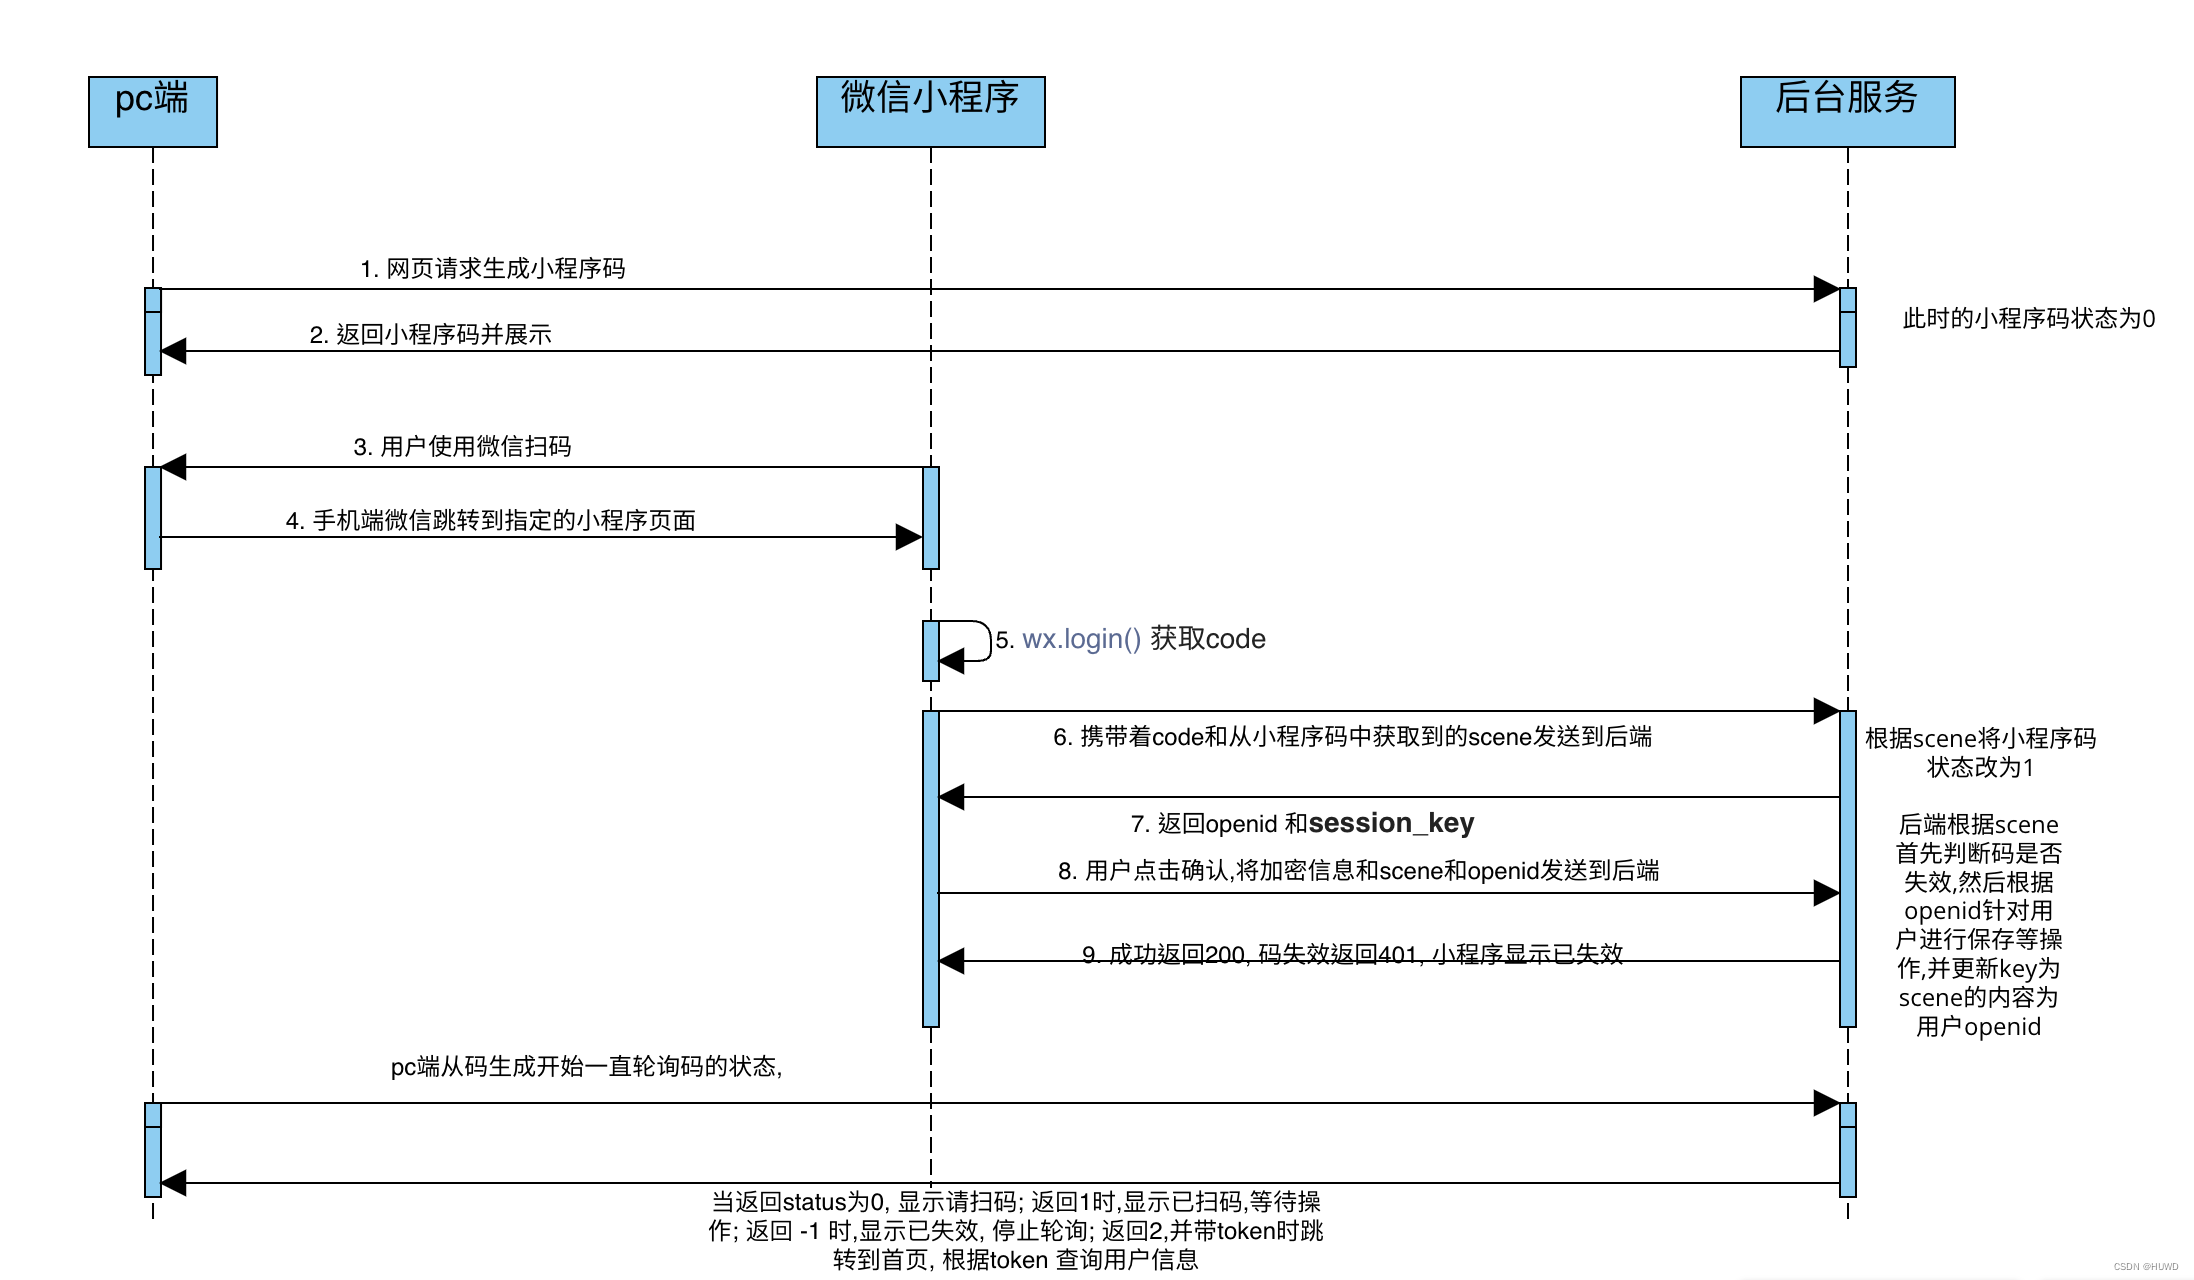
3. 登录流程时序图
4. 核心代码说明
- 首先我们创建一个springboot 项目引入操作小程序的maven坐标, github地址
        <dependency>
            <groupId>com.github.binarywang</groupId>
            <artifactId>weixin-java-miniapp</artifactId>
            <version>4.3.0</version>
        </dependency>
我们需要这三个controller
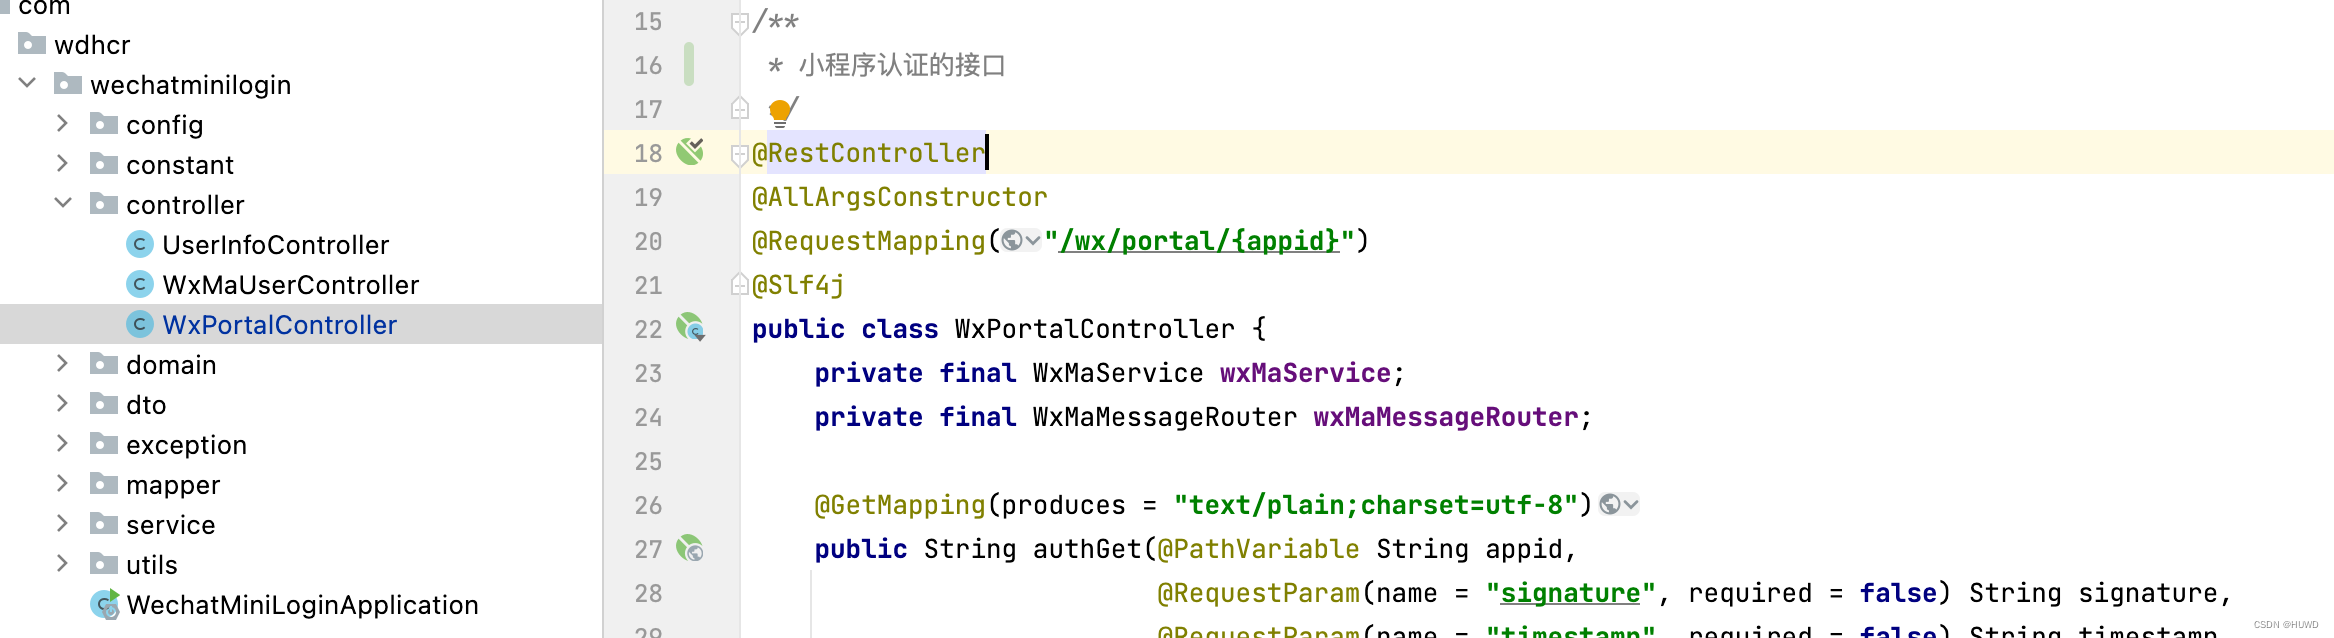
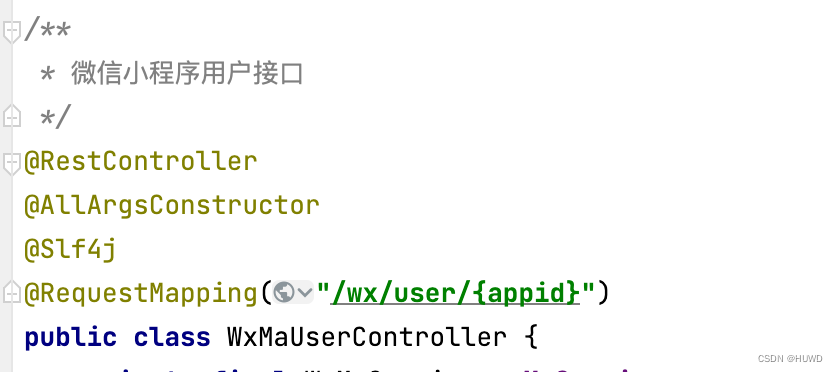
主要的核心代码就在WxMaUserController
/**
 * 微信小程序用户接口
 */
@RestController
@AllArgsConstructor
@Slf4j
@RequestMapping("/wx/user/{appid}")
public class WxMaUserController {
    private final WxMaService wxMaService;


    private final RedisService redisService;

    private final SysUserService sysUserService;

    private final TokenService tokenService;

    /**
     * 登陆接口
     */
    @GetMapping("/login")
    public AjaxResult login(@PathVariable String appid, String code, String scene) {
        if (StringUtils.isBlank(code)) {
            return AjaxResult.error("empty jscode");
        }

        String key = WxConstant.WX_QRCODE_SCENE + scene;
        String value = redisService.getCacheObject(key) != null ? redisService.getCacheObject(key).toString() : "";
        if (StringUtils.isNotEmpty(value)) {
            redisService.setCacheObject(key, WxConstant.WX_QRCODE_SCAN, 3, TimeUnit.MINUTES);
        }

        if (!wxMaService.switchover(appid)) {
            throw new IllegalArgumentException(String.format("未找到对应appid=[%s]的配置,请核实!", appid));
        }

        try {
            WxMaJscode2SessionResult session = wxMaService.getUserService().getSessionInfo(code);
            log.info(session.getSessionKey());
            log.info(session.getOpenid());
            //TODO 可以增加自己的逻辑,关联业务相关数据
            return AjaxResult.success(session);
        } catch (WxErrorException e) {
            log.error(e.getMessage(), e);
            return AjaxResult.error(e.toString());
        } finally {
            WxMaConfigHolder.remove();//清理ThreadLocal
        }
    }

    /**
     * <pre>
     * 获取用户信息接口
     * </pre>
     */
    @GetMapping("/info")
    public AjaxResult info(@PathVariable String appid, String openId, String sessionKey,
                           String signature, String rawData, String encryptedData, String iv
            , String scene) {

        if (!wxMaService.switchover(appid)) {
            throw new IllegalArgumentException(String.format("未找到对应appid=[%s]的配置,请核实!", appid));
        }
        // 用户信息校验
        if (!wxMaService.getUserService().checkUserInfo(sessionKey, rawData, signature)) {
            WxMaConfigHolder.remove();//清理ThreadLocal
            return AjaxResult.error("user check failed");
        }

        String key = WxConstant.WX_QRCODE_SCENE + scene;
        String value = redisService.getCacheObject(key) != null ? redisService.getCacheObject(key).toString() : "";
        if (StringUtils.isEmpty(value)) {
            return AjaxResult.error(401, "验证码已过期");
        }

        // 解密用户信息
        WxMaUserInfo userInfo = wxMaService.getUserService().getUserInfo(sessionKey, encryptedData, iv);
        WxMaConfigHolder.remove();//清理ThreadLocal
        SysUser one = sysUserService.getOne(new LambdaQueryWrapper<SysUser>()
                .eq(SysUser::getOpenId, openId));
        if (one == null) {
            SysUser sysUser = new SysUser();
            sysUser.setUserName(userInfo.getNickName());
            sysUser.setAvatarUrl(userInfo.getAvatarUrl());
            sysUser.setOpenId(openId);
            sysUserService.save(sysUser);
        }
        if (StringUtils.isNotEmpty(value)) {
            redisService.setCacheObject(key, WxConstant.WX_QRCODE_SUCCESS + openId, 30, TimeUnit.SECONDS);
        }
        return AjaxResult.success(userInfo);
    }


    /**
     * <pre>
     * 获取小程序码
     * </pre>
     */
    @SneakyThrows
    @GetMapping("/getQRCode")
    public AjaxResult getQRCode(@PathVariable String appid) {
        String uuid = UUID.randomUUID().toString().replaceAll("-", "");
        String key = WxConstant.WX_QRCODE_SCENE + uuid;
        redisService.setCacheObject(key, WxConstant.WX_QRCODE_NOT_SCAN, 3, TimeUnit.MINUTES);
        byte[] release = wxMaService.getQrcodeService().createWxaCodeUnlimitBytes(uuid, "pages/login/login", true, "release", 430, true, (WxMaCodeLineColor) null, false);
        String s = Base64.encodeBase64String(release);
        HashMap<String, Object> map = new HashMap<>();
        map.put("scene", uuid);
        map.put("img", WxConstant.BASE64_PNG + s);
        return AjaxResult.success(map);
    }

    /**
     * 根据uuid 查询redis中当前小程序码的状态
     * @param appid
     * @param uuid
     * @return
     */
    @GetMapping("/getQRStatus/{uuid}")
    public AjaxResult getQRStatus(@PathVariable String appid, @PathVariable String uuid) {
        String key = WxConstant.WX_QRCODE_SCENE + uuid;
        String value = redisService.getCacheObject(key) != null ? redisService.getCacheObject(key).toString() : "";
        AjaxResult success = AjaxResult.success();
        HashMap<String, String> map = new HashMap<>();
        if (StringUtils.isNotEmpty(value) && value.startsWith(WxConstant.WX_QRCODE_SUCCESS)) {
            String openId = value.split("-")[1];
            String token = tokenService.createToken(openId);
            map.put(WxConstant.QR_STATUS, WxConstant.QR_STATUS_SUCCESS);
            map.put(WxConstant.TOKEN, token);
            success.put(AjaxResult.DATA_TAG, map);
        } else if (StringUtils.isNotEmpty(value)) {
            map.put(WxConstant.QR_STATUS, value);
            success.put(AjaxResult.DATA_TAG, map);
        } else {
            map.put(WxConstant.QR_STATUS, WxConstant.WX_QRCODE_EXPIRED);
            success.put(AjaxResult.DATA_TAG, map);
        }
        return success;
    }

}
说明:
就是利用了在生成小程序码的时候可以传递一个额外的参数:
我们在pc端请求生成小程序码接口的时候, 生成一个全局唯一的字符串给微信接口, 并且我们将这个唯一字符串作为key, 一个状态码为value 存入redis 中
- pc端的核心代码如下:
<template>
  <div class="container">
    <div class="w-img">
      <el-avatar id="qrcode" :size="250" src="https://empty" @click="getImgQrCode" style="border: 8px solid #999;"
                 class="">
        <img
            :src="qcUrl"
        />
      </el-avatar>
    </div>
    <div class="w-qr-status-text" v-show="isShow">
      {{ qcStatus }}
    </div>
  </div>
</template>

<script setup lang="ts">


import {onUnmounted, ref} from "vue";
import router from "../router";
import {getQRCode, getQRStatus} from "../api/login";
import {setToken} from "../utils/auth";


const qcStatus = ref('请先扫码');
const qcUrl = ref();
const isShow = ref(true);
const time = ref()

const uuid = ref();

onUnmounted(() => {
  clearTimeout(time.value)
})

const getImgQrCode = () => {
  getQRCode().then(res => {
    qcUrl.value = res.data.img;
    uuid.value = res.data.scene
    isShow.value = true
    document.querySelector('#qrcode')!.classList.remove('w-qr-dead')
    clearTimeout(time.value)
    getStatus()
  })
}
const getStatus = () => {
  time.value = setInterval(() => {
    getQRStatus(uuid.value).then(res => {
      const {status} = res.data
      if (-1 == status) {
        document.querySelector('#qrcode')!.className = (`${document.querySelector('#qrcode')!.className} w-qr-dead`)
        isShow.value = false
        clearTimeout(time.value)
      }
      if (1 == status) {
        qcStatus.value = '已扫码,等待操作';
      }
      if (2 == status) {
        clearTimeout(time.value)
        const {token} = res.data
        setToken(token)
        router.push({path: "/"});
      }
    })
  }, 2000)

}

getImgQrCode()
</script>

<style lang="scss" scoped>

.container {
  width: 100%;
  height: 100vh;
  background-color: #333;
  display: flex;
  align-items: center;
  flex-direction: column;
  justify-content: center;

  .w-qr-status-text {
    display: flex;
    width: 250px;
    height: 48px;
    background-color: black;
    align-items: center;
    justify-content: center;
    color: #aaa;
    border-radius: 24px;
    margin-top: 10px;
  }

  .w-qr-dead:before {
    top: 0;
    left: 0;
    width: 100%;
    height: 100%;
    background-color: rgba(0, 0, 0, .9);
    border-radius: 50%;
    color: #fff;
    content: '码已过期,点击刷新';
    display: flex;
    align-items: center;
    justify-content: center;
    cursor: pointer;
  }
}
</style>
- 小程序核心代码:
- login.wxml
<view class="w-main"> <view class="w-img-pc"> <image class="size-l" mode="aspectFill" src="{{titleImg}}"></image> </view> <text class="w-title">{{title}}</text> <text class="w-desc">{{desc}}</text> <t-button bindtap="getUserProfile" wx:if="{{isLogin}}" class="w-login-btn" theme='primary' block>登录</t-button> </view> - login.wxss
/* pages/login/login.wxss */ .w-main { display: flex; text-align: center; min-height: 100vh; flex-direction: column; justify-content: center; } .w-img-pc image{ padding-bottom: 150rpx; width: 200rpx; height: 200rpx; } .w-title { margin-top: 2rpx; font-size: 40rpx; } .w-desc { margin-top: 10rpx; font-size: 30rpx; } .w-login-btn { padding-top: 100rpx; margin-left: 100rpx; margin-right: 100rpx; } - login.js
// pages/login/login.js
const request = require('../../api/login.js');
Page({

  /**
   * 页面的初始数据
   */
  data: {
    title: '欢迎来到wdhcr的小窝',
    desc: '请确认登录',
    titleImg: '../../assets/pc.png',
    isLogin: true,
    openId: '',
    sessionKey: '',
    scene: ''
  },

  /**
   * 生命周期函数--监听页面加载
   */
  onLoad(options) {
    this.setData({
      scene: decodeURIComponent(options.scene)
    })
    this.getOpenId();
  },

  getOpenId() {
    wx.login({
      success: res => {
        console.log(res.code)
        request.getOpenId({ code: res.code, scene: this.data.scene ? this.data.scene : '-1'})
          .then(res => {
            this.setData({
              openId: res.data.openid,
              sessionKey: res.data.sessionKey
            })
          })
      }
    })
  },
  getUserProfile(e) {
    // 开发者妥善保管用户快速填写的头像昵称,避免重复弹窗
    wx.getUserProfile({
      desc: '用于完善会员资料', // 声明获取用户个人信息后的用途,后续会展示在弹窗中,请谨慎填写
      success: (res) => {
        var params = {
          'openId': this.data.openId,
          'sessionKey': this.data.sessionKey,
          'encryptedData': res.encryptedData,
          'rawData': res.rawData,
          'signature': res.signature,
          'iv': res.iv,
          'scene': this.data.scene ? this.data.scene : '-1',
          'openId': this.data.openId
        }
        request.getInfo(params).then(res => {
          if (res.code === 200) {
            wx.reLaunch({
              url: '/pages/home/home',
            })
          } else if (res.code === 401) {
            this.setData({
              desc: res.msg,
              titleImg: '../../assets/laptop-error.png',
              isLogin: false
            })
          }
        })
      }
    })
  },

  /**
   * 生命周期函数--监听页面初次渲染完成
   */
  onReady() {

  },

  /**
   * 生命周期函数--监听页面显示
   */
  onShow() {

  },

  /**
   * 生命周期函数--监听页面隐藏
   */
  onHide() {

  },

  /**
   * 生命周期函数--监听页面卸载
   */
  onUnload() {

  },

  /**
   * 页面相关事件处理函数--监听用户下拉动作
   */
  onPullDownRefresh() {

  },

  /**
   * 页面上拉触底事件的处理函数
   */
  onReachBottom() {

  },

  /**
   * 用户点击右上角分享
   */
  onShareAppMessage() {

  }
})
- login.wxml


 2150
2150

 被折叠的 条评论
为什么被折叠?
被折叠的 条评论
为什么被折叠?
 到【灌水乐园】发言


