


js的引入
在head或者body中引入(但通常放在head中,这样不会显得杂乱),如图:

或建立js文件用
<script src="js_test1.js"></script>
引入
js的使用
1. 注释
单行注释://
多行注释/**/
2. var
变量声明:var(但现在let基本代替了var,想知道let,const,var区别的请自行查阅)
代码:

效果:

3. 运算符
算数运算符

赋值运算符

比较运算符
==值相等即可
===值与类型都要等
!=与!==亦是

比较运算符

条件运算符

位运算符

4. 条件语句
if(){
}else if(){
}else{
}
switch(){
case 1:
	break;
case 2:
	break;
...
default://条件不满足任何case时
	break;
}
5. 循环语句
for循环
        let i=[0,1,2,3,4,5,6,7,8,9]
        for(let j = 0; j<10; j++){
            document.write(i[j]);
        }
for/in循环
 		let i=[0,1,2,3,4,5,6,7,8,9]
        for(let j in i){
            document.write(i[j]);
        }
while循环和do/while循环
while(true){
...//执行
}
do{
...
}while(true){
...
}
区别:while先判断再执行
do/while先执行一次再判断
6. 跳转语句
break和continue语句
break是跳出循环,continue是跳出此次循环进行下次循环
7. 函数
函数定义与调用
函数定义
function必须小写,函数名称和调用函数时大小写敏感
function 函数名(){
代码块
}
函数调用
1.在script中调用:
    <script>
    function demo(a,b){
        let sum = a+b;
        alert(sum);
    }
    demo(1,2);
    </script>
- 在html中调用
    <script>
    function demo(a,b){
        let sum = a+b;
        alert(sum);
    }
    </script>
<button onclick="demo(10,20)">显示</button>
8. 异常和捕获
try/catch:
        try {
            alert(str);//异常代码块
        }catch (err){
            alert(err);//错误信息处理
        }
throw创建一个自定义错误:
<input type="text" id="test">
<input value="显示" type="button" onclick="demo()">
    <script>
    function demo(){
        try {
            let e = document.getElementById("test").value;
            if(e==""){
                throw "未进行输入";
            }
        }catch (err){
            alert(err);
        }
    }
    </script>
9. 事件
常见事件:

DOM0级事件会被覆盖掉
DOM2级事件不会被覆盖


事件对象

<div id="div">
    <button id="but">现</button>
    <a id="a_id" href="www.baidu.com">跳转</a>
</div>
<script>
let a = document.getElementById("but");
let b = document.getElementById("div")
let c = document.getElementById("a_id")
a.addEventListener("click",showType);
b.addEventListener("click",showDiv);
c.addEventListener("click",stopA)
function showType(e){
    alert(e.type);
    e.stopPropagation();//阻止事件冒泡
}
function showDiv(){
    alert("div");
}
function stopA(e){
    e.preventDefault();
    // e.stopPropagation();//阻止事件冒泡
}
</script>
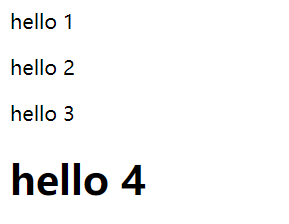
10. DOM操作html
document.write
用于输出
document.write里可以放置类似于
等标签,如图:

效果图:
依照各属性查找
getElementById和getElementsByClassName可以由标签的id和class名获取内容
getElementsByTagName可以利用标签名查找元素(相同元素中的第一个)

<p name="p_name" class="p_class">hello</p>
<p name="p_name" class="p_class">hello</p>
<p name="p_name" class="p_class">hello</p>
<p name="p_name" class="p_class">hello</p>
<p name="p_name" class="p_class">hello</p>
<p name="p_name" class="p_class">hello</p>
 <script>
    let a =document.getElementsByName("p_name");
    alert("name有"+a.length);
    a[0].innerHTML ="my name is zfh";
    let b = document.getElementsByTagName("p");
    alert("标签有"+b.length);
    b[2].innerHTML = "my name is zfh";
    let c = document.getElementsByClassName("p_class");
    alert("class有"+c.length)
    c[4].innerHTML = "my name is zfh";
 </script>
innerHTML
innerHTML可以改变获取id标签中的内容,如图:


attribute
getAttribute和setAttribute
获取属性和设置属性
<a id="a_id" href="www.baidu.com" title="去百度">百度</a>
<input value="跳" type="button" onclick="demo()">
<script>
    function demo(){
        let a = document.getElementById("a_id");
        a.setAttribute("title", "设置的属性");
        let b = a.getAttribute("title");
        alert(b)
    }
</script>
访问子节点
格式问题,显示为7
<ul>
    <li>1</li>
    <li>2</li>
    <li>3</li>
</ul>
<script>
    let a = document.getElementsByTagName("ul");
    let b = a[0].childNodes;
    alert(b.length)
</script>
访问父节点
<div>
    <p id="p_id">
        test
    </p>
</div>
<script>
    let a = document.getElementById("p_id");
    let b = a.parentNode.nodeName;
    alert(b);
</script>
创造节点
<script>
let a = document.body;
let input = document.createElement("input");
input.type = "button";
input.value = "按钮";
a.appendChild(input);//添加子节点
</script>
插入节点
<div id="div">
    <p id="p_id">
        这是原先的
    </p>
</div>
<script>
let a = document.getElementById("div");
let b = document.getElementById("p_id");
let c = document.createElement("p");
c.innerHTML = "插入的";
a.insertBefore(c,b);
</script>
删除节点
<div id="div">这是div
    <p id="p_id">
        这是p
    </p>
</div>
<script>
let a = document.getElementById("div");
// let b = document.getElementById("p_id");
a.removeChild(a.childNodes[1]);
</script>
网页尺寸
<script>
function getSize(){
    let width = document.documentElement.offsetWidth||document.body.offsetWidth;//  ||是为了兼容
    let height = document.documentElement.offsetHeight||document.body.offsetHeight;//  ||是为了兼容
    alert(width+"*"+height);
    let w = document.documentElement.scrollWidth;
    let h = document.documentElement.scrollHeight;
    alert(w+"*"+h);
    let wi = document.documentElement.clientWidth;
    let he = document.documentElement.clientHeight;
    alert(wi+"*"+he);
}
getSize();
</script>
11. DOM操作css
<div id="div_id" class="div_class">
    这是一个test
</div>
<input value="跳" type="button" onclick="demo()">
    <script>
        function demo(){
            document.getElementById("div_id").style.background = "pink"
        }
    </script>
background可以替换成其他属性
.div_class{
    height: 100px;
    width: 100px;
    background-color: aqua;
}
DOM EventListener
添加:addEventListener()
移除:removeEventListener()
<button id="but">现</button>
<script>
let a = document.getElementById("but");
a.addEventListener("click", hello);
a.addEventListener("click", world);
a.removeEventListener("click", hello);
function hello(){
    alert("hello");
}
function world(){
    alert("world");
}
</script>
12.内置对象
创建
直接创建:
<script>
    people = new Object();
    people.name = "zfh";
    people.age = 21;
    document.write("姓名:"+people.name+"<br/>"+"年龄"+people.age +"<br/>");
</script>
<script>
    person = {name:"ZFH",age:21};
    document.write("姓名:"+people.name+"<br/>"+"年龄"+people.age);
</script>
函数定义对象,创建新的对象实例:
<script>
    function people (name,age){
        this.name = name;
        this.age = age;
    }
    p = new people("zfh",21);
    document.write("name:"+p.name+",age:"+p.age);
</script>
String字符串对象:
length属性:字符串长度
indexOf:查询当前字符串是否存在,存在即返回所在位置,不存在返回-1;
match:匹配,匹配成功即打印出内容,不成功就打印出null
replace:替换目标字符
toLowerCase/toUpperCase:替换为小/大写
<script>
    let str = "Hello,my name is zfh";
    document.write("字符长度为"+str.length+'<br/>');
    document.write(str.indexOf("my")+"<br/>");
    document.write(str.match("name")+"<br/>");
    document.write(str.replace("zfh","ZFH")+"<br/>");
    document.write(str.toLowerCase()+"<br/>");
    document.write(str.toUpperCase()+"<br/>");
</script>
data日期对象
<script>
    let date =new Date();
    document.write(date+"<br/>");//获取date
    document.write(date.getFullYear()+"<br/>");//获取年份
    document.write(date.getTime()+"<br/>");//获取毫秒数
    date.setFullYear(2021,1.5);//设置时间
    document.write(date)
</script>
显示时钟
<body onload="time()">
<div id="div"></div>
<!--时钟-->
<script>
    function time(){
        let today = new Date();
        let h = today.getHours();
        let m = today.getMinutes();
        let s = today.getSeconds();
        m = fixTime(m);
        s = fixTime(s)
        document.getElementById("div").innerHTML = h+":"+m+":"+s;
        t = setTimeout(function (){
            time();
        },1000);
    }
    function fixTime(i){//整理时间为00:00:00格式
        if(i<10){
            i = "0" + i;
        }
        return i;
    }
</script>
</body>
Array数组对象
数组常用方法:
合并concat:
<script>
    let a = ["hello","world"];
    let b = ["my","name","is","zfh"];
    let c = a.concat(b);
    document.write(c);
</script>
排序sort:
<script>
    let a = ["a","c","b","x","t","f"];
    let b = ["2","5","1","4","3","6"];
    document.write(a.sort()+"<br/>");//升序
    document.write(b.sort(function (b, c){//降序
       return  c-b;
    }));
</script>
末尾追加push:
<script>
    let a = ["a","c","b","x","t","f"];
    let b = ["2","5","1","4","3","6"];
    b.push("999");
    document.write(b);
</script>
翻转reverse:
<script>
    let b = ["2","5","1","4","3","6"];
    document.write(b.reverse());
</script>
math对象
常用方法:
 <script>
     document.write(Math.round(99.99)+"<br/>");//四舍五入
     document.write(Math.random()*100+"<br/>");//0到1随机数
     document.write(parseInt(Math.random()*100)+"<br/>");//0到100随机整数
     document.write(Math.max(37,58,62,77,20,52)+"<br/>");//最大值
     document.write(Math.min(37,58,62,77,20,52,1.2351)+"<br/>");//最小值
     document.write(Math.abs(-37)+"<br/>");//绝对值
 </script>
13. 浏览器对象
window对象
浏览器宽高
<script>
document.write("宽度:"+window.innerWidth+"高度:"+window.innerHeight);
</script>
页面打开与关闭
<button onclick="but()">按钮</button>

<script>
    function but(){
        // window.open("index.html","test","height=200,weight=200,top = 100 left=100,toolbar = no,menubar=no");
        window.close();
    }
</script>
计时器

一直调用一个方法
<p id="p_id"></p>
<button onclick="stopTime()">停止</button>
<script>
    let a = setInterval(function (){
        getTime();
    },1000);//延时1000毫秒执行
    function getTime(){
        let b = new Date();
        let t = b.toLocaleTimeString();
        document.getElementById("p_id").innerHTML = t;
    }
    function stopTime(){
        clearInterval(a);
    }
</script>
延时调用自己
<body onload="tan()">
<button onclick="stop()">停止</button>
<script>
    let a
    function tan(){
        alert("hello")
        a = setTimeout(function (){
            tan();
        },3000);//延时1000毫秒执行
    }
    function stop(){
        clearTimeout(a)
    }
</script>
</body>
history对象

location对象

<button id="p_id" onclick="a()">qqqqqqqq</button>
<br/>
<script>
document.write(location.pathname+"<br/>");
document.write(location.hostname+"<br/>");
document.write(location.port+"<br/>");
document.write(location.protocol+"<br/>");
document.write(location.href+"<br/>");
function a(){
    location.assign("http://www.baidu.com");
}
</script>
Screen对象


 791
791


 被折叠的 条评论
为什么被折叠?
被折叠的 条评论
为什么被折叠?
 到【灌水乐园】发言


