


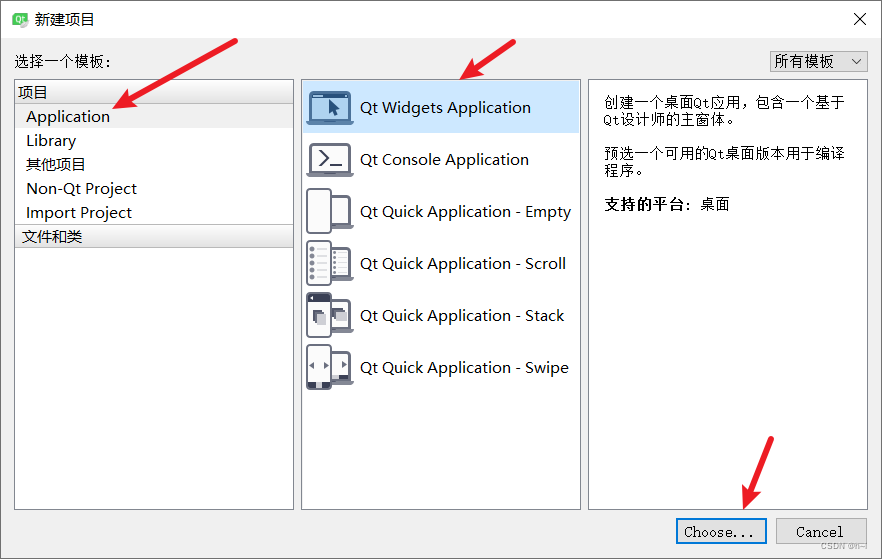
创建第一个QT项目
第一步:打开Qt Creator,点击new project

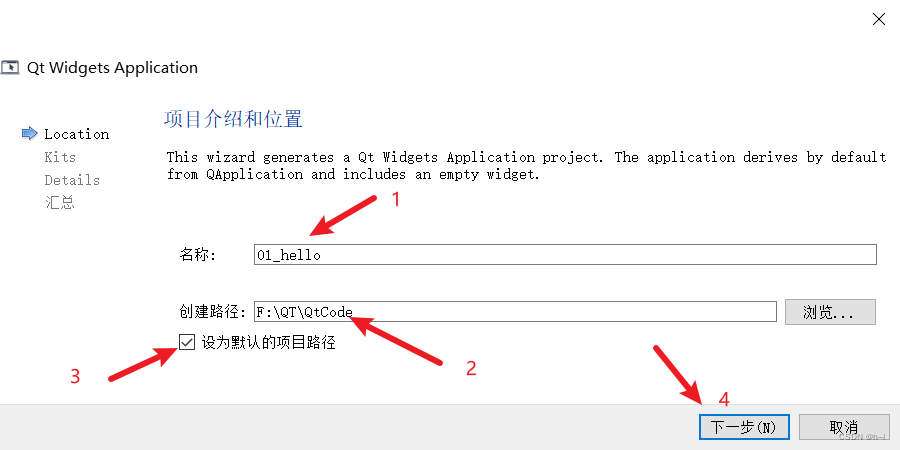
第二步:
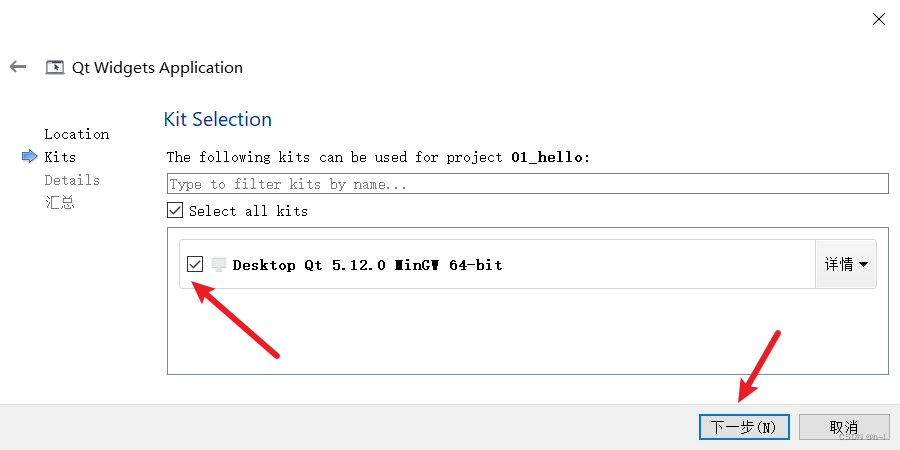
第三步:
第四步:
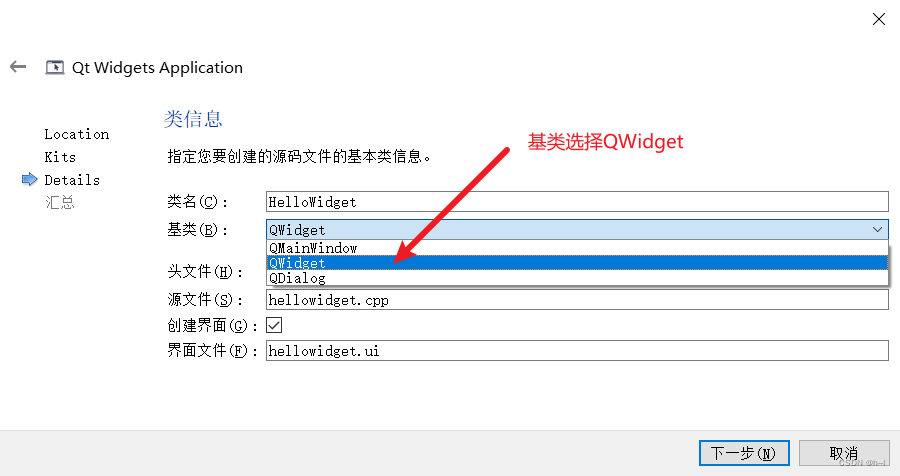
 第五步:
第五步:
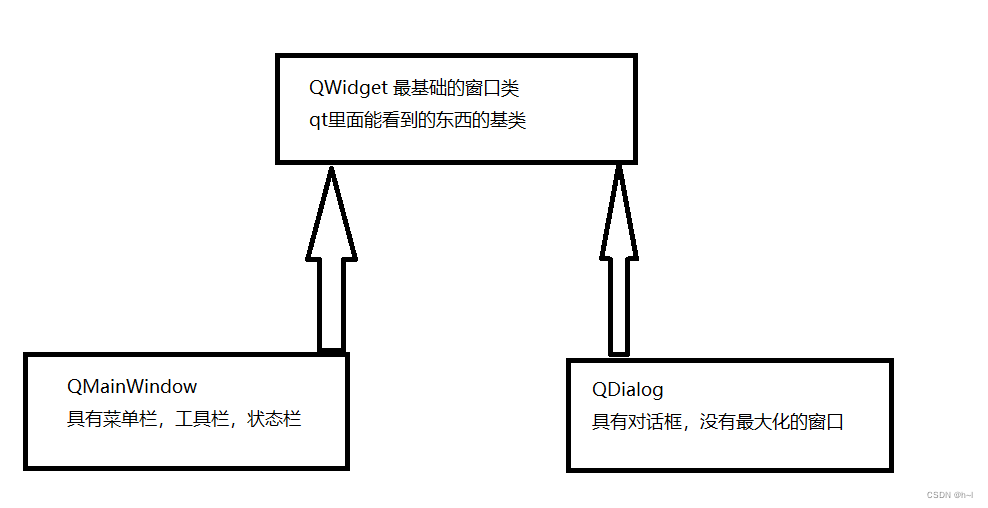
QWidget,QMainWindow,QDialog三者的关系
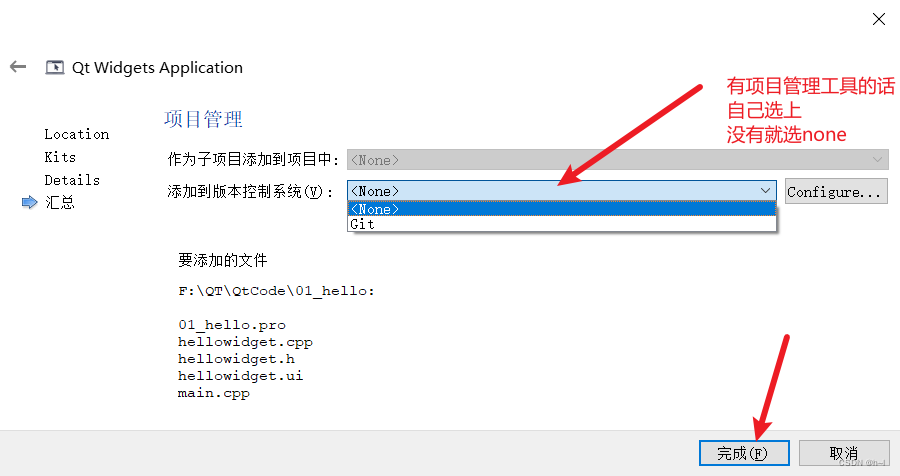
 第六步:
第六步:
 点击run,程序便运行起来
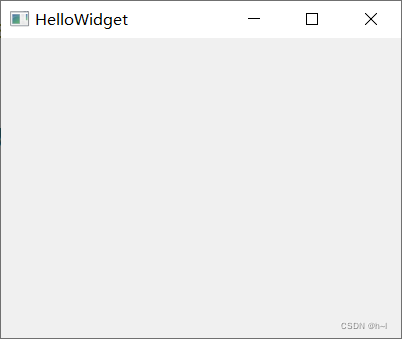
至此,我们的第一个项目就创建完成。
代码分析:
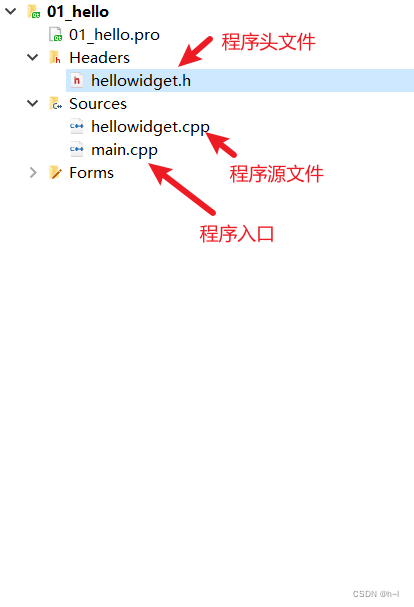 main.cpp
#include "hellowidget.h"
#include <QApplication>
#include <iostream>
int main(int argc, char *argv[])
{
    //创建一个应用程序对象
    //维护qt应用程序生命的一个对象,每个qt有且仅有一个对象
    QApplication a(argc, argv);
    //窗口类的一个对象
    HelloWidget w;
    //把窗口显示出来
    w.show();

    //std::cout<<"before a.exec()"<<std::endl;
    a.exec();

    //std::cout<<"after a.exec()"<<std::endl;
    return 0;
}
a,exec()相当于
/*
     * 死循环让程序一直运行,生命循环,消息循环
     * while(1)
     * {
     *      if(点击x按钮)
     *          break;
     *      if(点击最小化按钮)
     *          最小化动作;
     *      if(点击最大化按钮)
     *          最大化工作;
     *      .....
     *  }
     */
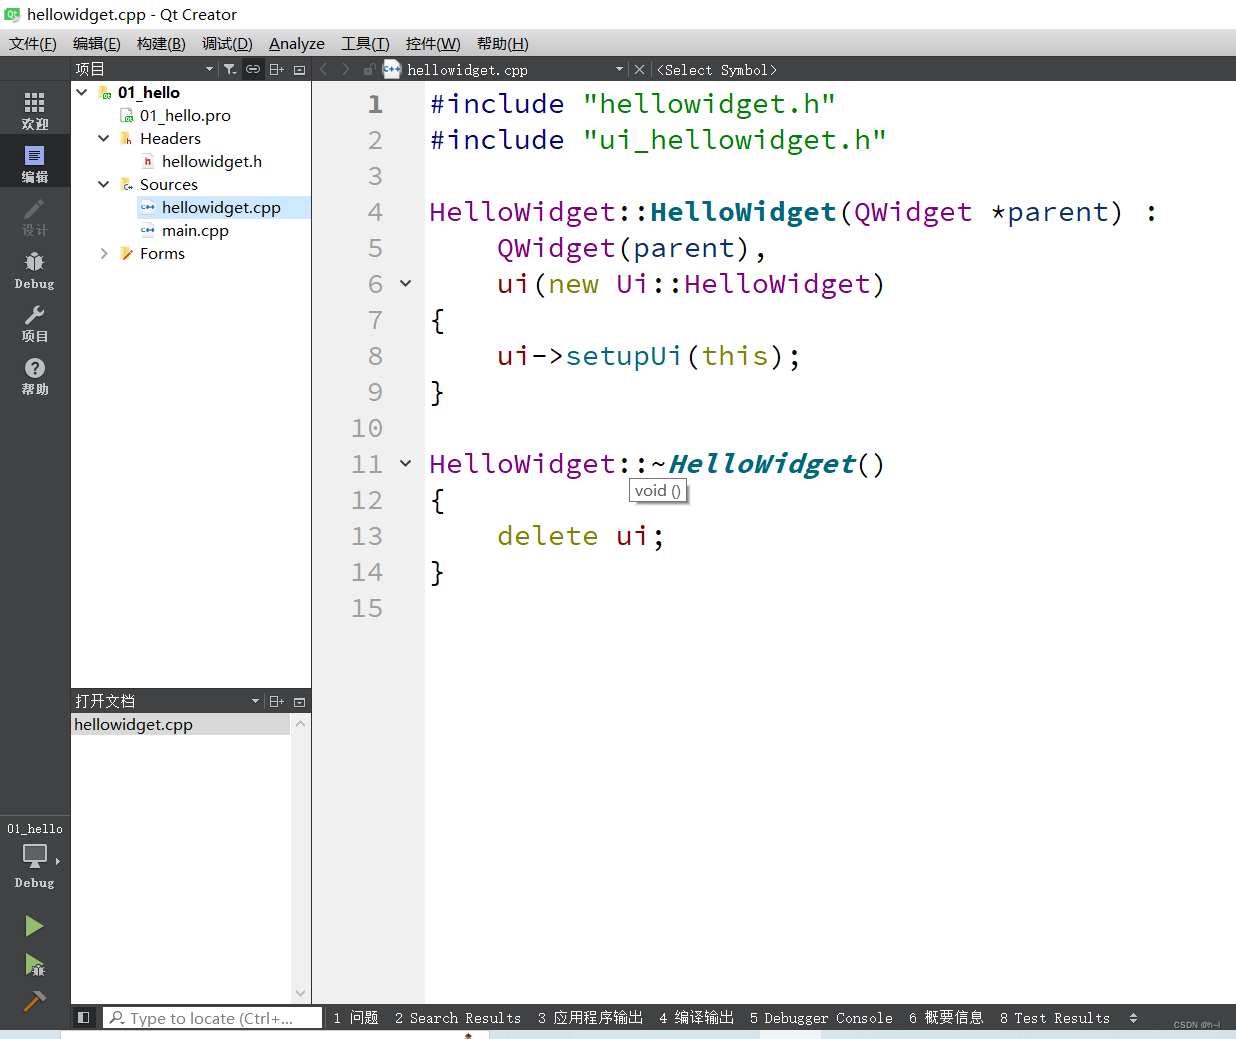
hellowidget.cpp
#include "hellowidget.h"
#include "ui_hellowidget.h"

HelloWidget::HelloWidget(QWidget *parent) :
    QWidget(parent),
    ui(new Ui::HelloWidget)
{
    ui->setupUi(this);
}

HelloWidget::~HelloWidget()
{
    delete ui;
}
hellowidget.h
#ifndef HELLOWIDGET_H
#define HELLOWIDGET_H

#include <QWidget>

namespace Ui {
class HelloWidget;
}

class HelloWidget : public QWidget
{
    //宏,引入qt信号和槽的一个宏
    Q_OBJECT

public:
    //parent窗口指针,父窗口对象的指针
    //如果parent为0或者NULL,表示当前窗口对象是个顶层窗口
    //顶层窗口就是在任务栏可以找到的窗口
    explicit HelloWidget(QWidget *parent = nullptr);
    ~HelloWidget();

private:
    Ui::HelloWidget *ui;
};
.pro分析
#-------------------------------------------------
#
# Project created by QtCreator 2023-01-03T18:19:40
#
#-------------------------------------------------
# Qt是工程模块变量  ,引入了qt的core 和 gui 模块
QT       += core gui
# 如果qt版本号大于4,就引入widgets模块
greaterThan(QT_MAJOR_VERSION, 4): QT += widgets
# 指定目标,生成可执行程序的名字
TARGET = 01_hello
# 模板,生成什么文件,app表示应用程序,lib表示生成库
TEMPLATE = app

# The following define makes your compiler emit warnings if you use
# any feature of Qt which has been marked as deprecated (the exact warnings
# depend on your compiler). Please consult the documentation of the
# deprecated API in order to know how to port your code away from it.
#如果你用了过时的api,就会报warning
DEFINES += QT_DEPRECATED_WARNINGS

# You can also make your code fail to compile if you use deprecated APIs.
# In order to do so, uncomment the following line.
# You can also select to disable deprecated APIs only up to a certain version of Qt.
#DEFINES += QT_DISABLE_DEPRECATED_BEFORE=0x060000    # disables all the APIs deprecated before Qt 6.0.0

CONFIG += c++11

SOURCES += \
        main.cpp \
        hellowidget.cpp

HEADERS += \
        hellowidget.h

FORMS += \
        hellowidget.ui

# Default rules for deployment.
qnx: target.path = /tmp/$${TARGET}/bin
else: unix:!android: target.path = /opt/$${TARGET}/bin
!isEmpty(target.path): INSTALLS += target
命名规范
- 类名:单词首字母大写,单词和单词之间直接连接,无需连接符。
- Qt中内置的类型,头文件于类命名同名,例如:
#include <QString>
QString str;
...
#include <QWidget>
QWidget w;
- 函数名,变量名:首字母小写,之后每个单词首字母大写,单词和单词之间直接连接,无需连接字符。
- 类的成员变量设置函数使用set+成员变量名,获取成员变量的函数直接用成员变量名(如果是bool类型,有可能会用一些表示状态的术语,如isVisilble):
//普通成员变量设置和获取
void setText(QString text);
QString text() const;
//bool的成员变量设置和获取
void setEnabled(bool enabled);
bool isEnabled() const;
QtCreator常用快捷键
运行 ctrl + R
编译 ctrl + B
注释 ctrl + /
整行移动代码 ctrl + shift + ↑ 或 ↓
自动对齐 ctrl + i
同名之间的.h 和 .cpp文件跳转 F4
父子关系
设置一个按钮
#include "widget.h"
#include <QApplication>
#include <QPushButton>
int main(int argc, char *argv[])
{
    QApplication a(argc, argv);
    Widget w;
    //如果直接添加按钮的话,系统会默认是一个顶层窗口
    QPushButton btn;
    btn.setText("button");
    btn.show();//将按钮显示出来

    w.show();
    return a.exec();
}
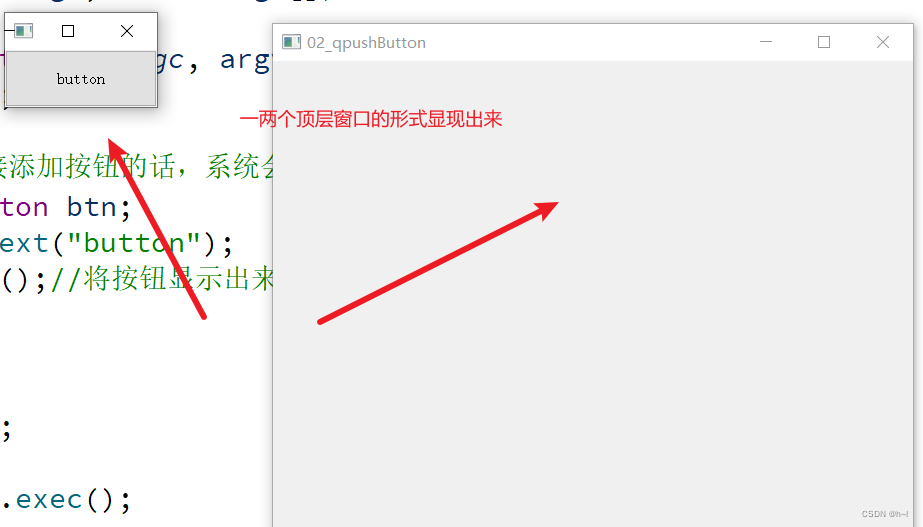
直接添加按钮的话,会出现上述的情况,两个窗口各自独立。为了让按钮出现在右边的窗口上,我们就需要建立相应的父子关系,让两个毫不相干的窗口产生依赖。
具体做法:一:使用setParent函数;二:构造函数传参
#include <QApplication>
#include <QPushButton>
int main(int argc, char *argv[])
{
    QApplication a(argc, argv);
    Widget w;

    //如果直接添加按钮的话,系统会默认是一个顶层窗口
    //QPushButton btn;
    //btn.setText("button");
    //btn.show();//将按钮显示出来

    //建立父子关系
    //1.使用setParent函数
    QPushButton btn1;
    btn1.setText("button1");
    btn1.setParent(&w);
    //2.使用构造函数传参
    QPushButton btn2("button2",&w);

    //将button2移动位置
    btn2.move(100,100);

    w.show();
    return a.exec();
}
常用api
move 移动窗口到父窗口的某个坐标
resize 重新设置窗口的大小
setFixedSize 设置窗口的固定大小
setWindowTitle 设置窗口的标题
对象树
概念:各个窗口对象通过建立父子关系构造的一个关系树
好处:父对象释放的时候会自动释放各个子对象(使用children列表)
以后基本都是用new的方式来创建窗口对象
注意点:
- 父对象能够被释放
- 父对象,子对象,直接或间接继承自QObject
点击按钮关闭窗口
分析:
按钮
被点击
窗口
关闭
建立四者的关系(按钮,被点击,窗口,关闭)
在源文件中
#include "widget.h"
#include <QPushButton>
Widget::Widget(QWidget *parent)
    : QWidget(parent)
{
    QPushButton *btn = new QPushButton("button",this);

    connect(btn,&QPushButton::clicked,this,&Widget::close);
}


 1461
1461


 被折叠的 条评论
为什么被折叠?
被折叠的 条评论
为什么被折叠?
 到【灌水乐园】发言


