


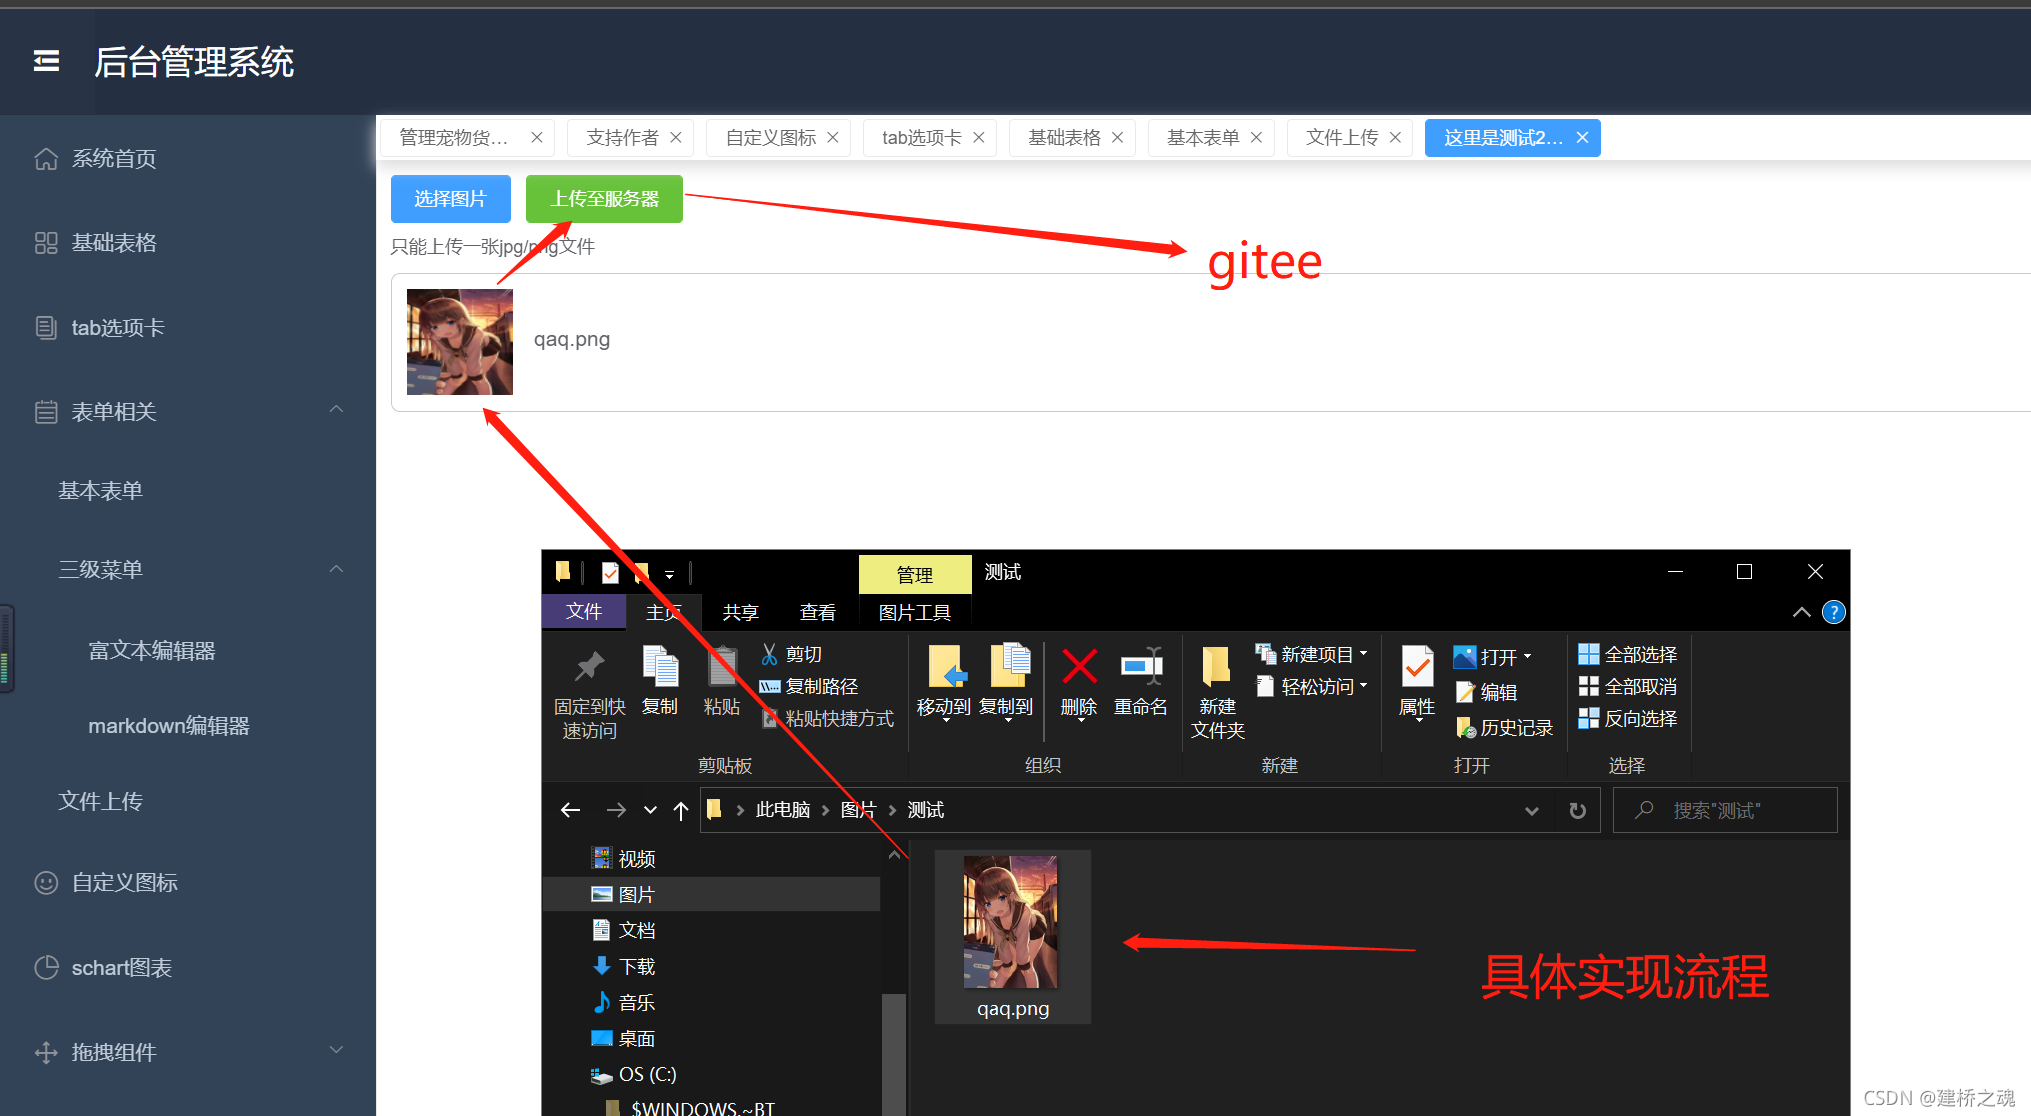
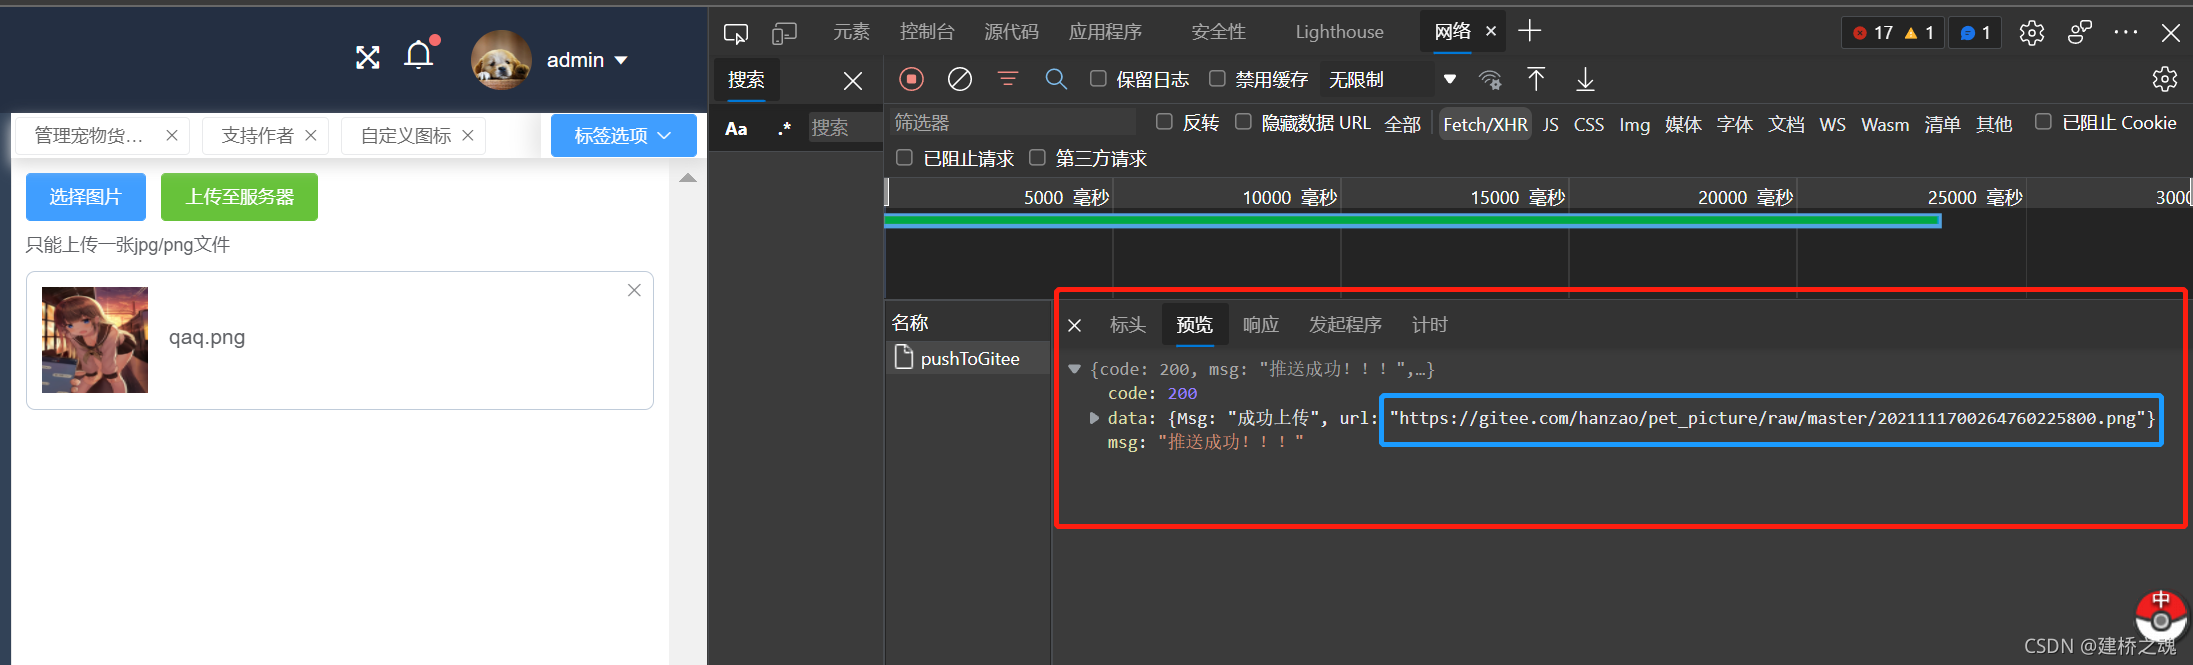
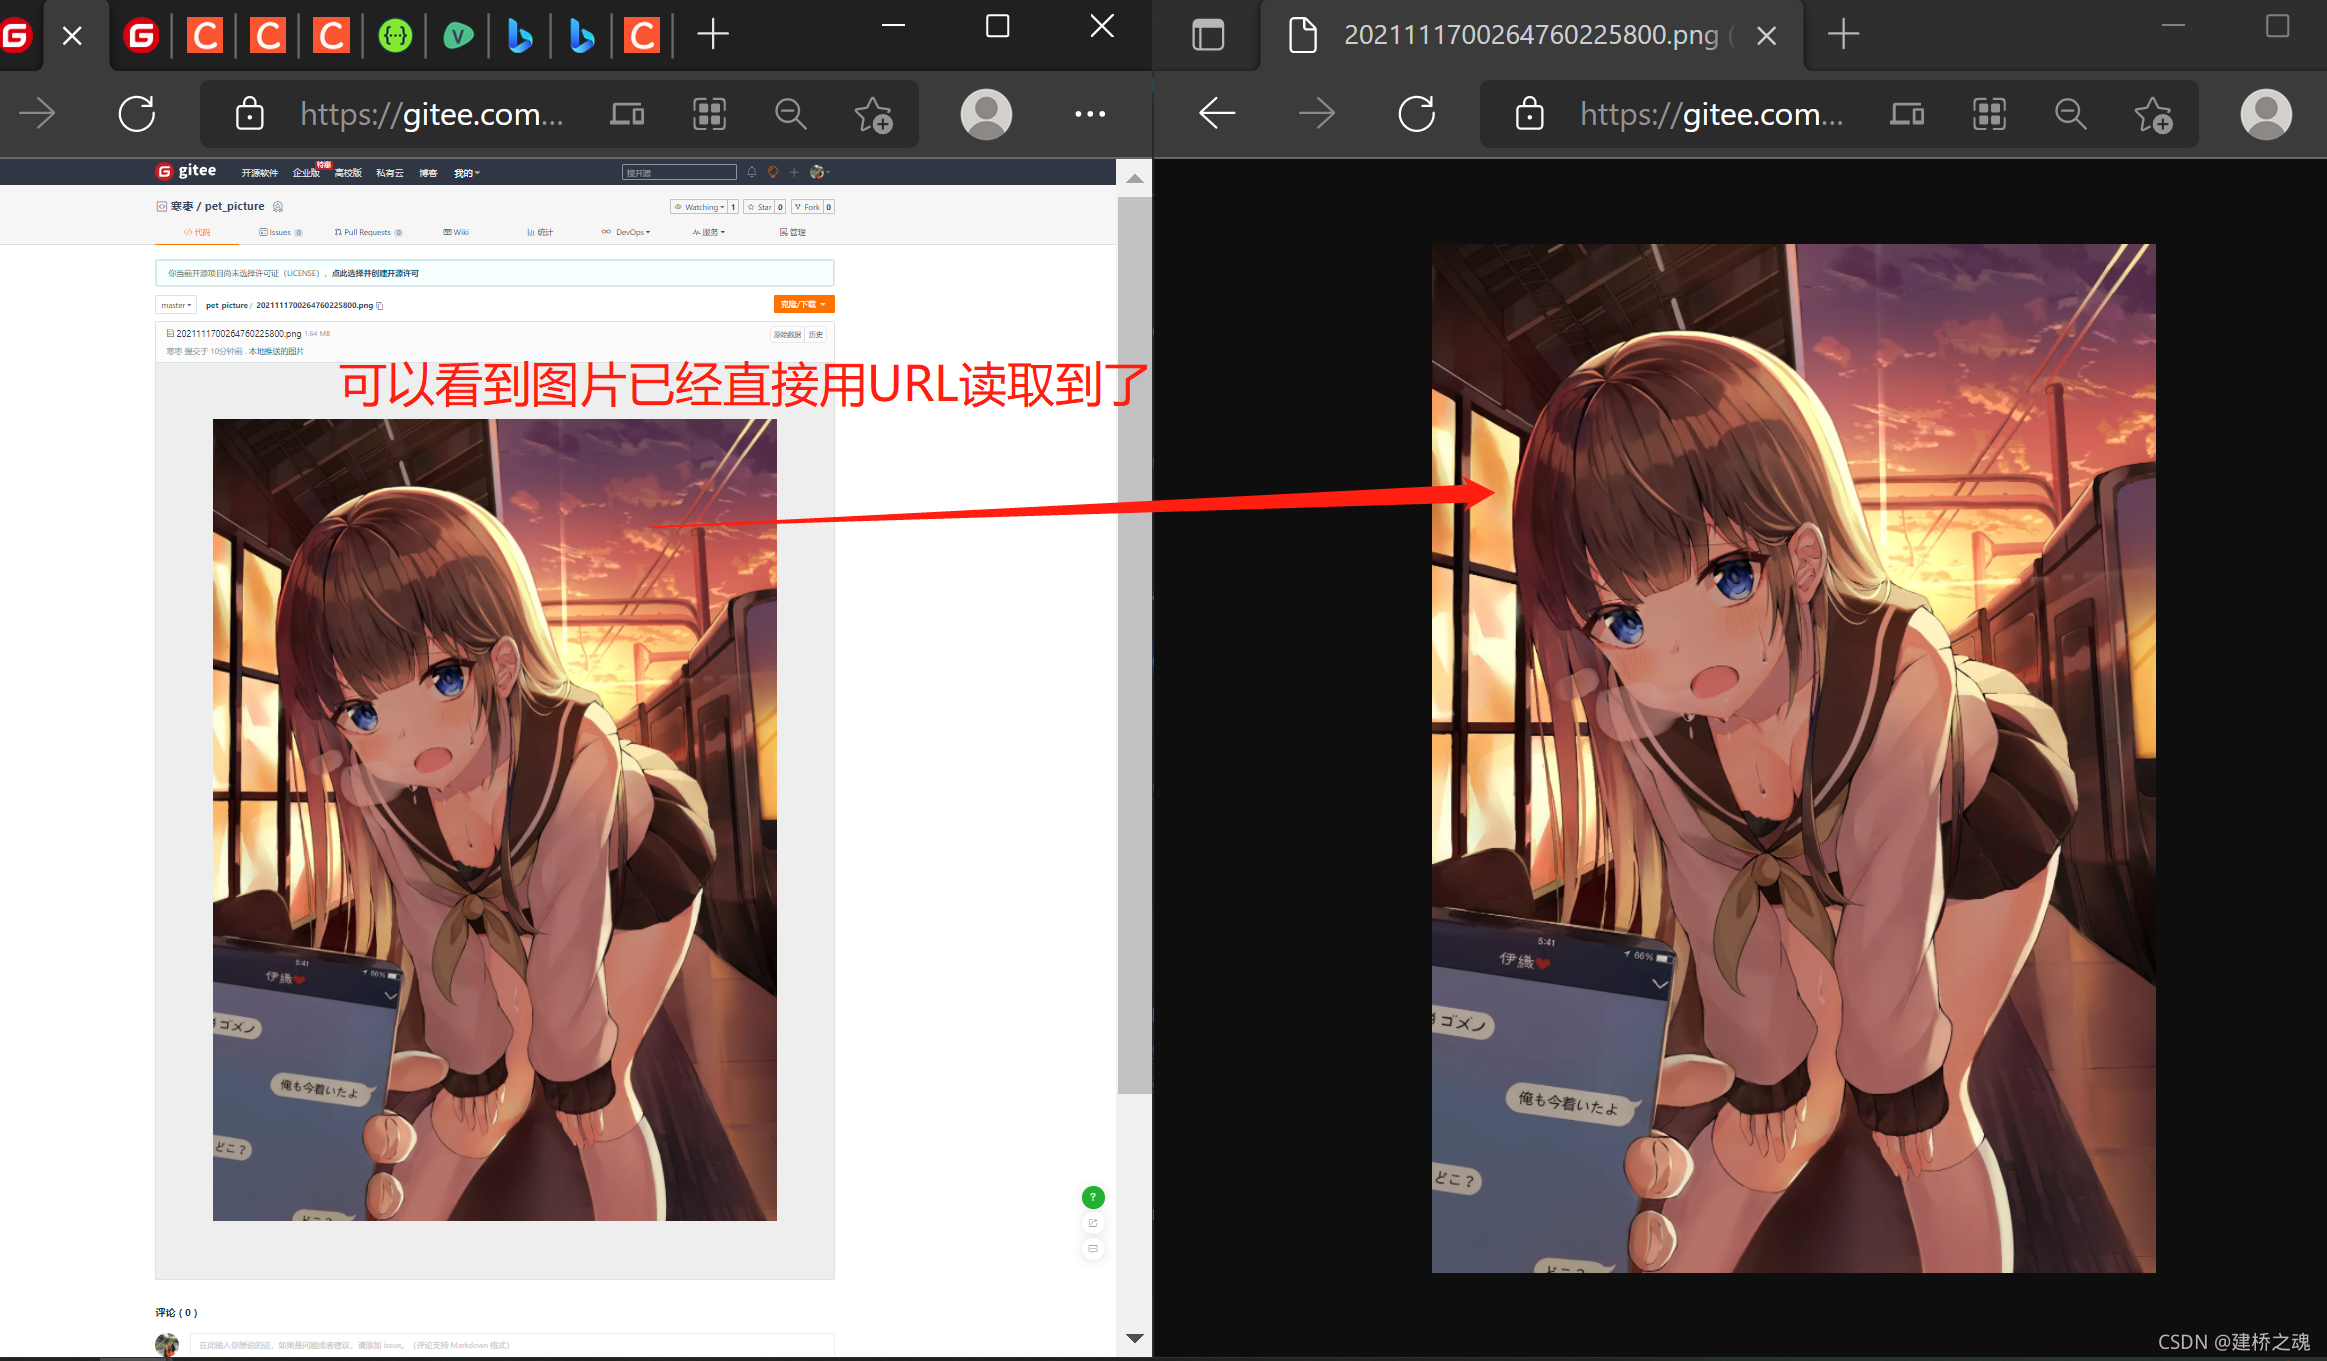
一、图文演示流程:
二、具体思想:
大致思路:使用Vue将本地上传的图片转为Base64格式,然后通过调用Gitee的api接口将图片存放在远程仓库中,这样我们就可以通过url来对图片进行一个在线访问了。
三、代码实现(前端):
<template>
  <div>
    <el-upload
        ref="upload"
        list-type="picture"
        action='#'
        accept=".jpg, .png"
        :limit="1"
        :file-list="fileList"
        :auto-upload="false"
        :on-change="HandleOnChange"
        :on-remove="HandleOnRemove"
        :on-exceed="handleOnExceed"
        :http-request="this.MyRequest"
    >
      <template #trigger>
        <el-button size="small" type="primary">选择图片</el-button>
      </template>
      <el-button
          style="margin-left: 10px"
          size="small"
          type="success"
          @click="submitUpload"
      >上传至服务器
      </el-button>
      <template #tip>
        <div class="el-upload__tip">
          只能上传一张jpg/png文件
        </div>
      </template>
    </el-upload>
  </div>
</template>

<script>
import axios from "axios";
import {ElNotification} from "element-ui";

export default {
  data() {
    return {
      file: "",
      proofImage: '', //待上传文件base64编码
      fileList: [] //待上传文件列表
    };
  },
  methods: {
    //文件列表移除文件时
    HandleOnRemove() {
      this.proofImage = '' //清空待上传文件base64编码
    },
    //文件超出个数限制时
    handleOnExceed() {
      ElNotification({
        title: 'Success',
        message: "只能上传一张jpg/png文件",
        type: 'error',
        duration: 3 * 1000,
      })
    },
    //获得待传文件base64编码
    HandleOnChange(file) {
      this.getBase64(file.raw).then(res => {
        this.proofImage = res
      })
    },
    getBase64(file) {
      return new Promise(function (resolve, reject) {
        const reader = new FileReader()
        let imgResult = ''
        reader.readAsDataURL(file)
        reader.onload = function () {
          imgResult = reader.result
        }
        reader.onerror = function (error) {
          reject(error)
        }
        reader.onloadend = function () {
          resolve(imgResult)
        }
      })
    },
    //将根据base64转码后的str进行访问
    MyRequest() {
      let str = this.proofImage.split("base64,")[1];
      console.log(str);
      axios.post("http://localhost:8412/pet/pushToGitee",
          {
            content: str
          }).then(res => {
        if (res) {
          ElNotification({
            title: 'Success',
            message: "图片上传成功",
            type: 'success',
            duration: 3 * 1000,
          })
          this.proofImage = '' //清空待上传文件base64编码
          this.fileList = [] //清空上传列表
        }
      })
    },
    //自定义上传文件请求,覆盖element默认的 xhr 行为(之前用来测试的接口,本次不需要)
    httpRequest() {
      console.log("asdasd" + this.proofImage.split("base64,")[1]);
      let formData = new FormData() //模拟表单对象
      // todo access_token可写入vuex状态池 url需要修改
      formData.append("access_token", 'xxxxxxxxxxxxxxxxxxxxxxxxxxxxxx')
      formData.append("content", this.proofImage.split("base64,")[1])
      formData.append("message", "ok")
      axios({
        method: "post",
        url: "https://gitee.com/api/v5/xxxx/xxxxxx/xxxxxx/xxxxxx/xxxxxxx",
        data: formData,
      }).then(res => {
        if (res) {
          ElNotification({
            title: 'Success',
            message: "图片上传成功",
            type: 'success',
            duration: 3 * 1000,
          })
          this.proofImage = '' //清空待上传文件base64编码
          this.fileList = [] //清空上传列表
        }
      })
    },
    //点击上传至服务器按钮
    submitUpload() {
      this.$refs.upload.submit()
    },
  }
}

</script>
四、代码实现(后端):
package com.example.han.util;
import com.alibaba.fastjson.JSONObject;
import org.springframework.beans.factory.annotation.Value;
import org.springframework.http.HttpEntity;
import org.springframework.http.HttpHeaders;
import org.springframework.http.ResponseEntity;
import org.springframework.stereotype.Component;
import org.springframework.web.client.RestTemplate;
import java.text.SimpleDateFormat;
import java.util.Date;
import java.util.HashMap;
import java.util.Map;
/**
* @Description: 将文件传送至gitee上
* @Author: Hanzao
* @Date: 2021/11/16/10:40
*/
@Component
public class PushGitee {
@Value("${gitee.access_token}")
private String access_token;
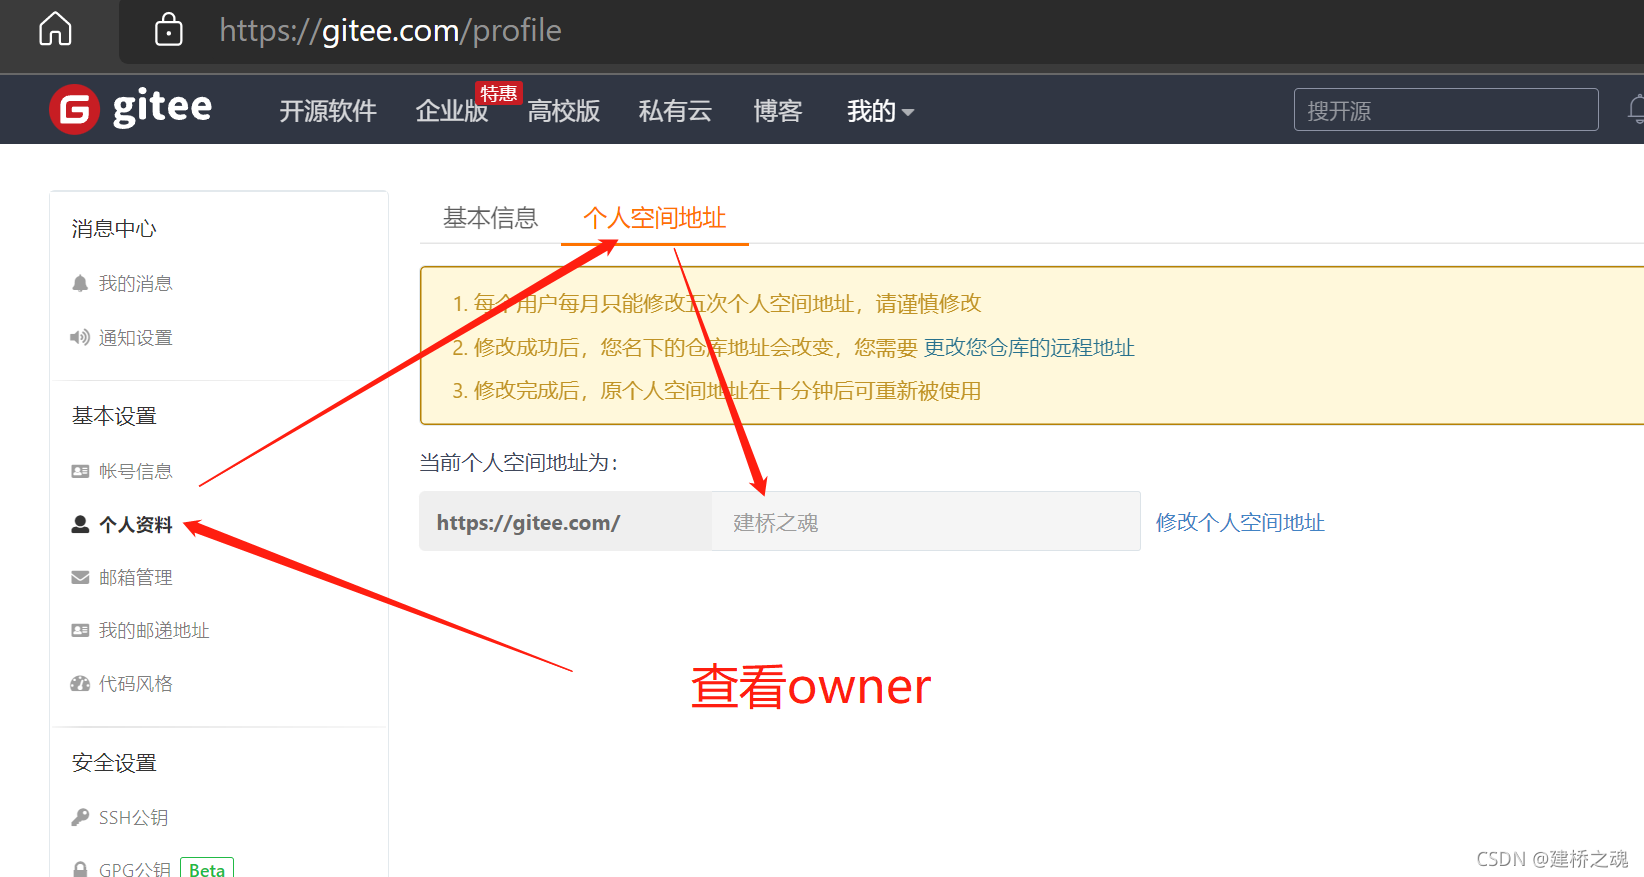
@Value("${gitee.owner}")
private String owner;
@Value("${gitee.repo}")
private String repo;
@Value("${gitee.message}")
private String message;
@Value("${gitee.url}")
private String url;
/**
* 推gitee
*
* @param content 文件内容, 要用 base64 编码
* @return
*/
public Map<String, String> push(Map<String,String> content) {
String newContent = content.get("content");
System.out.println(access_token + "\n" + owner + "\n" + repo + "\n" + message + "\n" + url);
String str = "";
try {
SimpleDateFormat formatter = new SimpleDateFormat("yyyyMMddHHmmssSSS");
str += formatter.format(new Date());
str += (int) ((Math.random() * 9 + 1) * 10000); //随机
String url = "https://gitee.com/api/v5/repos/" + owner + "/" + repo + "/contents/" + str + ".png";
System.out.println(url);
HttpHeaders headers = new HttpHeaders();
JSONObject param = new JSONObject();
param.put("access_token", access_token);
param.put("content", newContent);
param.put("message", message);
HttpEntity<JSONObject> request = new HttpEntity<>(param, headers);
RestTemplate restTemplate = new RestTemplate();
ResponseEntity<Map> mapResponseEntity = restTemplate.postForEntity(url, request, Map.class);
Map<String, Object> body = mapResponseEntity.getBody();
for (Map.Entry<String, Object> hzh : body.entrySet()) {
System.out.println(hzh.getKey() + ":" + hzh.getValue());
}
} catch (Exception e) {
e.printStackTrace();
return null;
}
Map<String, String> map = new HashMap();
map.put("Msg", "成功上传");
map.put("url", url + str + ".png");
return map;
}
}
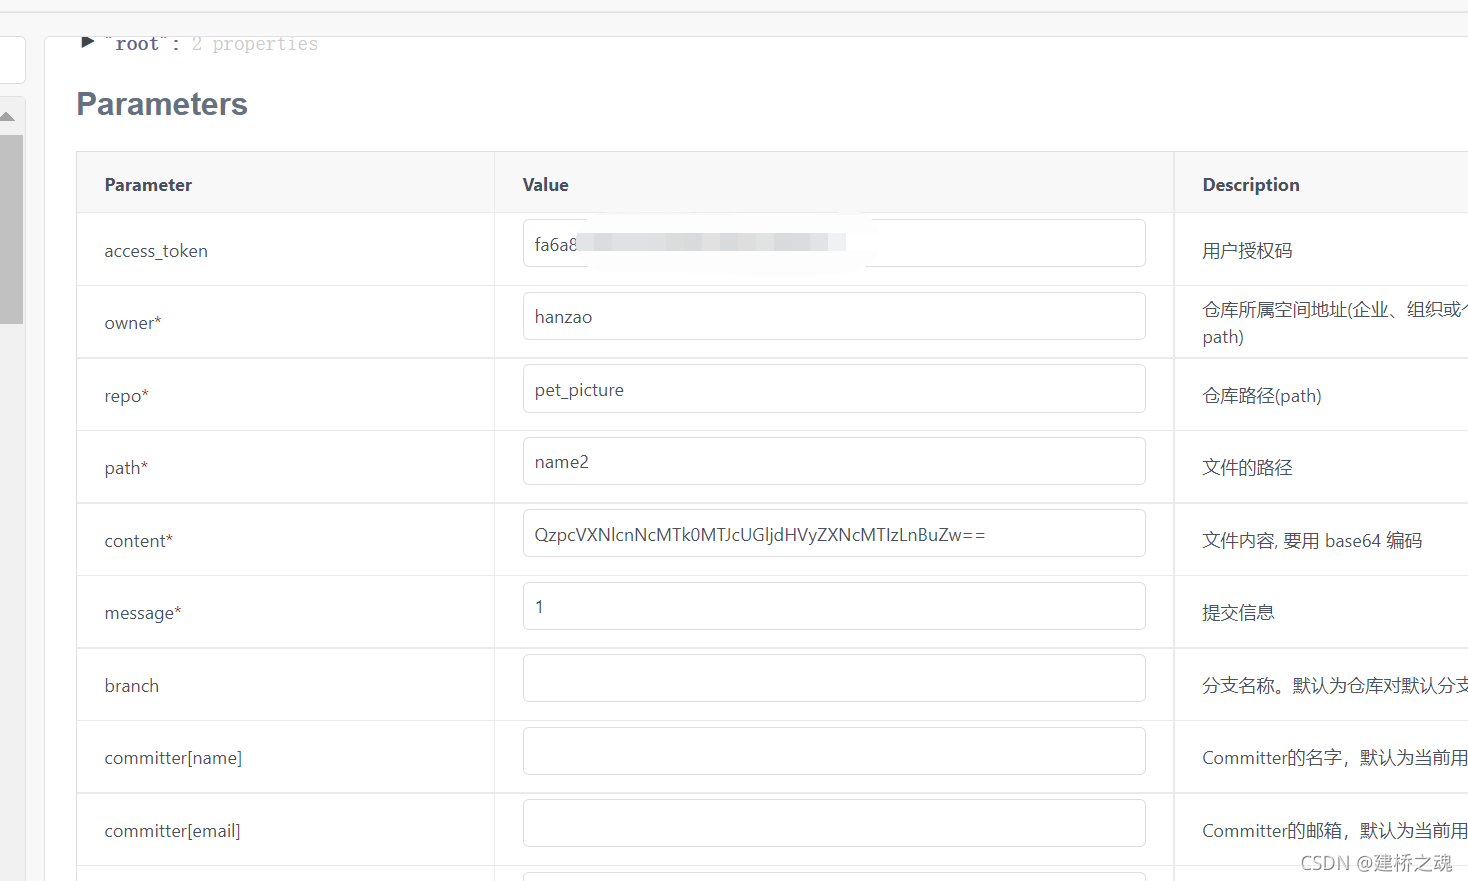
五、参考api:
https://gitee.com/api/v5/swagger#/postV5ReposOwnerRepoContentsPath
六、问题及解决:
问题描述:
当本人兴高采烈的把图片最后得到的url转存到数据库后,用前端轻轻一调,问题出现:
在确保url没有问题同时,也确保仓库开源且没加许可证的情况下
退出了自己的账号,再次通过url访问图片时,了解到文件如果大于1M,那就只能登陆后才能看。

解决方法:
前端首先进行是否大于1M的判断,添加“:before-upload”
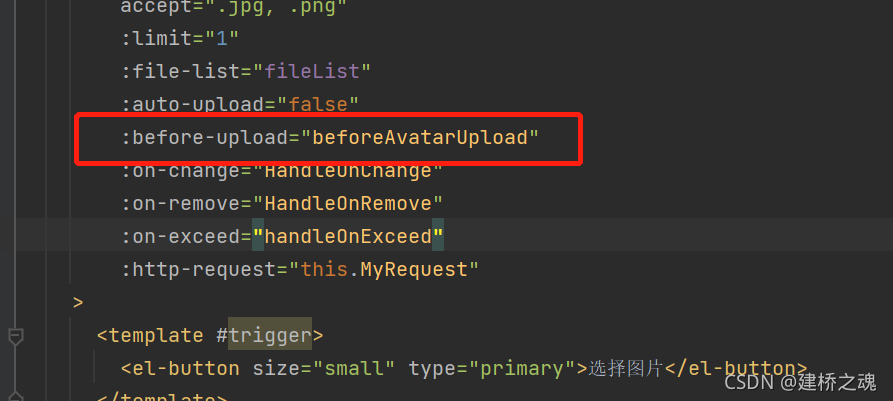
	//先判断类型,再对大小进行判断
    beforeAvatarUpload (file) {
      const fileType = file.type === 'image/jpeg' || file.type === 'image/png'
      const result = file.size / 1024 / 1024 < 1;
      if (!fileType) {
        this.$message.error("上传图片只能是 JPG和png 格式!");
        return false;
      }
      if (!result) {
        this.$message.error("上传图片大小不能超过 1M");
        return false;
      }
    },
再次实现:


 3351
3351


 被折叠的 条评论
为什么被折叠?
被折叠的 条评论
为什么被折叠?
 到【灌水乐园】发言


