


 本文详细介绍了如何复现MAttNet论文,包括环境配置、依赖库安装、数据预处理、特征提取以及模型训练的步骤。涉及的关键技术有PyTorch 0.4.1、CUDA 8.0、Mask R-CNN和COCO数据集。过程中需注意解决CUDA内存不足、库版本匹配等问题,并提供了代码执行示例。
MAttNet论文复现
一、论文连接以及代码地址
- 论文链接:《MAttNet: Modular Attention Network for Referring Expression Comprehension》 in CVPR 2018
- 代码链接:https://github.com/lichengunc/MAttNet
二、预先准备(Prerequisites)
- python2.7
这个简单!由于组里的服务器默认版本为python3.5,所以你可以用anaconda创建一个python==2.7的虚拟环境:
conda create --name your_env_name python=2.7
- pytorch0.2 (may not work with 1.0 or higher)
这个我安装的是pytorch0.4.1版本,这是最匹配CUDA8.0的版本了,下载链接:https://download.pytorch.org/whl/cu80/torch_stable.html
选择torch-0.4.1-cp27-cp27mu-linux_x86_64.whl下载下来,然后上传到服务器自己的文件夹,然后执行
pip install torch-0.4.1-cp27-cp27mu-linux_x86_64.whl
我这样做是因为直接wget下载太慢了。。。
- CUDA8.0
因为组里的服务器的CUDA驱动版本为410,CUDA版本为10.0,
所以需要在非root用户情况下安装CUDA8.0((꒦_꒦) 大哭有木有!),还好有万能的CSDN网友,搜索一哈你就知道!
https://blog.csdn.net/daydaydreamer/article/details/107172364
https://blog.csdn.net/weixin_42262721/article/details/108278214
按照这两篇文章将cuda10.0换成我们的cuda8.0来操作即可,操作过程一毛一样!
所以可以到nvidia官网下载对应操作系统的CUDA8.0,我们服务器使用的ubuntu16.0的版本,所以找到对应版本下载即可。建议先下到本地,然后再上传服务器运行,因为直接在服务器下的话,没有VPN可能很慢(是可能哈,别杠我!┭┮﹏┭┮)
三、安装(Installation)
1、Clone the MAttNet repository
git clone --recursive https://github.com/lichengunc/MAttNet
2、Prepare the submodules and associated data
- Mask R-CNN: Follow the instructions of my mask-faster-rcnn repo, preparing everything needed for
pyutils/mask-faster-rcnn. You could usecv/mrcn_detection.ipynbto test if you’ve get Mask R-CNN ready.
打开mask-faster-rcnn的仓库,按照其中指示操作:
Preparation
(1) First of all, clone the code with refer API:
git clone --recursive https://github.com/lichengunc/mask-faster-rcnn
(2) Prepare data:
COCO: We use coco to name COCO’s API as inheritance. Download the annotations and images into data/coco. Note the valminusminival and minival can be downloaded here.
git clone https://github.com/cocodataset/cocoapi data/coco
注意:一般都是下载COCO图像:2014 Train images[83K/13GB]和注释:2014 Train/Val annotations [241MB]即可;valminusminival and minival下载链接库中的这两个数据集,关键要注意这两个数据要解压到data/coco/annotations中,即要和coco的annotations放在一起! 最后解压上述下载的压缩包。
(3) REFER: Follow the instructions in REFER to prepare the annotations for RefCOCO, RefCOCO+ and RefCOCOg.
git clone https://github.com/lichengunc/refer data/refer
就按照refer库里面的操作流程:
(i) Run “make” before using the code. It will generate _mask.c and _mask.so in external/ folder. 下载数据之前要先运行make。
(ii) These mask-related codes are copied from mscoco API.
这里要根据链接下载cocoAPI到/data/coco里,注意还要要在PythonAPI文件夹内运行make。
(4) ImageNet Weights: Find the resnet101-caffe download link from this repository, and download it as data/imagenet_weights/res101.pth.
(5) coco_minus_refer: Make the coco_minus_refer annotation, which is to be saved as data/coco/annotations/instances_train_minus_refer_valtest2014.json
使用下述代码生成
python tools/make_coco_minus_refer_instances.py
(6) 最后我们不需要自己训练检测边界框,有现成预训练模型下载
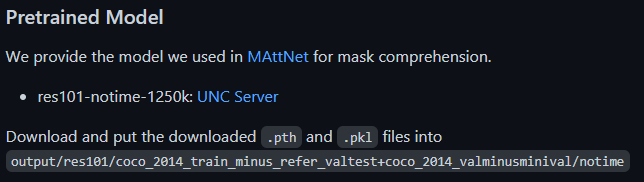 需要注意的坑:mask-rcnn中
mask-faster-rcnn/lib没有make!一定要make一下!!
- REFER API and data: Use the download links of REFER and go to the foloder running make. Follow data/README.md to prepare images and refcoco/refcoco+/refcocog annotations.
这里就git clone外加make一下refer就好了,不用添加三个数据集!!因为数据都在mask-faster-rcnn的data/refer里了! - refer-parser2: Follow the instructions of refer-parser2 to extract the parsed expressions using Vicente’s R1-R7 attributes. Note this sub-module is only used if you want to train the models by yourself.
首先要把仓库git clone到MAttnet/pyutils中
(1) Requirements:
自己查询与python2.7对应的版本号,使用pip install下载以下库,不指定版本号的话会出问题!!比如自动更新一些其他库、版本过新不支持一些其他库了。
practnlptools
nltk
corenlp
unidecode
(2) How to use:
我们只需要使用Vicente’s R1-R7 attributes,运行以下对应代码即可。但是贴心的作者又帮你提取好了各个数据集的属性特征!!!
1b) Parse expressions using Vicente's R1-R7 attributes:

python parse_atts.py --dataset refcoco --splitBy unc
各个数据集属性特征:
直接下载到/refer-parse2/cache/parsed_atts:
wget http://bvision.cs.unc.edu/licheng/MattNet/refer-parser2/cache/parsed_atts.zip
然后解压即可。
三、Training
首先需要按照data中的README.md下载数据集,但是README.md写的结构要少了一层images!!!实际应该创建如下目录:
$COCO_PATH
├── images
│   ├── mscoco
│   │   └──images
|	|		└──train2014
│   └── saiaprtc12
├── refcoco
│   ├── instances.json
│   ├── refs(google).p
│   └── refs(unc).p
├── refcoco+
│   ├── instances.json
│   └── refs(unc).p
└── refcocog
    ├── instances.json
    └── refs(google).p
1、(预处理数据)Prepare the training and evaluation data by running tools/prepro.py:
python tools/prepro.py --dataset refcoco --splitBy unc
结果:在/MAttNet/cache/prepro产生两个文件:data.json和data.h5
2、(提取边界框主体特征head_feats和上下文特征ann_feats)Extract features using Mask R-CNN, where the head_feats are used in subject module training and ann_feats is used in relationship module training.
注意此处我没有带上CUDA_VISIBLE_DEVICES=gpu_id,因为容易指定错误。
 python tools/extract_mrcn_head_feats.py --dataset refcoco --splitBy unc
 python tools/extract_mrcn_ann_feats.py --dataset refcoco --splitBy unc
结果:在/MAttNet/cache/feats/refcoco_unc/mrcn/产生一个文件夹res101_coco_minus_refer_notime和一个文件res101_coco_minus_refer_notime_ann_feats.h5
可能产生的报错:(1)CUDA:out of memory。处理方法:在出错主代码外围加上with torch.no_grad():(2)AttributeError:image_orig=im.astype(np.float32,copy=True)。处理方法:图片路径给错了,更改为正确路径!
3、(检测目标、目标掩码、提取边界框位置特征,置信度0.65)Detect objects/masks and extract features . We empirically set the confidence threshold of Mask R-CNN as 0.65.
同理省略CUDA_VISIBLE_DEVICES=gpu_id
python tools/run_detect.py --dataset refcoco --splitBy unc --conf_thresh 0.65
python tools/run_detect_to_mask.py --dataset refcoco --splitBy unc
python tools/extract_mrcn_det_feats.py --dataset refcoco --splitBy unc
结果:在/MAttNet/cache/detections/refcoco_unc/产生两个文件:
res101_coco_minus_refer_notime_dets.json
res101_coco_minus_refer_notime_masks.json
在/MAttNet/cache/feats/refcoco_unc/mrcn产生一个文件:
res101_coco_minus_refer_notime_det_feats.json
可能产生的报错:(1)CUDA:out of memory。处理方法:在出错主代码外围加上with torch.no_grad():(2)Dimension out of range。处理方法:在/tools/extract_mrcn_det_feats.py中注释掉fc7=fc7.mean(3).mean(2)因为已经如此操作过了!!
4、Train MAttNet with ground-truth annotation:
终于到了训练阶段了!!!非root用户加上sh,GPU_ID改为0,不然容易出错
sh ./experiments/scripts/train_mattnet.sh 0 refcoco unc
可能产生的报错:json.dump(infos,io)。处理方法:加上default=str:json.dump(infos,io,default=str)


 2119
2119

 被折叠的 条评论
为什么被折叠?
被折叠的 条评论
为什么被折叠?
 到【灌水乐园】发言


