


目录
2.2 application.yml配置文件中配置Redis:
2.3 使用RedisTemplate工具类操作Redis:
2.2 application.yml配置文件中配置Redis:
2.3 使用RedisTemplate工具类操作Redis:
一、Maven工程连接Redis
1.1 修改redis.conf文件:
java应用连接Redis,首先需要通过配置文件要将我们的Redis设置允许远程连接。需要注意的是:我们一般不会在原配置文件中进行更改,我们需要在原配置文件的基础上复制出一份conf文件,在此基础上进行更改,具体步骤如下:
1、 关闭保护模式
protected-mode no2、将bind 注释掉(如果不注释,默认为127.0.0.1 只能本机访问)
bind 127.0.0.13、设置密码(也可以不设置)
requirepass 1234564、 通过配置好的配置文件,重启Redis
redis-server redis-6379.conf5、如果使用的是阿里云服务器,则需要设置安全组放行对应的redis端口

1.2 在maven工程中添加Jedis依赖:
在maven工程中使用redis之前,我们需要添加Jedis依赖,另外redis中不能存储对象类型,所以我们需要gson将对象转化成gson格式的字符进行存储,所以我们还需要导入‘gson’的依赖
 <dependency>
            <groupId>redis.clients</groupId>
            <artifactId>jedis</artifactId>
            <version>3.3.0</version>
        </dependency>

        <dependency>
            <groupId>com.google.code.gson</groupId>
            <artifactId>gson</artifactId>
            <version>2.8.6</version>
        </dependency>
1.3 使用案例:
创建maven工程,并在redis中存储product对象,存储数据的key为product的id。
实体类:
package com.xgsm.pojo;
public class Product {
    private String productId;
    private String getProductName;
    private Double productPrice;

    public Product(String productId, String getProductName, Double productPrice) {
        this.productId = productId;
        this.getProductName = getProductName;
        this.productPrice = productPrice;
    }

    public String getProductId() {
        return productId;
    }

    public void setProductId(String productId) {
        this.productId = productId;
    }

    public String getGetProductName() {
        return getProductName;
    }

    public void setGetProductName(String getProductName) {
        this.getProductName = getProductName;
    }

    public Double getProductPrice() {
        return productPrice;
    }

    public void setProductPrice(Double productPrice) {
        this.productPrice = productPrice;
    }
}
测试类:
package com.xgsm.redis;
import com.google.gson.Gson;
import com.xgsm.pojo.Product;
import redis.clients.jedis.Jedis;
public class test {
public static void main(String[] args) {
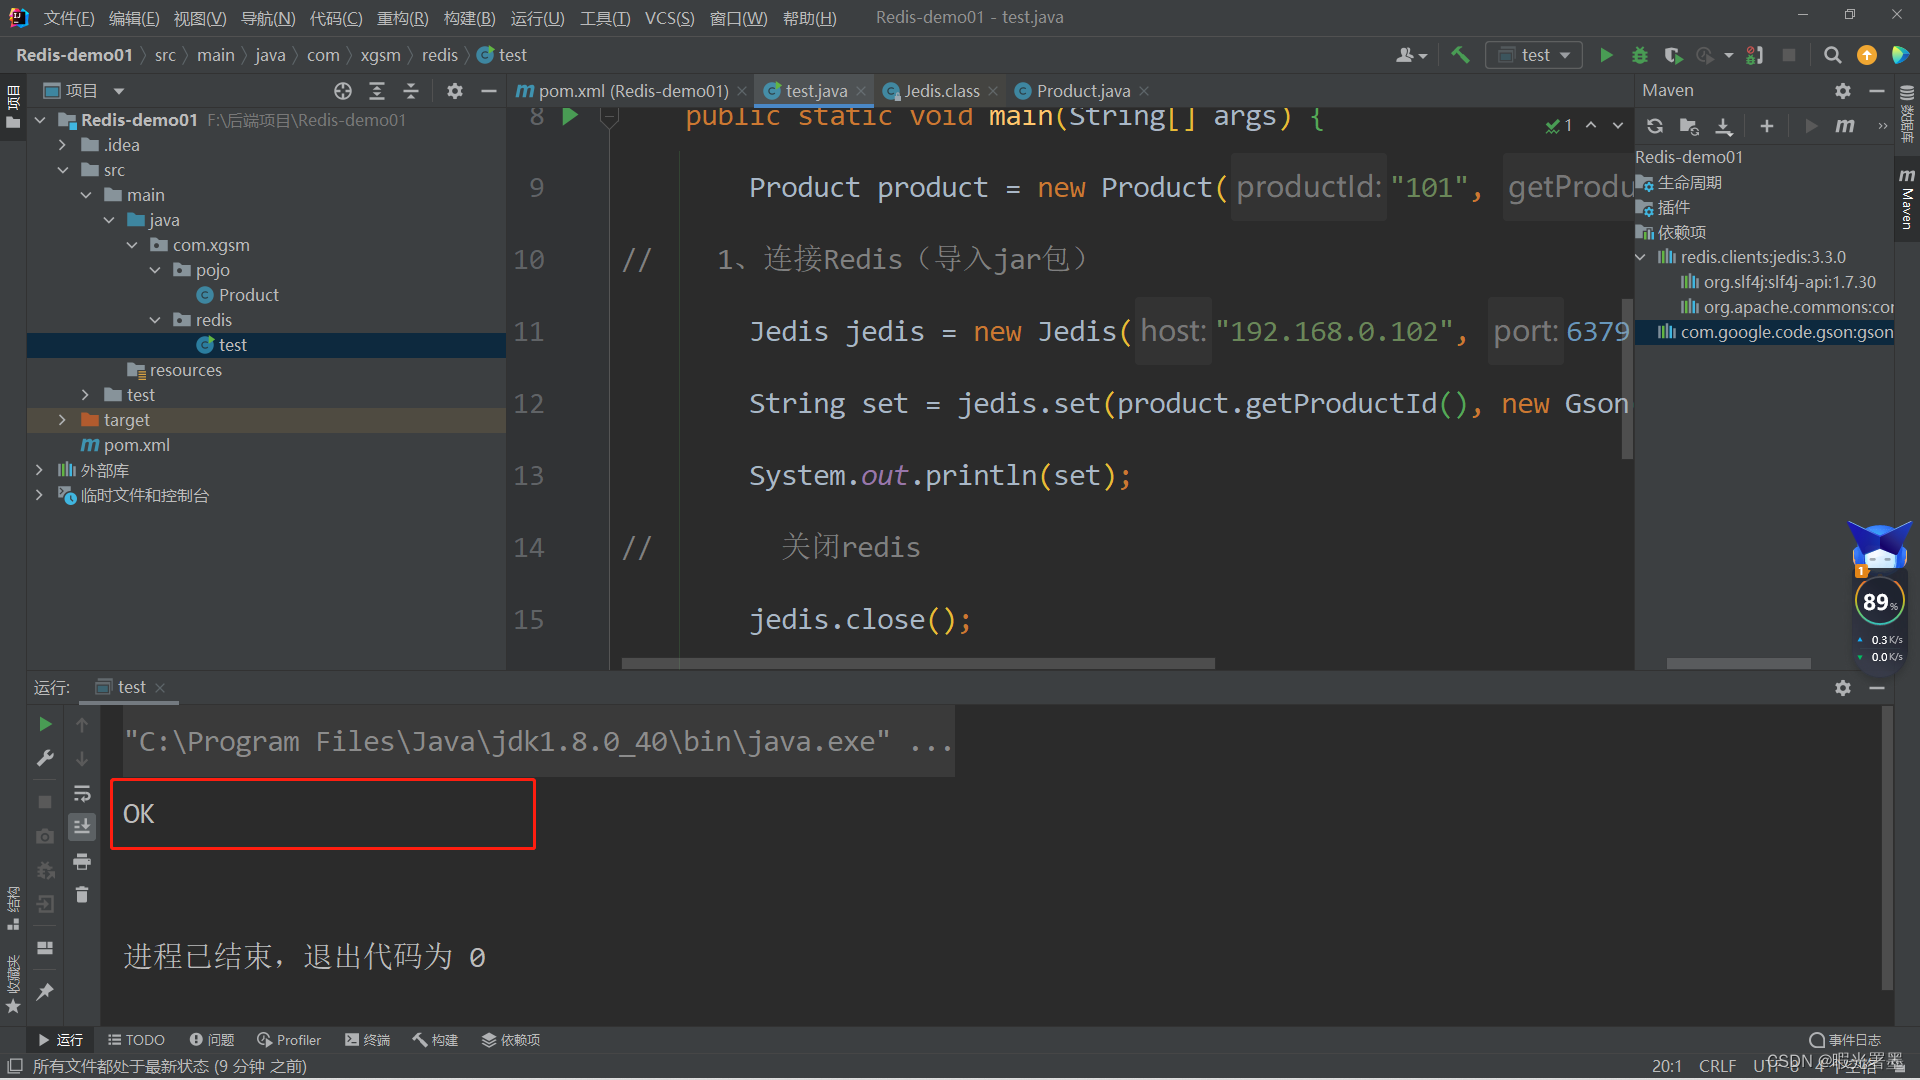
Product product = new Product("101", "wahhah", 323.0);
// 1、连接Redis(导入jar包)
Jedis jedis = new Jedis("192.168.0.102", 6379);
// 2、将对象存储在redis中
String set = jedis.set(product.getProductId(), new Gson().toJson(product));
System.out.println(set);
// 关闭redis
jedis.close();
}
}
需要注意的是:在进行redis存储的前,除了要修改redis.conf中的配置文件信息外,我们还需要关闭服务器的‘防火墙’,要不然会出现‘time out’连接超时的情况。关闭防火墙,执行‘systemctl stop firewalld’指令即可。执行test文件,返回‘OK’则存储成功

二、SpringBoot工程中连接Redis
2.1 创建springboot应用:
Spring Data Redis依赖中,提供了用于连接redis的客户端:
- RedisTemplate
- StringRedisTemplate
创建SpringBoot应用时,添加‘Nosql’依赖中的Sspring Data Redis(Access+Driver)’。其余步骤就是正常创建springboot应用即可,具体略~
2.2 application.yml配置文件中配置Redis:
# redis 服务器 ip
spring.redis.host=192.168.200.129
# redis 服务器端口
spring.redis.port=6379
# redis 密码
#spring.redis.password=root
# 连接超时时间(毫秒)
spring.redis.timeout=60000
# Redis默认情况下有16个分片,这里配置具体使用的分片,默认是0
spring.redis.database=0
2.3 使用RedisTemplate工具类操作Redis:
SpringBoot中使用RedisTemplate来操作redis,需要在我们bean中注入这个对象,代码如下:
@Autowired
private RedisTemplate<String, String> redisTemplate;
// 用下面5个对象来操作对应的类型
this.redisTemplate.opsForValue(); //提供了操作string类型的所有方法
this.redisTemplate.opsForList(); // 提供了操作list类型的所有方法
this.redisTemplate.opsForSet(); //提供了操作set的所有方法
this.redisTemplate.opsForHash(); //提供了操作hash表的所有方法
this.redisTemplate.opsForZSet(); //提供了操作zset的所有方法
2.4 RedisTemplate示例代码:
Xgsm  18:44:18
import org.springframework.beans.factory.annotation.Autowired;
import org.springframework.data.redis.core.RedisTemplate;
import org.springframework.web.bind.annotation.RequestMapping;
import org.springframework.web.bind.annotation.RestController;
import java.util.HashMap;
import java.util.List;
import java.util.Map;
import java.util.Set;
@RestController
@RequestMapping("/redis")
public class RedisController {
@Autowired
private RedisTemplate<String, String> redisTemplate;
@RequestMapping("/stringTest")
public String stringTest() {
this.redisTemplate.delete("name");
this.redisTemplate.opsForValue().set("name", "路人");
String name = this.redisTemplate.opsForValue().get("name");
return name;
}
@RequestMapping("/listTest")
public List<String> listTest() {
this.redisTemplate.delete("names");

Xgsm  18:45:03
this.redisTemplate.opsForList().rightPushAll("names", "刘德华", "张学友",
"郭富城", "黎明");
List<String> courses = this.redisTemplate.opsForList().range("names", 0,
-1);
return courses;
}
@RequestMapping("setTest")
public Set<String> setTest() {
this.redisTemplate.delete("courses");
this.redisTemplate.opsForSet().add("courses", "java", "spring",
"springboot");
Set<String> courses = this.redisTemplate.opsForSet().members("courses");
return courses;
}
@RequestMapping("hashTest")
public Map<Object, Object> hashTest() {
this.redisTemplate.delete("userMap");
Map<String, String> map = new HashMap<>();
map.put("name", "路人");
map.put("age", "30");
this.redisTemplate.opsForHash().putAll("userMap", map);
Map<Object, Object> userMap =
this.redisTemplate.opsForHash().entries("userMap");
return userMap;
}
@RequestMapping("zsetTest")
public Set<String> zsetTest() {
this.redisTemplate.delete("languages");
}
}
更多Java学习视频,请关注公众号:Java充电社
Set<String> languages =
this.redisTemplate.opsForZSet().range("languages", 0, -1);
return languages;

this.redisTemplate.opsForZSet().add("languages", "java", 100d);

this.redisTemplate.opsForZSet().add("languages", "c", 95d);

this.redisTemplate.opsForZSet().add("language","php",70);


Set<String> languages =
this.redisTemplate.opsForZSet().range("languages", 0, -1);
return languages;
}
}


 1万+
1万+


 被折叠的 条评论
为什么被折叠?
被折叠的 条评论
为什么被折叠?
 到【灌水乐园】发言


