


前言:
小伙伴们,大家好,我是狂奔の蜗牛rz,当然你们可以叫我蜗牛君,我是一个学习Java半年多时间的小菜鸟,同时还有一个伟大的梦想,那就是有朝一日,成为一个优秀的Java架构师。
这个Spring基础学习系列是用来记录我学习Spring框架基础知识的全过程 (这个系列是参照B站狂神的Spring5最新教程来写的,由于是之前整理的,但当时没有发布出来,所以有些地方可能有错误,希望大家能够及时指正!)
之后我将会以一天一更的速度更新这个系列,还没有学习Spring5框架的小伙伴可以参照我的博客学习一下;当然学习过的小伙伴,也可以顺便跟我一起复习一下基础。
最后,希望能够和大家一同进步吧!加油吧!少年们!
废话不多说,让我们开始今天的学习内容吧,今天我们来到了Spring基础学习的第七站:Bean的自动装配!
7.Bean的自动装配
- 自动装配Spring满足bean依赖的一种方式!
- Spring会在上下文中自动寻找,并自动给bean装配属性!
在Spring中有三种装配的方式:
- 在xml中显示的配置
- 在java中显示配置
- 隐式的自动装配bean【重要】
7.1 搭建基本环境
环境搭建:一个人有两个宠物
7.1.1 编写实体类
1.编写Cat实体类
//创建Cat实体类
public class Cat {
    public void shout(){
        System.out.println("喵呜~");
    }
}
2.编写Dog实体类
//创建Dog实体类
public class Dog {
    public void shout(){
        System.out.println("汪汪汪~");
    }
}
3.编写People实体类
//创建People实体类
public class People {
    private Cat cat;
    private  Dog dog;
    private String name;
    public Cat getCat() {
        return cat;
    }
    public void setCat(Cat cat) {
        this.cat = cat;
    }
    public Dog getDog() {
        return dog;
    }
    public void setDog(Dog dog) {
        this.dog = dog;
    }
    public String getName() {
        return name;
    }
    public void setName(String name) {
        this.name = name;
    }
    @Override
    public String toString() {
        return "People{" +
                "cat=" + cat +
                ", dog=" + dog +
                ", name='" + name + '\'' +
                '}';
    }
}
7.1.2 编写beans.xml配置文件
 <?xml version="1.0" encoding="UTF-8"?>
<beans xmlns="http://www.springframework.org/schema/beans"
       xmlns:xsi="http://www.w3.org/2001/XMLSchema-instance"
       xsi:schemaLocation="http://www.springframework.org/schema/beans
        https://www.springframework.org/schema/beans/spring-beans.xsd">
    <!--编写Cat实体类的Bean信息-->
	<bean id="cat" class="com.kuang.pojo.Cat"></bean>
    <!--编写Dog实体类的Bean信息-->
    <bean id="dog" class="com.kuang.pojo.Dog"></bean>
    <!--编写People实体类的Bean信息-->
    <bean id="people" class="com.kuang.pojo.People">
        <!--给name属性设置值-->
        <property name="name" value="华农兄弟"></property>
        <!--给dog属性设置值:通过引入dog的Bean信息-->
        <property name="dog" ref="dog"></property>
        <!--给cat属性设置值:通过引入cat的Bean信息-->
        <property name="cat" ref="cat"></property>
    </bean>
</beans>
7.1.3 编写MyTest测试类
public class MyTest {
    @Test
    public void test1(){
        //获取上下文信息,得到Spring的IOC容器
        ApplicationContext context = new ClassPathXmlApplicationContext("beans.xml");
        //从IOC容器中获取Bean信息:声明类型后就不需要强制转换了
        People people = context.getBean("people", People.class);
        //主人让宠物狗叫
        people.getDog().shout();
        //主人让宠物猫叫
        people.getCat().shout();
    }
}
7.1.4 测试结果

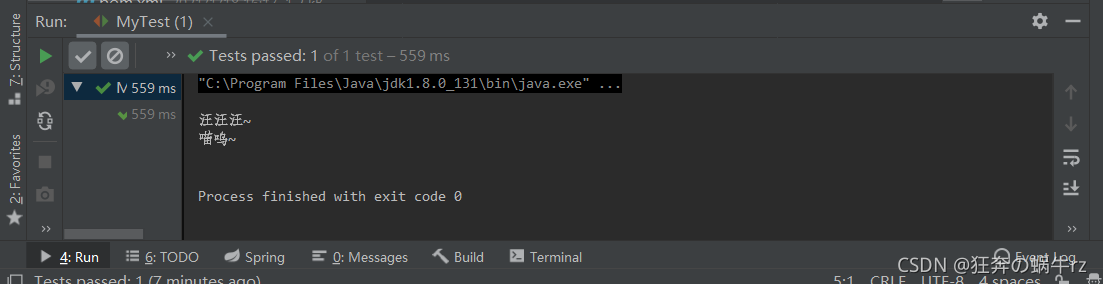
结果:分别成功输出了猫叫和狗叫的信息,“汪汪汪”和“喵呜“!
7.2使用配置文件实现自动装配
7.2.1 使用byName方式
1.编写beans.xml配置文件
1-1 Bean的id与类名保持一致
 <?xml version="1.0" encoding="UTF-8"?>
<beans xmlns="http://www.springframework.org/schema/beans"
       xmlns:xsi="http://www.w3.org/2001/XMLSchema-instance"
       xsi:schemaLocation="http://www.springframework.org/schema/beans
        https://www.springframework.org/schema/beans/spring-beans.xsd">
   	 <bean id="cat" class="com.kuang.pojo.Cat"></bean>
     <bean id="dog" class="com.kuang.pojo.Dog"></bean>
      <!--如果bean的id改为olddog,会报空指针异常-->
      <!--<bean id="olddog" class="com.kuang.pojo.Dog"></bean>-->
    <!--使用ByName方式:
            会自动在Spring的IOC容器中进行查找,
            找到Bean的id与当前对象的set方法值相同的的Bean-->
    <bean id="people" class="com.kuang.pojo.People" autowire="byName">
        <!--设置主人name属性的值-->
        <property name="name" value="华农兄弟"></property>
    </bean>
</beans>
1-2 Bean的id与类名不一致
 <?xml version="1.0" encoding="UTF-8"?>
<beans xmlns="http://www.springframework.org/schema/beans"
       xmlns:xsi="http://www.w3.org/2001/XMLSchema-instance"
       xsi:schemaLocation="http://www.springframework.org/schema/beans
        https://www.springframework.org/schema/beans/spring-beans.xsd">
   	 <bean id="cat" class="com.kuang.pojo.Cat"></bean>
      <!--如果bean的id改为olddog,会报空指针异常-->
      <bean id="olddog" class="com.kuang.pojo.Dog"></bean>
    <!--使用ByName方式:
            会自动在Spring的IOC容器中进行查找,
            找到与当前对象的set方法后面值对应的Bean的id-->
    <bean id="people" class="com.kuang.pojo.People" autowire="byName">
        <!--设置主人name属性的值-->
        <property name="name" value="华农兄弟"></property>
    </bean>
</beans>
2.编写MyTest测试类
public class MyTest {
    @Test
    public void test2(){
        //获取上下文信息,得到Spring的IOC容器
        ApplicationContext context = new ClassPathXmlApplicationContext("beans.xml");
        //从IOC容器中获取Bean信息:声明类型后就不需要强制转换了
        People people = context.getBean("people", People.class);
        //主人让宠物狗叫
        people.getDog().shout();
        //主人让宠物猫叫
        people.getCat().shout();
    }
}
3. 测试结果
3-1 Bean的id与类名一致

结果:成功输出了猫叫和狗叫,“汪汪汪”和“喵呜“!
3-2 Bean的id与类名不一致

结果:异常报错:出现空指针异常!
4. byName方式使用总结
总结:
- 使用byName方式自动装配时,首先需要保证所有Bean的id唯一
- 要引用的Bean的id和当前设置自动装配的Bean的set方法的值要一致
7.2.2 使用byType方式
1.编写beans2.xml配置文件
1-1 编写Bean时使用id
<?xml version="1.0" encoding="UTF-8"?>
<beans xmlns="http://www.springframework.org/schema/beans"
       xmlns:xsi="http://www.w3.org/2001/XMLSchema-instance"
       xsi:schemaLocation="http://www.springframework.org/schema/beans http://www.springframework.org/schema/beans/spring-beans.xsd">
    <!--编写Cat和Dog实体类对应的Bean信息-->
   	 <bean id="cat" class="com.kuang.pojo.Cat"></bean>
     <bean id="dog" class="com.kuang.pojo.Dog"></bean>
    <!--使用ByType方式:
            会在Spring的IOC容器中自动查找,
            和要引用的对象的属性类型相同的的Bean-->
    <bean id="people" class="com.kuang.pojo.People" autowire="byType">
        <property name="name" value="华农兄弟"></property>
    </bean>
</beans>
1-2 编写Bean时省略id
<?xml version="1.0" encoding="UTF-8"?>
<beans xmlns="http://www.springframework.org/schema/beans"
       xmlns:xsi="http://www.w3.org/2001/XMLSchema-instance"
       xsi:schemaLocation="http://www.springframework.org/schema/beans http://www.springframework.org/schema/beans/spring-beans.xsd">
    <!--ByType可以省略bean的id-->
    <bean class="com.kuang.pojo.Cat"></bean>
    <bean  class="com.kuang.pojo.Dog"></bean>
  <!--使用ByType方式:
            会在Spring的IOC容器中自动查找,
            和要引用的对象的属性类型相同的的Bean-->
    <bean id="people" class="com.kuang.pojo.People" autowire="byType">
        <property name="name" value="华农兄弟"></property>
    </bean>
</beans>
1-3 使用多个相同类
- 由于使用byType方式的原理是:自动在Spring的IOC容器中查找,和自己对象属性类型相同的的Bean,因此可以编写多个相同类的Bean信息来进行测试
<?xml version="1.0" encoding="UTF-8"?>
<beans xmlns="http://www.springframework.org/schema/beans"
       xmlns:xsi="http://www.w3.org/2001/XMLSchema-instance"
       xsi:schemaLocation="http://www.springframework.org/schema/beans http://www.springframework.org/schema/beans/spring-beans.xsd">
    <!--编写Cat实体类Bean信息时省略掉id-->
	<bean class="com.kuang.pojo.Cat"></bean>
    <!--设置多个相同类-->
	   <bean id="littledog" class="com.kuang.pojo.Dog"></bean>
        <bean id="olddog" class="com.kuang.pojo.Dog"></bean>
  <!--使用ByType方式:
            会在Spring的IOC容器中自动查找,
            和要引用的对象的属性类型相同的的Bean-->
    <bean id="people" class="com.kuang.pojo.People" autowire="byType">
        <property name="name" value="华农兄弟"></property>
    </bean>
</beans>
2.编写MyTest测试类
public class MyTest {
    @Test
    public void test2(){
        //获取上下文信息,得到Spring的IOC容器
        ApplicationContext context = new ClassPathXmlApplicationContext("beans2.xml");
        //从IOC容器中获取Bean信息:声明类型后就不需要强制转换了
        People people = context.getBean("people", People.class);
        //主人让宠物狗叫
        people.getDog().shout();
        //主人让宠物猫叫
        people.getCat().shout();
    }
}
3. 测试结果及分析
3-1 编写Bean时使用id

结果:成功输出了猫叫和狗叫,“汪汪汪”和“喵呜“!==
3-2 编写Bean时省略id

结果:与3-1的测试结果相同!
3-3 使用多个相同类

结果:Caused by: org.springframework.beans.factory.NoUniqueBeanDefinitionException: No qualifying bean of type ‘com.kuang.pojo.Dog’ available: expected single matching bean but found 2: littledog,olddog
原因分析:只能匹配一个bean,但却找到了两个:littledog和olddog
4. byType方式使用总结
总结:
-
使用byType方式自动装配时,首先要保证所有的class唯一
-
并且要引用的Bean对应的类和实现自动装配的Bean的属性类型要一致
7.3 使用注解实现自动装配
JDK1.5支持的注解,Spring2.5就支持注解了!基于注释的配置的引入提出了一个问题,即这种方法是否比XML“更好”?
简短的答案是“取决于情况”
7.3.1 使用注解自动装配的前提
- 首先要在对应的beans配置文件中导入context约束和开启注解的支持
1.导入context约束
- 在beans3.xml配置文件的beans标签中插入如下的context约束
http://www.springframework.org/schema/context
https://www.springframework.org/schema/context/spring-context.xsd
- 插入约束后,beans3.xml文件内容如下所示:
<?xml version="1.0" encoding="UTF-8"?>
<beans xmlns="http://www.springframework.org/schema/beans"
    xmlns:xsi="http://www.w3.org/2001/XMLSchema-instance"
    xmlns:context="http://www.springframework.org/schema/context"
    xsi:schemaLocation="http://www.springframework.org/schema/beans
        https://www.springframework.org/schema/beans/spring-beans.xsd
        http://www.springframework.org/schema/context
        https://www.springframework.org/schema/context/spring-context.xsd">
</beans>
2.开启配置注解的支持
- 在beans3.xml配置文件中引入如下代码
<!--开启注解的支持-->
<context:annotation-config/>
- 引入注解支持后,beans.xml文件内容如下所示:
<?xml version="1.0" encoding="UTF-8"?>
<beans xmlns="http://www.springframework.org/schema/beans"
    xmlns:xsi="http://www.w3.org/2001/XMLSchema-instance"
    xmlns:context="http://www.springframework.org/schema/context"
    xsi:schemaLocation="http://www.springframework.org/schema/beans
        https://www.springframework.org/schema/beans/spring-beans.xsd
        http://www.springframework.org/schema/context
        https://www.springframework.org/schema/context/spring-context.xsd">
    <!--开启注解的支持-->
    <context:annotation-config/>
</beans>
7.3.2 @Autowired注解的使用
1.编写People实体类
1-1 在属性上使用
public class People {
    @Autowired //在属性上使用@Autowired自动装配
    private Cat cat;
    @Autowired //在属性上使用@Autowired自动装配
    private  Dog dog;
    private String name;
    public Cat getCat() {
        return cat;
    }
    public void setCat(Cat cat) {
        this.cat = cat;
    }
    public Dog getDog() {
        return dog;
    }
    public void setDog(Dog dog) {
        this.dog = dog;
    }
    public String getName() {
        return name;
    }
    public void setName(String name) {
        this.name = name;
    }
    @Override
    public String toString() {
        return "People{" +
                "cat=" + cat +
                ", dog=" + dog +
                ", name='" + name + '\'' +
                '}';
    }
}
1-2 在set方法上使用
public class People {
    private Cat cat;
    private  Dog dog;
    private String name;
    //    @Autowired //在set方法上使用@Autowired自动装配
    public void setCat(Cat cat) {
        this.cat = cat;
    }
    //    @Autowired //在set方法上使用@Autowired自动装配
    public void setDog(Dog dog) {
        this.dog = dog;
    }
    public void setName(String name) {
        this.name = name;
    }
    public Cat getCat() {
        return cat;
    }
    public Dog getDog() {
        return dog;
    }
    public String getName() {
        return name;
    }
    @Override
    public String toString() {
        return "People{" +
                "cat=" + cat +
                ", dog=" + dog +
                ", name='" + name + '\'' +
                '}';
    }
}
1-3 不编写set方法
public class People {
    @Autowired
    private Cat cat;
    @Autowired
    private  Dog dog;
    private String name;
    public void setName(String name) {
        this.name = name;
    }
    public Cat getCat() {
        return cat;
    }
    public Dog getDog() {
        return dog;
    }
    public String getName() {
        return name;
    }
    @Override
    public String toString() {
        return "People{" +
                "cat=" + cat +
                ", dog=" + dog +
                ", name='" + name + '\'' +
                '}';
    }
}
2.编写beans3.xml文件
<?xml version="1.0" encoding="UTF-8"?>
<!--注意:一定导入context约束-->
<beans xmlns="http://www.springframework.org/schema/beans"
    xmlns:xsi="http://www.w3.org/2001/XMLSchema-instance"
    xmlns:context="http://www.springframework.org/schema/context"
    xsi:schemaLocation="http://www.springframework.org/schema/beans
        https://www.springframework.org/schema/beans/spring-beans.xsd
        http://www.springframework.org/schema/context
        https://www.springframework.org/schema/context/spring-context.xsd">
    <!--注意:一定要开启注解的支持!-->
    <context:annotation-config/>
    <!--编写Cat实体类的Bean信息-->
	<bean id="cat" class="com.kuang.pojo.Cat"></bean>
    <!--编写Dog实体类的Bean信息-->
    <bean id="dog" class="com.kuang.pojo.Dog"></bean>
    <!--编写People实体类的Bean信息-->
    <bean id="people" class="com.kuang.pojo.People">
        <!--给name属性设置值-->
        <property name="name" value="华农兄弟"></property>
    </bean>
</beans>
3.编写MyTest测试类
public class MyTest {
    @Test
    public void test2(){
        //获取上下文信息,得到Spring的IOC容器
        ApplicationContext context = new ClassPathXmlApplicationContext("beans3.xml");
        //从IOC容器中获取Bean信息:声明类型后就不需要强制转换了
        People people = context.getBean("people", People.class);
        //主人让宠物狗叫
        people.getDog().shout();
        //主人让宠物猫叫
        people.getCat().shout();
    }
}
4.测试结果
4-1 在属性上使用

结果:成功输出了猫叫和狗叫,“汪汪汪”和“喵呜“!
4-2 在set方法上使用

结果:与4-1的测试结果相同!
4-2 不编写set方法

结果:与4-1的测试结果相同!
5.@Autowired注解使用总结
- 直接在属性上使用即可,也可以在set方法上使用,甚至可以不写set方法!
- 使用Autowired虽然可以不编Set方法了,但前提是这个自动装配的属性在IOC(Spring)容器中存在,且符合byName的使用规则(要引用的Bean的id和当前设置自动装配的Bean的set方法的值要一致)
- 默认是按照类型(byType)装配依赖对象,如果想使用按照名称(byName)来装配,可以结合@qualifier注解使用
7.3.3 @Nullable注解的使用
1.编写people实体类
public class People {
    @Autowired
    private Cat cat;
    @Autowired
    private  Dog dog;
    private String name;
    //@Nullable字段标记了这个注释,说明这个字段可以为null
	public People(@Nullable String name) {
        this.name = name;
    }
    public Cat getCat() {
        return cat;
    }
    public Dog getDog() {
        return dog;
    }
    public void setName(String name) {
        this.name = name;
    }
    public String getName() {
        return name;
    }
    @Override
    public String toString() {
        return "People{" +
                "cat=" + cat +
                ", dog=" + dog +
                ", name='" + name + '\'' +
                '}';
    }
}
2.编写beans3.xml配置文件
<?xml version="1.0" encoding="UTF-8"?>
<!--注意:一定导入context约束-->
<beans xmlns="http://www.springframework.org/schema/beans"
    xmlns:xsi="http://www.w3.org/2001/XMLSchema-instance"
    xmlns:context="http://www.springframework.org/schema/context"
    xsi:schemaLocation="http://www.springframework.org/schema/beans
        https://www.springframework.org/schema/beans/spring-beans.xsd
        http://www.springframework.org/schema/context
        https://www.springframework.org/schema/context/spring-context.xsd">
    <!--注意:一定要开启注解的支持!-->
    <context:annotation-config/>
    <!--编写Cat实体类的Bean信息-->
	<bean id="cat" class="com.kuang.pojo.Cat"></bean>
    <!--编写Dog实体类的Bean信息-->
    <bean id="dog" class="com.kuang.pojo.Dog"></bean>
    <!--编写People实体类的Bean信息-->
    <bean id="people" class="com.kuang.pojo.People">
    </bean>
</beans>
3.编写MyTest测试类
public class MyTest {
    @Test
    public void test2(){
        //获取上下文信息,得到Spring的IOC容器
        ApplicationContext context = new ClassPathXmlApplicationContext("beans3.xml");
        //从IOC容器中获取Bean信息:声明类型后就不需要强制转换了
        People people = context.getBean("people", People.class);
        //主人让宠物狗叫
        people.getDog().shout();
        //主人让宠物猫叫
        people.getCat().shout();
    }
}
4.测试结果

结果:成功输出了猫叫和狗叫,“汪汪汪”和“喵呜“!
7.3.4 @Autowired注解的强化使用
1.分析Autowired源码
public @interface Autowired {
    //Autowired接口的required参数:布尔型参数,且默认值为true
    boolean required() default true;
}
Autowired接口有一个required参数:required参数类型为布尔型,且默认值为true,即该属性不能为null;若值为true,则该属性可以为null
2.编写People实体类
public class People {
    //如果显示定义了Autowired属性required值为false,说明这个属性可以为null,否则不为null
    @Autowired(required = false)
    private Cat cat;
    @Autowired //默认值为true,即该属性不能为null
    private  Dog dog;
    private String name;
    public void setName(String name) {
        this.name = name;
    }
    public Cat getCat() {
        return cat;
    }
    public Dog getDog() {
        return dog;
    }
    public String getName() {
        return name;
    }
    @Override
    public String toString() {
        return "People{" +
                "cat=" + cat +
                ", dog=" + dog +
                ", name='" + name + '\'' +
                '}';
    }
}
3.编写beans3.xml配置文件
<?xml version="1.0" encoding="UTF-8"?>
<!--注意:一定导入context约束-->
<beans xmlns="http://www.springframework.org/schema/beans"
    xmlns:xsi="http://www.w3.org/2001/XMLSchema-instance"
    xmlns:context="http://www.springframework.org/schema/context"
    xsi:schemaLocation="http://www.springframework.org/schema/beans
        https://www.springframework.org/schema/beans/spring-beans.xsd
        http://www.springframework.org/schema/context
        https://www.springframework.org/schema/context/spring-context.xsd">
    <!--注意:一定要开启注解的支持!-->
    <context:annotation-config/>
    <!--编写Cat实体类的Bean信息-->
	<bean id="cat" class="com.kuang.pojo.Cat"></bean>
    <!--编写Dog实体类的Bean信息-->
    <bean id="dog" class="com.kuang.pojo.Dog"></bean>
    <!--编写People实体类的Bean信息-->
    <bean id="people" class="com.kuang.pojo.People">
    </bean>
</beans>
4.编写MyTest测试类
public class MyTest {
    @Test
    public void test2(){
        //获取上下文信息,得到Spring的IOC容器
        ApplicationContext context = new ClassPathXmlApplicationContext("beans3.xml");
        //从IOC容器中获取Bean信息:声明类型后就不需要强制转换了
        People people = context.getBean("people", People.class);
        //主人让宠物狗叫
        people.getDog().shout();
        //主人让宠物猫叫
        people.getCat().shout();
    }
}
5.测试结果
结果:成功输出了猫叫和狗叫,“汪汪汪”和“喵呜“!
7.3.5 @Qualifier注解的使用
如果@Autowired自动装配的环境中比较复杂,自动装配无法通过一个注解【@Autowired】完成的时候,我们可以使用@Qualifier(value = “xxx”)去配置@Autowired的使用,指定一个唯一的bean对象注入!
1.修改People实体类
public class People {
    @Autowired
    //指定一个唯一的bean对象cat11注入
    @Qualifier(value = "cat11")
    private Cat cat;
    @Autowired
    //指定一个唯一的bean对象dog222注入
    @Qualifier(value = "dog222")
    private  Dog dog;
    private String name;
    public People(@Nullable String name) {
        this.name = name;
    }
    public Cat getCat() {
        return cat;
    }
    public Dog getDog() {
        return dog;
    }
    public String getName() {
        return name;
    }
    @Override
    public String toString() {
        return "People{" +
                "cat=" + cat +
                ", dog=" + dog +
                ", name='" + name + '\'' +
                '}';
    }
}
2.修改beans3.xml配置文件
<?xml version="1.0" encoding="UTF-8"?>
<beans xmlns="http://www.springframework.org/schema/beans"
       xmlns:xsi="http://www.w3.org/2001/XMLSchema-instance"
       xmlns:context="http://www.springframework.org/schema/context"
       xsi:schemaLocation="http://www.springframework.org/schema/beans
           http://www.springframework.org/schema/beans/spring-beans.xsd
           http://www.springframework.org/schema/context
           https://www.springframework.org/schema/context/spring-context.xsd">
    <!--开启注解的支持-->
    <context:annotation-config/>
    <!--编写Cat实体类的多个Bean对象信息-->
    <bean id="cat11" class="com.kuang.pojo.Cat"></bean>
    <bean id="cat111" class="com.kuang.pojo.Cat"></bean>
    <!--编写Dog实体类的多个Bean对象信息-->
    <bean id="dog22" class="com.kuang.pojo.Dog"></bean>
    <bean id="dog222" class="com.kuang.pojo.Dog"></bean>
    <bean id="people" class="com.kuang.pojo.People"></bean>
</beans>
3.编写MyTest测试类
public class MyTest {
    @Test
    public void test2(){
        //获取上下文信息,得到Spring的IOC容器
        ApplicationContext context = new ClassPathXmlApplicationContext("beans3.xml");
        //从IOC容器中获取Bean信息:声明类型后就不需要强制转换了
        People people = context.getBean("people", People.class);
        //主人让宠物狗叫
        people.getDog().shout();
        //主人让宠物猫叫
        people.getCat().shout();
    }
}
4.测试结果

结果:成功输出了猫叫和狗叫,“汪汪汪”和“喵呜“!
5.@Autowired注解的使用总结
如果@Autowired自动装配的环境中比较复杂,自动装配无法通过一个注解【@Autowired】完成的时候,我们可以使用@Qualifier(value = “xxx”)去配置@Autowired的使用,指定一个唯一的bean对象注入!
7.3.6 @Resource注解的使用
1.修改beans3.xml配置文件
<?xml version="1.0" encoding="UTF-8"?>
<beans xmlns="http://www.springframework.org/schema/beans"
       xmlns:xsi="http://www.w3.org/2001/XMLSchema-instance"
       xmlns:context="http://www.springframework.org/schema/context"
       xsi:schemaLocation="http://www.springframework.org/schema/beans
           http://www.springframework.org/schema/beans/spring-beans.xsd
           http://www.springframework.org/schema/context
           https://www.springframework.org/schema/context/spring-context.xsd">
    <!--开启注解的支持-->
    <context:annotation-config/>
     <!--编写Cat实体类的多个Bean对象信息-->
    <bean id="cat11" class="com.kuang.pojo.Cat"></bean>
    <bean id="cat111" class="com.kuang.pojo.Cat"></bean>
     <!--编写Dog实体类的多个Bean对象信息-->
    <bean id="dog22" class="com.kuang.pojo.Dog"></bean>
    <bean id="dog222" class="com.kuang.pojo.Dog"></bean>
    <bean id="people" class="com.kuang.pojo.People"></bean>
</beans>
2.修改实体类People
public class People {
    //在@Resource注解的name属性中指明唯一bean对象cat11
    @Resource(name="cat11")
    private Cat cat;
     //在@Resource注解的name属性中指明唯一bean对象dog222
    @Resource(name="dog222")
    private  Dog dog;
    private String name;
    public People(@Nullable String name) {
        this.name = name;
    }
    public Cat getCat() {
        return cat;
    }
    public Dog getDog() {
        return dog;
    }
    public String getName() {
        return name;
    }
    @Override
    public String toString() {
        return "People{" +
                "cat=" + cat +
                ", dog=" + dog +
                ", name='" + name + '\'' +
                '}';
    }
}
3.编写MyTest测试类
public class MyTest {
    @Test
    public void test2(){
        //获取上下文信息,得到Spring的IOC容器
        ApplicationContext context = new ClassPathXmlApplicationContext("beans3.xml");
        //从IOC容器中获取Bean信息:声明类型后就不需要强制转换了
        People people = context.getBean("people", People.class);
        //主人让宠物狗叫
        people.getDog().shout();
        //主人让宠物猫叫
        people.getCat().shout();
    }
}
4.测试结果

结果:成功输出了猫叫和狗叫,“汪汪汪”和“喵呜“!
7.3.7 @Resource和@Autowired的区别:
-
都是通过自动装配的,都可以放在属性字段上
-
@Autowired 通过byType的方式实现,而且必须要求这个对象存在【常用】
-
@Resource 默认通过byName的方式实现,如果找不到名字,则通过byType实现,如果两个都找不到的情况下就报错【常用】
-
执行顺序不同:@Autowired默认通过byType的方式实现,@Resource默认通过byName的方式实现
好了,今天的有关Spring基础学习之Bean的自动装配的学习就到此结束啦,欢迎小伙伴们积极学习和讨论,喜欢的可以给蜗牛君点个关注,顺便来个一键三连,我们下期见,拜拜啦!
参考视频链接:https://www.bilibili.com/video/BV1WE411d7Dv(【狂神说Java】Spring5最新教程IDEA版通俗易懂)


 3151
3151


 被折叠的 条评论
为什么被折叠?
被折叠的 条评论
为什么被折叠?
 到【灌水乐园】发言


