


memcached+keepalived高性能内存缓存应用
一、 安装及配置memcached
1、 安装memcached、centos02一样配置
1)
安装依赖程序libevent
[root@centos01 ~]# cd /usr/src/
[root@centos01 src]# rz

[root@centos01 src]# ls

[root@centos01 src]# tar zxvf libevent-1.4.9-stable.tar.gz
[root@centos01 src]# cd libevent-1.4.9-stable/
[root@centos01 libevent-1.4.9-stable]# ./configure --prefix=/usr/local/libevent
[root@centos01 libevent-1.4.9-stable]# make && make install
2)
安装memcached
[root@centos01 src]# tar zxvf memcached-1.2.6.tar.gz
[root@centos01 src]# cd memcached-1.2.6/
[root@centos01 memcached-1.2.6]# ./configure --prefix=/usr/local/memcached --with-libevent=/usr/local/libevent/
[root@centos01 memcached-1.2.6]# make && make install
3)
优化memcached命令
[root@centos01 ~]# vim /etc/profile
PATH=$PATH:/usr/local/memcached/bin/
[root@centos01 ~]# source /etc/profile
4)
加载libevent
[root@centos01 ~]# vim /etc/ld.so.conf
include ld.so.conf.d/.conf
/usr/local/libevent/lib/
[root@centos01 ~]# ldconfig
5)
启动memcached服务
[root@centos01 ~]# memcached -d -m 300m -p 11211 -u root
6)
安装telnet登陆memcached
[root@centos01 ~]# rm -rf /etc/yum.repos.d/CentOS-
[root@centos01 ~]# mount /dev/cdrom /mnt/
mount: /dev/sr0 写保护,将以只读方式挂载
[root@centos01 ~]# yum -y install telnet
7)
使用telnet登陆memcached
[root@centos01 ~]# telnet 192.168.100.10 11211
Trying 192.168.100.10…
Connected to 192.168.100.10.
Escape character is ‘^]’.
8)
查看memcached服务状态
stats

9)
插入数据
set cheng 0 0 5
cheng
STORED
10)
查看设置的值
get cheng
VALUE cheng 0 5
cheng
END
11)
删除值
delete cheng
DELETED
2、 安装manget、centos02一样配置
1)
添加网卡、联网安装centos7源和libevent-devel工具
[root@centos01 ~]# cd /etc/yum.repos.d/
[root@centos01 yum.repos.d]# wget http://mirrors.aliyun.com/repo/Centos-7.rep
[root@centos01 ~]# yum -y install libevent-devel
2)
创建magent目录并安装magent
[root@centos01 ~]# mkdir /usr/local/magent/
[root@centos01 ~]# cd /usr/src/
[root@centos01 src]# rz
z waiting to receive.**B0100000023be50
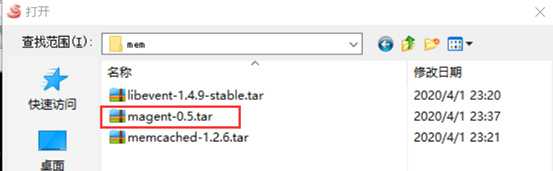
[root@centos01 src]# tar zxvf magent-0.5.tar.gz -C /usr/local/magent/
3)
修改magent配置文件
[root@centos01 ~]# cd /usr/local/magent/
[root@centos01 magent]# vim Makefile
LIBS = -levent -lm
[root@centos01 magent]# vim ketama.h
#ifndef SSIZE_MAX
#define SSIZE_MAX 32767
#endif
[root@centos01 magent]# make
4)
修改magent位置
[root@centos01 magent]# cp magent /usr/bin/
3、 安装和配置keepalived、centos02一样配置
1)
安装keepalived依赖程序
[root@centos01 ~]# yum -y install kernel-devel openssl-devel popt-devel
[root@centos01 ~]# umount /mnt/
[root@centos01 ~]# mount /dev/cdrom /mnt/
mount: /dev/sr0 写保护,将以只读方式挂载
[root@centos01 ~]# tar zxvf /mnt/keepalived-1.2.13.tar.gz -C /usr/src/
2)
配置keepalived
[root@centos01 ~]# cd /usr/src/keepalived-1.2.13/
[root@centos01 keepalived-1.2.13]# ./configure --prefix=/ --with-kernel-dir=/usr/src/kernels/
[root@centos01 keepalived-1.2.13]# make && make install
3)
添加系统服务设置开机自动启动
[root@centos01 ~]# chkconfig --add keepalived
[root@centos01 ~]# chkconfig --level 35 keepalived on
4)
修改keepalived主节点配置文件
[root@centos01 ~]# vim /etc/keepalived/keepalived.conf
! Configuration File for keepalived
global_defs {
router_id Master
}
vrrp_instance VI_1 {
state MASTER
interface ens32
virtual_router_id 51
priority 100
advert_int 1
authentication {
auth_type PASS
auth_pass 1111
}
virtual_ipaddress {
192.168.100.254
}
vrrp_script magent {
script “/opt/magent.sh”
interval 2
}
track_script {
magent
}
}
5)
启动主keepalived
[root@centos01 ~]# systemctl start keepalived
6)
配置监控主keepalived脚本
[root@centos01 ~]# vim /opt/magent.sh
#!/bin/bash
KEEPALIVED=ps -ef |grep keepalived |grep -v grep |wc -l
if [ $KEEPALIVED -gt 0 ];then
magent -u root -n 51200 -l 192.168.100.254 -p 12000 -s 192.168.100.10:11211 -b 192.168.100.20:11211
else
pkill -9 magent
fi
[root@centos01 ~]# chmod +x /opt/magent.sh
[root@centos01 ~]# sh /opt/magent.sh
7)
修改keepalived从节点配置文件
[root@centos02 ~]# vim /etc/keepalived/keepalived.conf
! Configuration File for keepalived
global_defs {
router_id Backup
}
vrrp_instance VI_1 {
state BACKUP
interface ens32
virtual_router_id 51
priority 99
advert_int 1
authentication {
auth_type PASS
auth_pass 1111
}
virtual_ipaddress {
192.168.100.254
}
vrrp_script magent {
script “/opt/magent.sh”
interval 2
}
track_script {
magent
}
}
8)
启动从keepalived
[root@centos02 ~]# systemctl start keepalived
9)
配置监控从keepalived脚本
[root@centos02 ~]# vim /opt/magent.sh
#!/bin/bash
KEEPALIVED=ip addr |grep 192.168.100.254 |grep -v grep |wc -l
if [ $KEEPALIVED -gt 0 ];then
magent -u root -n 51200 -l 192.168.100.254 -p 12000 -s 192.168.100.10:11211 -b 192.168.100.20:11211
else
pkill -9 magent
fi
[root@centos02 ~]# chmod +x /opt/magent.sh
[root@centos02 ~]# sh /opt/magent.sh
10
客户端安装telnet
[root@centos03 ~]# rm -rf /etc/yum.repos.d/CentOS-*
[root@centos03 ~]# mount /dev/cdrom /mnt/
mount: /dev/sr0 写保护,将以只读方式挂载
[root@centos03 ~]# yum -y install telnet
11)
客户端测试

[root@centos03 ~]# telnet 192.168.100.254 12000
Trying 192.168.100.254…
Connected to 192.168.100.254.
Escape character is ‘^]’.
set cheng 0 0 4
qaqq
STORED
get cheng
VALUE cheng 0 4
qaqq
END
停掉主节点再次查看
[root@centos01 ~]# systemctl stop keepalived

[root@centos03 ~]# telnet 192.168.100.254 12000
Trying 192.168.100.254…
Connected to 192.168.100.254.
Escape character is ‘^]’.
get cheng
VALUE cheng 0 4
qaqq
END
[root@centos03 ~]# telnet 192.168.100.10 11211
Trying 192.168.100.10…
Connected to 192.168.100.10.
Escape character is ‘^]’.
get cheng
VALUE cheng 0 4
qaqq
END
quit
Connection closed by foreign host.
[root@centos03 ~]# telnet 192.168.100.20 11211
Trying 192.168.100.20…
Connected to 192.168.100.20.
Escape character is ‘^]’.
get cheng
VALUE cheng 0 4
qaqq
END


 6721
6721


 被折叠的 条评论
为什么被折叠?
被折叠的 条评论
为什么被折叠?
 到【灌水乐园】发言


