


注意:vue2和vue3的写法是不一样的!
编写三个缓存路由文件
First.vue
// src\views\alive\first.vue
<template>
    <div class="first">
        <h1 class="title">第一个组件</h1>
        <button @click="toSecond">跳到第二个组件</button>
    </div>
</template>
<script>
export default {
    name: 'first',
    created() {
        console.log('first created')
    },
    methods: {
        toSecond() {
            document.querySelector('.title').style.color = 'red'
            this.$router.push('/second')
        }
    },
    activated: function() {
        console.log('first activated')
    }
}
</script>
Second.vue
// src\views\alive\second.vue
<template>
    <div class="second">
        <h1>第二个组件</h1>
        <button @click="toThird">跳到第三个组件</button>
    </div>
</template>
<script>
export default {
    name: 'second',
    created() {
        console.log('second created')
    },
    methods: {
        toThird() {
            document.querySelector('.second').style.backgroundColor = 'green'
            this.$router.push('/third')
        }
    },
    activated() {
        console.log('second activated')
    }
}
</script>
Third.vue
// src\views\alive\third.vue
  <template>
    <div class="third">
        <h1>第三个组件</h1>
    </div>
</template>
<script>
export default {
    name: 'third',
    created() {
        console.log('third created')
    },
    methods: {
    },
    activated() {
        console.log('third activated')
    }
}
</script>
定义三个路由文件
// src\router\index.js
  import { createRouter, createWebHistory } from "vue-router";

const router = new createRouter({
  history: createWebHistory(),
  routes: [
    {
      path: "/first",
      name: "first",
      component: () => import("../views/alive/first.vue"),
      meta: {
        keepAlive: true, //设置页面是否需要使用缓存
      },
    },
    {
      path: "/second",
      name: "second",
      component: () => import("../views/alive/second.vue"),
      meta: {
        keepAlive: true, //设置页面是否需要使用缓存
      },
    },
    {
      path: "/third",
      name: "third",
      component: () => import("../views/alive/third.vue"),
      meta: {
        keepAlive: true, //设置页面是否需要使用缓存
      },
    },
  ],
});

export default router;
使用keep-alive缓存
先看看不使用缓存的情况
// src/App.vue
<script setup>
</script>
<template>
  <!-- vue3.0配置 -->
  <router-link to="/first">first</router-link>
  <!-- <router-view v-slot="{ Component }">
    <keep-alive>
      <component :is="Component" v-if="$route.meta.keepAlive"  :key="$route.path" />
    </keep-alive>
    <component :is="Component" v-if="!$route.meta.keepAlive"  :key="$route.path"/>
  </router-view> -->
  <router-view></router-view>
</template>

<style scoped>

</style>
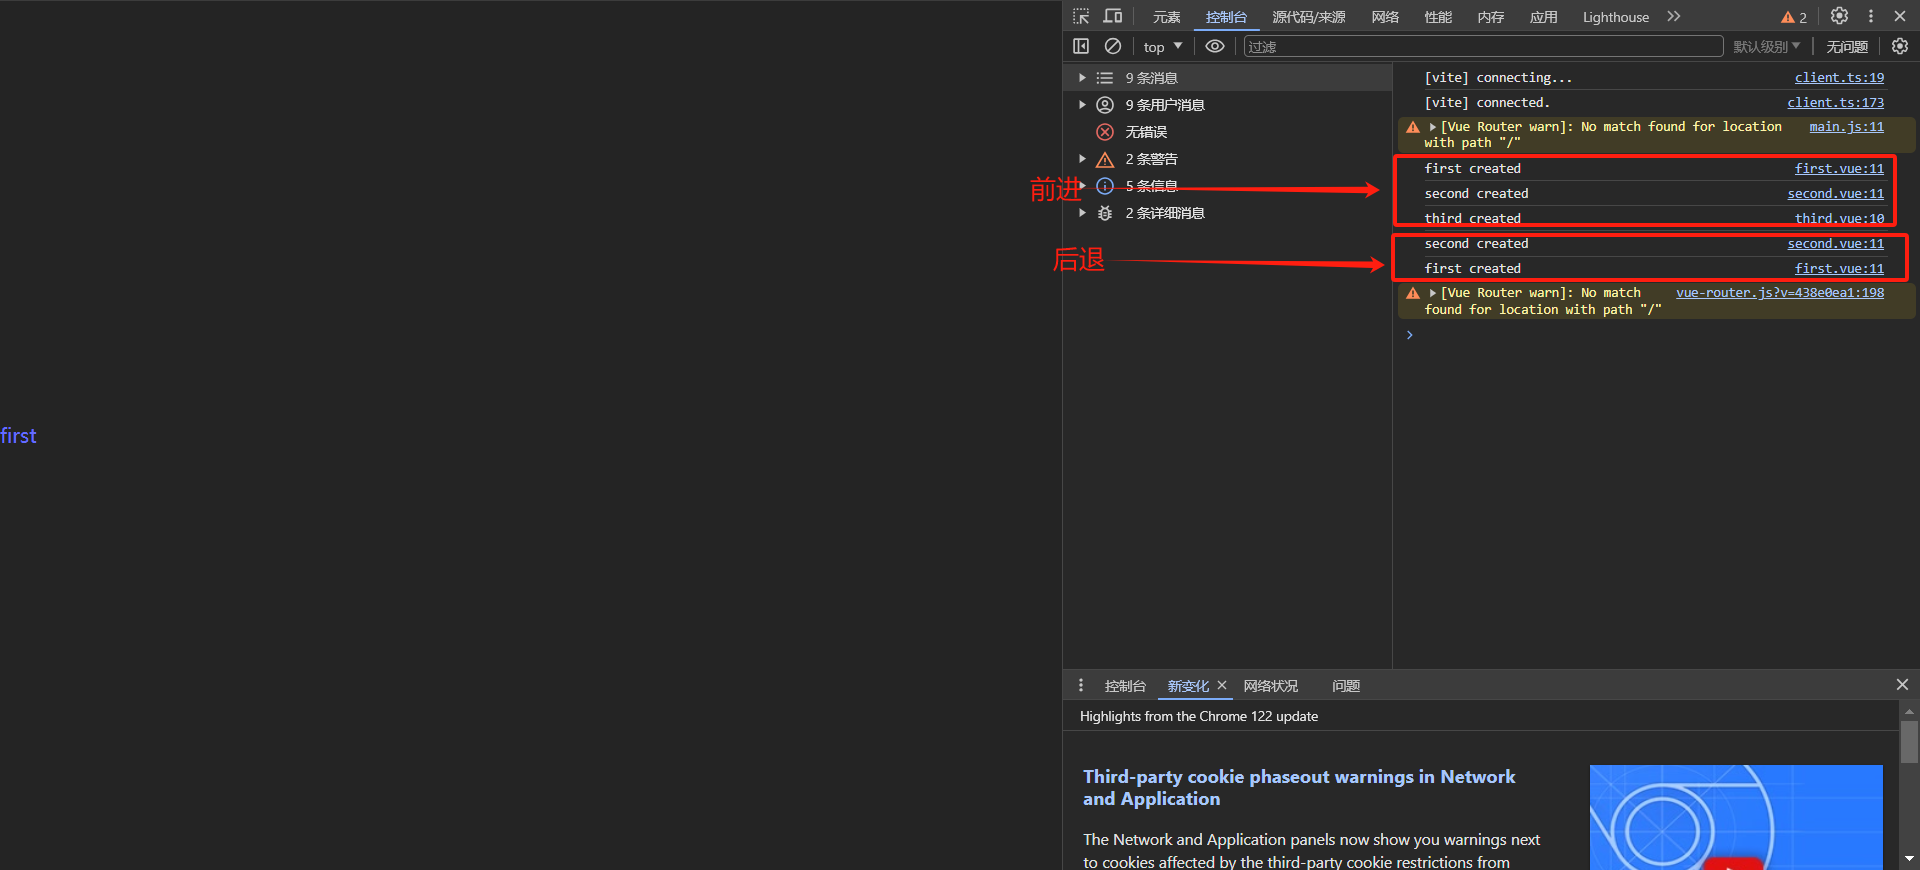
前进:点击了router-link的fisrt显示first页面后,点击前进到second,再点击前进到third页面,会发生三次create函数,也就是组件创建了三次。
后退:在third页面点击页面左上角的回退按钮,会发生second组件的创建。second页面继续回退,会发生first的创建。
再看看使用了缓存的情况
<script setup>
</script>
<template>
  <!-- vue3.0配置 -->
  <router-link to="/first">first</router-link>
  <router-view v-slot="{ Component }">
    <keep-alive>
      <component :is="Component" v-if="$route.meta.keepAlive"  :key="$route.path" />
    </keep-alive>
    <component :is="Component" v-if="!$route.meta.keepAlive"  :key="$route.path"/>
  </router-view>
  <!-- <router-view></router-view> -->
</template>

<style scoped>

</style>
记得一定要加:key,不然会报错,这是vue3的写法,Component是vue里的特殊组件,可以暂时不用管,这样就可以有缓存效果了。
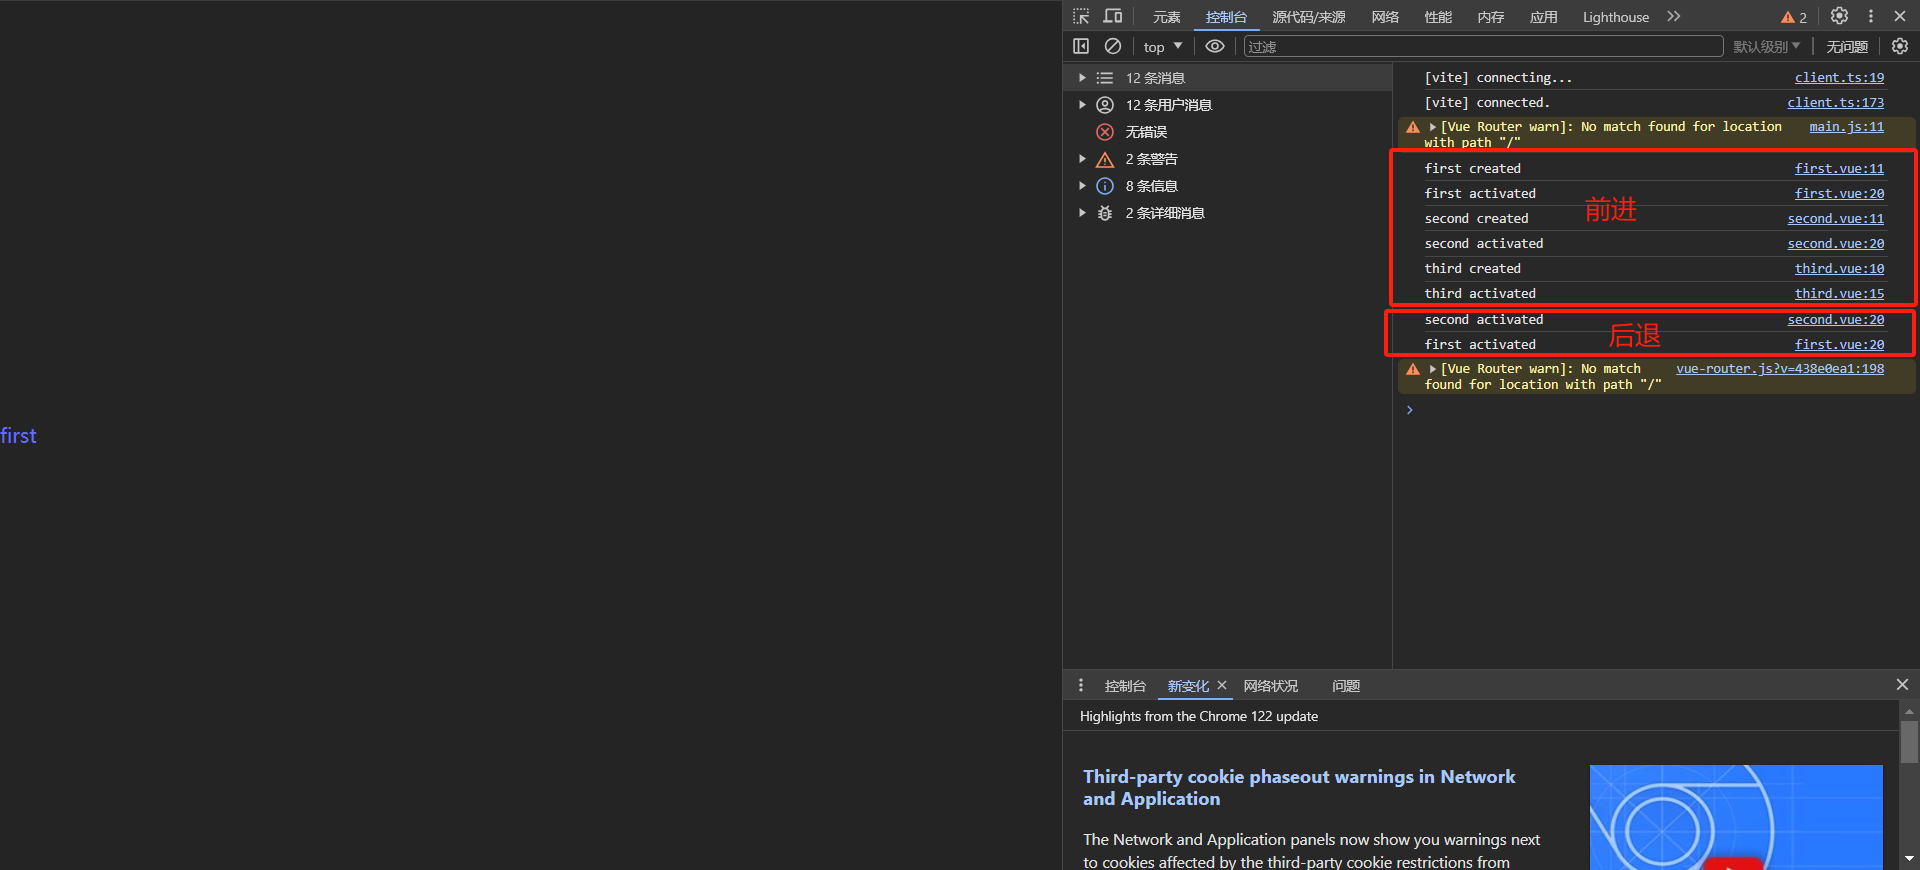
这里多了actived,这个可以理解为已经开始缓存了。而后续的回退步骤也没有再发生create事件,而是actived事件,代表着页面重新被激活,而不是创建。


 3万+
3万+


 被折叠的 条评论
为什么被折叠?
被折叠的 条评论
为什么被折叠?
 到【灌水乐园】发言


