


http协议的前世今生
https://www.jianshu.com/p/8293438e6131
一、Http 协议的引入
1.JavaWeb开发就是浏览器和服务器之间的开发。

2.协议
2.1 http协议的来源
浏览器发送请求给服务器,服务器解析请求获取相应的数据。
服务器解析请求获取相应的数据,然后响应给浏览器。

服务器解析浏览器的请求,浏览器解析服务器的响应,如果浏览器发送的请求格式不一致
或服务器响应的数据格式不一致,那么浏览器厂商、服务器厂商肯定要做很多兼容性。所
以在此基础上,w3c组织定义了请求和响应的数据格式,即Http协议。约束了请求和响应的
数据格式。
2.2 http协议
	前提:一个请求发出,一定会有一个相应。

	服务器厂商要求浏览器厂商发出的请求格式一定要一致。
	浏览器厂商要求服务器厂商响应的数据格式也一定要一致。

	这样一致的数据格式,我们称之为协议。而这里定义的协议即是Http协议。
	它是对浏览器客户端和服务器端数据格式的规范。

二、HTTP协议和TCP/IP通信协议
1.什么是HTTP协议?
http协议:对 浏览器客户端和服务器端的数据传输格式规范。
2.Http协议和TCP/IP通信协议的区别?
	TCP/IP协议:关注的是客户端和服务器端之间的数据是否传输成功。
	Http协议:是在TCP/IP通信协议基础之上封装的一层协议,关注的是
			  数据传输的格式是够规范。

	(B/S结构底层也是C/S结构,使用TCP/IP的Socket(插座)进行通信)

3. 拦截Http请求的方式(查看http协议的内容)
方式1:浏览器自带开发者工具
		火狐:使用火狐的firebug插件(右键 -> firebug -> 网络)
		谷歌:使用谷歌的审查元素
方式2:操作系统自带的telnet工具
1.打开telnet服务
控制面板-程序-打开或关闭Windows功能-勾上telnet服务端


2.在cmd中输入telnet命令
	   输入		 telnet localhost 8080
	   然后输入   ctrl + ]  ,
	   按  enter键 进入telnet控制台
	   再次按enter键

	   粘贴请求的信息
	   然后按 	 enter键
详细步骤:
输入 telnet localhost 8080, 按 enter键


然后输入 ctrl + ] ,按 enter键


测试 localhost:8080/test2/heelo2
复制请求头,只需复制这两行即可
				GET /test2/hello2 HTTP/1.1
				Host: localhost:8080


三、Http协议的内容
请求
请求(浏览器-》服务器)
GET /day09/hello HTTP/1.1
Host: localhost:8080
User-Agent: Mozilla/5.0 (Windows NT 6.1; WOW64; rv:35.0) Gecko/20100101 Firefox/35.0
Accept: text/html,application/xhtml+xml,application/xml;q=0.9,*/*;q=0.8
Accept-Language: zh-cn,en-us;q=0.8,zh;q=0.5,en;q=0.3
Accept-Encoding: gzip, deflate
Connection: keep-alive
响应
响应(服务器-》浏览器)
HTTP/1.1 200 OK
Server: Apache-Coyote/1.1
Content-Length: 24
Date: Fri, 30 Jan 2015 01:54:57 GMT

this is hello servlet!!!
四、Http 请求
4.1 Http 请求详解
	一个完整的Http请求包括一个请求行、若干个请求头、一个实体内容。
	其中一些请求头是可选的,实体内容也是可选的。
	请求头与实体内容之间有一个空行分开。
请求报文:
GET /day09/hello HTTP/1.1        --请求行
Host: localhost:8080             --请求头(多个key-value对象)
User-Agent: Mozilla/5.0 (Windows NT 6.1; WOW64; rv:35.0) Gecko/20100101 Firefox/35.0
Accept: text/html,application/xhtml+xml,application/xml;q=0.9,*/*;q=0.8
Accept-Language: zh-cn,en-us;q=0.8,zh;q=0.5,en;q=0.3
Accept-Encoding: gzip, deflate
Connection: keep-alive
                                    --一个空行
name=eric&password=123456           --(可选)实体内容
4.1.1 请求行
	GET /day09/hello HTTP/1.1

			## http协议的版本:
				 http1.0:当前浏览器客户端与服务器端建立连接之后,只能发送一次请求,一次请求之后连接关闭。
				 http1.1:当前浏览器客户端与服务器端建立连接之后,可以在一次连接中发送多次请求。(基本都使用1.1)

			## 请求的资源</b>
			  URL:统一的资源定位符  http://localhost:8080/demo/default.html  只能定位互联网资源。
			  URI:统一的资源标识符   /day09/hello 。用于标记任何资源,可以是本地文件系统的资源、局域网的资源,也可以是互联网的资源。(可以走不同的协议)

			  关系:URL只能定位互联网资源,URI可以定位本地、局域网、互联网的资源,所以URI的范围要大于URL,即URL是URI的子集。
			  一个URI可以转化为URL,即协议://IP:端口/URI   ,即可变为URL。

			 ## 请求方式
			  1.常见的请求方式:
			  			GET、POST、HEAD、PUT、DELETE、CONNECT
			  2.表单提交

				<form  action=" hello"  method="GET/POST" >

			    </form>
GET vs POST 区别
		1)GET方式提交
			a)地址栏(URI)会跟上参数数据。以?开头,多个参数之间以&分割。

				GET /day09/testMethod.html<font color="red">?name=eric&password=123456</font> HTTP/1.1
				Host: localhost:8080
				User-Agent: Mozilla/5.0 (Windows NT 6.1; WOW64; rv:35.0) Gecko/20100101 Firefox/35.0
				Accept: text/html,application/xhtml+xml,application/xml;q=0.9,*/*;q=0.8
				Accept-Language: zh-cn,en-us;q=0.8,zh;q=0.5,en;q=0.3
				Accept-Encoding: gzip, deflate
				Referer: http://localhost:8080/day09/testMethod.html
				Connection: keep-alive
			b)GET提交参数数据有限制,不超过1KB。
			c)GET方式不适合提交敏感密码。
			d)注意: 浏览器直接访问的请求,默认提交方式是GET方式

		2)POST方式提交
			a)参数不会跟着URI后面。参数而是跟在请求的实体内容中。没有?开头,多个参数之间以&分割。

				POST /day09/testMethod.html HTTP/1.1
				Host: localhost:8080
				User-Agent: Mozilla/5.0 (Windows NT 6.1; WOW64; rv:35.0) Gecko/20100101 Firefox/35.0
				Accept: text/html,application/xhtml+xml,application/xml;q=0.9,*/*;q=0.8
				Accept-Language: zh-cn,en-us;q=0.8,zh;q=0.5,en;q=0.3
				Accept-Encoding: gzip, deflate
				Referer: http://localhost:8080/day09/testMethod.html
				Connection: keep-alive

				<font color="red">name=eric&password=123456</font>

			b)POST提交的参数数据没有限制。
			c)POST方式提交敏感数据。
4.1.2 请求头
多个 key-value 键值对
			Accept: text/html,image/*      -- 浏览器可以接受的数据类型
			Accept-Charset: ISO-8859-1     -- 浏览器可以接受的编码格式
			Accept-Encoding: gzip,compress  --浏览器接受的数据压缩格式
			Accept-Language: en-us,zh-       --浏览器接受的语言
			Host: www.it315.org:80          --(必须的)当前请求访问的目标地址(主机:端口)
			If-Modified-Since: Tue, 11 Jul 2000 18:23:51 GMT  --浏览器最后的缓存时间
			Referer: http://www.it315.org/index.jsp      -- 当前请求来自于哪里
			User-Agent: Mozilla/4.0 (compatible; MSIE 5.5; Windows NT 5.0)  --浏览器类型
			Cookie:name=eric                     -- 浏览器保存的cookie信息
			Connection: close/Keep-Alive            -- 浏览器跟服务器连接状态。前端可以设置该请求头,控制连接的开关。close: 连接关闭  keep-alive:保存连接。
			Date: Tue, 11 Jul 2000 18:23:51 GMT      -- 请求发出的时间
4.1.3 实体内容
post提交的内容才有实体内容
一个网站有三张不同的图片,访问这个网站需要请求四次。
一个网站有三张相同的图片,访问这个网站需要请求四次,但是另外两次被浏览器拦截了。===》精灵图
4.2 HttpServletReqest 对象
HttpServletRequest对象作用是用于获取请求数据。
4.2.1 HttpServletReqest 对象的来源
		浏览器对服务器发送的请求信息为字符串信息,后台获取到字符串信息后一定要
		解析字符串,获取数据。但是用户截取字符串获取数据,肯定是麻烦的。由于
		JAVA是面向对象的,所以Tomcat服务器把请求信息进行解析,封装到了
		HttpServletReqest对象中。
		1)tomcat服务器接收到浏览器发送的请求数据,然后解析这些数据封装到
		   HttpServletReqest对象中。
		2)tomcat服务器调用Servlet的doGet()或doPost()方法,并将request
		   请求对象传入。
4.2.2 HttpServletReqest 对象的API
	   ### 请求行
			req.getMethod()         获取请求的方式 		  GET/POST/DELETE ...
			req.getRequestURI()     获取资源标识   	  /demo/hello
			req.getRequestURL()     获取资源定位      http://localhost:8080/ demo/hello
			req.getProtocol()       获取HTTP请求协议    HTTP/1.1  或 HTTP/1.0


		###请求头
			 req.getHeader("key")  根据请求头的key获取值
			 Enumeration<String> en = req.getHeaderNames();  获取所有请求头

		### 实体内容【只有post提交的才有实体内容】
			  req.getInputStream();  获取实体内容

		### 获取请求参数
			  GET方式:请求参数放在URI的后面
		  			 req.getQueryString(); 			获取GET方式参数(?后面的键值对)

			  POST方式:请求参数放在实体内容中
					 req.getInputStream();	获取POST方式参数

			  ===》问题:由于以上两种不通用,而且获取到的参数还需要进一步地解析。	 =====》所以可以使用统一方便的获取参数的方式。


			  统一方便的获取参数:
					核心的API:
						request.getParameter("参数名");  根据参数名获取参数值(注意,只能获取一个值的参数)
						request.getParameterValues("参数名“);根据参数名获取参数值(可以获取多个值的参数--复选框有多个值)
						request.getParameterNames();   获取所有参数名称列表
						req.getParameterMap()    获取所有参数map


			###其他
					    request.setCharacterEncoding("utf-8") 设置获取请求数据的编码集
				    	request.getContextPath(); /项目名
例1:获取请求行、请求头
HelloWorld.java
public class HelloWorld  extends HttpServlet{

	@Override
	protected void doGet(HttpServletRequest req, HttpServletResponse resp) throws ServletException, IOException {

		/********************************************
		 * 			获取请求行
		 *******************************************/

		//1.获取请求方式
		// get / post
		String method = req.getMethod();
		System.out.println("获取请求方式:"+method);

		//2.获取资源标识
		String requestURI = req.getRequestURI();
		System.out.println("获取资源标识:"+requestURI);		//  /Demo44/hello


		//3.获取资源定位
		StringBuffer requestURL = req.getRequestURL();
		System.out.println("获取资源定位:"+requestURL); //  http://localhost:8080/Demo44/hello

		//4.获取请求协议版本
		String protocol = req.getProtocol();
		System.out.println("获取请求协议版本:"+protocol); // HTTP/1.1


		/********************************************
		 * 			获取请求头
		 *******************************************/

		//1.获取所有的请求头name,以及value
		Enumeration<String> headerNames = req.getHeaderNames();
		while(headerNames.hasMoreElements()) {

			String key = headerNames.nextElement();
			String value = req.getHeader(key);
			System.out.println("Key:"+key+"  value:"+value);
		}

	}
}
访问该servlet,控制台打印:
获取请求方式:GET
获取资源标识:/Demo44/hello
获取资源定位:http://localhost:8080/Demo44/hello
获取请求协议版本:HTTP/1.1
Key:host  value:localhost:8080
Key:connection  value:keep-alive
Key:upgrade-insecure-requests  value:1
Key:user-agent  value:Mozilla/5.0 (Windows NT 10.0; Win64; x64) AppleWebKit/537.36 (KHTML, like Gecko) Chrome/79.0.3945.130 Safari/537.36
Key:sec-fetch-user  value:?1
Key:accept  value:text/html,application/xhtml+xml,application/xml;q=0.9,image/webp,image/apng,*/*;q=0.8,application/signed-exchange;v=b3;q=0.9
Key:sec-fetch-site  value:none
Key:sec-fetch-mode  value:navigate
Key:accept-encoding  value:gzip, deflate, br
Key:accept-language  value:zh-CN,zh;q=0.9
例2:获取get方式提交的请求内容
web.xml
<?xml version="1.0" encoding="UTF-8"?>
<web-app version="2.5"
	xmlns="http://java.sun.com/xml/ns/javaee"
	xmlns:xsi="http://www.w3.org/2001/XMLSchema-instance"
	xsi:schemaLocation="http://java.sun.com/xml/ns/javaee
	http://java.sun.com/xml/ns/javaee/web-app_2_5.xsd">


  <servlet>
    <servlet-name>hello</servlet-name>
    <servlet-class>org.jsoft.demo.HelloWorld</servlet-class>
  </servlet>

  <servlet-mapping>
    <servlet-name>hello</servlet-name>
    <url-pattern>/hello</url-pattern>
  </servlet-mapping>


</web-app>
HelloWorld .java
public class HelloWorld  extends HttpServlet{

	@Override
	protected void doGet(HttpServletRequest req, HttpServletResponse resp) throws ServletException, IOException {

		//获取get方式提交的参数
		String queryString = req.getQueryString();

		System.out.println(queryString); //username=23&password=23

	}
}
Hello.jsp
<%@ page language="java" contentType="text/html; charset=UTF-8"
    pageEncoding="UTF-8"%>
<!DOCTYPE html>
<html>
<head>
<meta charset="UTF-8">
<title>Insert title here</title>
</head>
<body>

	<form action="{pageContext.request.requestURI}/hello" method="get">
		<input type="text"  name="username">
		<input type="text"  name="password">
		<input type="submit"  value="提交">
	</form>

</body>
</html>
浏览器访问Hello.jsp
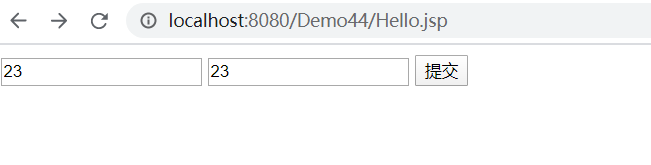
控制台打印:
username=23&password=23
例2:获取post方式的请求参数
web.xml
<?xml version="1.0" encoding="UTF-8"?>
<web-app version="2.5"
	xmlns="http://java.sun.com/xml/ns/javaee"
	xmlns:xsi="http://www.w3.org/2001/XMLSchema-instance"
	xsi:schemaLocation="http://java.sun.com/xml/ns/javaee
	http://java.sun.com/xml/ns/javaee/web-app_2_5.xsd">


  <servlet>
    <servlet-name>hello</servlet-name>
    <servlet-class>org.jsoft.demo.HelloWorld</servlet-class>
  </servlet>

  <servlet-mapping>
    <servlet-name>hello</servlet-name>
    <url-pattern>/hello</url-pattern>
  </servlet-mapping>


</web-app>
HelloWorld .java
public class HelloWorld  extends HttpServlet{


	@Override
	protected void doPost(HttpServletRequest req, HttpServletResponse resp) throws ServletException, IOException {

		InputStream in = req.getInputStream();

		//使用字节流读取
		int content=-1;
		StringBuffer sb=new StringBuffer();
		while((content=in.read())>0) {
			System.out.println((char) content);
		}


	}
}
Hello.jsp
<%@ page language="java" contentType="text/html; charset=UTF-8"
    pageEncoding="UTF-8"%>
<!DOCTYPE html>
<html>
<head>
<meta charset="UTF-8">
<title>Insert title here</title>
</head>
<body>

	<form action="{pageContext.request.requestURI}/hello" method="post">
		<input type="text"  name="username">
		<input type="text"  name="password">
		<input type="submit"  value="提交">
	</form>

</body>
</html>
浏览器访问Hello.jsp
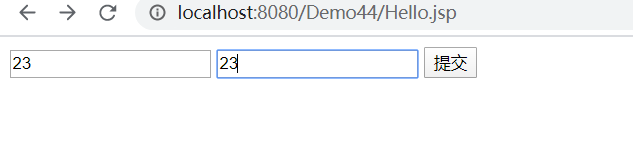
控制台打印:
username=23&password=23
例4:使用统一方式获取请求参数
	由例2、例3可知,
		  	 GET方式:请求参数放在URI的后面
		  			 req.getQueryString(); 	获取GET方式参数(?后面的键值对)

			 POST方式:请求参数放在实体内容中
					 req.getInputStream();	获取POST方式参数

	两种方式都可以获取请求参数,只不过获取的参数还需要进一步解析,并且
	对于提交方式所使用的获取参数的方法也不一致,所以,我们在此基础之上,
	提出了统一获取请求参数的方式。
public class HelloWorld  extends HttpServlet{

	@Override
	protected void doGet(HttpServletRequest req, HttpServletResponse resp) throws ServletException, IOException {

		doPost(req, resp);

	}

	@Override
	protected void doPost(HttpServletRequest req, HttpServletResponse resp) throws ServletException, IOException {

		//1、根据参数名获取参数值
		String parameter = req.getParameter("username");
		System.out.println(parameter);

		//2.根据参数名获取参数集合
		// 针对复选框
		String[] values = req.getParameterValues("pwd");
		System.out.println(Arrays.toString(values));

		//3.获取所有的请求参数的key
		Enumeration<String> ens = req.getParameterNames();
		while(ens.hasMoreElements()) {
			String key = ens.nextElement();
			String value = req.getParameter(key);
			System.out.println(key+":"+value);
		}

		//4、获取参数封装的map
		Map<String, String[]> map = req.getParameterMap();
		System.out.println(map);
	}
}
例5:其他实例
实例1:
获取请求行、请求头、实体内容
index.html
<!DOCTYPE html>
<html>
<head>
<meta charset="UTF-8">
<title>Insert title here</title>
</head>
<body>
	<!-- GET请求 -->
	<form action="./hello"  method="GET" >
		用户名:<input type="text" name="name" /><br/>
		密码: <input type="password" name="pwd"/>
		<input type="submit" value="提交"/>
	</form>
	<br/>
	<!-- POST请求 -->
	<form action="./hello"  method="POST" >
		用户名:<input type="text" name="name" /><br/>
		密码: <input type="password" name="pwd"/>
		<input type="submit" value="提交"/>
	</form>
</body>
</html>
Hello .java
public class Hello  extends HttpServlet{

	@Override
	protected void doGet(HttpServletRequest req, HttpServletResponse resp) throws ServletException, IOException {


		//获取请求行
		getRequestLine(req);

		//获取请求头
		getRequestHeads(req);

	    /**
		 *  请求头
		 */
		resp.getWriter().write("hello ");

	}

	@Override
	protected void doPost(HttpServletRequest req, HttpServletResponse resp) throws ServletException, IOException {

		/**
		 * 	获取实体内容
		 */
		InputStream in = req.getInputStream();


		byte[]buf=new byte[1024];
		int length=0;
		while((length=in.read(buf))>0) {
			System.out.println(new String(buf,0,length));
		}
	}


	/**
	 *   1.请求行 	 POST /day09/testMethod.html HTTP/1.1
	 */
	private void getRequestLine(HttpServletRequest req) {

		String method = req.getMethod();
		System.out.println("请求的方式:"+method);

		String requestURI = req.getRequestURI();
		StringBuffer requestURL = req.getRequestURL();
		System.out.println("获取资源标识(uri):"+requestURI);
		System.out.println("获取资源定位(url):"+requestURL);

		String protocol = req.getProtocol();
		System.out.println("获取协议版本:"+protocol);
	}

	/**
	 * 	2.获取请求头
	 */
	private void getRequestHeads(HttpServletRequest req) {

		//获取一个请求头
		String value = req.getHeader("Host");
		System.out.println("获取Key为Host的请求头:Host="+value);

		//获取多个请求头
		Enumeration<String> en = req.getHeaderNames();
		while(en.hasMoreElements()) {
			String key = en.nextElement();
			System.out.println(key+"="+req.getHeader(key));
		}
	}


}
web.xml
<?xml version="1.0" encoding="UTF-8"?>
<web-app version="2.5"
	xmlns="http://java.sun.com/xml/ns/javaee"
	xmlns:xsi="http://www.w3.org/2001/XMLSchema-instance"
	xsi:schemaLocation="http://java.sun.com/xml/ns/javaee
	http://java.sun.com/xml/ns/javaee/web-app_2_5.xsd">

  <servlet>
    <servlet-name>HelloServlet</servlet-name>
    <servlet-class>org.jsoft.demo.Hello</servlet-class>
  </servlet>

  <servlet-mapping>
    <servlet-name>HelloServlet</servlet-name>
    <url-pattern>/hello</url-pattern>
  </servlet-mapping>

</web-app>
实例2
获取get方式提交的参数、获取post方式提交的参数、统一方便的获取参数
index.html
<!DOCTYPE html>
<html>
<head>
<meta charset="UTF-8">
<title>Insert title here</title>
</head>
<body>

	<form action="/FirstServlet/testparam"  method="GET" >
		用户名:<input type="text" name="user" /><br/>
		密码: <input type="password" name="pwd"/>
		<input type="submit" value="提交"/>
	</form><br/>
	<form action="/FirstServlet/testparam"  method="post" >
		用户名:<input type="text" name="user" /><br/>
		密码: <input type="password" name="pwd"/>
		<input type="submit" value="提交"/>
	</form>

</body>
</html>
HelloServlet .java
public class HelloServlet  extends HttpServlet{

	@Override
	protected void doGet(HttpServletRequest req, HttpServletResponse resp) throws ServletException, IOException {

		//1.获取get方式提交的参数(?后面的参数)
		String queryString = req.getQueryString();
		System.out.println("获取get方式提交的参数: "+queryString);


		//2.统一方便的获取请求参数
		String userName=req.getParameter("user");
		String pwd=req.getParameter("pwd");
		System.out.println("获取参数:[userName:"+userName+" pwd:"+pwd+"]");

	}


	@Override
	protected void doPost(HttpServletRequest req, HttpServletResponse resp) throws ServletException, IOException {

		//1.获取POST方式提交的参数(实体内容)
		InputStream in=req.getInputStream();
		byte[]buf=new byte[1024];
		int length=0;
		StringBuffer sb=new StringBuffer();
		while((length=in.read(buf))!=0) {
			sb.append(new String(buf,0,length));
		}
		System.out.println("获取POST方式提交的参数: "+sb.toString());

		//2.统一方便的获取请求参数
		String userName=req.getParameter("user");
		String pwd=req.getParameter("pwd");
		System.out.println("获取参数:[userName:"+userName+" pwd:"+pwd+"]");

	}
}
web.xml
<?xml version="1.0" encoding="UTF-8"?>
<web-app version="2.5"
	xmlns="http://java.sun.com/xml/ns/javaee"
	xmlns:xsi="http://www.w3.org/2001/XMLSchema-instance"
	xsi:schemaLocation="http://java.sun.com/xml/ns/javaee
	http://java.sun.com/xml/ns/javaee/web-app_2_5.xsd">

  <servlet>
    <servlet-name>HelloServlet</servlet-name>
    <servlet-class>org.jsoft.demo.Hello</servlet-class>
  </servlet>

  <servlet-mapping>
    <servlet-name>HelloServlet</servlet-name>
    <url-pattern>/hello</url-pattern>
  </servlet-mapping>

   <servlet>
    <servlet-name>HelloServlet2</servlet-name>
    <servlet-class>org.jsoft.demo.HelloServlet</servlet-class>
  </servlet>

  <servlet-mapping>
    <servlet-name>HelloServlet2</servlet-name>
    <url-pattern>/testparam</url-pattern>
  </servlet-mapping>

</web-app>
实例3:
index.html
<!DOCTYPE html>
<html>
<head>
<meta charset="UTF-8">
<title>Insert title here</title>
</head>
<body>

	<form action="/FirstServlet/testparam"  method="GET" >
		用户名:<input type="text" name="user" /><br/>
		密码: <input type="password" name="pwd"/>

		性别:<input type="radio" name="sex" value="man"/>男
		<input type="radio" name="sex" value="woman"/>女 <br/>

		爱好:<input type="checkbox" name="hobit" value="basketball"/>篮球
		<input type="checkbox" name="hobit" value="man"/>足球
		<input type="checkbox" name="hobit" value="man"/>黑球 <br/>

		籍贯:<select  name="jg">
				<option>汉族</option>
				<option>壮族</option>
			</select><br/>
		个人介绍:<textarea rows="10" cols="10" name="info"></textarea><br/>

		<input type="submit" value="提交"/>
	</form><br/>


</body>
</html>
HelloServlet.java
public class HelloServlet  extends HttpServlet{
	@Override
	protected void doGet(HttpServletRequest req, HttpServletResponse resp) throws ServletException, IOException {


		//获取get方式提交的参数(?后面的参数)
		String queryString = req.getQueryString();
		System.out.println("获取get方式提交的参数: "+queryString);
		System.out.println("===========================");


		//获取请求参数
		System.out.println("统一方便的方式获取参数");
		String userName=req.getParameter("user");
		String pwd=req.getParameter("pwd");
		String sex=req.getParameter("sex");
		String jg=req.getParameter("jg");
		String info=req.getParameter("info");
		System.out.println("user:"+userName);
		System.out.println("pwd:"+pwd);
		System.out.println("sex:"+sex);
		System.out.println("jg:"+jg);
		System.out.println("info:"+info);

		String[] hs = req.getParameterValues("hobit");
		System.out.println("hobit:"+Arrays.toString(hs));


	}


}
web.xml
<?xml version="1.0" encoding="UTF-8"?>
<web-app version="2.5"
	xmlns="http://java.sun.com/xml/ns/javaee"
	xmlns:xsi="http://www.w3.org/2001/XMLSchema-instance"
	xsi:schemaLocation="http://java.sun.com/xml/ns/javaee
	http://java.sun.com/xml/ns/javaee/web-app_2_5.xsd">

  <servlet>
    <servlet-name>HelloServlet</servlet-name>
    <servlet-class>org.jsoft.demo.Hello</servlet-class>
  </servlet>

  <servlet-mapping>
    <servlet-name>HelloServlet</servlet-name>
    <url-pattern>/hello</url-pattern>
  </servlet-mapping>

   <servlet>
    <servlet-name>HelloServlet2</servlet-name>
    <servlet-class>org.jsoft.demo.HelloServlet</servlet-class>
  </servlet>

  <servlet-mapping>
    <servlet-name>HelloServlet2</servlet-name>
    <url-pattern>/testparam</url-pattern>
  </servlet-mapping>

</web-app>


4.2.3 请求参数的乱码问题
inedx.html
<!DOCTYPE html>
<html>
<head>
<meta charset="UTF-8">
<title>Insert title here</title>
</head>
<body>

	<form action="/FirstServlet/testparam"  method="post" >
		用户名:<input type="text" name="user" /><br/>
		密码: <input type="password" name="pwd"/>

		性别:<input type="radio" name="sex" value="男"/>男
		<input type="radio" name="sex" value="女"/>女 <br/>

		爱好:<input type="checkbox" name="hobit" value="篮球"/>篮球
		<input type="checkbox" name="hobit" value="足球"/>足球
		<input type="checkbox" name="hobit" value="黑球"/>黑球 <br/>

		籍贯:<select  name="jg">
				<option value="汉族">汉族</option>
				<option value="壮族">壮族</option>
			</select><br/>
		个人介绍:<textarea rows="10" cols="10" name="info"></textarea><br/>

		<input type="submit" value="提交"/>
	</form><br/>


</body>
</html>
HelloServlet.java
public class HelloServlet  extends HttpServlet{

		@Override
	protected void doPost(HttpServletRequest req, HttpServletResponse resp) throws ServletException, IOException {


		String user= req.getParameter("user");
		System.out.println("user:"+user);

		String sex= req.getParameter("sex");
		System.out.println("sex:"+sex);

	}
}


前端传入中文,后台出现乱码。
4.2.1 乱码的原因分析

		1.浏览器请求html资源后,解析html文档会按照其指定的编码表进行解码
									<meta charset="UTF-8">
		2.在html中提交数据给后台,输入html页面上的数据为字符,字符会按照html页面指定的编码集进行编码,然后传输给后台。
		3.HttpServletRequest 对象读取数据时,默认使用的编码表是ISO-8859-1。
		4.如果前台传入数据编码时用的编码表和后台解析数据用的编码表不同,则会出现乱码。
4.2.1 乱码的解决方式
	前端传入数据采用的编码表和后端解析数据采用的编码表要一致。

	请求参数乱码解决方式:

			修改get方式的参数编码表:     手动解码
								String name = new String(name.getBytes("iso-8859-1"),"utf-8");
					该方法适用于所有提交方式,但是获取的请求数据每一个都要手动解码

			修改post方式参数编码表:	   指定编码表
								req.setCharacterEncoding("utf-8");
								req.getParamter("name")
								...
					 该方法只适用于post

1)方式一:手动解码
由于前端采用的编码表是UTF-8,所以后台解析的数据需要重新编码。代码修改:
	@Override
	protected void doPost(HttpServletRequest req, HttpServletResponse resp) throws ServletException, IOException {

		String user= req.getParameter("user");

		//手动编码:由于user是按照iso-8859-1进行的解码,所以需要重新编码获取原始的二进制数据
		byte[] temp = user.getBytes("iso-8859-1");
		//手动解码:获取原始的二进制数据,然后按照utf-8解码
		user=new String(temp,"utf-8");

		System.out.println("user:"+user);
	}
该方式通用,只不过每一个参数都要手动解码。
2)方式二:在获取参数之前,设置参数的编码表
req.setCharacterEncoding("utf-8");
该方法设置的编码集只对实体内容有效,即对post提交的内容有效,而对get方式提交的数据是无效的。
代码修改:
@Override
	protected void doPost(HttpServletRequest req, HttpServletResponse resp) throws ServletException, IOException {
		//设置编码表
		req.setCharacterEncoding("utf-8");

		String user= req.getParameter("user");
		System.out.println("user:"+user);

		String sex= req.getParameter("sex");
		System.out.println("sex:"+sex);
	}
4.3 表单方式提交的内容与后台接受参数的关系
	form 表单:
	<form action="{pageContext.request.requestURI}/hello" method="get">
		<input type="text"  name="username">
		<input type="text"  name="password">
		<input type="submit"  value="提交">
	</form>

	后台:
		String parameter = req.getParameter("username");
		String parameter = req.getParameter("password");

	由上可知,表单标签的name与标签的值value,构成 key-value。
			  后台获取的参数就是  key-value
五、 HTTP 响应
	HTTP/1.1 200 OK              	  		-- 响应行
	Server: Apache-Coyote/1.1        	    -- 响应头(key-vaule)
	Content-Length: 24
	Date: Fri, 30 Jan 2015 01:54:57 GMT
	                                        -- 一个空行
	this is hello servlet!!!                -- 实体内容
5.1 Http响应详解
5.1.1 响应行
			 #HTTP协议版本  HTTP/1.1

			 #状态码 : 服务器处理请求的结果(状态)
					常见的状态:
						200 :  表示请求处理完成并完美返回
						302:   表示请求需要进一步细化。
						404:   表示客户访问的资源找不到。
						500:   表示客户访问的资源找到了,但是服务器发生错误。(服务器内部错误)

			 #状态描述 		 ok
5.1.2 常见的响应头
		Location: http://www.it315.org/index.jsp   -表示重定向的地址,该头和302的状态码一起使用。
		Server:apache tomcat                     ---表示服务器的类型
		Content-Encoding: gzip                 -- 表示服务器发送给浏览器的数据压缩类型
		Content-Length: 80                      --表示服务器发送给浏览器的数据长度
		Content-Language: zh-cn               --表示服务器支持的语言
		Content-Type: text/html; charset=GB2312   --表示服务器发送给浏览器的数据类型及内容编码
		Last-Modified: Tue, 11 Jul 2000 18:23:51 GMT  --表示服务器资源的最后修改时间
		Refresh: 1;url=http://www.it315.org     --表示定时刷新
		Content-Disposition: attachment; filename=aaa.zip --表示告诉浏览器以下载方式打开资源(下载文件时用到)
		Transfer-Encoding: chunked
		Set-Cookie:SS=Q0=5Lb_nQ; path=/search   --表示服务器发送给浏览器的cookie信息(会话管理用到)

		Expires: -1                           --表示通知浏览器不进行缓存
		Cache-Control: no-cache
		Pragma: no-cache

		Connection: close/Keep-Alive           --表示服务器和浏览器的连接状态。close:关闭连接 keep-alive:保存连接
5.2 HttpServletResponse对象
对于服务器发送给浏览器的数据,tomcat会把响应的数据封装到HttpServletResponse对象中。

	1)tomcat把请求的数据封装到request对象中,把响应的数据封装到
	  response对象中。
	对于开发者来说,tomcat封装响应数据之前,开发者要在Servlet中
	  设置响应的数据。
	2)romcat服务器调用doGet()、doPost() 传入参数


HttpServletResponse对象修改响应信息:

				响应行:
						response.setStatus()  设置状态码
				响应头:
						response.setHeader("name","value")  设置响应头
				实体内容:
						response.getWriter().writer();   发送字符实体内容
						response.getOutputStream().writer()  发送字节实体内容
5.2.1 HttpServletResponse对象的API
			响应行:
					response.setStatus()  设置状态码

			响应头:
					response.setHeader("name","value")  设置响应头

			实体内容:
					response.getWriter().writer();   发送字符实体内容
					response.getOutputStream().writer()  发送字节实体内容
例1:修改状态码例子:
修改了状态码404,但是数据其实写出来了。
public class HelloServlet  extends HttpServlet{

@Override
	protected void doGet(HttpServletRequest req, HttpServletResponse resp) throws ServletException, IOException {

		resp.setStatus(404);

		//输出404页面
		resp.getWriter().write("<!doctype html><html lang=\"en\"><head><title>HTTP Status 404 – Not Found</title><style type=\"text/css\">H1 {font-family:Tahoma,Arial,sans-serif;color:white;background-color:#525D76;font-size:22px;} H2 {font-family:Tahoma,Arial,sans-serif;color:white;background-color:#525D76;font-size:16px;} H3 {font-family:Tahoma,Arial,sans-serif;color:white;background-color:#525D76;font-size:14px;} BODY {font-family:Tahoma,Arial,sans-serif;color:black;background-color:white;} B {font-family:Tahoma,Arial,sans-serif;color:white;background-color:#525D76;} P {font-family:Tahoma,Arial,sans-serif;background:white;color:black;font-size:12px;}A {color : black;}A.name {color : black;}HR {color : #525D76;}</style></head><body><h1>HTTP Status 404 – Not Found</h1><hr class=\"line\" /><p><b>Type</b> Status Report</p><p><b>Message</b> /FirstServlet/testparam2</p><p><b>Description</b> The origin server did not find a current representation for the target resource or is not willing to disclose that one exists.</p><hr class=\"line\" /><h3>Apache Tomcat/7.0.94</h3></body></html>");
		resp.getWriter().write("fuck");
	}
}

例2:修改响应头、实体内容例子
@Override
	protected void doGet(HttpServletRequest req, HttpServletResponse resp) throws ServletException, IOException {

		//设置状态码
		resp.setStatus(404);

		//设置响应头
		resp.setHeader("Server", "JBL");

		//设置实体内容
		resp.getWriter().write("test");
	}

5.2.3 一些请求头的作用
5.2.3.1 请求重定向(location)
1.1 来源:
	在html页面中,我们可以通过a标签、form来进行跳转资源,但是
	在servlet中如何进行资源跳转。
	在servet中我们可以使用 请求重定向 的方式进行跳转资源跳转
	(跳转到页面、跳转到Servlet ....)。
1.2 作用:
请求重定向相当于超链接跳转。请求重定向,浏览器向服务器发送了两次请求。
1.3 原理:

1.4 实现:
		实现方式一:
				 设置状态码302+响应头location

					1.设置响应的状态码为302
					2.设置响应的location响应头。
								eg:
									resp.setStatus(302);
									resp.setHeader("location", "/b.html");
		实现方式二:

					response.sendRedirect("/test/b.html");
1)设置状态码302+响应头location
		    1.设置响应的状态码为302
			2.设置响应的location响应头。
浏览器认识302的状态码,当浏览器接收到302的状态码,会再次自动向服务器发出一个请求,请求的地址就是location的value值。
例子:
浏览器访问a.html,点击提交,会请求HelloServlet 后,又自动跳转到b.html
HelloServlet .java
public class HelloServlet extends HttpServlet{

	@Override
	protected void doGet(HttpServletRequest req, HttpServletResponse resp) throws ServletException, IOException {
		System.out.println("..");
		resp.setStatus(302);
		resp.setHeader("location", "/b.html");
	}

}
a.html
<!DOCTYPE html>
<html>
<head>
<meta charset="UTF-8">
<title>Insert title here</title>
</head>
<body>
	<form action="./hello">
		<input type="submit">

	</form>
</body>
</html>
location响应头的地址设置问题:
项目结构:

设置路径:/项目名/资源名
public class HelloServlet extends HttpServlet{
	@Override
	protected void doGet(HttpServletRequest req, HttpServletResponse resp) throws ServletException, IOException {
		System.out.println("..");
		resp.setStatus(302);
		resp.setHeader("location", "/test2/b.html");
	}

}
设置路径: ./资源名
public class HelloServlet extends HttpServlet{

	@Override
	protected void doGet(HttpServletRequest req, HttpServletResponse resp) throws ServletException, IOException {
		System.out.println("..");
		resp.setStatus(302);
		resp.setHeader("location", "./b.html");
	}
}
设置路径 : 网络路径
public class HelloServlet extends HttpServlet{

	@Override
	protected void doGet(HttpServletRequest req, HttpServletResponse resp) throws ServletException, IOException {
		System.out.println("..");
		resp.setStatus(302);
		resp.setHeader("location", "http://www.baidu.com?id=fuck");
	}

}
2)简化写法
response.sendRedirect("/test/b.html");
这个方法和第一种方法实现的效果相同,它只是上一种方式的简化写法。
public class HelloServlet extends HttpServlet{
	@Override
	protected void doGet(HttpServletRequest req, HttpServletResponse resp) throws ServletException, IOException {
		resp.sendRedirect("/test2/b.html");
	}
}
response.sendRedirect的地址设置问题
public class HelloServlet extends HttpServlet{

	@Override
	protected void doGet(HttpServletRequest req, HttpServletResponse resp) throws ServletException, IOException {

		//   1- /项目名/资源名
		//resp.sendRedirect("/test2/b.html");

		//   2- ./资源名
		//resp.sendRedirect("./b.html");

		//   3- http网络全路径
		resp.sendRedirect("http://www.java1234.com");


	}

}
5.2.3.2 定时刷新(refresh)
refresh响应头作用:
实现定时刷新或定时跳转其他资源
refresh响应头原理:
浏览器认识refresh响应头,得到该头信息后,就会重新请求当前资源或进行跳转
refresh响应头设置:
		resp.setHeader("refresh", "3");   每隔3s进行刷新

		resp.setHeader("refresh", "3;url=/demo/b.html");  隔3s后跳转到其他资源
例子1:
使用refresh实现时钟
HelloServlet.java
public class HelloServlet extends HttpServlet{

	@Override
	protected void doGet(HttpServletRequest req, HttpServletResponse resp) throws ServletException, IOException {

		resp.setHeader("refresh", "1");

		resp.getWriter().write(new Date().toGMTString());

	}

}
index.html
<!DOCTYPE html>
<html>
<head>
<meta charset="UTF-8">
<title>Insert title here</title>
</head>
<body>
	<form action="./hello2">
		用户名:<input type="text" />
		密码:<input type="password" />

			 <input type="submit">
	</form>
</body>
</html>

例子2:
实现3s后跳转到百度页面
public class HelloServlet extends HttpServlet{

	@Override
	protected void doGet(HttpServletRequest req, HttpServletResponse resp) throws ServletException, IOException {


		// ./资源名
		resp.setHeader("refresh", "3;url=./b.html");

		//  /项目名/资源名
		//resp.setHeader("refresh", "3;
		url=/test2/b.html");

		//http网络全路径
		//resp.setHeader("refresh", "3;url=http://www.baidu.com");

	}

}
5.2.3.3 content-Type作用
content-Type响应头作用:
服务器告诉浏览器数据类型 和 数据使用的编码表。
content-Type响应头设置:
		方法一:
			response.setHeader("content-type" ,"text/html");  设置响应的内容格式为html的文本。
			response.setHeader("content-type" ,"text/html;charset=utf-8");  设置响应的内容格式为html的文本,和设置编码集为utf-8
		方法二:
			response.setContentType("text/html"); 这个方法等价于上一个方法。

			response.setContentType("text/html;charset=utf-8");  设置响应的内容格式为html的文本,和设置编码集为utf-8

		以上两个方法互相等价


		content-type常见的值:
				在 %tomcat%/config/web.xml 中可以查找到content-type的值。

							 %tomcat%/config/web.xml:
							 ...
							 <mime-mapping>
						        <extension>jpe</extension>
						        <mime-type>image/jpeg</mime-type>
						     </mime-mapping>
						     ...
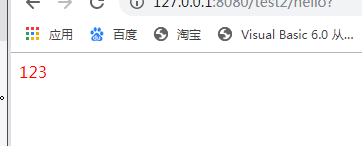
例子:
设置发送的格式为html的文本
public class HelloServlet extends HttpServlet{

	@Override
	protected void doGet(HttpServletRequest req, HttpServletResponse resp) throws ServletException, IOException {

		resp.setContentType("text/html");

		resp.getWriter().write("<font color='red'>123</font>");
	}

}
浏览器以图片的方式打开响应数据
public class HelloServlet extends HttpServlet{

	@Override
	protected void doGet(HttpServletRequest req, HttpServletResponse resp) throws ServletException, IOException {

		resp.setHeader("content-type", "image/jpg");

		File f=new File("C:\\Users\\Administrator\\Desktop\\2.jpg");
		InputStream in=new FileInputStream(f);

		byte[]buf=new byte[1024];
		int length=0;
		while((length=in.read(buf))>0){
			resp.getOutputStream().write(buf,0,length);
		}

	}

}

5.2.3.3 Content-Disposition作用
浏览器以下载图片的方式打开响应数据
	实现方式:设置两个响应头
	resp.setHeader("content-type", "image/jpg");
	resp.setHeader("Content-Disposition" ,"attachment; filename=aaa.jpg");
public class HelloServlet extends HttpServlet{

		resp.setHeader("content-type", "image/jpg");
		resp.setHeader("Content-Disposition" ,"attachment; filename=aaa.jpg");

		File f=new File("C:\\Users\\Administrator\\Desktop\\2.jpg");
		InputStream in=new FileInputStream(f);

		byte[]buf=new byte[1024];
		int length=0;
		while((length=in.read(buf))>0){
			resp.getOutputStream().write(buf,0,length);
		}

	}
}

1.2.4 响应数据的乱码问题
HelloServlet.java
public class HelloServlet extends HttpServlet{

	@Override
	protected void doGet(HttpServletRequest req, HttpServletResponse resp) throws ServletException, IOException {
		resp.getWriter().write("您好,阿里");
	}
}
a.html
<!DOCTYPE html>
<html>
<head>
<meta charset="UTF-8">
<title>Insert title here</title>
</head>
<body>
	<form action="./hello2">
		用户名:<input type="text" />
		密码:<input type="password" />

			 <input type="submit">
	</form>
</body>
</html>
web.xml
<?xml version="1.0" encoding="UTF-8"?>
<web-app version="2.5"
	xmlns="http://java.sun.com/xml/ns/javaee"
	xmlns:xsi="http://www.w3.org/2001/XMLSchema-instance"
	xsi:schemaLocation="http://java.sun.com/xml/ns/javaee
	http://java.sun.com/xml/ns/javaee/web-app_2_5.xsd">

  <servlet>
    <servlet-name>HelloServlet</servlet-name>
    <servlet-class>org.jsoft.demo.HelloServlet</servlet-class>
  </servlet>

  <servlet-mapping>
    <servlet-name>HelloServlet</servlet-name>
    <url-pattern>/hello2</url-pattern>
  </servlet-mapping>

</web-app>


原因分析:

	 	 1.HttpServlerResponse默认采用ISO-8859-1编码表。
		 2."中国"为一个字符,如果想从服务器发送给浏览器,则必须要进行编码,即采用ISO-8859-1进行编码。
		 3.ISO-8859-1 没有中文编码,所以浏览器接受数据时,出现乱码。
解决方式:
		方式一:
		在response.getWriter() 之前,使用此方法:
			response.setHeader("content-type" ,"text/html;charset=utf-8");

		方式二:
		在response.getWriter() 之前,使用此方法:
			response.setCharacterEncoding("utf-8;charset=utf-8")

		方式三:手动编码
			resp.getOutputStream().write("你好,阿里".getBytes());
方式一:手动编码
public class HelloServlet extends HttpServlet{

	@Override
	protected void doGet(HttpServletRequest req, HttpServletResponse resp) throws ServletException, IOException {
		System.out.println("...");
		//方式一:手动编码
		resp.getOutputStream().write("你好,阿里".getBytes());
	}
}
方式二:
public class HelloServlet extends HttpServlet{

	@Override
	protected void doGet(HttpServletRequest req, HttpServletResponse resp) throws ServletException, IOException {

		resp.setHeader("content-type" ,"text/html;charset=utf-8");
		resp.getWriter().write("你好,阿里");
	}
}
方式三:
public class HelloServlet extends HttpServlet{

	@Override
	protected void doGet(HttpServletRequest req, HttpServletResponse resp) throws ServletException, IOException {

			resp.setCharacterEncoding("utf-8;charset=utf-8");
			resp.getWriter().write("你好,阿里");
	}
}
六、 项目的编码问题完整解决方案
		++ 修改get方式的参数编码表:     手动解码
					String name = new String(name.getBytes("iso-8859-1"),"utf-8");

				    该方法适用于所有提交方式,但是获取的请求数据每一个都要手动解码

	    ++ 修改post方式参数编码表:	   指定编码表
								req.setCharacterEncoding("utf-8");
								req.getParamter("name")

		++ 设置响应数据的编码表:
					response.setContentType("text/html;charset=utf-8");


	  	总结:在每个servlet开头写:

			request.setCharacterEncoding("utf-8"); //该方式只是设置了post提交的编码表,对于get提交仍需手动解码。
			response.setContentType("text/html;charset=utf-8");//设置响应的编码表

总结
Http协议:
	1)http协议: 对浏览器客户端和服务器端之间数据传输的格式规范。
	2)http请求:浏览器->服务器端
	格式:
			请求行(请求方式(GET/POST) 请求资源(URI) http协议版本(http1.1))
			请求头(键值对形式存在。 host、user-agent、referer)
			一个空行
			实体内容(POST提交的参数)
		HttpServletRequest对象: 请求对象。获取请求信息。
		请求行:request.getMethod()   request.getRequestURI/getRequestURL()  request.getProtocol();
		请求头: request.getHeader("name")    request.getHeaderNames()
		实体内容: request.getInputStream()

		获取参数数据:(GET或POST)
				request.getParameter("name")  一个值的参数
				request.getParameterValues("name"); 多个值的参数
				request.getParameterNames()    所有参数

3)http响应: 服务器->浏览器端
		格式:
			响应行(http协议版本 状态码 描述)
				常用的状态码: 200   302  404   500
			响应头( location(结合302状态码完成请求重定向功能)、 refresh(定时刷新)、content-type、							content-disiposition(以下载方式打开))
			一个空行
			实体内容
		HttpServletResponse对象: 响应对象。设置响应信息。
			响应行: response.setStatus();
			响应头: response.setHeader("name","value")
			实体内容:
					(PrintWriter) response.getWriter().writer(); 字符内容
				  (OutputStream)response.getOutputStream().writer();  字节内容
4.3 Form表单问题
1)form表单项设置name名称,提交的参数会按照键值对的方式来提交给后台。
<!DOCTYPE html>
<html>
<head>
<meta charset="UTF-8">
<title>Insert title here</title>
</head>
<body>

	<form action="/FirstServlet/testparam"  method="GET" >
		用户名:<input type="text" name="user" /><br/>
		密码: <input type="password" name="pwd"/>

		性别:<input type="radio" name="sex" value="man"/>男
		<input type="radio" name="sex" value="woman"/>女 <br/>

		爱好:<input type="checkbox" name="hobit" value="basketball"/>篮球
		<input type="checkbox" name="hobit" value="man"/>足球
		<input type="checkbox" name="hobit" value="man"/>黑球 <br/>

		籍贯:<select  name="jg">
				<option>汉族</option>
				<option>壮族</option>
			</select><br/>
		个人介绍:<textarea rows="10" cols="10" name="info"></textarea><br/>

		<input type="submit" value="提交"/>
	</form><br/>


</body>
</html>

表单项提交的数据会以键值对的形式传输。
2)form表单的action路径
	使用  ./      访问当前项目下的资源
	<form action="./hello"  method="POST" >      访问当前项目下的hello资源

	使用 /项目名   访问当前项目下的资源
	<form action="/Demo/hello"  method="POST" >  访问Deom项目下的hello资源

	两者链接的路径相同,只是表达方式不一样而已。
	<!--访问Demo项目下的hello资源>
	<form action="/Demo/hello"  method="POST" >
		用户名:<input type="text" name="name" /><br/>
		密码: <input type="password" name="pwd"/>
		<input type="submit" value="提交"/>
	</form>
	<br/>
	<!--访问当前项目下的hello资源>
	<form action="./hello"  method="POST" >
		用户名:<input type="text" name="name" /><br/>
		密码: <input type="password" name="pwd"/>
		<input type="submit" value="提交"/>
	</form>


 3314
3314


 被折叠的 条评论
为什么被折叠?
被折叠的 条评论
为什么被折叠?
 到【灌水乐园】发言


