


203. 移除链表元素
题目链接: 203. 移除链表元素
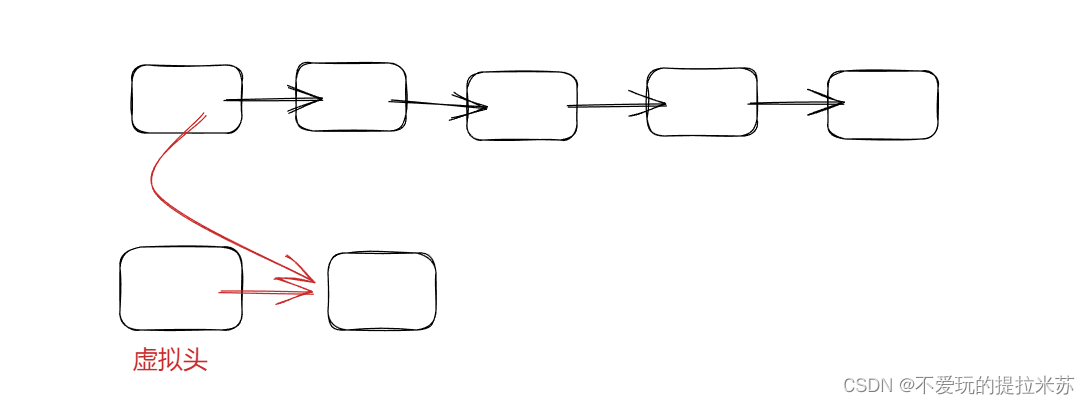
注: 本题主要学习会利用虚拟头结点
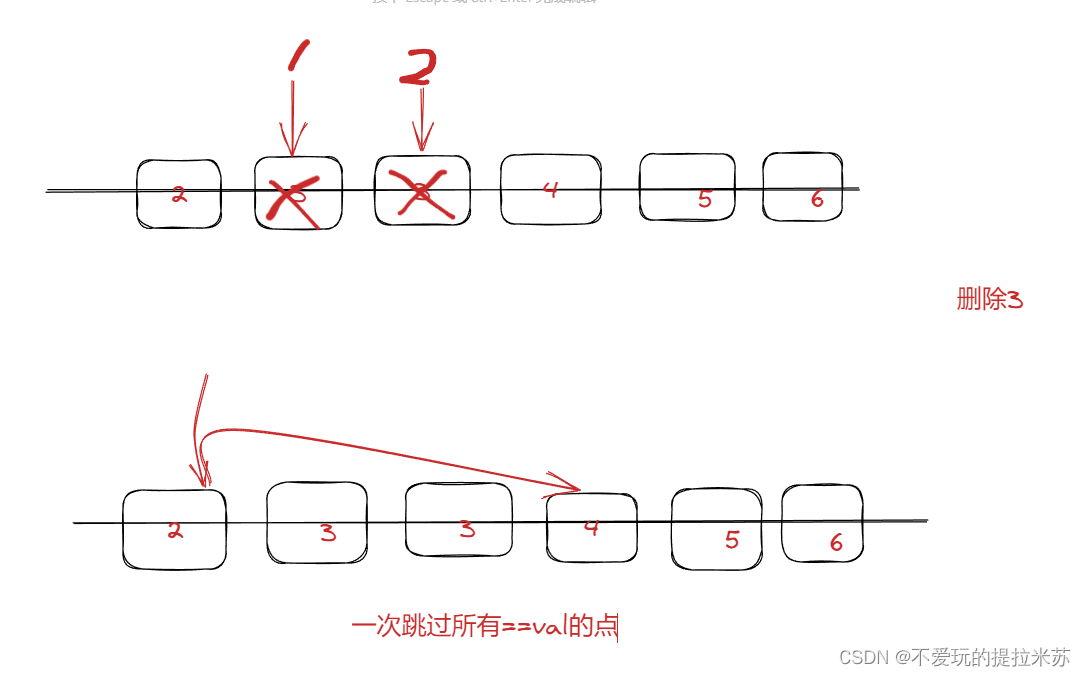
思路1: 在链表中每查找一个元素若是 == val 就删除
思路2: 让一个指针 q 走到当当前指针 p 的前面,若发现 q 的值 == val 就让他不停的跳,直到找到 != val 的点,然后直接让 p -> next = q
思路1代码:
/**
 * Definition for singly-linked list.
 * struct ListNode {
 *     int val;
 *     ListNode *next;
 *     ListNode() : val(0), next(nullptr) {}
 *     ListNode(int x) : val(x), next(nullptr) {}
 *     ListNode(int x, ListNode *next) : val(x), next(next) {}
 * };
 */
class Solution {
public:
    ListNode* removeElements(ListNode* head, int val) {
        ListNode* thead = new ListNode(0);
        thead -> next = head;
        ListNode* i = thead;
        while(i -> next != NULL){
            if(i -> next -> val == val){
                ListNode* j = i -> next -> next;
                ListNode *cur = i -> next;
                i -> next = j;
                delete cur;
            }
            else i = i -> next;
        }
        head = thead -> next;
        delete thead;
        return head;
    }
};
思路2代码:
/**
 * Definition for singly-linked list.
 * struct ListNode {
 *     int val;
 *     ListNode *next;
 *     ListNode() : val(0), next(nullptr) {}
 *     ListNode(int x) : val(x), next(nullptr) {}
 *     ListNode(int x, ListNode *next) : val(x), next(next) {}
 * };
 */
class Solution {
public:
    ListNode* removeElements(ListNode* head, int val) {
        ListNode* dummy = new ListNode(-1); //虚拟头结点
        dummy -> next = head;
        for(auto i = dummy; i != NULL; i = i ->next){
            auto q = i ->next; //快指针
            while(q && q ->val == val) q = q -> next; //不断的跳的过程,while可以理解为多次if的过程。
            i -> next = q;
        }
        return dummy -> next;
    }
};
707. 设计链表
题目链接: 707. 设计链表
思路:这是最基本的对链表的操作,一定要会,且熟练,本题难度不大,但是每一个处理相对应的细节有点烦人。
class MyLinkedList {
public:
    struct Node {
        int val;
        Node* next;
        Node(int _val): val(_val), next(NULL) {}
    }*head;

    /** Initialize your data structure here. */
    MyLinkedList() {
        head = NULL;
    }

    /** Get the value of the index-th node in the linked list. If the index is invalid, return -1. */
    int get(int index) {
        if (index < 0) return -1;
        auto p = head;
        for (int i = 0; i < index && p; i ++ ) p = p->next;
        if (!p) return -1;
        return p->val;
    }

    /** Add a node of value val before the first element of the linked list. After the insertion, the new node will be the first node of the linked list. */
    void addAtHead(int val) {
        auto cur = new Node(val);
        cur->next = head;
        head = cur;
    }

    /** Append a node of value val to the last element of the linked list. */
    void addAtTail(int val) {
        if (!head) head = new Node(val);
        else {
            auto p = head;
            while (p->next) p = p->next;
            p->next = new Node(val);
        }
    }

    /** Add a node of value val before the index-th node in the linked list. If index equals to the length of linked list, the node will be appended to the end of linked list. If index is greater than the length, the node will not be inserted. */
    void addAtIndex(int index, int val) {
        if (index <= 0) addAtHead(val);
        else {
            int len = 0;
            for (auto p = head; p; p = p->next) len ++ ;
            if (index == len) addAtTail(val);
            else if (index < len) {
                auto p = head;
                for (int i = 0; i < index - 1; i ++ ) p = p->next;
                auto cur = new Node(val);
                cur->next = p->next;
                p->next = cur;
            }
        }
    }

    /** Delete the index-th node in the linked list, if the index is valid. */
    void deleteAtIndex(int index) {
        int len = 0;
        for (auto p = head; p; p = p->next) len ++ ;
        if (index >= 0 && index < len) {
            if (!index) head = head->next;
            else {
                auto p = head;
                for (int i = 0; i < index - 1; i ++ ) p = p->next;
                p->next = p->next->next;
            }
        }
    }
};

/**
 * Your MyLinkedList object will be instantiated and called as such:
 * MyLinkedList* obj = new MyLinkedList();
 * int param_1 = obj->get(index);
 * obj->addAtHead(val);
 * obj->addAtTail(val);
 * obj->addAtIndex(index,val);
 * obj->deleteAtIndex(index);
 */
206. 反转链表
题目链接: 206. 反转链表
思路: 本题主要学会的是尾插法,在建立一个虚拟头结点的情况下,依次遍历链表,并将每个遍历到的链表元素尾插在虚拟头结点的后面(尾插法的固定操作)。
代码如下:
/**
 * Definition for singly-linked list.
 * struct ListNode {
 *     int val;
 *     ListNode *next;
 *     ListNode() : val(0), next(nullptr) {}
 *     ListNode(int x) : val(x), next(nullptr) {}
 *     ListNode(int x, ListNode *next) : val(x), next(next) {}
 * };
 */
class Solution {
public:
    ListNode* reverseList(ListNode* head) {
        ListNode* dummy = new ListNode(0);
        for(auto p = head; p;){
            auto q = p->next;
            p->next = dummy->next;
            dummy->next = p;
            p = q;
        }
        head = dummy -> next;
        return head;
    }
};


 129
129


 被折叠的 条评论
为什么被折叠?
被折叠的 条评论
为什么被折叠?
 到【灌水乐园】发言


