


springboot
创建springboot:


原理初探
自动配置:
pom.xml
- spring-boot-dependencies:核心依赖在父工程中!
- 我们在写或者引入一些Springboot以来的时候,不需要指定版本,就因为有这些版本仓库

启动器
<dependency>
    <groupId>org.springframework.boot</groupId>
    <artifactId>spring-boot-starter</artifactId>
</dependency>
启动器:说白了就是Springboot的启动场景;
主程序入口:
@SpringBootApplication
public class Demo2Application {

    public static void main(String[] args) {
        SpringApplication.run(Demo2Application.class, args);
    }

}
注解:
@SpringBootConfiguration
	@SpringBootConfiguration
	@EnableAutoConfiguration

@EnableAutoConfiguration //自动配置
	@AutoConfigurationPackage//自动配置包
		@Import({Registrar.class})//导入包注册
	@Import({AutoConfigurationImportSelector.class})//导入自动导入选择器

//获取所有配置
List<String> configurations = this.getCandidateConfigurations(annotationMetadata, attributes);
获取候选配置:
protected List<String> getCandidateConfigurations(AnnotationMetadata metadata, AnnotationAttributes attributes) {
    List<String> configurations = SpringFactoriesLoader.loadFactoryNames(this.getSpringFactoriesLoaderFactoryClass(), this.getBeanClassLoader());
    Assert.notEmpty(configurations, "No auto configuration classes found in META-INF/spring.factories. If you are using a custom packaging, make sure that file is correct.");
    return configurations;
}

结论: springboot所有自动配置都是在启动时候扫描并加载,spring.facotries所有的自动配置类都在这里面,但是不一定生效,要判断条件是否成立,只要写入对应的start,就有对应的启动器了,有了启动器。我们自动装配就会生效,然后就配置成功。
- springboot在启动的时候
- 将这些自动配置的类导入容器,自动配置就会生效。
- 以前我们需要自动配置的东西,
- 整合JavaEE,解决方案和自动配置springboot-autoconfigure-2.2.0.RELEASE.jar这个包下
- 它会把所有需要导入的组件,以类名的方式返回,这些组件就会配添加到容器;
- 容器中也会存在非常多的xxxAutoConfiguration的文件(@Bean),就是这些类给容器中导入了这个场景需要的所有组件,@Configuration,JavaConfig!
- 有了自动配置类,免去了我们手动编写配置文件的工作!
yml和properpties比较
推荐使用yml配置
server:
  port: 8081
person:
  name: xcg
  happy: false
  age: 3
  birth: 2000/3/22
  maps: {k1: v1,k2: v2}
  list:
    - code
    - music
    - girl
  dog:
    name: 旺财
    age: 10
@Component
@ConfigurationProperties(prefix = "person")
public class Person {
    private String name;
    private Boolean happy;
    private Integer age;
    private Date birth;
    private Map<String,Object> maps;
    private List<Object> list;
    private Dog dog;
}
| @ConfigurationProperties | @Value | |
|---|---|---|
| 功能 | 批量注入配置文件 | 一个个指定 |
| 松散绑定 | 支持(原Do层为lastName而配置中是last-name) | 不支持 |
| SpEL | 不支持 | 支持 |
| JSR303 | 支持 | 不支持 |
| 复杂类型对接 | 支持 | 不支持 |
JSR303校验:(@Validated)

多环境配置及配置文件位置
环境配置的优先级及位置:
file:./config/file:./classpath:/config/classpath:/
激活其他配置文件名
命名方式: application-{profile}.properties
再application.properties中激活:
# 激活其他配置文件
spring.profiles.active=dev
yml方式:
server:
  port: 8081
spring:
  profiles:
    active: dev

---
server:
  port: 8082
spring:
  profiles: dev

---
server:
  port: 8083
spring:
  profiles: test
自动装配

SpringBoot Web开发
解决的问题:
- 导入静态资源
- 首页
- jsp,模板渲染引擎
- 装配扩展SpringMVC
- 增删改查
- 拦截器
- 国际化
@Override
protected void addResourceHandlers(ResourceHandlerRegistry registry) {
    super.addResourceHandlers(registry);
    if (!this.resourceProperties.isAddMappings()) {
        logger.debug("Default resource handling disabled");
        return;
    }
    ServletContext servletContext = getServletContext();
    addResourceHandler(registry, "/webjars/**", "classpath:/META-INF/resources/webjars/");
    addResourceHandler(registry, this.mvcProperties.getStaticPathPattern(), (registration) -> {
        registration.addResourceLocations(this.resourceProperties.getStaticLocations());
        if (servletContext != null) {
            registration.addResourceLocations(new ServletContextResource(servletContext, SERVLET_LOCATION));
        }
    });
}

1.在springboot,可以使用以下方式处理静态资源
- webjars
- public,static,/**,/resources localhost:8080
2.优先级:resources>static(默认)>public
thymeleaf模板引擎
1、Thymeleaf官网: https://www.thymeleaf.org/
2、Thymeleaf在Github的主页: https://github.com/thymeleaf/thymeleaf
3、Spring官方文档:“https://docs.spring.io/spring-boot/docs/2.1.6.RELEASE/reference/htmlsingle/#using-boot-starter”,找到我们对应的版本
4、Thymeleaf在线文献:https://www.thymeleaf.org/doc/tutorials/2.1/usingthymeleaf.html#using-texts
maven依赖:
<dependency>
    <groupId>org.thymeleaf</groupId>
    <artifactId>thymeleaf-spring5</artifactId>
</dependency>
<dependency>
    <groupId>org.thymeleaf.extras</groupId>
    <artifactId>thymeleaf-extras-java8time</artifactId>
</dependency>
html的约束
xmlns="http://www.w3.org/1999/xhtml"
xmlns:th="http://www.thymeleaf.org"
[外链图片转存失败,源站可能有防盗链机制,建议将图片保存下来直接上传(img-DqInGCW7-1612598972877)(C:\Users\11218\AppData\Roaming\Typora\typora-user-images\1610694515616.png)]
自动化配置:
Spring MVC Auto-configuration
The auto-configuration adds the following features on top of Spring’s defaults:
- Inclusion of
ContentNegotiatingViewResolverandBeanNameViewResolverbeans. - Support for serving static resources, including support for WebJars (covered later in this document)).
- Automatic registration of
Converter,GenericConverter, andFormatterbeans. - Support for
HttpMessageConverters(covered later in this document). - Automatic registration of
MessageCodesResolver(covered later in this document). - Static
index.htmlsupport. - Custom
Faviconsupport (covered later in this document). - Automatic use of a
ConfigurableWebBindingInitializerbean (covered later in this document).
配置视图解析器
@Configuration
public class MyWebMvcConfig implements WebMvcConfigurer {

    @Bean
    public ViewResolver myViewResolver(){
        return new MyViewResolver();
    }

    public static class MyViewResolver implements ViewResolver{

        @Override
        public View resolveViewName(String viewName, Locale locale) throws Exception {
            return null;
        }
    }
}
实验后在dispatcherservlet的doDispatch中看到
[外链图片转存失败,源站可能有防盗链机制,建议将图片保存下来直接上传(img-ZdHKmmPK-1612598972878)(C:\Users\11218\AppData\Roaming\Typora\typora-user-images\1610780542361.png)]
自动配置的扩展
在springboot中,有非常多的xxxConfiguration帮助我们进行扩展配置,只要看见了这个东西,就要注意了
案例员工管理
1、dao伪造数据
//员工dao
public class EmployeeDao {

    //模拟数据中的数据
    private static Map<Integer, Employee> employeeMap = null;

    //员工所属部门
    @Autowired
    private DepartmentDao departmentDao;
    static {
        employeeMap = new HashMap<Integer, Employee>();

        employeeMap.put(1001,new Employee(1001,"AA","1121885408@qq.com",0,new Department(101,"教学部")));
        employeeMap.put(1002,new Employee(1002,"BB","1121885408@qq.com",0,new Department(102,"市场部")));
        employeeMap.put(1003,new Employee(1003,"CC","1121885408@qq.com",0,new Department(103,"校验部")));
        employeeMap.put(1004,new Employee(1004,"DD","1121885408@qq.com",0,new Department(104,"人管部")));
        employeeMap.put(1005,new Employee(1005,"EE","1121885408@qq.com",0,new Department(105,"后勤部")));

    }

    //主键自增
    private static Integer initId = 1006;
    //增加一个员工
    public void save(Employee employee){
        if (employee.getId()==null){
            employee.setId(initId++);
        }

        employee.setDepartment(departmentDao.getDepartmentById(employee.getDepartment().getId()));

        employeeMap.put(employee.getId(),employee);
    }

    //查询全部员工
    public Collection<Employee> getAll(){
        return employeeMap.values();
    }

    //通过id查询
    public Employee getEmployeeById(Integer id){
        return employeeMap.get(id);
    }

    //删除员工
    public void delete(Integer id){
        employeeMap.remove(id);
    }

}
2、与thymeleaf结合后需要使用静态资源,需要@{}
3、国际化步骤:
- 在resources下创建i18n包,并建立相关properties,填写对应文字转化
- 静态页面由于使用thymeleaf利用
#{}替换所需转换的文字,注意有些需要使用[[#{}]] - 在config中配置MyLocalResover
public class MyLocalResover implements  LocaleResolver{

    //解析请求
    @Override
    public Locale resolveLocale(HttpServletRequest request) {
        //获取语言参数
        String language = request.getParameter("l");

        Locale locale = Locale.getDefault();//如果没有就使用默认

        //如果不为空携带国际化参数
        if (!StringUtils.isEmpty(language)){
            String[] s = language.split("_");
            locale = new Locale(s[0],s[1]);
        }

        return locale;
    }

    @Override
    public void setLocale(HttpServletRequest request, HttpServletResponse response, Locale locale) {

    }
}
- 在MyWebMvcConfig中进行bean注册
@Bean
public LocaleResolver localeResolver(){
    return new MyLocalResover();
}
4、登录和拦截器
//拦截器
public class LoginHandlerInterceptor implements HandlerInterceptor {

    @Override
    public boolean preHandle(HttpServletRequest request, HttpServletResponse response, Object handler) throws Exception {
        //登陆成功后又用户session
        Object loginUser = request.getSession().getAttribute("loginUser");

        if (loginUser==null){//没有登陆
            request.setAttribute("msg","没有权限,请先登录");
            request.getRequestDispatcher("/index.html").forward(request,response);
            return false;
        }else{
            return true;
        }
    }
}
5、员工列表及thmeleaf整合
- 对于一些重复的框架用
th:fragment=""及<div th:insert="~{common/commons::topbar}"></div> - thmeleaf传参加()
例如:<div th:insert="~{common/commons::sidebar(active='main.html')}"></div>
- 通过传的参数三目运算得到侧边栏字体高亮
th:class="${active=='list.html'?'nav-link active':'nav-link'}" - 员工列表代码
<table class="table table-striped table-sm">
    <thead>
        <tr>
            <th>id</th>
            <th>lastName</th>
            <th>email</th>
            <th>gender</th>
            <th>department</th>
            <th>birth</th>
            <th>操作</th>
        </tr>
    </thead>
    <tbody>
        <tr th:each="emp:${emps}">
            <td th:text="${emp.getId()}"></td>
            <td th:text="${emp.getLastName()}"></td>
            <td th:text="${emp.getEmail()}"></td>
            <td th:text="${emp.getGender()}"></td>
            <td th:text="${emp.department.getDepartmentName()}"></td>
            <!--${#dates.format(date, 'dd/MMM/yyyy HH:mm')}-->
            <td th:text="${#dates.format(emp.getBirth(),'yyyy/MM/dd HH:mm')}"></td>
            <td>
                <button class="btn btn-sm btn-primary">编辑</button>
                <button class="btn btn-sm btn-danger">删除</button>
            </td>
        </tr>
    </tbody>
</table>
6、增删改
Data
官网:https://spring.io/projects/spring-data
Druid依赖
<!-- https://mvnrepository.com/artifact/com.alibaba/druid -->
<dependency>
    <groupId>com.alibaba</groupId>
    <artifactId>druid</artifactId>
    <version>1.2.4</version>
</dependency>
application.yml
spring:
  datasource:
    username: root
    password: root
    url: jdbc:mysql://localhost:3306/mybatis?serverTimezone=UTC&useUnicode=true&characterEncoding=utf-8
    driver-class-name: com.mysql.cj.jdbc.Driver
    type: com.alibaba.druid.pool.DruidDataSource

    #Spring Boot 默认是不注入这些属性值的,需要自己绑定
    #druid 数据源专有配置
    initialSize: 5
    minIdle: 5
    maxActive: 20
    maxWait: 60000
    timeBetweenEvictionRunsMillis: 60000
    minEvictableIdleTimeMillis: 300000
    validationQuery: SELECT 1 FROM DUAL
    testWhileIdle: true
    testOnBorrow: false
    testOnReturn: false
    poolPreparedStatements: true

    #配置监控统计拦截的filters,stat:监控统计、log4j:日志记录、wall:防御sql注入
    #如果允许时报错  java.lang.ClassNotFoundException: org.apache.log4j.Priority
    #则导入 log4j 依赖即可,Maven 地址:https://mvnrepository.com/artifact/log4j/log4j
    filters: stat,wall,log4j
    maxPoolPreparedStatementPerConnectionSize: 20
    useGlobalDataSourceStat: true
    connectionProperties: druid.stat.mergeSql=true;druid.stat.slowSqlMillis=500
Mybatis
mysql连接依赖
<dependency>
    <groupId>mysql</groupId>
    <artifactId>mysql-connector-java</artifactId>
</dependency>
数据库连接池配置
spring.datasource.username=root
spring.datasource.password=root
spring.datasource.url=jdbc:mysql://localhost:3306/mybatis?serverTimezone=UTC&useUnicode=true&characterEncoding=utf-8
spring.datasource.driver-class-name=com.mysql.cj.jdbc.Driver

#整合mybatis
mybatis.type-aliases-package=com.xv.pojo
mybatis.mapper-locations=classpath:mybatis/mapper/*.xml
SpringSecurity
shiro、SpringSecurity
认证、授权
图标:https://zijieke.com/semantic-ui/introduction/getting-started.php
登录与认证的整合
//aop
@EnableWebSecurity
public class SecurityConfig extends WebSecurityConfigurerAdapter {

    //链式编程
    @Override
    protected void configure(HttpSecurity http) throws Exception {
        //首页所有人访问
        http.authorizeRequests()
                .antMatchers("/").permitAll()
                .antMatchers("/level1/**").hasRole("vip1")
                .antMatchers("/level2/**").hasRole("vip2")
                .antMatchers("/level3/**").hasRole("vip3");

        //没有权限默认跳到登录页面(默认是spring的)
        http.formLogin().loginPage("/toLogin").loginProcessingUrl("/login");

        //登出失败伪造失败
        http.csrf().disable();

        //注销
        http.logout();

        http.logout().logoutSuccessUrl("/");

        //开启记住我,默认两周
        http.rememberMe().rememberMeParameter("remember");
    }

    //认证
    //密码编码
    //再spring security 5+ 新增了很多的加密方法
    @Override
    protected void configure(AuthenticationManagerBuilder auth) throws Exception {
        auth.inMemoryAuthentication().passwordEncoder(new BCryptPasswordEncoder())
                .withUser("xcg").password(new BCryptPasswordEncoder().encode("123456")).roles("vip1","vip2")
                .and()
                .withUser("root").password(new BCryptPasswordEncoder().encode("123456")).roles("vip1","vip2","vip3")
                .and()
                .withUser("guest").password(new BCryptPasswordEncoder().encode("123456")).roles("vip1");

    }
}
与thymeleaf结合显示(springbootparent的版本更换成2.0.9)
<!--登录注销-->
<div class="right menu">
    <!--未登录-->
    <div sec:authorize="!isAuthenticated()">
        <a class="item" th:href="@{/toLogin}">
            <i class="address card icon"></i> 登录
        </a>
    </div>
    <!--已登录:用户,注销-->
    <div sec:authorize="isAuthenticated()">
        <a class="item">
            用户名:<span sec:authentication="name"></span>
            <!--角色:<span sec:authentication="principal.getAuthorities()"></span>-->
        </a>
    </div>
    <div sec:authorize="isAuthenticated()">
        <a class="item" th:href="@{/logout}">
            <i class="sign-out icon"></i> 注销
        </a>
    </div>
</div>

<div class="column" sec:authorize="hasRole('vip1')">
                <div class="ui raised segment">
                    <div class="ui">
                        <div class="content">
                            <h5 class="content">Level 1</h5>
                            <hr>
                            <div><a th:href="@{/level1/1}"><i class="bullhorn icon"></i> Level-1-1</a></div>
                            <div><a th:href="@{/level1/2}"><i class="bullhorn icon"></i> Level-1-2</a></div>
                            <div><a th:href="@{/level1/3}"><i class="bullhorn icon"></i> Level-1-3</a></div>
                        </div>
                    </div>
                </div>
            </div>

            <div class="column" sec:authorize="hasRole('vip2')">
                <div class="ui raised segment">
                    <div class="ui">
                        <div class="content">
                            <h5 class="content">Level 2</h5>
                            <hr>
                            <div><a th:href="@{/level2/1}"><i class="bullhorn icon"></i> Level-2-1</a></div>
                            <div><a th:href="@{/level2/2}"><i class="bullhorn icon"></i> Level-2-2</a></div>
                            <div><a th:href="@{/level2/3}"><i class="bullhorn icon"></i> Level-2-3</a></div>
                        </div>
                    </div>
                </div>
            </div>

            <div class="column" sec:authorize="hasRole('vip3')">
                <div class="ui raised segment">
                    <div class="ui">
                        <div class="content">
                            <h5 class="content">Level 3</h5>
                            <hr>
                            <div><a th:href="@{/level3/1}"><i class="bullhorn icon"></i> Level-3-1</a></div>
                            <div><a th:href="@{/level3/2}"><i class="bullhorn icon"></i> Level-3-2</a></div>
                            <div><a th:href="@{/level3/3}"><i class="bullhorn icon"></i> Level-3-3</a></div>
                        </div>
                    </div>
                </div>
            </div>
<parent>
    <groupId>org.springframework.boot</groupId>
    <artifactId>spring-boot-starter-parent</artifactId>
    <version>2.0.9.RELEASE</version>
    <relativePath></relativePath> <!-- lookup parent from repository -->
</parent>
Shiro
快速开始
1、导入依赖
2、配置文件
3、helloworld
// 环境搭建
Factory<SecurityManager> factory = new IniSecurityManagerFactory("classpath:shiro.ini");
SecurityManager securityManager = factory.getInstance();
SecurityUtils.setSecurityManager(securityManager);

// 获取当前执行用户
Subject currentUser = SecurityUtils.getSubject();

// 获取shiro的session
Session session = currentUser.getSession();
// session设置值
session.setAttribute("someKey", "aValue");
// session获取值
String value = (String) session.getAttribute("someKey");
if (value.equals("aValue")) {
    log.info("Retrieved the correct value! [" + value + "]");
}

//认证
if (!currentUser.isAuthenticated()) {
    UsernamePasswordToken token = new UsernamePasswordToken("lonestarr", "vespa");
    // 记住我
    token.setRememberMe(true);
    try {
        currentUser.login(token);
    } catch (UnknownAccountException uae) {
        log.info("There is no user with username of " + token.getPrincipal());
    } catch (IncorrectCredentialsException ice) {
        log.info("Password for account " + token.getPrincipal() + " was incorrect!");
    } catch (LockedAccountException lae) {
        log.info("The account for username " + token.getPrincipal() + " is locked.  " +
                 "Please contact your administrator to unlock it.");
    }
    // ... catch more exceptions here (maybe custom ones specific to your application?
    catch (AuthenticationException ae) {
        //unexpected condition?  error?
    }
}

//say who they are:
//print their identifying principal (in this case, a username):
log.info("User [" + currentUser.getPrincipal() + "] logged in successfully.");

// 当前用户是否有这个角色
if (currentUser.hasRole("schwartz")) {
    log.info("May the Schwartz be with you!");
} else {
    log.info("Hello, mere mortal.");
}

//粗粒度度
// 测试当前用户是否被授权
if (currentUser.isPermitted("lightsaber:wield")) {
    log.info("You may use a lightsaber ring.  Use it wisely.");
} else {
    log.info("Sorry, lightsaber rings are for schwartz masters only.");
}

// 细粒度
if (currentUser.isPermitted("winnebago:drive:eagle5")) {
    log.info("You are permitted to 'drive' the winnebago with license plate (id) 'eagle5'.  " +
             "Here are the keys - have fun!");
} else {
    log.info("Sorry, you aren't allowed to drive the 'eagle5' winnebago!");
}

// 注销用户
currentUser.logout();

System.exit(0);
springboot集成
1、导入依赖
<dependency>
    <groupId>org.apache.shiro</groupId>
    <artifactId>shiro-spring</artifactId>
    <version>1.7.0</version>
</dependency>
2、编写ShiroConfig(注意顺序编写)和UserRealm
shiroconfig.java
@Configuration
public class ShiroConfig {

    //3、ShiroFilterFactoryBean
    @Bean
    public ShiroFilterFactoryBean shiroFilterFactoryBean(@Qualifier("securityManager") DefaultWebSecurityManager defaultWebSecurityManager){
        ShiroFilterFactoryBean shiroFilterFactoryBean = new ShiroFilterFactoryBean();
        //设置安全管理器
        shiroFilterFactoryBean.setSecurityManager(defaultWebSecurityManager);
        return shiroFilterFactoryBean;
    }


    //2、DefaultWebSecurityManager
    @Bean(name="securityManager")
    public DefaultWebSecurityManager defaultWebSecurityManager(@Qualifier("userRealm") UserRealm userRealm){
        DefaultWebSecurityManager securityManager = new DefaultWebSecurityManager();
        securityManager.setRealm(userRealm);
        return securityManager;
    }


    //1、realm
    @Bean
    public UserRealm userRealm(){
        return new UserRealm();
    }
}
UserRealm.java
//自定义的UserRealm
public class UserRealm extends AuthorizingRealm {
    //授权
    @Override
    protected AuthorizationInfo doGetAuthorizationInfo(PrincipalCollection principalCollection) {
        System.out.println("==>执行了授权");
        return null;
    }

    //认证
    @Override
    protected AuthenticationInfo doGetAuthenticationInfo(AuthenticationToken authenticationToken) throws AuthenticationException {
        System.out.println("==>执行了认证");
        return null;
    }
}
认证
MyController
@RequestMapping("/login")
public String login(String username ,String password,Model model){
    //获取当前用户
    Subject subject = SecurityUtils.getSubject();
    //封装用户的登陆数据
    UsernamePasswordToken token = new UsernamePasswordToken(username, password);

    try {
        subject.login(token);//执行登录方法
        return "index";
    }catch (UnknownAccountException e){//用户名不存在
        model.addAttribute("msg","用户名不存在");
        return "login";
    }catch (IncorrectCredentialsException e){
        model.addAttribute("msg","密码错误");
        return "login";
    }
}
UserRealm
//认证
@Override
protected AuthenticationInfo doGetAuthenticationInfo(AuthenticationToken authenticationToken) throws AuthenticationException {
    System.out.println("==>执行了认证");

    UsernamePasswordToken userToken = (UsernamePasswordToken) authenticationToken;
    User user = userService.getUserByName(userToken.getUsername());


    if (user==null){
        return null;//抛出异常
    }

    Subject currentSubject = SecurityUtils.getSubject();
    Session session = currentSubject.getSession();
    session.setAttribute("loginUser",user);

    //密码shiro自己做
    return new SimpleAuthenticationInfo(user,user.getPwd(),"");
}
shiroFilterFactoryBean
//拦截
Map<String, String> filterMap = new LinkedHashMap<>();

filterMap.put("/user/*","authc");

shiroFilterFactoryBean.setLoginUrl("/toLogin");
连接数据库
nysql+druid
依赖
<dependency>
    <groupId>mysql</groupId>
    <artifactId>mysql-connector-java</artifactId>
</dependency>
<dependency>
    <groupId>log4j</groupId>
    <artifactId>log4j</artifactId>
    <version>1.2.17</version>
</dependency>
<dependency>
    <groupId>com.alibaba</groupId>
    <artifactId>druid</artifactId>
    <version>1.2.4</version>
</dependency>
<dependency>
    <groupId>org.mybatis.spring.boot</groupId>
    <artifactId>mybatis-spring-boot-starter</artifactId>
    <version>2.1.4</version>
</dependency>
spring:
  datasource:
    username: root
    password: root
    url: jdbc:mysql://localhost:3306/mybatis?serverTimezone=UTC&useUnicode=true&characterEncoding=utf-8
    driver-class-name: com.mysql.cj.jdbc.Driver
    type: com.alibaba.druid.pool.DruidDataSource

    #Spring Boot 默认是不注入这些属性值的,需要自己绑定
    #druid 数据源专有配置
    initialSize: 5
    minIdle: 5
    maxActive: 20
    maxWait: 60000
    timeBetweenEvictionRunsMillis: 60000
    minEvictableIdleTimeMillis: 300000
    validationQuery: SELECT 1 FROM DUAL
    testWhileIdle: true
    testOnBorrow: false
    testOnReturn: false
    poolPreparedStatements: true

    #配置监控统计拦截的filters,stat:监控统计、log4j:日志记录、wall:防御sql注入
    #如果允许时报错  java.lang.ClassNotFoundException: org.apache.log4j.Priority
    #则导入 log4j 依赖即可,Maven 地址:https://mvnrepository.com/artifact/log4j/log4j
    filters: stat,wall,log4j
    maxPoolPreparedStatementPerConnectionSize: 20
    useGlobalDataSourceStat: true
    connectionProperties: druid.stat.mergeSql=true;druid.stat.slowSqlMillis=500
#整合mybatis
mybatis.type-aliases-package=com.xv.pojo
mybatis.mapper-locations=classpath:mapper/*.xml
UserMapper
@Repository
@Mapper
public interface UserMapper {

    public User getUserByName(String name);

}
UserService
public interface UserService {

    public User getUserByName(String name);
}
UserServiceImpl
@Service
public class UserServiceImpl implements UserService {

    @Autowired
    UserMapper userMapper;

    @Override
    public User getUserByName(String name) {
        User user = userMapper.getUserByName(name);
        return user;
    }
}
UserMapper
<!DOCTYPE mapper
        PUBLIC "-//mybatis.org//DTD Mapper 3.0//EN"
        "http://mybatis.org/dtd/mybatis-3-mapper.dtd">

<mapper namespace="com.xv.mapper.UserMapper">
    <resultMap type="com.xv.pojo.User" id="user">
        <id column="id" property="id"/>
        <result column="name" property="name"/>
        <result column="pwd" property="pwd"/>
        <result column="perms" property="perms"/>
    </resultMap>


    <select id="getUserByName" resultType="com.xv.pojo.User" parameterType="String">
        select * from mybatis.user where name=#{name}
    </select>


</mapper>
授权
ShiroConfig
//授权操作
filterMap.put("/user/add","perms[user:add]");
filterMap.put("/user/update","perms[user:update]");

//设置未授权页面
shiroFilterFactoryBean.setUnauthorizedUrl("/unauthotication");
UserRealm
//授权
@Override
protected AuthorizationInfo doGetAuthorizationInfo(PrincipalCollection principalCollection) {
    System.out.println("==>执行了授权");

    SimpleAuthorizationInfo info = new SimpleAuthorizationInfo();
    //info.addStringPermission("user:add");

    //拿到当前登录的这个对象
    Subject subject = SecurityUtils.getSubject();
    User user = (User)subject.getPrincipal();//拿到user对象

    //设置当前用户的权限
    info.addStringPermission(user.getPerms());


    return info;
}
整合thymeleaf
依赖
<dependency>
    <groupId>com.github.theborakompanioni</groupId>
    <artifactId>thymeleaf-extras-shiro</artifactId>
    <version>2.0.0</version>
</dependency>
ShiroConfig
//整合shiro和thymeleaf
@Bean
public ShiroDialect getShiroDialect(){
    return new ShiroDialect();
}
html应用例子:
<div shiro:hasPermission="user:add">
<a th:href="@{/user/add}">add</a>
</div>
<div shiro:hasPermission="user:update">
| <a th:href="@{/user/update}">update</a>
</div>
swagger
依赖
<!-- https://mvnrepository.com/artifact/io.springfox/springfox-swagger2 -->
<dependency>
    <groupId>io.springfox</groupId>
    <artifactId>springfox-swagger2</artifactId>
    <version>3.0.0</version>
    </dependency>
    <!-- https://mvnrepository.com/artifact/io.springfox/springfox-swagger-ui -->
<dependency>
    <groupId>io.springfox</groupId>
    <artifactId>springfox-swagger-ui</artifactId>
    <version>3.0.0</version>
</dependency>
<dependency>
    <groupId>io.springfox</groupId>
    <artifactId>springfox-boot-starter</artifactId>
    <version>3.0.0</version>
</dependency>
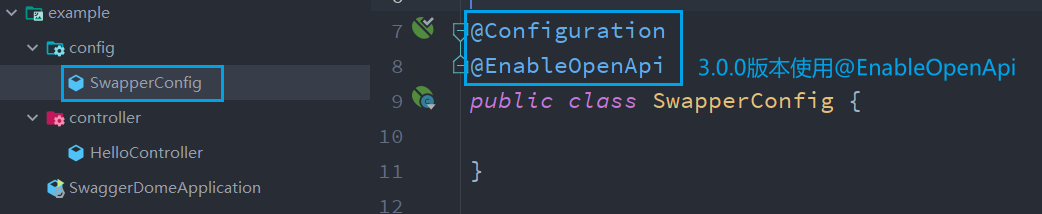
配置swaggerConfig
@Configuration
@EnableOpenApi
public class SwaggerConfig {
	 @Bean
    public Docket docket(){
        return new Docket(DocumentationType.SWAGGER_2).apiInfo(apiInfo());
    }

    private ApiInfo apiInfo(){
        //作者信息
        Contact DEFAULT_CONTACT
                = new Contact(
                "xcg",
                "",
                "1121885408@qq.com");

        return new ApiInfo("纸飞机的blog",//标题
                "很懒",
                "v1.0",
                "urn:tos",
                DEFAULT_CONTACT,
                "Apache 2.0",
                "http://www.apache.org/licenses/LICENSE-2.0",
                new ArrayList<>());
    }
}
[外链图片转存失败,源站可能有防盗链机制,建议将图片保存下来直接上传(img-lk33fgGg-1612598972879)(C:\Users\11218\AppData\Roaming\Typora\typora-user-images\1612358356533.png)]
扫描
@Bean
public Docket docket(){
    return new Docket(DocumentationType.SWAGGER_2)
        .apiInfo(apiInfo())
        .select()
        //RequestHandlerSelectors配置要扫描的接口方式
        //any配置扫描全部
        //none全部不扫描
        //withClassAnnotation类的注解
        //withMethodAnnotation方法的注解
        //basePackage包的路径
        .apis(RequestHandlerSelectors.basePackage("com.xv.controller"))
        //paths访问路径的扫描
        .paths(PathSelectors.ant("/xv/**"))
        .build();
}
开关
@Bean
public Docket docket(Environment environment){

    //获取项目环境是否位测试环境
    Profiles profiles = Profiles.of("dev","test");

    boolean flag = environment.acceptsProfiles(profiles);

    return new Docket(DocumentationType.SWAGGER_2)
        .apiInfo(apiInfo())
        .enable(flag)
        .select()
        .paths(PathSelectors.ant("/xv/**"))
        .build();
}
组设置(根据自己的需要设置多个Docket不同组)
Docket(DocumentationType.SWAGGER_2).groupName("xcg");
swagger注解
| 注解 | 用途 |
|---|---|
| @ApiOperation | 在类中的方法中注释 |
| @ApiModelProperty | 实体类的参数注释 |
| @ApiModel | 实体类注释 |
| @ApiParam(“用户名”) | 方法中参数的注释 |
swagger的调试
[外链图片转存失败,源站可能有防盗链机制,建议将图片保存下来直接上传(img-t9afVCXA-1612598972880)(C:\Users\11218\AppData\Roaming\Typora\typora-user-images\1612364480752.png)]
[外链图片转存失败,源站可能有防盗链机制,建议将图片保存下来直接上传(img-SSADPgqS-1612598972880)(C:\Users\11218\AppData\Roaming\Typora\typora-user-images\1612364514344.png)]
任务
异步任务
1、开启异步
@EnableAsync
2、在需要异步的语句上加上@Async
@Service
public class AsyncService {

    @Async
    public void test(){
        try {
            Thread.sleep(3000);
        } catch (InterruptedException e) {
            e.printStackTrace();
        }
        System.out.println("数据正在处理");
    }
}
邮件任务
1、导入依赖
<dependency>
    <groupId>org.springframework.boot</groupId>
    <artifactId>spring-boot-starter-mail</artifactId>
</dependency>
2、配置信息
spring.mail.username=1121885408@qq.com
spring.mail.password=oloolwwlrsligicc
spring.mail.host=smtp.qq.com
# 开启加密验证
spring.mail.properties.mail.smtp.ssl.enable=true
3、测试
@SpringBootTest
class Springboot10TestApplicationTests {

    @Autowired
    JavaMailSenderImpl mailSender;

    @Test
    void contextLoads() {
        //一个简单的邮件
        SimpleMailMessage mailMessage = new SimpleMailMessage();

        mailMessage.setSubject("你好徐朝刚");
        mailMessage.setText("加油!!!");
        mailMessage.setFrom("1121885408@qq.com");
        mailMessage.setTo("1121885408@qq.com");

        mailSender.send(mailMessage);

    }

    @Test
    void testMiMeMessage() throws MessagingException {
        //一个复杂邮件
        MimeMessage mimeMessage = mailSender.createMimeMessage();
        //组装
        MimeMessageHelper messageHelper = new MimeMessageHelper(mimeMessage,true);

        //正文
        messageHelper.setSubject("欢迎你!!");
        messageHelper.setText("<p style='color:red'>加油啦</p>",true);

        //附件
        messageHelper.addAttachment("a.png",new File("C:\\Users\\11218\\Desktop\\1.png"));
        messageHelper.addAttachment("1.png",new File("C:\\Users\\11218\\Desktop\\1.png"));

        //发送的人
        messageHelper.setTo("1121885408@qq.com");
        messageHelper.setFrom("1121885408@qq.com");


        mailSender.send(mimeMessage);
    }

    //spring封装发送复杂邮件

    /**
     *
     * @param title 邮件题目
     * @param text  邮件正文
     * @param html  是否是html格式
     * @param upTo  上传的文件
     * @param setTo  发送给谁
     * @param setFrom  发送来自谁
     * @throws MessagingException
     */
    public void sendSmartMail(String title, String text, boolean html, Map<String,File> upTo,String setTo,String setFrom) throws MessagingException {
        //一个复杂邮件
        MimeMessage mimeMessage = mailSender.createMimeMessage();
        //组装
        MimeMessageHelper messageHelper = new MimeMessageHelper(mimeMessage,true);

        //正文
        messageHelper.setSubject(title);
        messageHelper.setText(text,html);

        //附件
        Iterator<Map.Entry<String, File>> entries = upTo.entrySet().iterator();
        while(entries.hasNext()){
            Map.Entry<String, File> entry = entries.next();
            messageHelper.addAttachment(entry.getKey(),entry.getValue());
        }

        //发送的人
        messageHelper.setTo(setTo);
        messageHelper.setFrom(setFrom);

        mailSender.send(mimeMessage);

    }

}
定时任务
1、开启注解
@EnableScheduling
2、在需要定时执行的语句上加入@Scheduled(cron = "0/2 * * * * ?")
分布式Dubbo+Zookeeper+springboot
dubbo是一个远程调用服务的分布式框架,可以实现远程通讯、动态配置、地址路由等等功能。
比如在入门demo里的暴露服务,使得远程调用的协议可以使用dobbo协议(dubbo://x.x.x.x)或者其它协议,可以配置zookeeper集群地址,实现软负载均衡并配置均衡方式等。
在不搭配注册中心的时候,它也是可以实现服务端和调用端的通信的,这种方式是点对点通信的,所谓“没有中间商”。但是如果配置服务发布和调用端过多特别是集群的方式提供服务的时候,就会暴露许多的问题:增加节点需要修改配置文件、服务端机器宕机后不能被感知等。它可以通过集成注册中心,来动态地治理服务发布和服务调用。相当于把服务注册和发布推送的功能分摊给了(zookeeper)注册中心。
可视化界面及部署zookeeper
1、下载zookeeper及常用的可视化界面dubbo-admin
zookeeper地址:http://archive.apache.org/dist/zookeeper
dubbo-admin:https://github.com/apache/dubbo-admin/tree/master
2、配置zookeeper(bin->zkServer.cmd)遇到闪退在zkServer.cmd里添加pause
3、打包dubbo-admin
mvn clean package -Dmaven.test.skip=true
4、开启dubbo-admin
先开启zookeeper服务,然后运行dubbo-admin的jar包
账户默认:root
密码默认:root
与springboot 简单集成
1、导入依赖
<!-- https://mvnrepository.com/artifact/org.apache.dubbo/dubbo-spring-boot-starter -->
<dependency>
    <groupId>org.apache.dubbo</groupId>
    <artifactId>dubbo-spring-boot-starter</artifactId>
    <version>2.7.8</version>
</dependency>
<!-- https://mvnrepository.com/artifact/com.github.sgroschupf/zkclient -->
<dependency>
    <groupId>com.github.sgroschupf</groupId>
    <artifactId>zkclient</artifactId>
    <version>0.1</version>
</dependency>
<!-- zookeeper及冲突问题解决 -->
<dependency>
    <groupId>org.apache.curator</groupId>
    <artifactId>curator-framework</artifactId>
    <version>2.12.0</version>
</dependency>
<dependency>
    <groupId>org.apache.curator</groupId>
    <artifactId>curator-recipes</artifactId>
    <version>2.12.0</version>
</dependency>
<dependency>
    <groupId>org.apache.zookeeper</groupId>
    <artifactId>zookeeper</artifactId>
    <version>3.4.14</version>
    <!--排除这个slf4j-log4j12-->
    <exclusions>
        <exclusion>
            <groupId>org.slf4j</groupId>
            <artifactId>slf4j-log4j12</artifactId>
        </exclusion>
    </exclusions>
</dependency>
2、配置properties
#==============================provider=================================
# 服务应用名字
dubbo.application.name=provider
# 注册中心地址
dubbo.registry.address=zookeeper://127.0.0.1:2181
# 那些服务被注册
dubbo.scan.base-packages=com.xv.service

#===============================customer=================================
# 消费者取哪里拿服务需要暴露自己的名字
dubbo.application.name=customer
# 注册中心的位置
dubbo.registry.address=zookeeper://127.0.0.1:2181
3、注册服务,示例
import org.apache.dubbo.config.annotation.DubboService;
import org.springframework.stereotype.Component;

@DubboService //可以被扫描到,在项目已启动就自动注册到注册中心
@Component //使用Dubbo后,不需要使用Service注解
public class TicketServiceImpl implements TicketService{
    @Override
    public String getTicket() {
        return "《徐朝刚分布式1》";
    }
}
4、已经注册的服务进行调用
import org.apache.dubbo.config.annotation.DubboReference;
import org.springframework.stereotype.Service;

@Service
public class UserService {
    //注册中心拿
    @DubboReference
    TicketService ticketService;

    public void buyTicket(){
        String ticket = ticketService.getTicket();
        System.out.println("在注册中心拿到服务=>"+ticket);
    }
}
5、注意启动时要先打开zookeeper服务然后运行两个程序。
问题集锦:
1.项目启动就立刻结束
出现这种问题的主要原因是,项目现在没有成为一个web项目,项目中并没有相关的tomcat等的服务器,所以项目运行就结束!
如果想要一直运行,就需要在pom文件中加入对应的web坐标
 <dependency>
     <groupId>org.springframework.boot</groupId>
     <artifactId>spring-boot-starter-web</artifactId>
</dependency>
2.未加Component注解报错
3.对于pom文件里的一些爆红有可能是多了空格少了一些标签导致。
4、swagger3.0.0版本问题
4.1.springboot项目检查Maven中所导入的依赖
3.0.0版本:需添加……springboot-starter
<dependency>
            <groupId>io.springfox</groupId>
            <artifactId>springfox-boot-starter</artifactId>
            <version>3.0.0</version>
</dependency>
3.0.0版本以下:
<dependency>
            <groupId>io.springfox</groupId>
            <artifactId>springfox-swagger2</artifactId>
            <version>2.9.2</version>
        </dependency>
        <dependency>
            <groupId>io.springfox</groupId>
            <artifactId>springfox-swagger-ui</artifactId>
            <version>2.9.2</version>
</dependency>
4.2.配置Config
3.0.0之前版本需使用@EnableSwagger2注解
3.0.0版本则不需要@EnableSwagger2注解,取而代之是@EnableOpenApi
4.3.swagger-ui界面url地址的改变
3.0.0之前的版本访问是:
/swagger-ui.html
3.0.0版本访问是:
/swagger-ui/index.html


 16万+
16万+

 被折叠的 条评论
为什么被折叠?
被折叠的 条评论
为什么被折叠?
 到【灌水乐园】发言


