


yum安装LAMP部署以及测试
实验环境
使用 yum 安装 httpd mysql PHP 等软件,修改对应配置,部署简单的LAMP部署实验,并且用PHP简单代码进行启动测试。这里用的是最小化安装的centos7系统。
关闭防火墙以及selinux。
主机为centos7,对应IP为192.168.32.7
[root@centos7 ~]#ip a
1: lo: <LOOPBACK,UP,LOWER_UP> mtu 65536 qdisc noqueue state UNKNOWN group default qlen 1000
    link/loopback 00:00:00:00:00:00 brd 00:00:00:00:00:00
    inet 127.0.0.1/8 scope host lo
       valid_lft forever preferred_lft forever
    inet6 ::1/128 scope host
       valid_lft forever preferred_lft forever
2: eth0: <BROADCAST,MULTICAST,UP,LOWER_UP> mtu 1500 qdisc pfifo_fast state UP group default qlen 1000
    link/ether 00:0c:29:2e:a1:73 brd ff:ff:ff:ff:ff:ff
    inet 192.168.32.7/24 brd 192.168.32.255 scope global noprefixroute eth0
       valid_lft forever preferred_lft forever
    inet6 fe80::20c:29ff:fe2e:a173/64 scope link
       valid_lft forever preferred_lft forever
[root@centos7 ~]#cat /etc/redhat-release
CentOS Linux release 7.6.1810 (Core)
[root@centos7 ~]#
[root@centos7 ~]#firewall-cmd --state
not running
[root@centos7 ~]#
[root@centos7 ~]#getenforce
Disabled
[root@centos7 ~]#
[root@centos7 ~]#
部署HTTP以及PHP
[root@centos7 ~]#yum install httpd -y
[root@centos7 ~]#systemctl start httpd
[root@centos7 ~]#
[root@centos7 ~]#ss -ntl
State Recv-Q Send-Q Local Address:Port Peer Address:Port
LISTEN 0 128 *:22 *:*
LISTEN 0 100 127.0.0.1:25 *:*
LISTEN 0 128 :::80 :::*
LISTEN 0 128 :::22 :::*
[root@centos7 ~]#
[root@centos7 ~]#cd /var/www/html/ #跳转到网页默认路径
[root@centos7 html]#
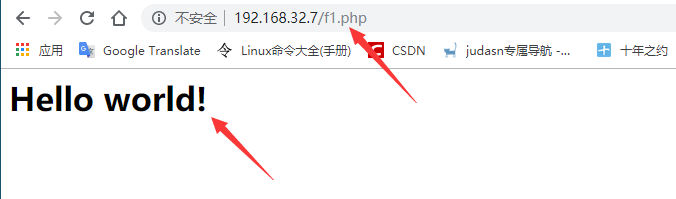
[root@centos7 html]#vim f1.php
[root@centos7 html]#cat f1.php
<?php
echo "<h1>Hello world!</h1>" #打印出Hello world!
?>
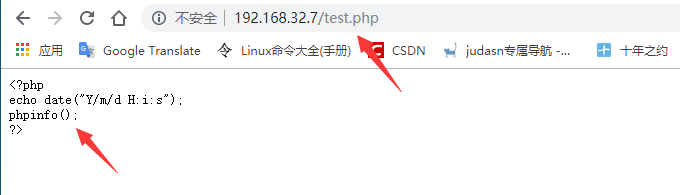
[root@centos7 html]#vim test.php
[root@centos7 html]#
[root@centos7 html]#cat test.php
<?php
echo date("Y/m/d H:i:s"); #显示时间
phpinfo(); #显示PHP默认状态页
?>
[root@centos7 html]#
访问页面查看,由于现在还没有部署PHP软件,所以解析不了PHP文件,显示原代码。

centos7安装PHP有多种方式
Module 模块方式:
yum install php
FastCGI 方式:效率更高
yum install php-fpm
这里通过Module 模块方式安装
[root@centos7 ~]#yum install php -y
由于在centos7中的模块化思想已经把php应用当作apache的模块,所以这里重启一下httpd,重新加载一下php模块即可。
[root@centos7 ~]#systemctl restart httpd
再一次访问对应页面

上述的时候默认是UTC时间。修改时间:date.timezone =Asia/Shanghai 即可
安装数据库
php-mysql :PHP连接数据库的模块
[root@centos7 ~]#yum install  php-mysql mariadb-server -y #需要安装 php-mysql连接php

[root@centos7 ~]#rpm -ql php-mysql
/etc/php.d/mysql.ini
/etc/php.d/mysqli.ini
/etc/php.d/pdo_mysql.ini
/usr/lib64/php/modules/mysql.so   #使用mysql扩展模块mysql.so连接数据,此方式已经在php 7版后淘汰
/usr/lib64/php/modules/mysqli.so  #扩展模块mysqli.so连接数据,此方式只能连接MySQL数据库,不支持其它数据库
/usr/lib64/php/modules/pdo_mysql.so  #常用模块,使用PDO扩展模块pdo_mysql.so连接数据库
,此方式可以支持连接MySQL,Oracle等多种数据库

[root@centos7 ~]#systemctl start mariadb

[root@centos7 ~]#ss -ntl
State       Recv-Q Send-Q            Local Address:Port                    Peer Address:Port
LISTEN      0      50                            *:3306                               *:*
LISTEN      0      128                           *:22                                 *:*
LISTEN      0      100                   127.0.0.1:25                                 *:*
LISTEN      0      128                          :::80                                :::*
LISTEN      0      128                          :::22                                :::*
LISTEN      0      100                         ::1:25                                       :::*
[root@centos7 ~]#
测试是否成功连接到数据库:
php使用pdo扩展连接数据库的测试代码1
[root@centos7 ~]#cd /var/www/html/

[root@centos7 html]#vim pdo1.php

[root@centos7 html]#cat pdo1.php
<?php
$dsn='mysql:host=mysqlhost;dbname=mysql';
$username='root';
$passwd='';                 #这里没有跑数据库加固脚本设置密码
$dbh=new PDO($dsn,$username,$passwd);
var_dump($dbh);
?>

[root@centos7 html]#
php使用pdo扩展连接数据库的测试代码2
[root@centos7 html]#vim pdo2.php

[root@centos7 html]#cat pdo2.php
<?php
try {
$user='root';
$pass='';               #这里没有跑数据库加固脚本设置密码
$dbh = new PDO('mysql:host=localhost;dbname=mysql', $user, $pass);
foreach($dbh->query('SELECT user,host from user') as $row) {
print_r($row);
}
$dbh = null;
} catch (PDOException $e) {
print "Error!: " . $e->getMessage() . "<br/>";
die();
}
?>


能够正常访问,说明数据库的部署也成功了。
[root@centos8 ~]#ss -ntl
State       Recv-Q Send-Q            Local Address:Port                    Peer Address:Port
LISTEN      0      50                            *:3306                               *:*
LISTEN      0      128                           *:22                                 *:*
LISTEN      0      100                   127.0.0.1:25                                 *:*
LISTEN      0      128                          :::80                                :::*
LISTEN      0      128                          :::22                                :::*
LISTEN      0      100                         ::1:25                                       :::*
[root@centos8 ~]#
端口3306和80端口都已经打开。LAMP 搭建成功。
扩展centos8中部署LAMP
[root@centos8 ~]#dnf -y install httpd php php-mysqlnd mariadb-server

#修改为prefork模式支持httpd 模块方式
[root@centos8 ~]#vim /etc/httpd/conf.modules.d/00-mpm.conf
LoadModule mpm_prefork_module modules/mod_mpm_prefork.so
#LoadModule mpm_worker_module modules/mod_mpm_worker.so
#LoadModule mpm_event_module modules/mod_mpm_event.so

[root@centos8 ~]#systemctl start httpd php-fpm mariadb
#CentOS 8的php 默认是factcgi模式 ,修改为httpd模块方式,只要把下面的注释掉就变成了FCGI模式

[root@centos8 html]#vim /etc/httpd/conf.d/php.conf
#<IfModule !mod_php5.c>
# <IfModule !mod_php7.c>
# # Enable http authorization headers
# SetEnvIfNoCase ^Authorization$ "(.+)" HTTP_AUTHORIZATION=$1
#
# <FilesMatch \.(php|phar)$>
# SetHandler "proxy:unix:/run/php-fpm/www.sock|fcgi://localhost"
# </FilesMatch>
# </IfModule>
#</IfModule>
[root@centos8 html]#systemctl restart httpd

[root@centos8 ~]#vim /var/www/html/test1.php

[root@centos8 ~]#cat /var/www/html/tset1.php
<?php
try {
$user='root';
$pass='';
$dbh = new PDO('mysql:host=localhost;dbname=mysql', $user, $pass);
foreach($dbh->query('SELECT user,host from user') as $row) {
print_r($row);
}
$dbh = null;
} catch (PDOException $e) {
print "Error!: " . $e->getMessage() . "<br/>";
die();
}             #验证是否能够访问数据库 检测数据库部署是否成功
phpinfo();    #PHP状态信息 验证是否部署PHP成功
?>

[root@centos8 html]#ss -ntl
State         Recv-Q         Send-Q                  Local Address:Port        PeAddress:Port
LISTEN        0              128                           0.0.0.0:22              0.0.0.0:*
LISTEN        0              128                           0.0.0.0:80              0.0.0.0:*
LISTEN        0              128                              [::]:22                 [::]:*
LISTEN        0              80                                  *:3306                  *:*
访问网页:

出现该页面表示搭建成功。
实现phpMyadmin应用部署
PhpMyAdmin是一个以PHP为基础,以Web-Base方式架构在网站主机上的MySQL的数据库管理工具,让管理者可用Web接口管理MySQL数据库。
准备工作:
这里部署最新版本的phpMyadmin,最新版本对于LAMP架构的版本要求有一定的要求,在centos7中需要更新版本的PHP版本。
清华大学php包仓库
[root@centos7 ~]#wget https://mirrors.tuna.tsinghua.edu.cn/remi/enterprise/remi-release-7.rpm
#下载仓库包
[root@centos7 ~]#yum install remi-release-7.rpm  #安装仓库包

[root@centos7 ~]#yum install php72-php php72-php-mbstring php72-php-mysqlnd mariadb-server -y
 #安装高版本的PHP和数据库

[root@centos7 ~]#cd /var/www/html/

[root@centos7 html]#vim f1.php
[root@centos7 html]#cat f1.php
<?php
phpinfo();
?>

[root@centos7 html]#vim test.php

[root@centos7 html]#cat test.php
<?php
try {
$user='root';
$pass='';
$dbh = new PDO('mysql:host=localhost;dbname=mysql', $user, $pass);
foreach($dbh->query('SELECT user,host from user') as $row) {
print_r($row);
}
$dbh = null;
} catch (PDOException $e) {
print "Error!: " . $e->getMessage() . "<br/>";
die();
}
?>
[root@centos7 html]#
[root@centos7 html]#cd
[root@centos7 ~]#ss -ntl
State       Recv-Q Send-Q                    Local Address:Port             Peer Address:Port
LISTEN      0      50                                    *:3306                          *:*
LISTEN      0      128                                   *:22                            *:*
LISTEN      0      100                           127.0.0.1:25                            *:*
LISTEN      0      128                                  :::80                           :::*
LISTEN      0      128                                  :::22                           :::*

说明php部署成功

说明数据库部署成功。
[root@centos7 ~]#wget https://files.phpmyadmin.net/phpMyAdmin/4.9.2/phpMyAdmin-4.9.2-all-languages.zip

[root@centos7 ~]#ll
total 10888
-rw-------. 1 root root     1612 Dec  5 21:45 anaconda-ks.cfg
-rw-r--r--  1 root root      155 Dec  5 22:10 ifcfg-eth0
-rw-r--r--. 1 root root    11537 Nov  7 17:24 init.sh
-rw-r--r--  1 root root 11128586 Dec 12 11:46 phpMyAdmin-4.9.2-all-languages.zip
[root@centos7 ~]#
[root@centos7 ~]#unzip phpMyAdmin-4.9.2-all-languages.zip

[root@centos7 ~]#mv phpMyAdmin-4.9.2-all-languages /var/www/html/pma

虽然这里界面已经出来,但是这里不允许空密码登入数据库。这里跑一下数据库加固脚本设置下密码。
[root@centos7 ~]#mysql_secure_installation #关键步骤为设置密码

成功访问。

新建一个账户和数据库,并且给予授权。
简单的实现phpMyadmin应用部署
实现 wordpress应用部署
实验环境:
部署之前已经完成LAMP基本架构部署
关闭防火墙以及selinux。
这里实验主机为centos8,对应IP为192.168.32.8
这里安装部署版本: wordpress-5.2.4-zh_CN.tar.gz
[root@centos8 ~]#ip a
1: lo: <LOOPBACK,UP,LOWER_UP> mtu 65536 qdisc noqueue state UNKNOWN group default qlen 1000
    link/loopback 00:00:00:00:00:00 brd 00:00:00:00:00:00
    inet 127.0.0.1/8 scope host lo
       valid_lft forever preferred_lft forever
    inet6 ::1/128 scope host
       valid_lft forever preferred_lft forever
2: eth0: <BROADCAST,MULTICAST,UP,LOWER_UP> mtu 1500 qdisc mq state UP group default qlen 1000
    link/ether 00:0c:29:a5:39:58 brd ff:ff:ff:ff:ff:ff
    inet 192.168.32.8/24 brd 192.168.32.255 scope global noprefixroute eth0
       valid_lft forever preferred_lft forever
[root@centos8 ~]#firewall-cmd --state
not running
[root@centos8 ~]#getenforce
Disabled
[root@centos8 ~]#
[root@centos8 ~]#ss -ntl
State         Recv-Q         Send-Q                  Local Address:Port                 Peer Address:Port
LISTEN        0              128                           0.0.0.0:22                        0.0.0.0:*
LISTEN        0              128                           0.0.0.0:80                        0.0.0.0:*
LISTEN        0              128                              [::]:22                           [::]:*
LISTEN        0              80                                  *:3306                            *:*
[root@centos8 ~]#
已经打开3306数据库端口以及HTTP服务器端口80 PHP以模块方式集成在apache服务中
重官网下载对应的wordpress安装包,然后解压到默认的hppt服务子文件下
[root@centos8 ~]#ll
total 12168
-rw-------. 1 root root     1331 Dec  6 05:52 anaconda-ks.cfg
-rw-r--r--. 1 root root    11537 Nov  7 17:24 init.sh
-rw-r--r--  1 root root 12442470 Dec 15 09:05 wordpress-5.2.4-zh_CN.tar.gz  #安装包

[root@centos8 ~]#tar xvf wordpress-5.2.4-zh_CN.tar.gz -C /var/www/html/   #解压
[root@centos8 ~]#cd /var/www/html/
[root@centos8 html]#ll
total 16
-rw-r--r-- 1 root root   20 Dec 14 20:58 f1.php
-rw-r--r-- 1 root root   39 Dec 11 14:59 index.html
-rw-r--r-- 1 root root  281 Dec 14 21:30 test.php
drwxr-xr-x 5 1006 1006 4096 Dec 13 09:08 wordpress   #解压后的子文件夹
针对wordpress用户创建一个专门的用户,来管理数据库。
[root@centos8 ~]#mysql
Welcome to the MariaDB monitor.  Commands end with ; or \g.
Your MariaDB connection id is 24
Server version: 10.3.11-MariaDB MariaDB Server

Copyright (c) 2000, 2018, Oracle, MariaDB Corporation Ab and others.

Type 'help;' or '\h' for help. Type '\c' to clear the current input statement.

MariaDB [(none)]> create database wordpress;
Query OK, 1 row affected (0.000 sec)

MariaDB [(none)]> grant all on wordpress.* to wordpress@'192.168.32.%' identified by 'centos';
Query OK, 0 rows affected (0.000 sec)

MariaDB [(none)]>
MariaDB [(none)]> use wordpress
Database changed
MariaDB [wordpress]> show tables;          #数据库现在为空
Empty set (0.000 sec)

MariaDB [wordpress]>
[root@centos8 ~]#cd /var/www/html/wordpress

[root@centos8 wordpress]#cp wp-config-sample.php wp-config.php   #参考模板配置文件修改名称

[root@centos8 wordpress]#vim wp-config.php     #配置数据库信息

// ** MySQL 设置 - 具体信息来自您正在使用的主机 ** //
/** WordPress数据库的名称 */
#define( 'DB_NAME', 'database_name_here' );
define( 'DB_NAME', 'wordpress' );

/** MySQL数据库用户名 */
#define( 'DB_USER', 'username_here' );
define( 'DB_USER', 'wordpress' );

/** MySQL数据库密码 */
#define( 'DB_PASSWORD', 'password_here' );
define( 'DB_PASSWORD', 'centos' );

/** MySQL主机 */
#define( 'DB_HOST', 'localhost' );
define( 'DB_HOST', '192.168.32.8' );
如果修改了对应的权限,则可以跳过配置文件的方式,可以通过网页的方式创建配置文件。配置完成后,在数据库中会生成对应WP-开头的数据库文件。
修改wordpress对应的权限
[root@centos8 ~]#chown -R apache.apache /var/www/html/wordpress
或者通过ACL设置权限也一样
setfacl -R -m u:apache:rwx /var/www/html/wordpress/
到这里就可以开始访问网页了

然后一步一步通过中文向导安装即可


扩展升级
如果要版本升级或者是安装插件,使用Wordpress程序架构的网站如果需要在网站后台升级、安装主题或者插件的时候,总是会提示需要我们提供FTP信息的界面。有这样的字样提示"要执行请求的操作,WordPress需要访问您网页服务器的权限。请输入您的FTP登陆凭据以继续。如果您忘记了您的登陆凭据(如用户名、密码),请联系您的网站托管商"。这个是比较麻烦的,现在就尝试解决一下!
第一,如果我们安装的是lnmp一键安装包,那可以使用。授权组来解决。
chown -R www /home/wwwroot/www.yxlgh.com(修改成网站域名目录)
其中 www是www用户组 一定加上-R 递归指定。
第二,如果是其他的可以使用在wp-config.php文件中添加脚本方式。
define(“FS_METHOD”,“direct”);
define(“FS_CHMOD_DIR”, 0777);
define(“FS_CHMOD_FILE”, 0777);
上述脚本添加到文件最后面就可以。 升级之后可以注释掉。
其实这两个方法都是通用的,不存在那个好坏。
扩展centoc7中部署wordpress
#下载官网地址:https://cn.wordpress.org/
#解压缩WordPress博客程序到网页站点目录下
unzip wordpress-5.1.1-zh_CN.zip
mv wordpress /var/www/html/
#新建wpdb库和wpuser用户
mysql> create database wpdb;
mysql> grant all on wpdb.* to wpuser@'%' identified by "wppass";
setfacl –R –m u:apache:rwx /var/www/html/wordpress/
#或者chown –R apache.apache /var/www/html/wordpress
#打开http://LAMP服务器IP/wordpress进行页面安装
实现 Discuz应用部署
实验环境:
部署之前已经完成LAMP基本架构部署
关闭防火墙以及selinux。
这里实验主机为centos8,对应IP为192.168.32.8
[root@centos8 ~]#ip a
1: lo: <LOOPBACK,UP,LOWER_UP> mtu 65536 qdisc noqueue state UNKNOWN group default qlen 1000
    link/loopback 00:00:00:00:00:00 brd 00:00:00:00:00:00
    inet 127.0.0.1/8 scope host lo
       valid_lft forever preferred_lft forever
    inet6 ::1/128 scope host
       valid_lft forever preferred_lft forever
2: eth0: <BROADCAST,MULTICAST,UP,LOWER_UP> mtu 1500 qdisc mq state UP group default qlen 1000
    link/ether 00:0c:29:a5:39:58 brd ff:ff:ff:ff:ff:ff
    inet 192.168.32.8/24 brd 192.168.32.255 scope global noprefixroute eth0
       valid_lft forever preferred_lft forever
[root@centos8 ~]#firewall-cmd --state
not running
[root@centos8 ~]#getenforce
Disabled
[root@centos8 ~]#
[root@centos8 ~]#ss -ntl
State         Recv-Q         Send-Q                  Local Address:Port                 Peer Address:Port
LISTEN        0              128                           0.0.0.0:22                        0.0.0.0:*
LISTEN        0              128                           0.0.0.0:80                        0.0.0.0:*
LISTEN        0              128                              [::]:22                           [::]:*
LISTEN        0              80                                  *:3306                            *:*
[root@centos8 ~]#
[root@centos8 ~]#wget https://gitee.com/3dming/DiscuzL/attach_files/305647/download

[root@centos8 ~]#ll
total 23064
-rw-------. 1 root root     1331 Dec  6 05:52 anaconda-ks.cfg
-rw-r--r--  1 root root 11800498 Dec 12 14:57 Discuz_X3.4_SC_UTF8【20191201】.zip
-rw-r--r--. 1 root root    11537 Nov  7 17:24 init.sh

[root@centos8 ~]#unzip Discuz_X3.4_SC_UTF8【20191201】.zip
[root@centos8 ~]#ll
total 23160
-rw-------.  1 root root     1331 Dec  6 05:52 anaconda-ks.cfg
-rw-r--r--   1 root root 11800498 Dec 12 14:57 Discuz_X3.4_SC_UTF8【20191201】.zip
-rw-r--r--.  1 root root    11537 Nov  7 17:24 init.sh
-rw-r--r--   1 root root    18451 Jul  3 18:45 qqqun.png
drwxr-xr-x   2 root root      102 Dec  1 17:53 readme
-rw-r--r--   1 root root    70883 Dec  1 18:12 readme.html
drwxr-xr-x  13 root root     4096 Dec  1 17:53 upload
drwxr-xr-x   4 root root       94 Dec  1 17:53 utility
上面这么多文件只需要upload即可,移动到http默认访问页面下
[root@centos8 ~]#mv upload/ /var/www/html/forum
[root@centos8 ~]#
[root@centos8 ~]#cd /var/www/html/
[root@centos8 html]#ll
total 20
-rw-r--r--   1 root root   20 Dec 14 20:58 f1.php
drwxr-xr-x  13 root root 4096 Dec  1 17:53 forum
-rw-r--r--   1 root root   39 Dec 11 14:59 index.html
-rw-r--r--   1 root root  281 Dec 14 21:30 test.php
[root@centos8 html]#chown -R apache.apache /var/www/html/forum
[root@centos8 html]#

#在数据中新建一个单独管理用户并且给予权限

[root@centos8 html]#mysql
Welcome to the MariaDB monitor.  Commands end with ; or \g.
Your MariaDB connection id is 144
Server version: 10.3.11-MariaDB MariaDB Server

Copyright (c) 2000, 2018, Oracle, MariaDB Corporation Ab and others.

Type 'help;' or '\h' for help. Type '\c' to clear the current input statement.

MariaDB [(none)]> create database ultrax;
Query OK, 1 row affected (0.000 sec)

MariaDB [(none)]> grant all on ultrax.* to ultrax@'localhost' identified by 'centos';
Query OK, 0 rows affected (0.001 sec)

MariaDB [(none)]>
现在可以访问对应的页面

centos8中默认没有安装XML模块。上面不支持XML,继续安装对应的PHP-xml模块,重启httpd即可
[root@centos8 html]#yum install php-xml -y
[root@centos8 html]#systemctl restart httpd

接下来按照安装向导即可。

访问页面,用admin账号登入查看。

Discuz基本部署完成
扩展centos7中Discuz部署
yum install php-xml -y
systemctl restart httpd
#官网:http://www.discuz.net
#下载源码:
wget http://download.comsenz.com/DiscuzX/3.3/Discuz_X3.3_SC_UTF8.zip
unzip Discuz_X3.3_SC_UTF8.zip
mv upload/ /var/www/html/forum
chown -R apache.apache /var/www/html/forum
或者setfacl -R -m u:apache:rwx /var/www/html/forum
mysql>create database discuz;
mysql>grant all on discuz.* to discuz@'192.168.32.%' identified by 'centos';
安装向导:http://localhost/forum
解析器问题解决:yum install php-xml -y
实现 PowerDNS 应用部署-8
PowerDNS官网:https://www.powerdns.com/
PowerDNS文档:https://doc.powerdns.com/
Poweradmin官网:http://www.poweradmin.org/
范例:CentOS 8 利用RPM包部署PowerDNS(目前20191212,不支持powerdns,缺少相关php包)
实验环境:
部署之前已经完成LAMP基本架构部署
关闭防火墙以及selinux。
这里实验主机为centos8,对应IP为192.168.32.8
这里安装部署版本:
[root@centos8 ~]#ip a
1: lo: <LOOPBACK,UP,LOWER_UP> mtu 65536 qdisc noqueue state UNKNOWN group default qlen 1000
    link/loopback 00:00:00:00:00:00 brd 00:00:00:00:00:00
    inet 127.0.0.1/8 scope host lo
       valid_lft forever preferred_lft forever
    inet6 ::1/128 scope host
       valid_lft forever preferred_lft forever
2: eth0: <BROADCAST,MULTICAST,UP,LOWER_UP> mtu 1500 qdisc mq state UP group default qlen 1000
    link/ether 00:0c:29:a5:39:58 brd ff:ff:ff:ff:ff:ff
    inet 192.168.32.8/24 brd 192.168.32.255 scope global noprefixroute eth0
       valid_lft forever preferred_lft forever
[root@centos8 ~]#firewall-cmd --state
not running
[root@centos8 ~]#getenforce
Disabled
[root@centos8 ~]#
[root@centos8 ~]#ss -ntl
State         Recv-Q         Send-Q                  Local Address:Port                 Peer Address:Port
LISTEN        0              128                           0.0.0.0:22                        0.0.0.0:*
LISTEN        0              128                           0.0.0.0:80                        0.0.0.0:*
LISTEN        0              128                              [::]:22                           [::]:*
LISTEN        0              80                                  *:3306                            *:*
[root@centos8 ~]#
在centos8中安装对应的安装包
[root@centos8 ~]#yum install -y pdns pdns-backend-mysql mariadb-server

[root@centos8 ~]#systemctl restart mariadb
建立对应的数据库和用户账号:
[root@centos8 ~]#mysql
Welcome to the MariaDB monitor.  Commands end with ; or \g.

MariaDB [(none)]> create database powerdns;
Query OK, 1 row affected (0.000 sec)

MariaDB [(none)]> grant all on powerdns.* to 'powerdns'@'192.168.32.%' identified by 'centos';
Query OK, 0 rows affected (0.000 sec)
参考官方提供的文档:
Default Schema
[root@centos8 ~]#vim pdns1.sql  #直接从官方文档粘贴复制即可

[root@centos8 ~]#cat pdns1.sql
REATE TABLE domains (
  id                    INT AUTO_INCREMENT,
  name                  VARCHAR(255) NOT NULL,
  master                VARCHAR(128) DEFAULT NULL,
  last_check            INT DEFAULT NULL,
  type                  VARCHAR(6) NOT NULL,
  notified_serial       INT DEFAULT NULL,
  account               VARCHAR(40) DEFAULT NULL,
  PRIMARY KEY (id)
) Engine=InnoDB;

CREATE UNIQUE INDEX name_index ON domains(name);


CREATE TABLE records (
  id                    BIGINT AUTO_INCREMENT,
  domain_id             INT DEFAULT NULL,
  name                  VARCHAR(255) DEFAULT NULL,
  type                  VARCHAR(10) DEFAULT NULL,
  content               VARCHAR(64000) DEFAULT NULL,
  ttl                   INT DEFAULT NULL,
  prio                  INT DEFAULT NULL,
  change_date           INT DEFAULT NULL,
  disabled              TINYINT(1) DEFAULT 0,
  ordername             VARCHAR(255) BINARY DEFAULT NULL,
  auth                  TINYINT(1) DEFAULT 1,
  PRIMARY KEY (id)
) Engine=InnoDB;

CREATE INDEX nametype_index ON records(name,type);
CREATE INDEX domain_id ON records(domain_id);
CREATE INDEX recordorder ON records (domain_id, ordername);


CREATE TABLE supermasters (
  ip                    VARCHAR(64) NOT NULL,
  nameserver            VARCHAR(255) NOT NULL,
  account               VARCHAR(40) NOT NULL,
  PRIMARY KEY (ip, nameserver)
) Engine=InnoDB;


CREATE TABLE comments (
  id                    INT AUTO_INCREMENT,
  domain_id             INT NOT NULL,
  name                  VARCHAR(255) NOT NULL,
  type                  VARCHAR(10) NOT NULL,
  modified_at           INT NOT NULL,
  account               VARCHAR(40) NOT NULL,
  comment               VARCHAR(64000) NOT NULL,
  PRIMARY KEY (id)
) Engine=InnoDB;

CREATE INDEX comments_domain_id_idx ON comments (domain_id);
CREATE INDEX comments_name_type_idx ON comments (name, type);
CREATE INDEX comments_order_idx ON comments (domain_id, modified_at);


CREATE TABLE domainmetadata (
  id                    INT AUTO_INCREMENT,
  domain_id             INT NOT NULL,
  kind                  VARCHAR(32),
  content               TEXT,
  PRIMARY KEY (id)
) Engine=InnoDB;

CREATE INDEX domainmetadata_idx ON domainmetadata (domain_id, kind);


CREATE TABLE cryptokeys (
  id                    INT AUTO_INCREMENT,
  domain_id             INT NOT NULL,
  flags                 INT NOT NULL,
  active                BOOL,
  content               TEXT,
  PRIMARY KEY(id)
) Engine=InnoDB;

CREATE INDEX domainidindex ON cryptokeys(domain_id);


CREATE TABLE tsigkeys (
  id                    INT AUTO_INCREMENT,
  name                  VARCHAR(255),
  algorithm             VARCHAR(50),
  secret                VARCHAR(255),
  PRIMARY KEY (id)
) Engine=InnoDB;

CREATE UNIQUE INDEX namealgoindex ON tsigkeys(name, algorithm);
[root@centos8 ~]#
运行数据库文件,导入数据
[root@centos8 ~]#mysql powerdns < pdns1.sql
[root@centos8 ~]#mysql powerdns
Reading table information for completion of table and column names
You can turn off this feature to get a quicker startup with -A

Welcome to the MariaDB monitor.  Commands end with ; or \g.
Your MariaDB connection id is 12
Server version: 10.3.11-MariaDB MariaDB Server

Copyright (c) 2000, 2018, Oracle, MariaDB Corporation Ab and others.

Type 'help;' or '\h' for help. Type '\c' to clear the current input statement.

MariaDB [powerdns]> show tables;
+--------------------+
| Tables_in_powerdns |
+--------------------+
| comments           |
| cryptokeys         |
| domainmetadata     |
| domains            |
| records            |
| supermasters       |
| tsigkeys           |
+--------------------+
7 rows in set (0.000 sec)

MariaDB [powerdns]>
配置PowerDNS使用mariadb作为后台数据存储
[root@centos8 ~]#vim /etc/pdns/pdns.conf  #并且搜索launch

# launch        Which backends to launch and order to query them in
#
#launch=bind       #默认配置
launch=gmysql      #修改配置
gmysql-host=localhost
gmysql-port=3306
gmysql-dbname=powerdns
gmysql-user=powerdns
gmysql-password=centos


[root@centos8 ~]#grep -Ev "^#|^$" /etc/pdns/pdns.conf
launch=gmysql
gmysql-host=localhost
gmysql-port=3306
gmysql-dbname=powerdns
gmysql-user=powerdns
gmysql-password=centos
setgid=pdns
setuid=pdns
[root@centos8 ~]#
[root@centos8 ~]#systemctl enable --now pdns
Created symlink /etc/systemd/system/multi-user.target.wants/pdns.service → /usr/lib/systemd/system/pdns.service.
[root@centos8 ~]#ss -ntl        #查看DNS端口一个是UDP的53 一个是TCP的53
State         Recv-Q         Send-Q                  Local Address:Port                 Peer Address:Port
LISTEN        0              128                           0.0.0.0:53                        0.0.0.0:*
LISTEN        0              128                           0.0.0.0:22                        0.0.0.0:*
LISTEN        0              128                           0.0.0.0:80                        0.0.0.0:*
LISTEN        0              128                              [::]:53                           [::]:*
LISTEN        0              128                              [::]:22                           [::]:*
LISTEN        0              80                                  *:3306                            *:*
[root@centos8 html]#
安装httpd和php相关包
[root@centos8 ~]#yum -y install httpd php php-devel php-gd  php-ldap php-mysqlnd php-odbc php-pear
php-xml php-xmlrpc php-mbstring php-mhash gettext

[root@centos8 ~]#systemctl enable --now httpd
Created symlink /etc/systemd/system/multi-user.target.wants/httpd.service → /usr/lib/systemd/system/httpd.service.
[root@centos8 ~]#
下载poweradmin程序,并解压缩到相应目录
[root@centos8 ~]#
[root@centos8 ~]#wget https://sourceforge.net/projects/poweradmin/files/poweradmin-2.1.7.tgz/download

[root@centos8 ~]#ll
total 308
-rw-------. 1 root root   1331 Dec  6 05:52 anaconda-ks.cfg
-rw-r--r--. 1 root root  11537 Nov  7 17:24 init.sh
-rw-r--r--  1 root root 296469 Dec 15 17:40 poweradmin-2.1.7.tgz

[root@centos8 ~]#tar xvf poweradmin-2.1.7.tgz -C /var/www/html/

[root@centos8 ~]#cd /var/www/html/
[root@centos8 html]#ll
total 20
-rw-r--r--  1 root root   20 Dec 14 20:58 f1.php
-rw-r--r--  1 root root   39 Dec 11 14:59 index.html
-rw-r--r--  1 root root 2933 Dec 15 17:51 pdns.sql
drwxrwxr-x 10 root root 4096 Jul  5  2014 poweradmin-2.1.7
-rw-r--r--  1 root root  281 Dec 14 21:30 test.php

[root@centos8 html]#mv poweradmin-2.1.7/ poweradmin

[root@centos8 html]#ll
total 20
-rw-r--r--  1 root root   20 Dec 14 20:58 f1.php
-rw-r--r--  1 root root   39 Dec 11 14:59 index.html
-rw-r--r--  1 root root 2933 Dec 15 17:51 pdns.sql
drwxrwxr-x 10 root root 4096 Jul  5  2014 poweradmin
-rw-r--r--  1 root root  281 Dec 14 21:30 test.php
[root@centos8 html]#

[root@centos8 html]#
还缺少一个php-mcrypt安装包:

epel源中php-mcrypt暂时还没有,实验暂停。
解决思路:
是由于centos8自带的源上没有对应的包,所以可以安装最新源的PHP,然后安装对应的php主程序和相应模块。
yum install https://mirrors.tuna.tsinghua.edu.cn/remi/enterprise/remi-release-8.rpm

yum install -y httpd php php-devel php-gd php-mcrypt php-imap php-ldap php-mysql php-odbc php-pear php-xml php-xmlrpc php-mbstring php-mhash gettext
每一个php前面加php72-xxx eg:php72-php-mcrypt 这里的php72换成其他版本都可以
实现 PowerDNS 应用部署-7
最小化安装centos7:192.168.32.7
关闭防火墙和selinux
#安装包:基于EPEL源
[root@centos7 ~]#yum install -y pdns pdns-backend-mysql mariadb-server

[root@centos7 ~]#systemctl enable --now mariadb
#准备mariadb中的数据库,表和用户
[root@centos7 ~]#mysql
ERROR 1045 (28000): Access denied for user 'root'@'localhost' (using password: NO)
[root@centos7 ~]#mysql -uroot -pcentos
Welcome to the MariaDB monitor.  Commands end with ; or \g.
Your MariaDB connection id is 179
Server version: 5.5.64-MariaDB MariaDB Server

Copyright (c) 2000, 2018, Oracle, MariaDB Corporation Ab and others.

Type 'help;' or '\h' for help. Type '\c' to clear the current input statement.

MariaDB [(none)]> CREATE DATABASE powerdns;
Query OK, 1 row affected (0.00 sec)

MariaDB [(none)]> GRANT ALL ON powerdns.* TO 'powerdns'@'localhost' IDENTIFIED BY 'magedu';
Query OK, 0 rows affected (0.00 sec)

MariaDB [(none)]>
#创建powerdns数据库中的表,参看下面文档实现
#https://doc.powerdns.com/md/authoritative/backend-generic-mysql/
[root@centos7 ~]#cat pdns.sql  #这个文件可以去官方网址复制粘贴

#CREATE DATABASE powerdns;
#GRANT ALL ON powerdns.* TO 'powerdns'@'localhost' IDENTIFIED BY 'magedu';

use powerdns
CREATE TABLE domains (
  id                    INT AUTO_INCREMENT,
  name                  VARCHAR(255) NOT NULL,
  master                VARCHAR(128) DEFAULT NULL,
  last_check            INT DEFAULT NULL,
  type                  VARCHAR(6) NOT NULL,
  notified_serial       INT DEFAULT NULL,
  account               VARCHAR(40) DEFAULT NULL,
  PRIMARY KEY (id)
) Engine=InnoDB;

CREATE UNIQUE INDEX name_index ON domains(name);


CREATE TABLE records (
  id                    BIGINT AUTO_INCREMENT,
  domain_id             INT DEFAULT NULL,
  name                  VARCHAR(255) DEFAULT NULL,
  type                  VARCHAR(10) DEFAULT NULL,
  content               VARCHAR(64000) DEFAULT NULL,
  ttl                   INT DEFAULT NULL,
  prio                  INT DEFAULT NULL,
  change_date           INT DEFAULT NULL,
  disabled              TINYINT(1) DEFAULT 0,
  ordername             VARCHAR(255) BINARY DEFAULT NULL,
  auth                  TINYINT(1) DEFAULT 1,
  PRIMARY KEY (id)
) Engine=InnoDB;

CREATE INDEX nametype_index ON records(name,type);
CREATE INDEX domain_id ON records(domain_id);
CREATE INDEX recordorder ON records (domain_id, ordername);


CREATE TABLE supermasters (
  ip                    VARCHAR(64) NOT NULL,
  nameserver            VARCHAR(255) NOT NULL,
  account               VARCHAR(40) NOT NULL,
  PRIMARY KEY (ip, nameserver)
) Engine=InnoDB;


CREATE TABLE comments (
  id                    INT AUTO_INCREMENT,
  domain_id             INT NOT NULL,
  name                  VARCHAR(255) NOT NULL,
  type                  VARCHAR(10) NOT NULL,
  modified_at           INT NOT NULL,
  account               VARCHAR(40) NOT NULL,
  comment               VARCHAR(64000) NOT NULL,
  PRIMARY KEY (id)
) Engine=InnoDB;

CREATE INDEX comments_domain_id_idx ON comments (domain_id);
CREATE INDEX comments_name_type_idx ON comments (name, type);
CREATE INDEX comments_order_idx ON comments (domain_id, modified_at);


CREATE TABLE domainmetadata (
  id                    INT AUTO_INCREMENT,
  domain_id             INT NOT NULL,
  kind                  VARCHAR(32),
  content               TEXT,
  PRIMARY KEY (id)
) Engine=InnoDB;

CREATE INDEX domainmetadata_idx ON domainmetadata (domain_id, kind);


CREATE TABLE cryptokeys (
  id                    INT AUTO_INCREMENT,
  domain_id             INT NOT NULL,
  flags                 INT NOT NULL,
  active                BOOL,
  content               TEXT,
  PRIMARY KEY(id)
) Engine=InnoDB;

CREATE INDEX domainidindex ON cryptokeys(domain_id);


CREATE TABLE tsigkeys (
  id                    INT AUTO_INCREMENT,
  name                  VARCHAR(255),
  algorithm             VARCHAR(50),
  secret                VARCHAR(255),
  PRIMARY KEY (id)
) Engine=InnoDB;

CREATE UNIQUE INDEX namealgoindex ON tsigkeys(name, algorithm);


[root@centos7 ~]#mysql powerdns -pcentos < pdns.sql #导入生成数据库表
#配置PowerDNS使用mariadb作为后台数据存储
[root@centos7 ~]#vim /etc/pdns/pdns.conf,查找到包含launch= 的行,修改并添加下面的内容
launch=gmysql
gmysql-host=localhost
gmysql-port=3306
gmysql-dbname=powerdns
gmysql-user=powerdns
gmysql-password=magedu

[root@centos7 ~]#grep -Ev "^#|^$" /etc/pdns/pdns.conf
launch=gmysql
gmysql-host=localhost
gmysql-port=3306
gmysql-dbname=powerdns
gmysql-user=powerdns
gmysql-password=magedu
setgid=pdns
setuid=pdns
[root@centos7 ~]#
#启动服务
[root@centos7 ~]#systemctl enable --now pdns
Created symlink from /etc/systemd/system/multi-user.target.wants/pdns.service to /usr/lib/systemd/system/pdns.service.

[root@centos7 ~]#ss -ntl #查看端口53  有2个53 一个UDP 一个TCP
State       Recv-Q Send-Q           Local Address:Port                          Peer Address:Port
LISTEN      0      50                           *:3306                                     *:*
LISTEN      0      128                          *:53                                       *:*
LISTEN      0      128                          *:22                                       *:*
LISTEN      0      100                  127.0.0.1:25                                       *:*
LISTEN      0      128                         :::80                                      :::*
LISTEN      0      128                         :::53                                      :::*
LISTEN      0      128                         :::22                                      :::*
LISTEN      0      100                        ::1:25                                      :::*
[root@centos7 ~]#
#安装httpd和php相关包
[root@centos7 ~]#yum -y install httpd php php-devel php-gd php-mcrypt php-imap php-ldap php-mysql php-odbc php-pear php-xml php-xmlrpc php-mbstring php-mhash gettext

[root@centos7 ~]#systemctl enable --now httpd
Created symlink from /etc/systemd/system/multi-user.target.wants/httpd.service to
/usr/lib/systemd/system/httpd.service.
#下载poweradmin程序,并解压缩到相应目录
[root@centos7 ~]#wget http://downloads.sourceforge.net/project/poweradmin/poweradmin-2.1.7.tgz
--2019-12-15 18:41:28--  http://downloads.sourceforge.net/project/poweradmin/poweradmin-2.1.7.tgz
Resolving downloads.sourceforge.net (downloads.sourceforge.net)... 216.105.38.13
Connecting to downloads.sourceforge.net (downloads.sourceforge.net)|216.105.38.13|:80... connected.
HTTP request sent, awaiting response... 302 Found
Location: https://jaist.dl.sourceforge.net/project/poweradmin/poweradmin-2.1.7.tgz [following]
--2019-12-15 18:41:29--  https://jaist.dl.sourceforge.net/project/poweradmin/poweradmin-2.1.7.tgz
Resolving jaist.dl.sourceforge.net (jaist.dl.sourceforge.net)... 150.65.7.130, 2001:df0:2ed:feed::feed
Connecting to jaist.dl.sourceforge.net (jaist.dl.sourceforge.net)|150.65.7.130|:443... connected.
HTTP request sent, awaiting response... 200 OK
Length: 296469 (290K) [application/octet-stream]
Saving to: ‘poweradmin-2.1.7.tgz’

100%[=======================================================================>] 296,469      386KB/s   in 0.8s

2019-12-15 18:41:30 (386 KB/s) - ‘poweradmin-2.1.7.tgz’ saved [296469/296469]

[root@centos7 ~]#ll
total 11184
-rw-------. 1 root root     1612 Dec  5 21:45 anaconda-ks.cfg
-rw-r--r--  1 root root      155 Dec  5 22:10 ifcfg-eth0
-rw-r--r--. 1 root root    11537 Nov  7 17:24 init.sh
-rw-r--r--  1 root root     2933 Dec 15 18:31 pdns.sql
-rw-r--r--  1 root root 11128586 Dec 12 11:46 phpMyAdmin-4.9.2-all-languages.zip
-rw-r--r--  1 root root   296469 Jul 10  2014 poweradmin-2.1.7.tgz
[root@centos7 ~]#
[root@centos7 ~]#tar xvf poweradmin-2.1.7.tgz -C /var/www/html

[root@centos7 ~]#cd /var/www/html/

[root@centos7 html]#mv poweradmin-2.1.7/ poweradmin
[root@centos7 html]#ll
total 24
-rw-r--r--  1 root root   20 Dec 14 21:32 f1.php
-rw-r--r--  1 root root   39 Dec 14 21:32 index.html
drwxr-xr-x 12 root root 4096 Nov 22 03:03 pma
drwxrwxr-x 10 root root 4096 Jul  5  2014 poweradmin
-rw-r--r--  1 root root  281 Dec 14 21:35 test.php
[root@centos7 html]#
[root@centos7 html]#systemctl restart httpd
[root@centos7 html]#systemctl restart mariadb
访问网页

在浏览器上面添加install,进行进一步的页面安装。


提供先前配置的数据库详情,同时为Poweradmin设置管理员密码

为Poweradmin创建一个受限用户
说明:
Username:PowerAdmin用户名
Password:上述用户的密码
Hostmaster:当创建SOA记录指定默认主机管理员
Primary nameserver:主域名服务器
Secondary namesever:辅域名服务器


[root@centos7 ~]#cd /var/www/html/poweradmin/inc
[root@centos7 inc]#
[root@centos7 inc]#vim config.inc.php     #复制粘贴即可

[root@centos7 inc]#cat config.inc.php
<?php

$db_host		= 'localhost';
$db_user		= 'poweradmin';
$db_pass		= 'centos';
$db_name		= 'powerdns';
$db_type		= 'mysql';
$db_layer		= 'PDO';

$session_key		= '~)hs0vV1LoBvKD*_(Sx(7Z^{EIGR-Ed[dJgo8kZWwKs!dw';

$iface_lang		= 'en_EN';

$dns_hostmaster		= 'likai.tech';
$dns_ns1		= 'master.likai.tech';
$dns_ns2		= 'slave.likai.tech';

[root@centos7 inc]#rm -rf /var/www/html/poweradmin/install/
重新登入

登入之后的界面

实现 PowerDNS 应用部署基本配置完成。


 805
805


 被折叠的 条评论
为什么被折叠?
被折叠的 条评论
为什么被折叠?
 到【灌水乐园】发言


