


# Gitlab 部署与使用
下载并部署 gitlab
Ubuntu 系统环境准备
配置 ubuntu 远程连接
//切换至root用户
kaivi@ubuntu:~$ sudo su -root
[sudo] password for kaivi:

//设置root用户密码
root@ubuntu:~# passwd
Enter new UNIX password:
Retype new UNIX password:
passwd: password updated successfully

//编辑ssh连接配置文件
root@ubuntu:~# vim /etc/ssh/sshd_config

PermitRootLogin yes #允许root远程登录
PasswordAuthentication yes #开启密码验证
配置 ubuntu 网卡和主机名
root@ubuntu:~# cat /etc/netplan/01-netcfg.yaml
# This file describes the network interfaces available on your system
# For more information, see netplan(5).
network:
  version: 2
  renderer: networkd
  ethernets:
    eth0:
      dhcp4: no
      dhcp6: no
      addresses: [ 192.168.26.104/24 ]
      gateway4: 192.168.26.2
      nameservers:
        addresses: [ 233.6.6.6,180.76.76.76 ]
root@jenkins:~# cat /etc/hostname
jenkins.example.com
root@jenkins:~# netplan apply
root@jenkins:~# reboot
配置 ubuntu 仓库
root@ubuntu:~#vim /etc/apt/sources.list
deb http://mirrors.aliyun.com/ubuntu/ bionic main restricted universe multiverse
deb-src http://mirrors.aliyun.com/ubuntu/ bionic main restricted universe multiverse

deb http://mirrors.aliyun.com/ubuntu/ bionic-security main restricted universe multiverse
deb-src http://mirrors.aliyun.com/ubuntu/ bionic-security main restricted universe multiverse

deb http://mirrors.aliyun.com/ubuntu/ bionic-updates main restricted universe multiverse
deb-src http://mirrors.aliyun.com/ubuntu/ bionic-updates main restricted universe multiverse

deb http://mirrors.aliyun.com/ubuntu/ bionic-proposed main restricted universe multiverse
deb-src http://mirrors.aliyun.com/ubuntu/ bionic-proposed main restricted universe multiverse

deb http://mirrors.aliyun.com/ubuntu/ bionic-backports main restricted universe multiverse
deb-src http://mirrors.aliyun.com/ubuntu/ bionic-backports main restricted universe multiverse
root@jenkins:~# apt install iproute2 ntpdate tcpdump telnet nfs-kernel-server nfs-common lrzsz tree openssl libssl-dev libpcre3 libpcre3-dev zlib1g-dev traceroute gcc openssh-server iotop unzip zip ipmitool -y
Centos 系统环境准备
//安装基础命令
yum install vim gcc gcc-c++ wget net-tools lrzsz iotop lsof iotop bash-completion -y

//安装远程连接及其他工具
yum install curl policycoreutils openssh-server openssh-clients postfix -y

//配置epel源
wget -O /etc/yum.repos.d/epel.repo http://mirrors.aliyun.com/repo/epel-7.repo

//关闭防火墙
systemctl disable firewalld

//关闭selinux
sed -i '/SELINUX/s/enforcing/disabled/' /etc/sysconfig/selinux

//设置主机名
hostnamectl set-hostname gitlab.example.com

//重启
reboot
Gitlab 安装及使用
- 安装包下载地址:https://packages.gitlab.com/gitlab/gitlab-ce
- rpm 包国内下载地址: https://mirrors.tuna.tsinghua.edu.cn/gitlab-ce/yum/
- ubuntu 国内下载地址: https://mirrors.tuna.tsinghua.edu.cn/gitlab-ce/ubuntu/pool/
//确定工作目录
pwd
/usr/local/src

//下载.deb安装包
wget https://mirrors.tuna.tsinghua.edu.cn/gitlab-ce/ubuntu/pool/bionic/main/g/gitlab-ce/gitlab-ce_12.2.5-ce.0_amd64.deb

//安装包
dpkg -i gitlab-ce_12.2.5-ce.0_amd64.deb
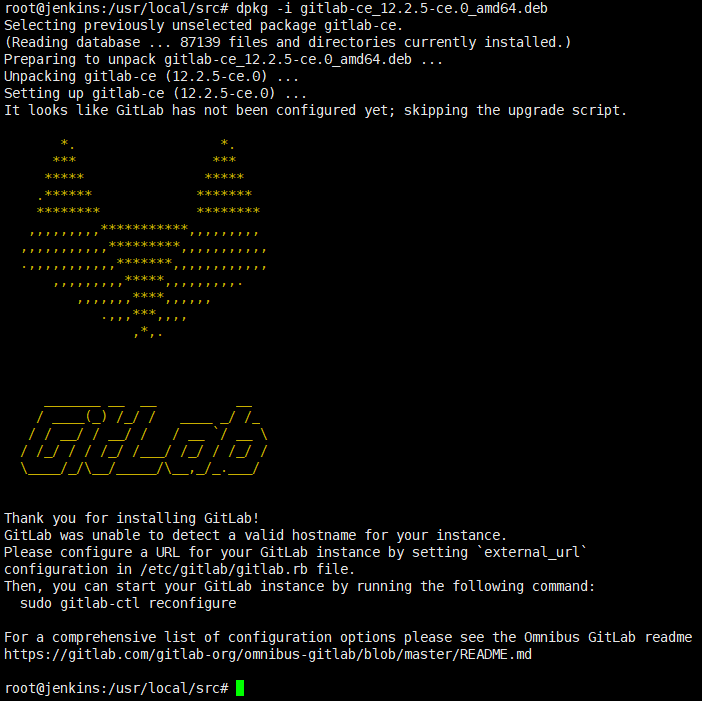
gitlab 配置使用
root@gitlab:~# grep "^[a-Z]" /etc/gitlab/gitlab.rb
external_url 'http://192.168.26.2'

# 可选邮件通知设置
gitlab_rails['smtp_enable'] = true
gitlab_rails['smtp_address'] = "smtp.qq.com"
gitlab_rails['smtp_port'] = 465
gitlab_rails['smtp_user_name'] = "xxxxxx151@qq.com"
gitlab_rails['smtp_password'] = " XXXXXXXX "
gitlab_rails['smtp_domain'] = "qq.com"
gitlab_rails['smtp_authentication'] = :login
gitlab_rails['smtp_enable_starttls_auto'] = true
gitlab_rails['smtp_tls'] = true
gitlab_rails['gitlab_email_from'] = "xxxxxx151@qq.com"
user["git_user_email"] = "xxxxxx151@qq.com"
初始化服务
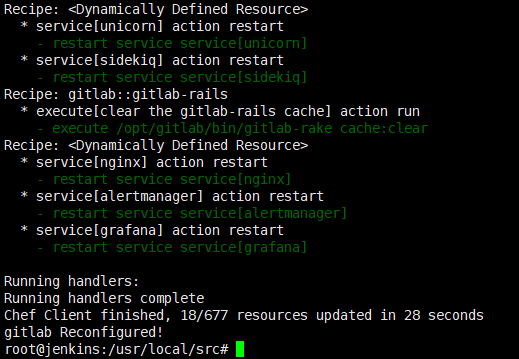
- 执行配置并启动服务
//每次修改完配置文件都需要执行此条命令
gitlab-ctl reconfigure
gitlab 相关的目录有哪些
/etc/gitlab         #配置文件目录
/run/gitlab         #运行 pid 目录
/opt/gitlab         #安装目录
/var/opt/gitlab     #数据目录
/var/log/gitlab     #日志目录
常用命令
//用于启动控制台进行特殊操作,比如修改管理员密码、打开数据库控制台(gitlab-rails dbconsole)等
gitlab-rails
//Example
root@jenkins:/usr/local/src# gitlab-rails dbconsole
psql (10.9)
Type "help" for help.

gitlabhq_production=> help
You are using psql, the command-line interface to PostgreSQL.
Type:  \copyright for distribution terms
       \h for help with SQL commands
       \? for help with psql commands
       \g or terminate with semicolon to execute query
       \q to quit
gitlabhq_production=>
//Example
root@jenkins:/usr/local/src# gitlab-rails --help
The most common rails commands are:
 generate     Generate new code (short-cut alias: "g")
 console      Start the Rails console (short-cut alias: "c")
 server       Start the Rails server (short-cut alias: "s")
 test         Run tests except system tests (short-cut alias: "t")
 test:system  Run system tests
 dbconsole    Start a console for the database specified in config/database.yml
              (short-cut alias: "db")

 new          Create a new Rails application. "rails new my_app" creates a
              new application called MyApp in "./my_app"

...省略...
//数据库命令行
gitlab-psql
//Example
root@jenkins:/usr/local/src# gitlab-psql
psql (10.9)
Type "help" for help.

gitlabhq_production=# help
You are using psql, the command-line interface to PostgreSQL.
Type:  \copyright for distribution terms
       \h for help with SQL commands
       \? for help with psql commands
       \g or terminate with semicolon to execute query
       \q to quit
gitlabhq_production=# \db
         List of tablespaces
    Name    |    Owner    | Location
------------+-------------+----------
 pg_default | gitlab-psql |
 pg_global  | gitlab-psql |
(2 rows)

gitlabhq_production=#
//数据备份恢复等数据操作
gitlab-rake
//客户端命令行操作行
gitlab-ctl
//停止 gitlab
gitlab-ctl stop
//启动 gitlab
gitlab-ctl start
//重启 gitlab
gitlab-ctl restart
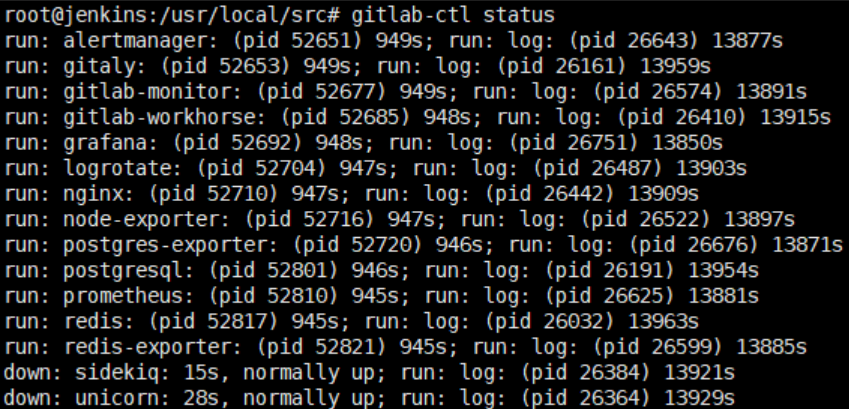
//查看组件运行状态
gitlab-ctl status
//查看某个组件的日志
gitlab-ctl tail nginx
验证 gitlab 启动完成
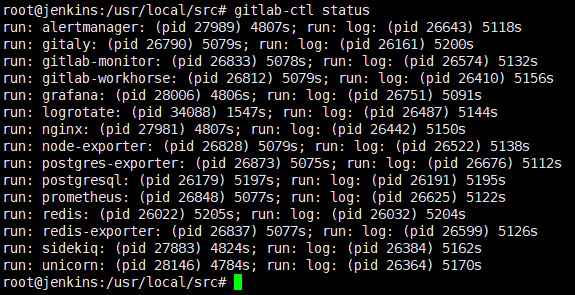
验证端口及状态
- 80端口是在初始化 gitlib 的时候启动的,因此如果之前的有程序占用会导致初始化失败或无法访问!

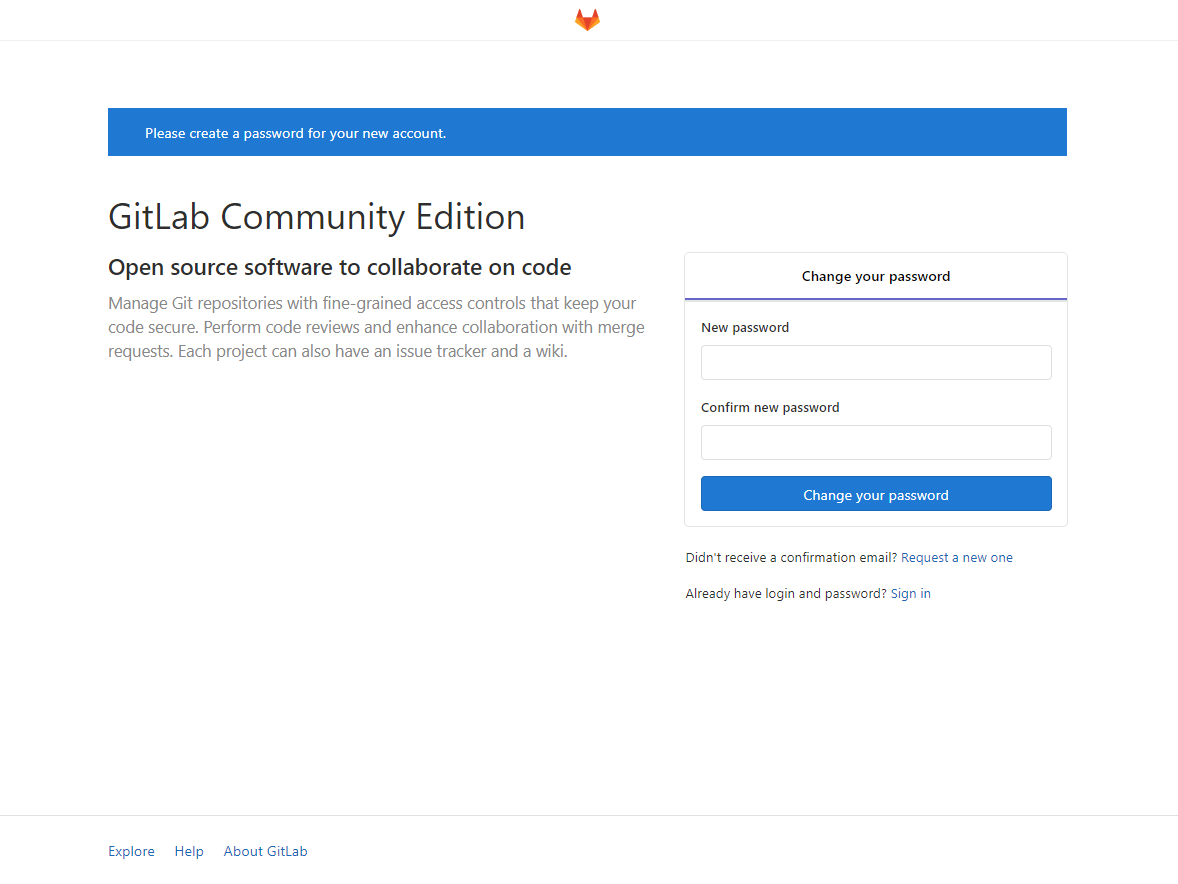
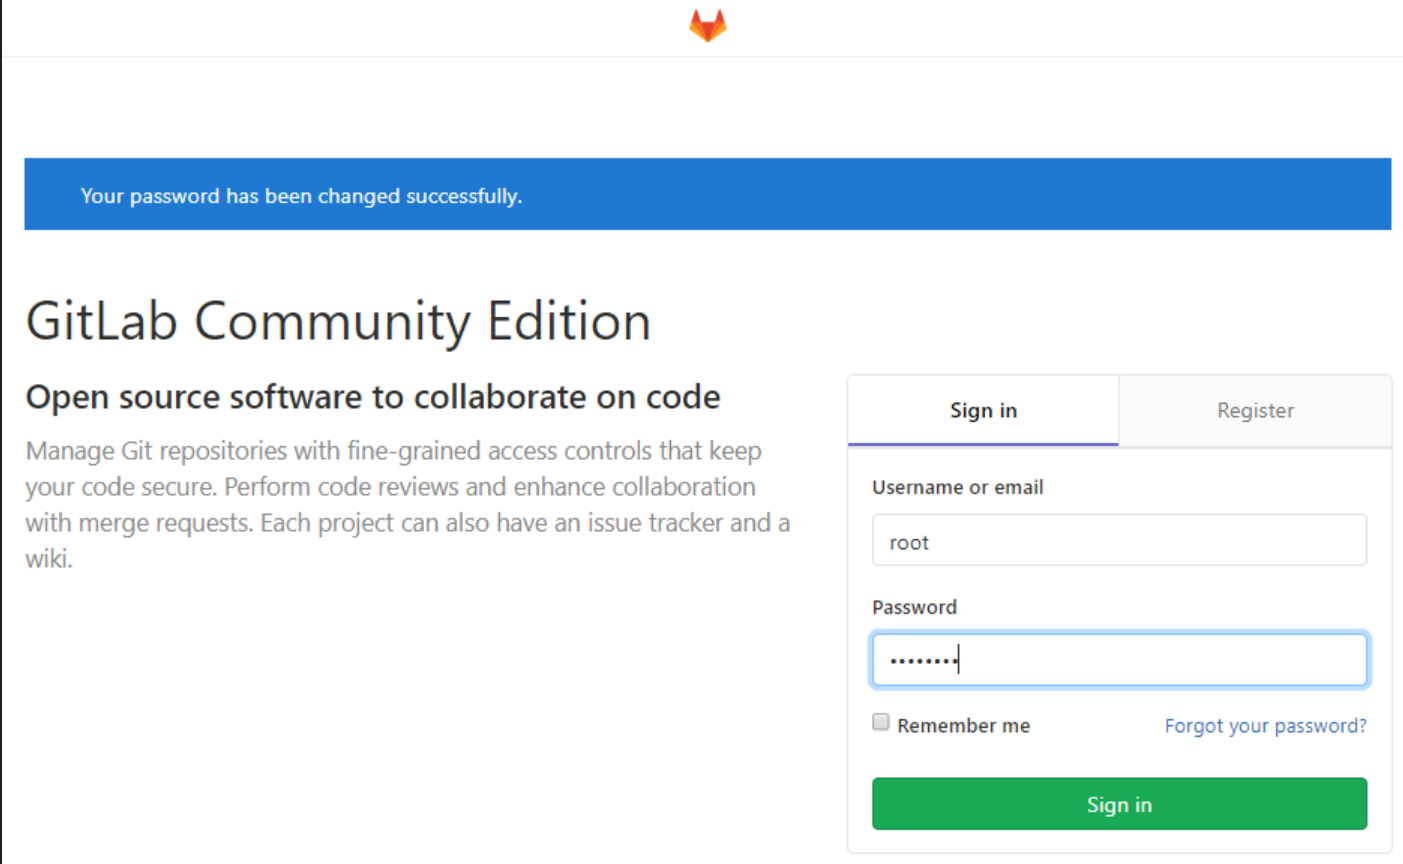
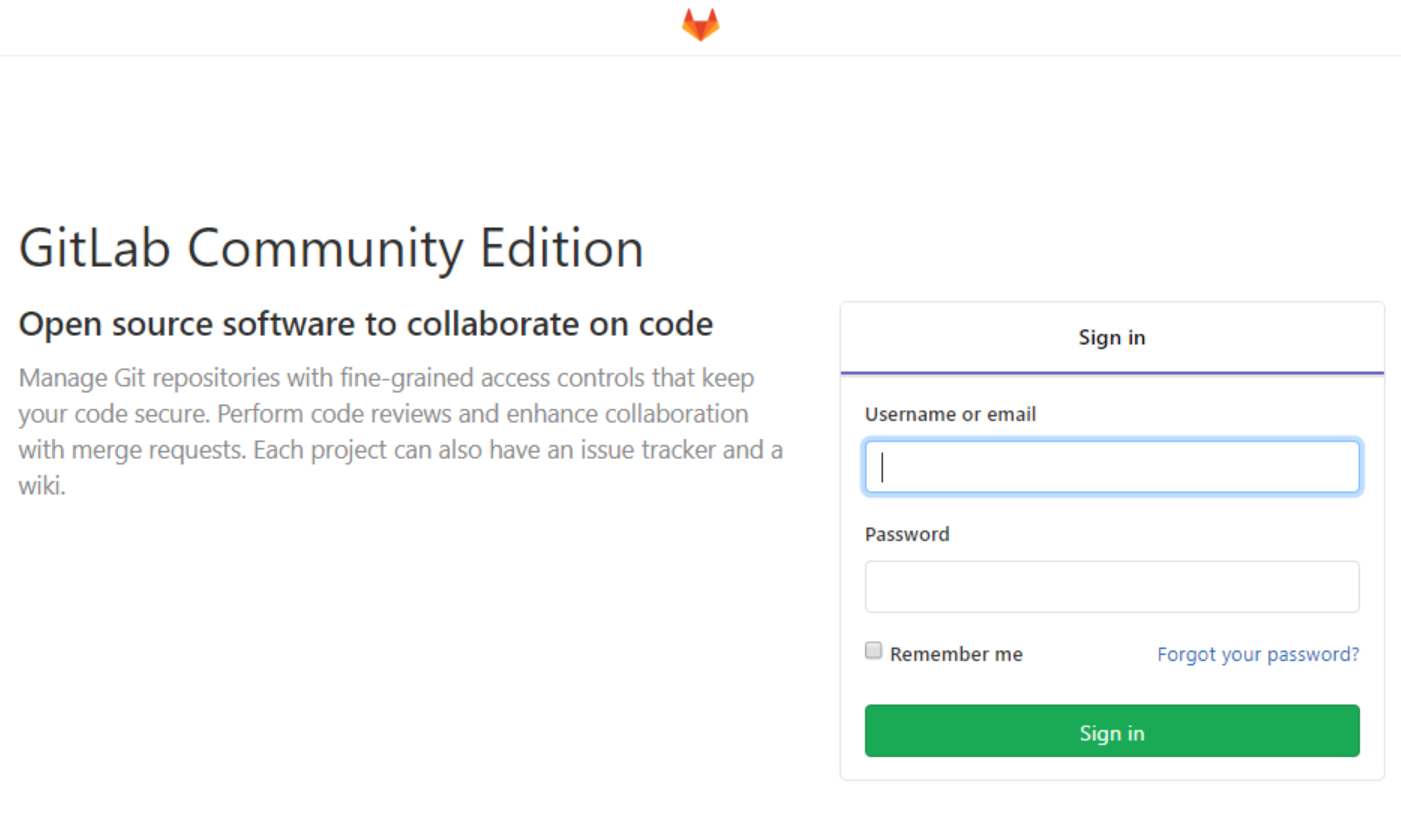
登录 gitlab web 界面
- 浏览器访问:http://192.168.26.104
- 登录 web 页面并设置密码最少 8 位
登录 gitlab
- 登录,默认用户为root
- 输入刚才设置的密码
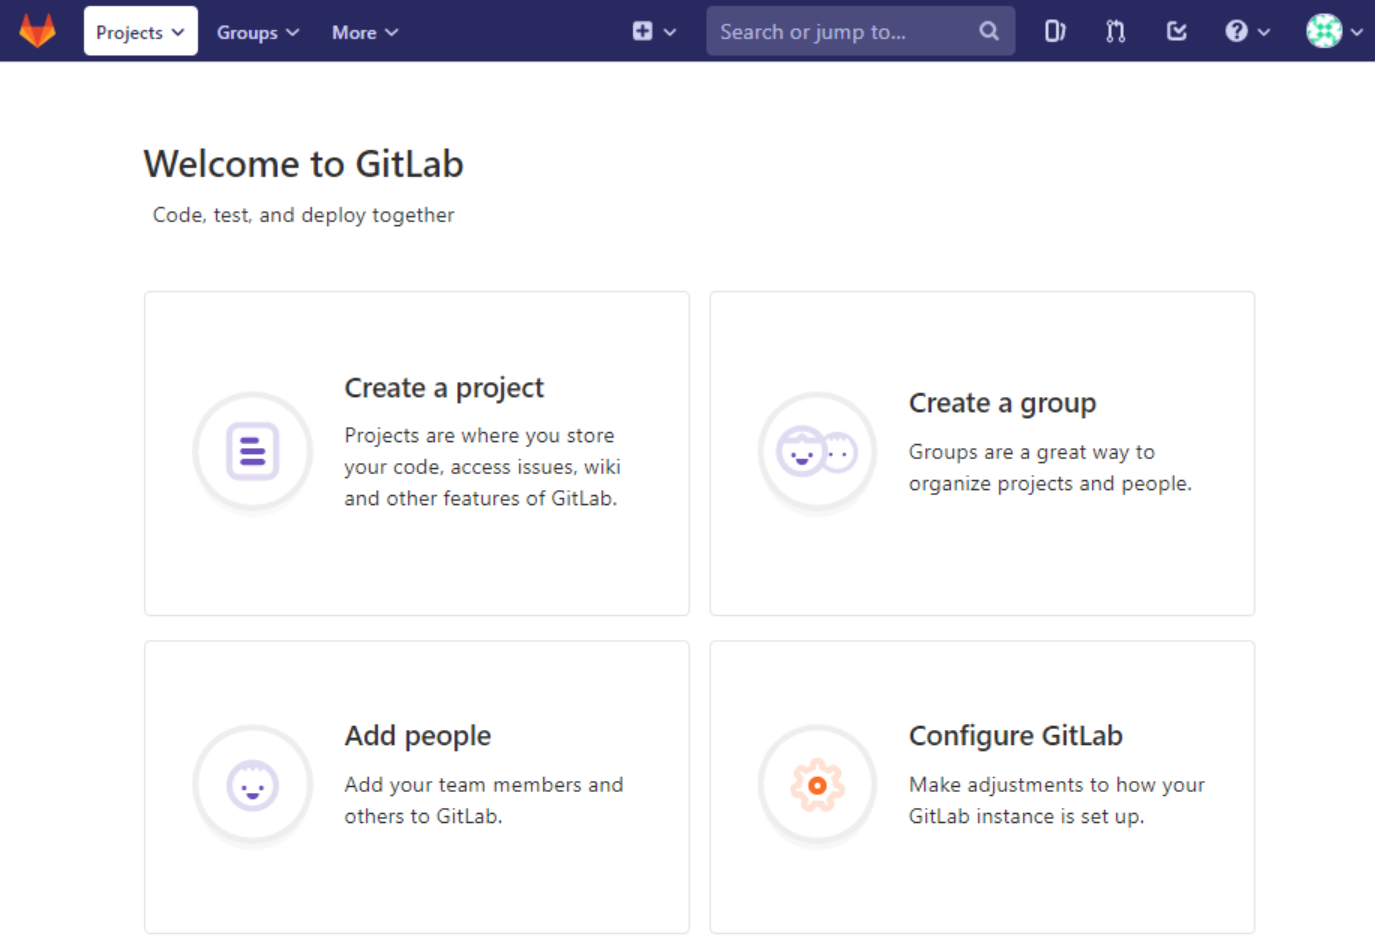
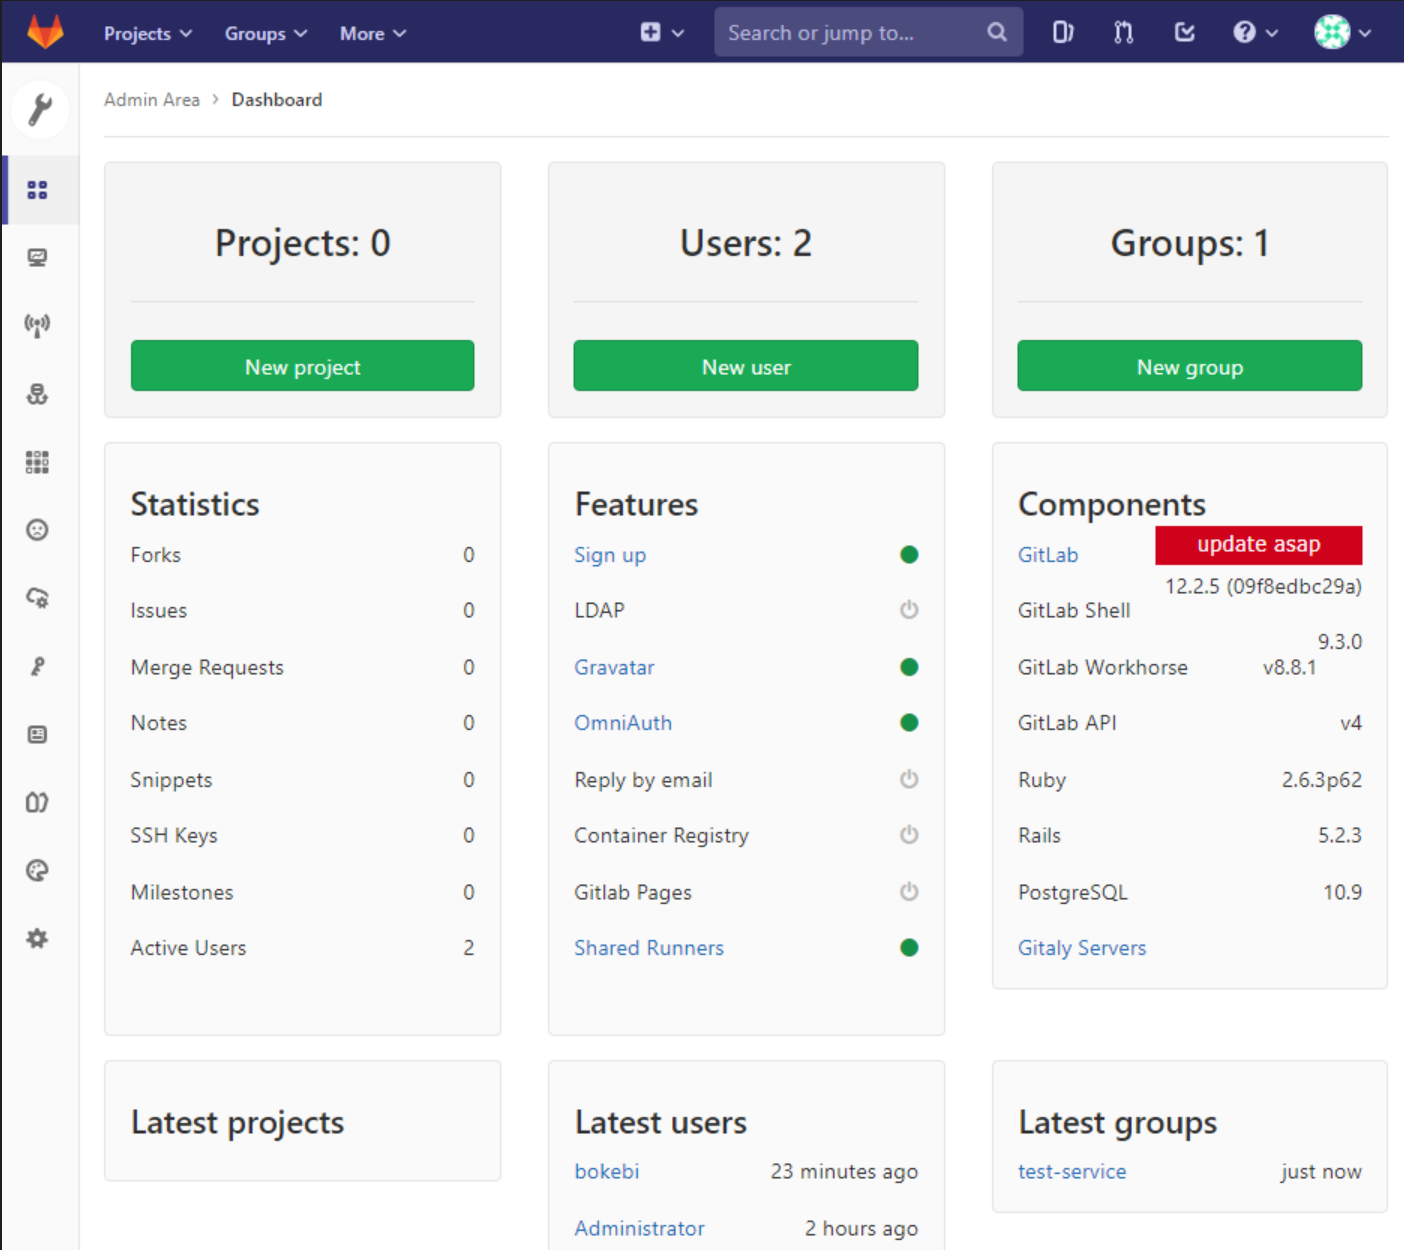
默认首页
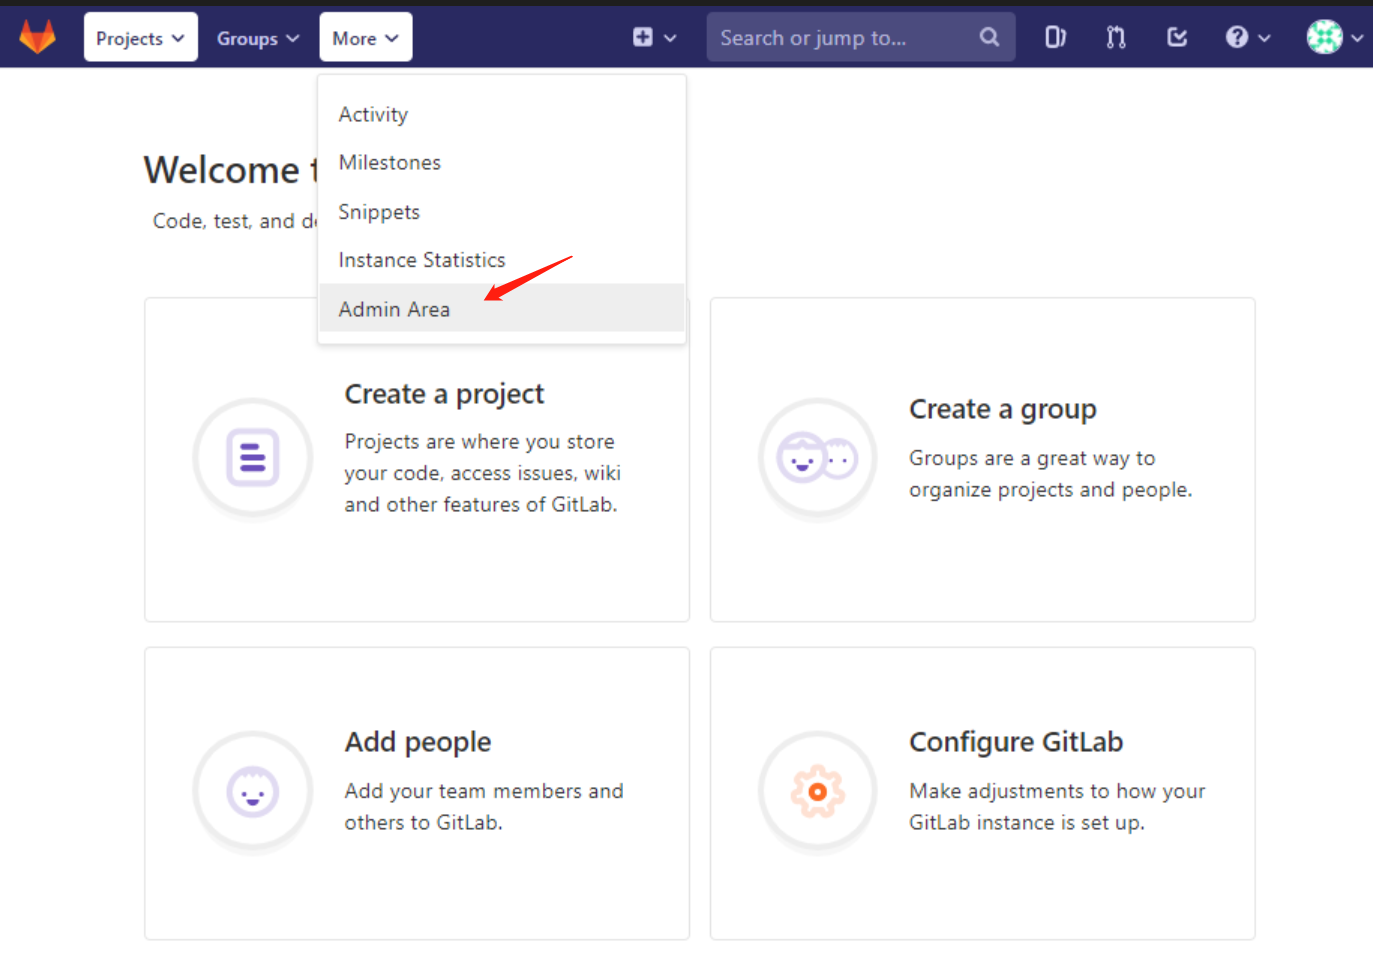
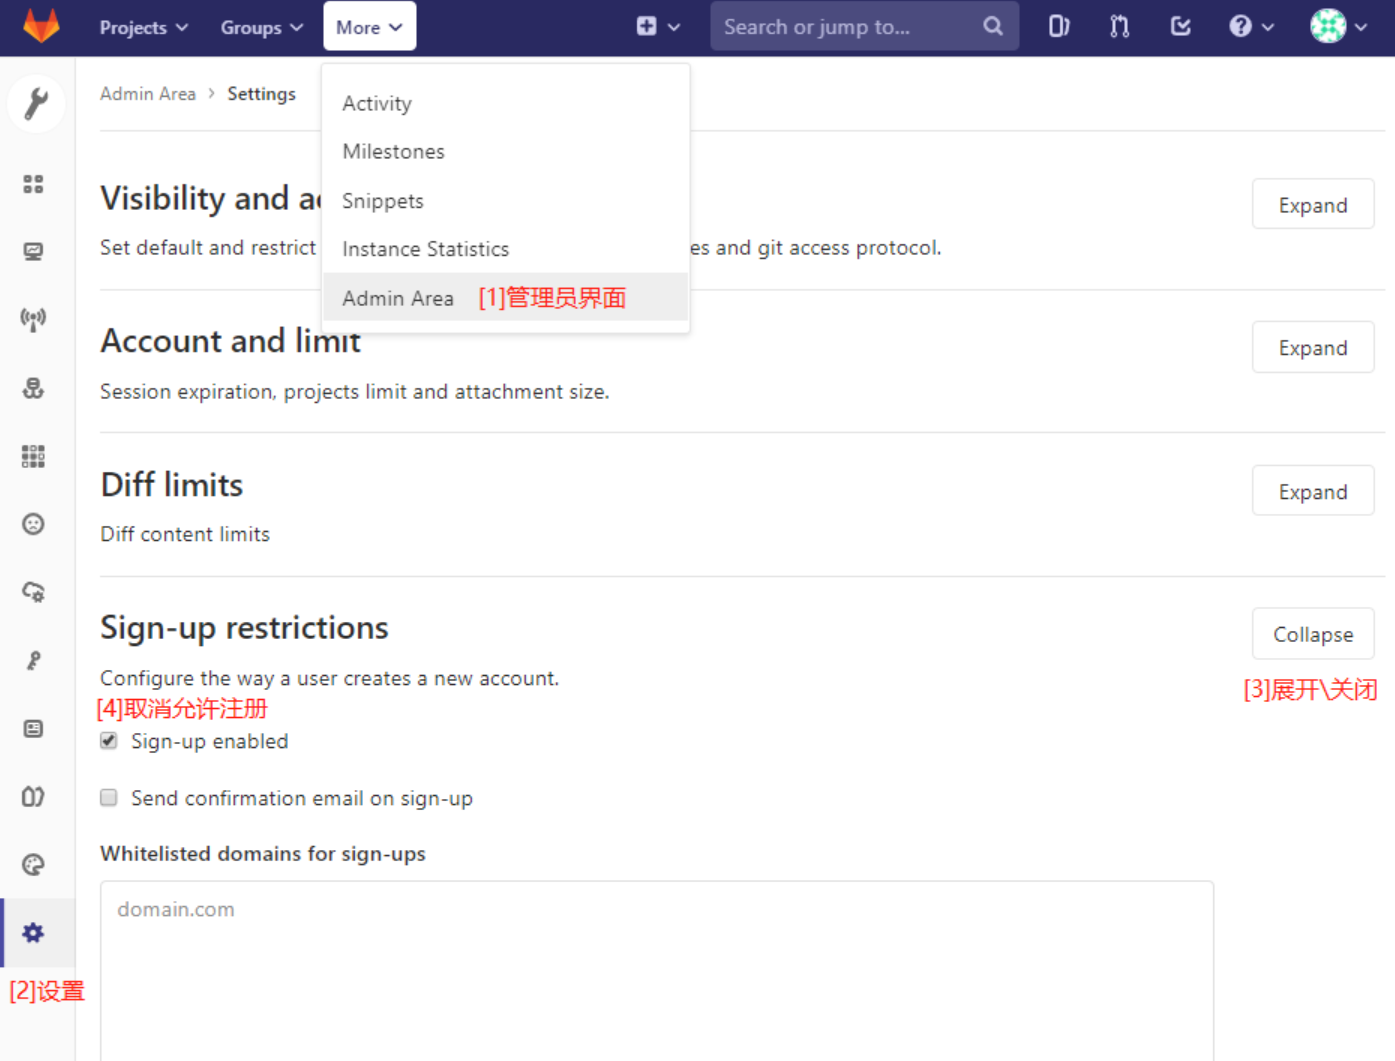
关闭账号注册
- 默认情况下可以直接注册账号,因此方便管理用户,一般都关闭此功能
取消启用注册选后,记得点击保存更改
验证是否还有注册选项
创建 git 账户
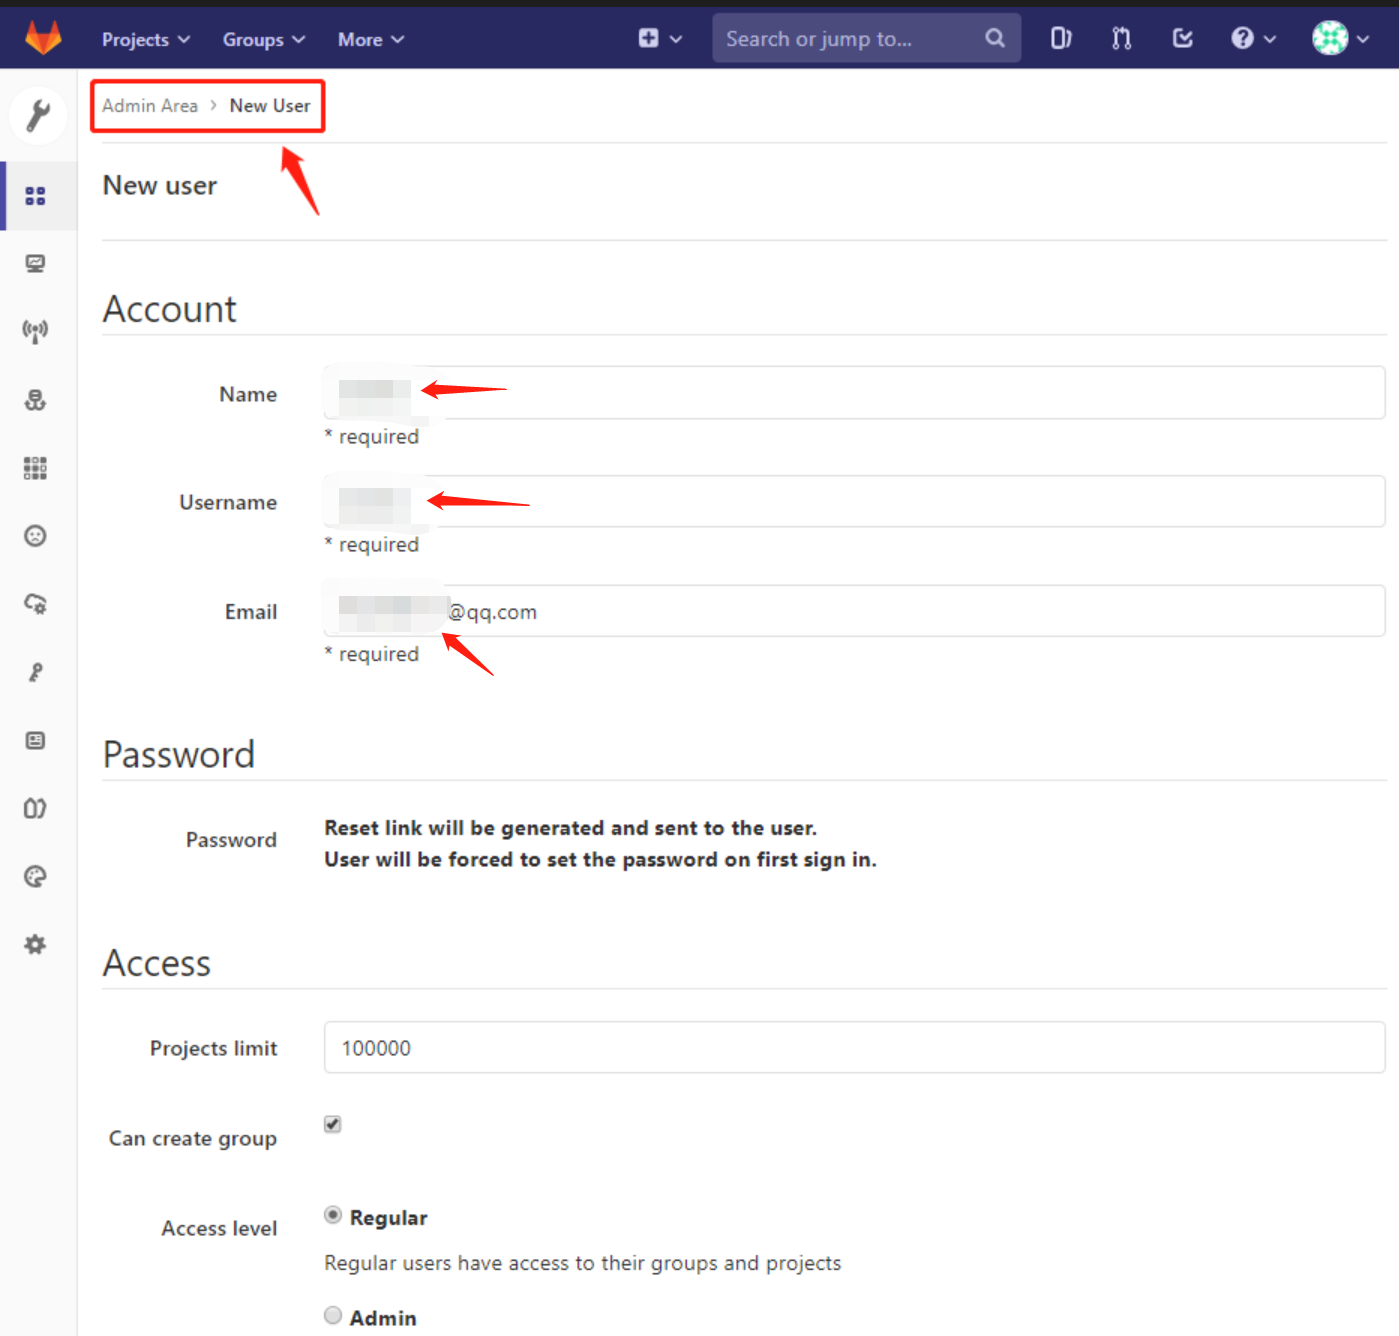
之后通过邮件确认即可
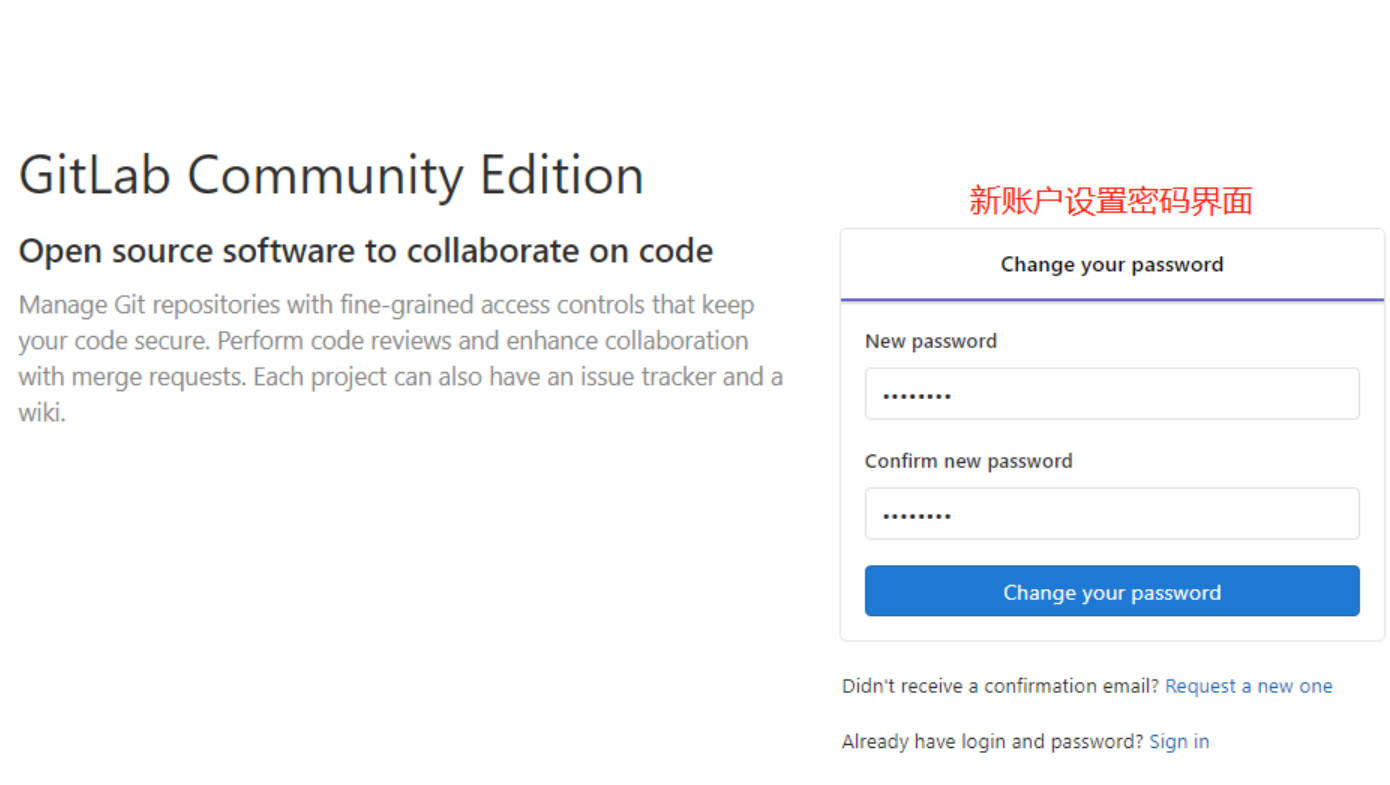
重新设置密码
-
第一次使用新账户登录要通过邮件设置密码
-
选择接受设置密码邮件的邮箱
-
到指定邮箱接受设置密码邮件
-
为新账户设置密码
创建组
- 使用管理员 root 创建组 ,一个组里面可以有多个项目分支,可以将开发添加到组里面进行设置权限,不同的组就是公司不同的开发项目或者服务模块,不同的组添加不同的开发即可实现对开发设置权限的管理。

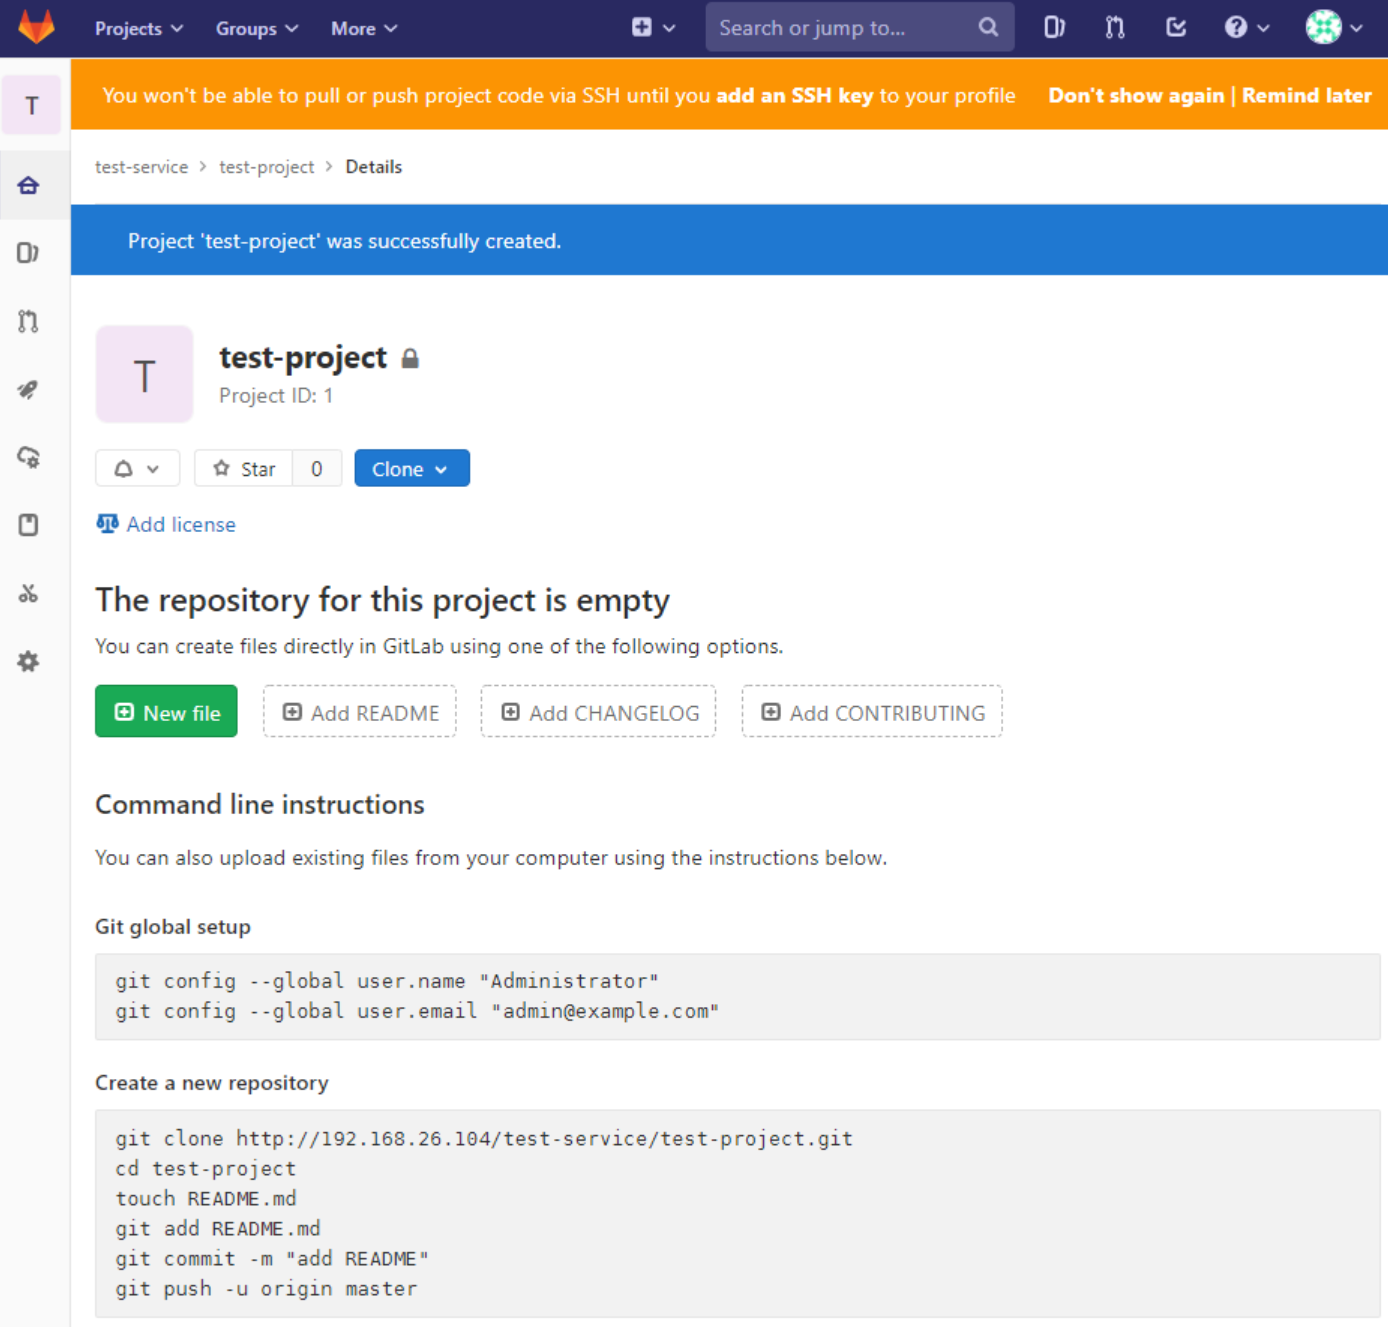
使用管理员创建项目
- 使用管理员创建项目

- 创建后的项目效果
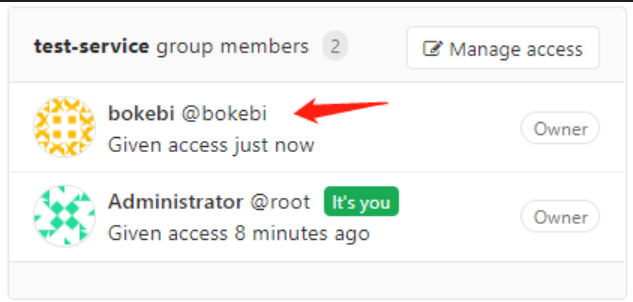
将用户添加到组

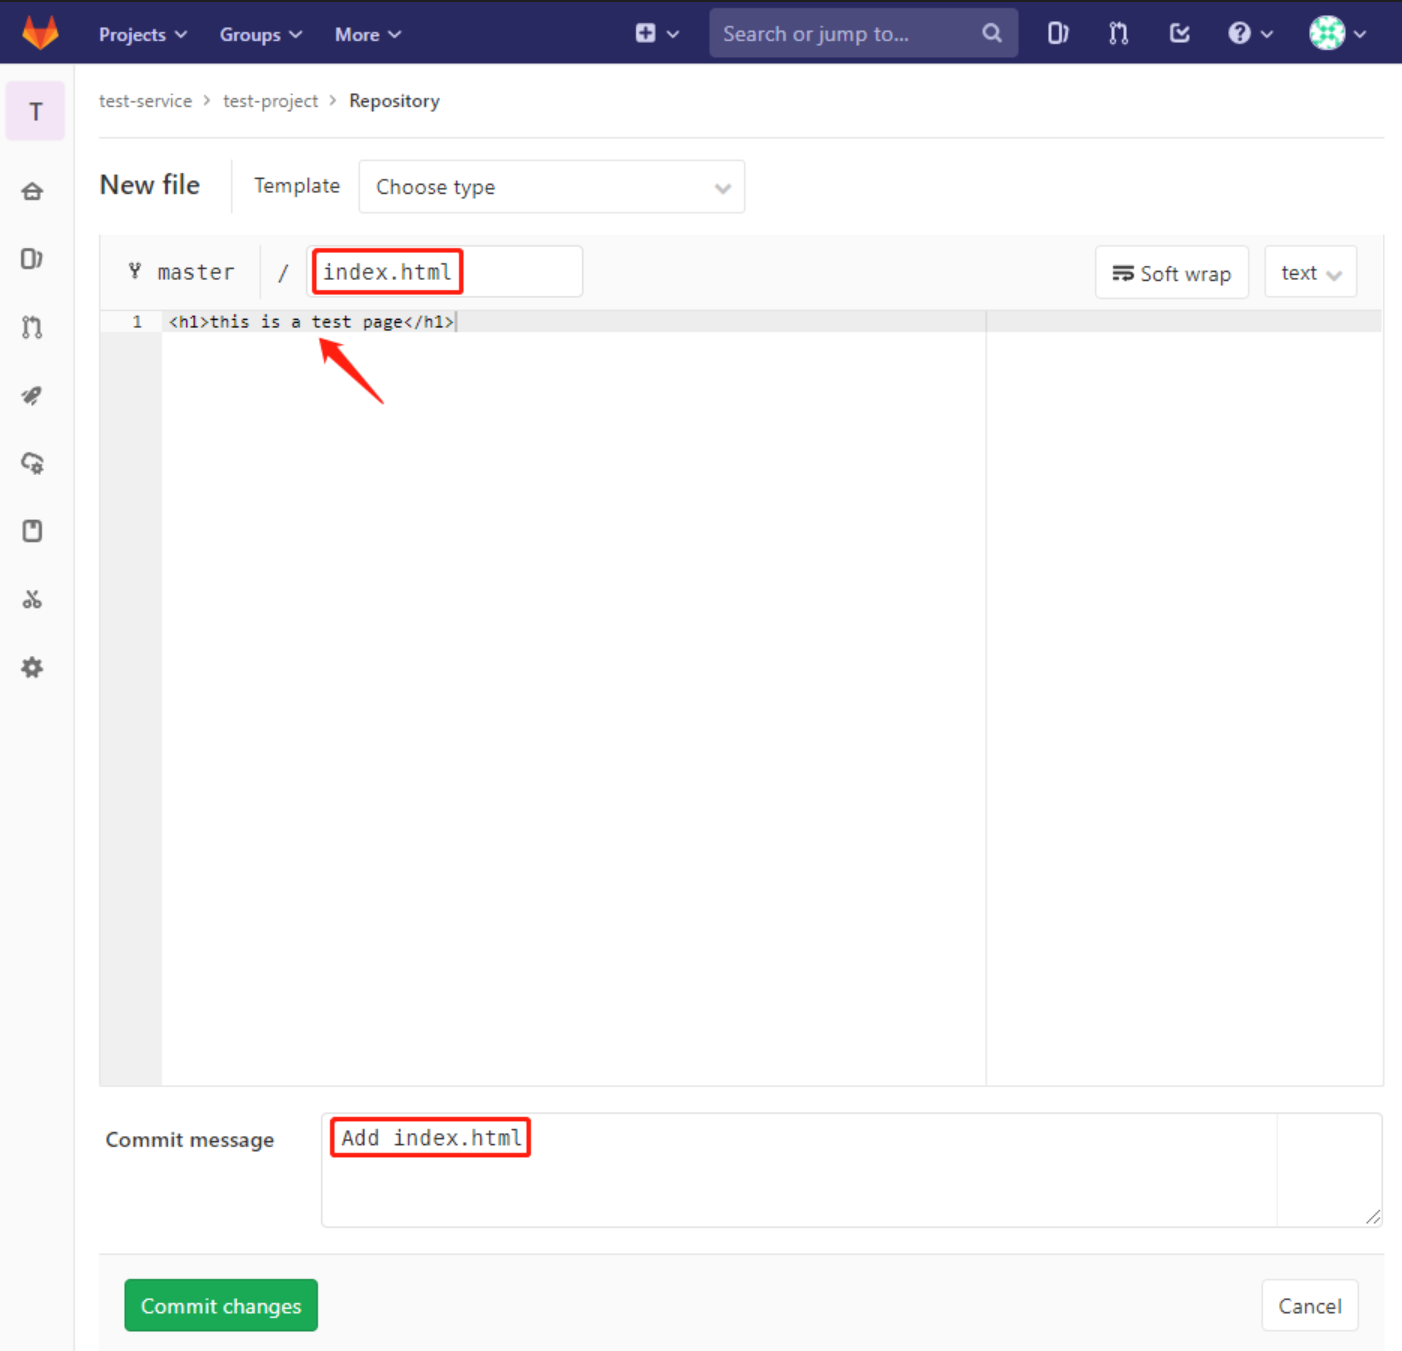
创建一个测试页面
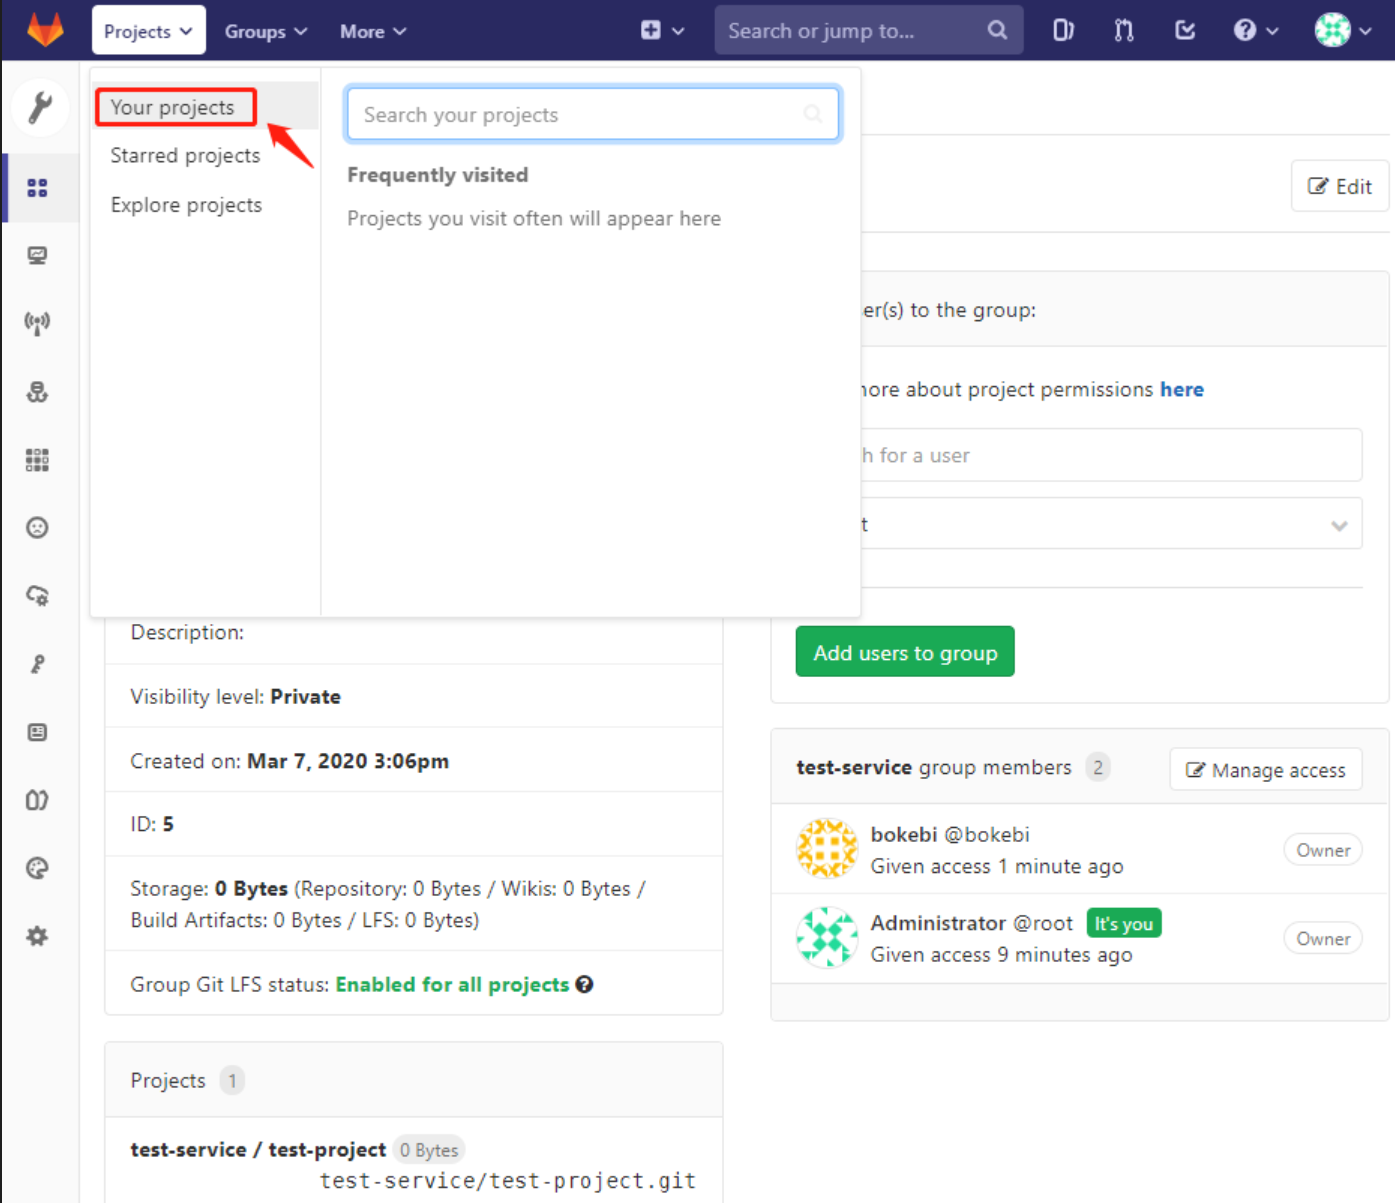
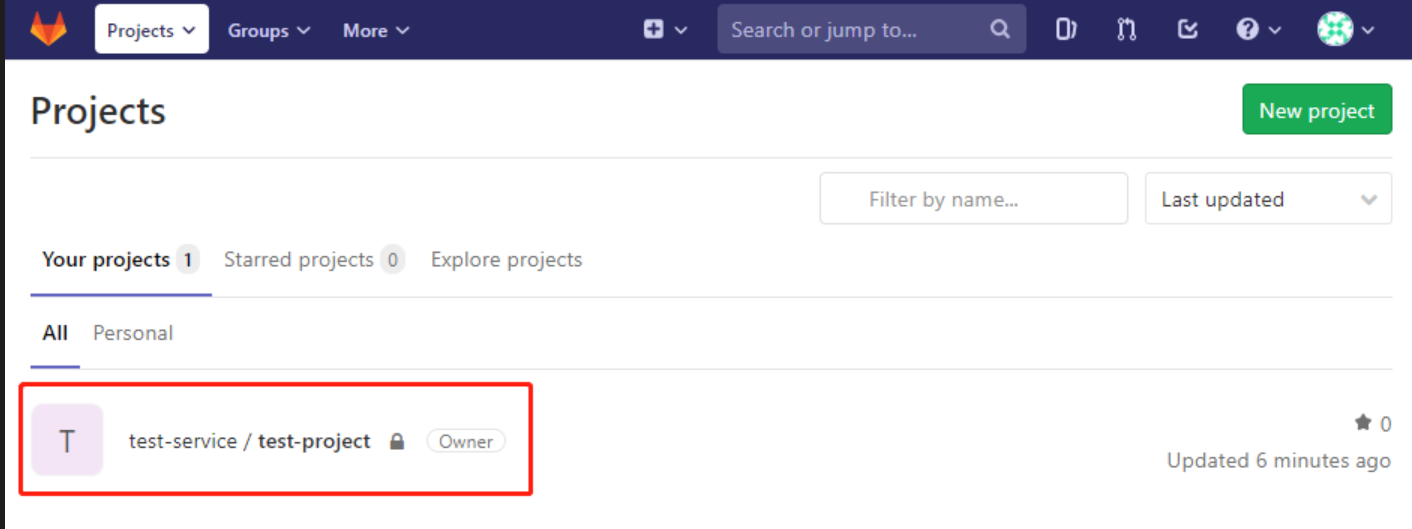
- 找到项目界面

- 编写一个测试页面

git 客户端测试 clone 项目
root@jenkins:/usr/local/src# git clone http://192.168.26.104/test-service/test-project.git
Cloning into 'test-project'...
Username for 'http://192.168.26.104':kaivi
Password for 'http://kaivi@192.168.26.104':
remote: Enumerating objects: 3, done.
remote: Counting objects: 100% (3/3), done.
remote: Total 3 (delta 0), reused 0 (delta 0)
Unpacking objects: 100% (3/3), done.

root@jenkins:/usr/local/src# cat test-project/index.html
<h1>this is a test page</h1>root@jenkins:/usr/local/src#
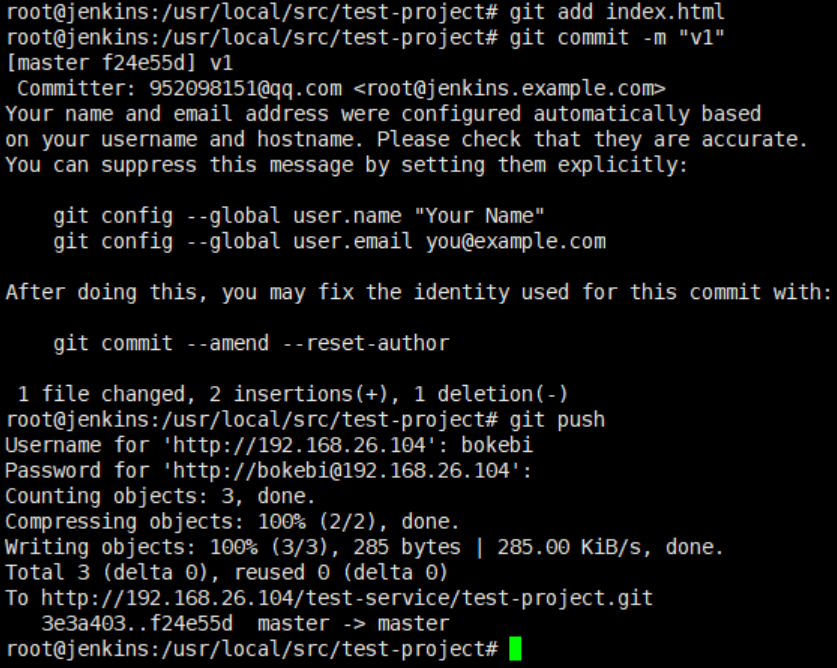
- 编辑文件并测试提交
root@jenkins:/usr/local/src# cd test-project/

root@jenkins:/usr/local/src/test-project# git config --global user.name "kaivi"
root@jenkins:/usr/local/src/test-project# git config --global user.name xxxxxxxxx@qq.com
root@jenkins:/usr/local/src/test-project# ls
index.html
root@jenkins:/usr/local/src/test-project# vim index.html
root@jenkins:/usr/local/src/test-project# cat index.html
<h1>this is a test page</h1>
<h1>this is the second test page</h1>
//添加到暂存区
root@jenkins:/usr/local/src/test-project# git add index.html

//添加到本地仓库
root@jenkins:/usr/local/src/test-project# git commit -m "v1"

//上传到中央仓库
root@jenkins:/usr/local/src/test-project# git push
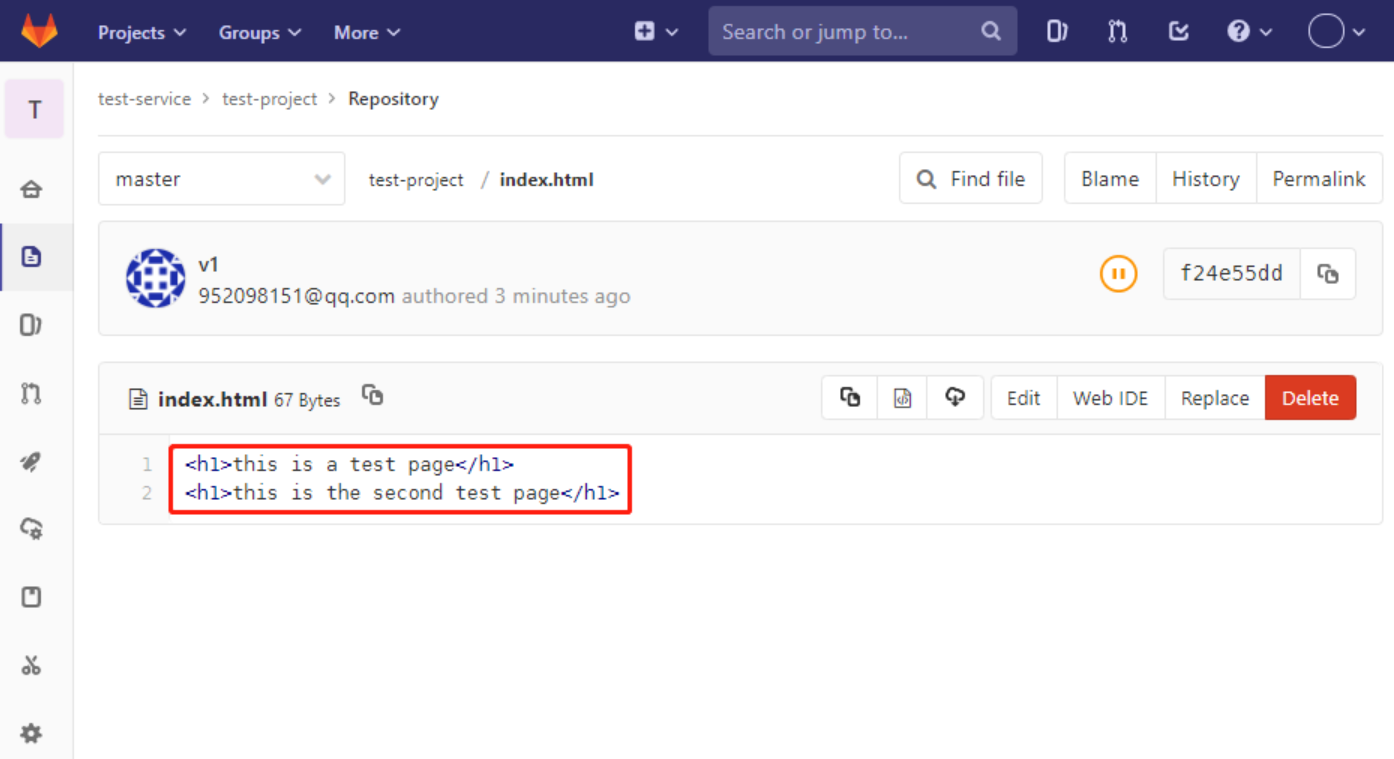
git web 端验证数据
git 使用
数据保存方式
- SVN 与 CVS
- 每次提交的文件都单独保存, 即按照文件的提交时间区分不同 的版本,保存至不同的逻辑存储区域,后期恢复的时候直接基于 之前版本恢复。

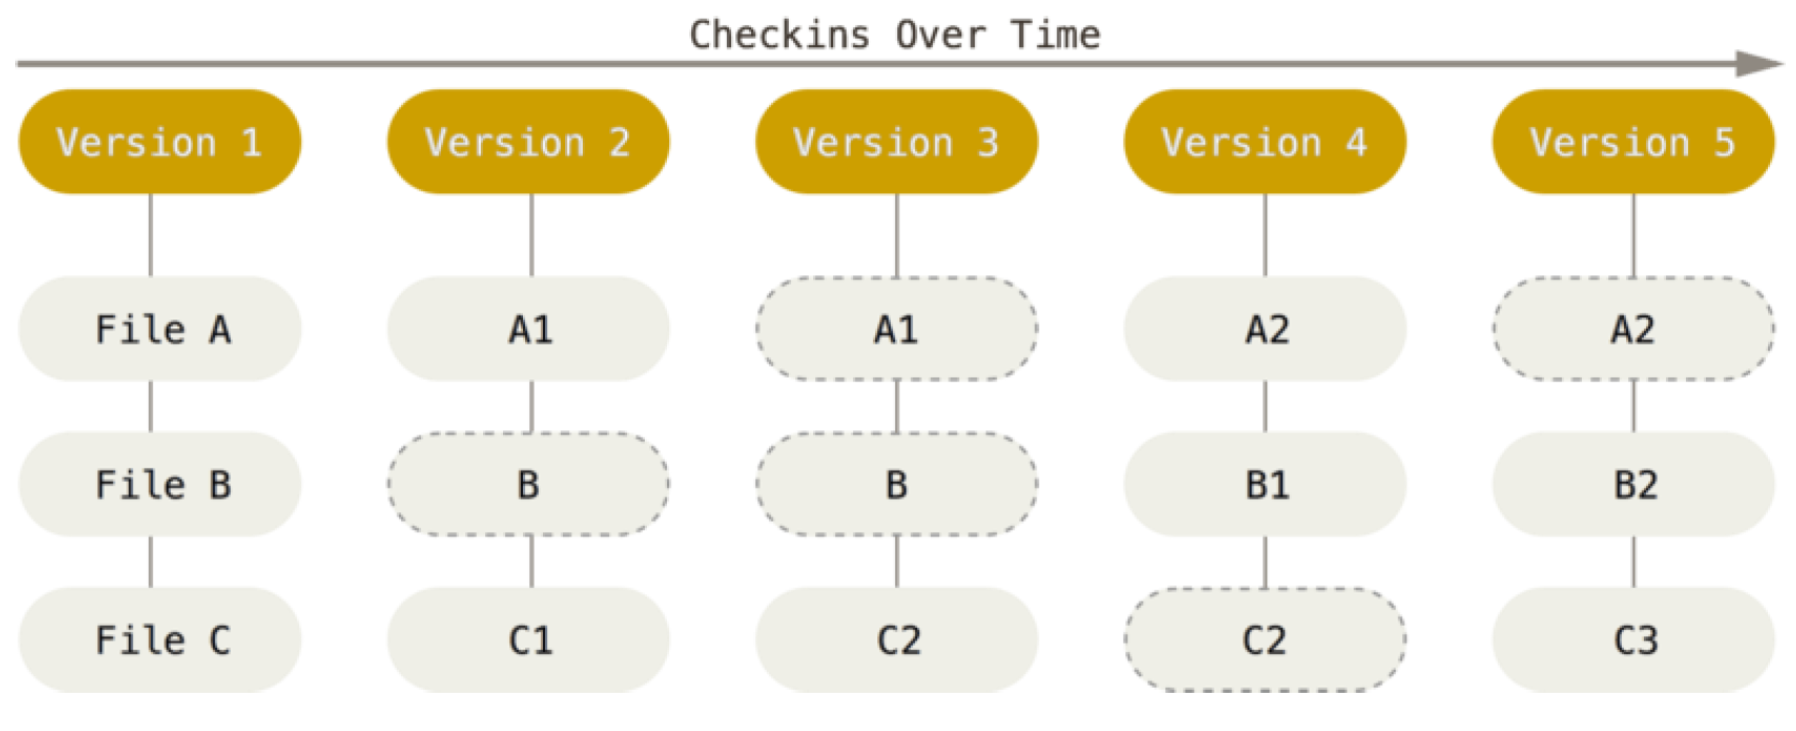
- Gitlab
- Gitlab 与 SVN 的数据保存方式不一样,gitlab 虽然也会在内部对数据进行逻辑划分保存,但是当后期提交的数据如果和之前提交过的数据没有变化,gitlab 就直接快照之前的文件,而不是在将文件重新上传一份在保存一遍,这样既节省了空间又加快了代码提交速度。
常用 git 命令
- 使用 git 命令下载代码与提交代码等操作
git config --global user.name "name" #设置全局用户名

git config --global user.email "xxx@xx.com" #设置全局邮箱

git config --global --list #列出用户全局设置

git add index.html / . #添加指定文件、目录或当前目录下所有数据到暂存区

git commit -m "11" #提交文件到工作区

git status #查看工作区的状态

git push #提交代码到服务器

git pull #获取代码到本地

git log #查看操作日志

vim .gitignore #定义忽略文件

git reset --hard HEAD^^ #git版本回滚,HEAD 为当前版本,加一个^为上一个,加两个^^为上上一个版本

git reflog #获取每次提交的 ID,可以使用 --hard 根据提交的 ID 进行版本回退

git reset --hard 5ae4b06 #回退到指定 ID 的版本

git branch #查看当前所处的分支

git checkout -b develop # 创建并切换到一个新分支

git checkout develop #切换分支
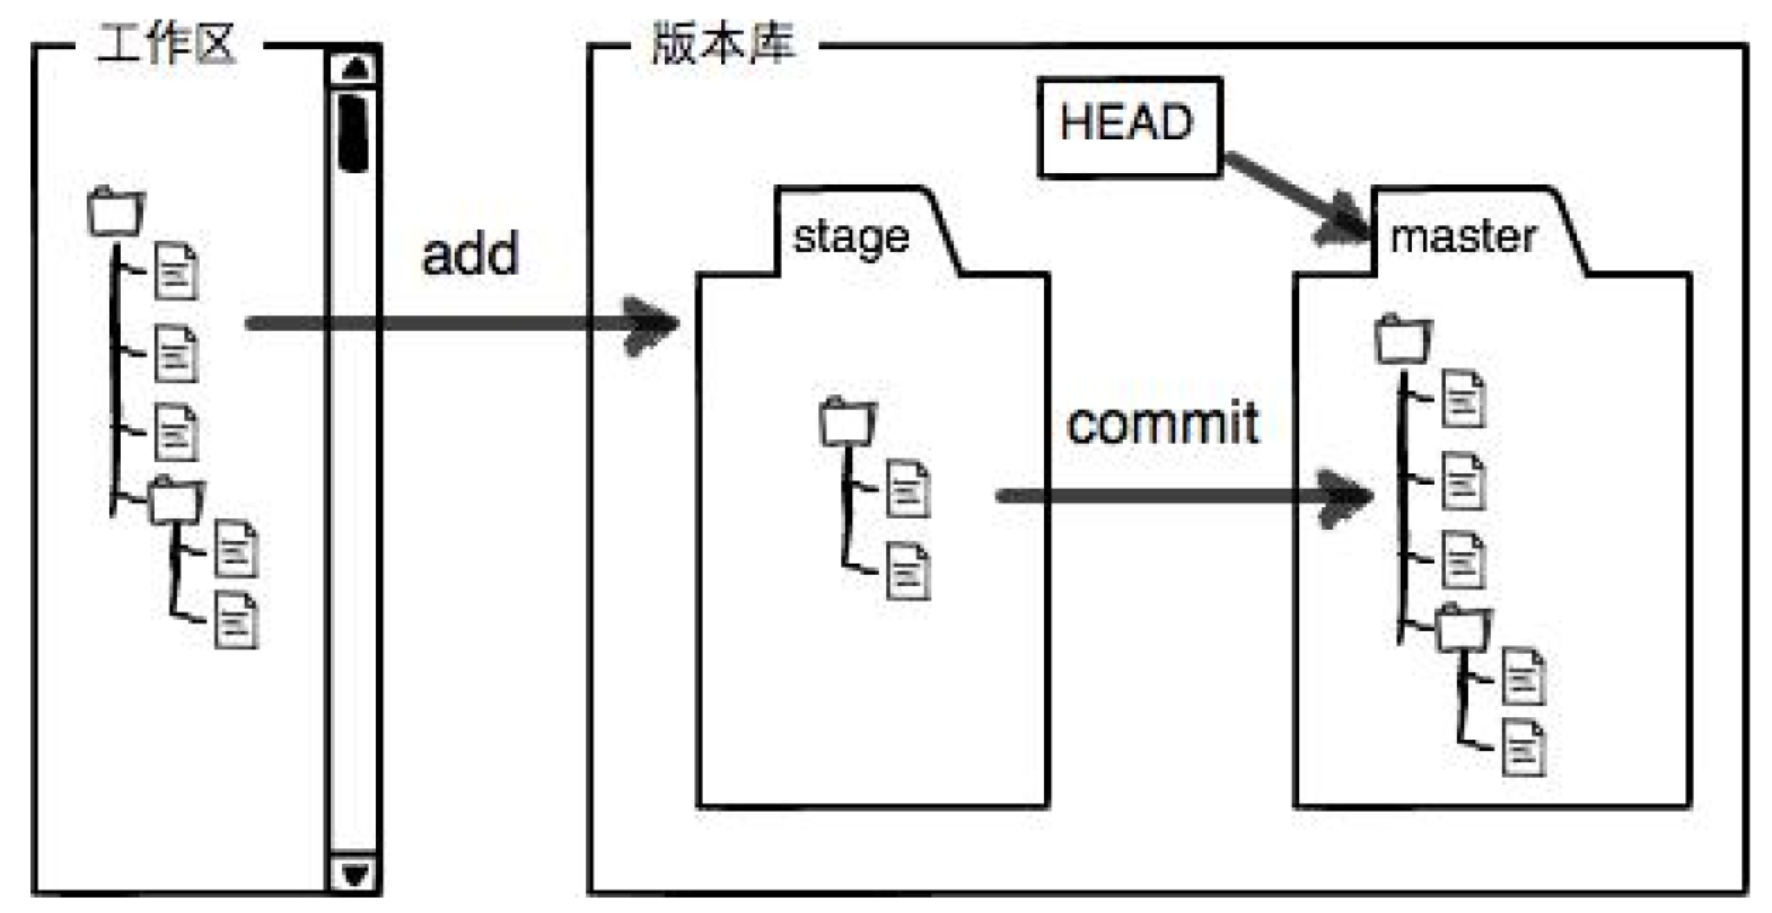
git 缓存区与工作区等概念
工作区
- clone 的代码或者开发自己编写的代码文件所在的目录,通常是代码所在的一个服务的目录名称。
暂存区
- 用于存储在工作区中对代码进行修改后的问价你所保存的地方,使用 git add 添加。
本地仓库
- 用于提交存储在工作区和暂存区中修改过的文件地方,使用 git commit 提交。
远程仓库
- 多个开发共同协作提交代码的仓库,即 gitlab 服务器。

停止 gitlab 数据服务
root@jenkins:/usr/local/src# gitlab-ctl stop unicorn
ok: down: unicorn: 0s, normally up
root@jenkins:/usr/local/src# gitlab-ctl stop sidekiq
ok: down: sidekiq: 0s, normally up
- 验证关闭项(gitlab-ctl status)
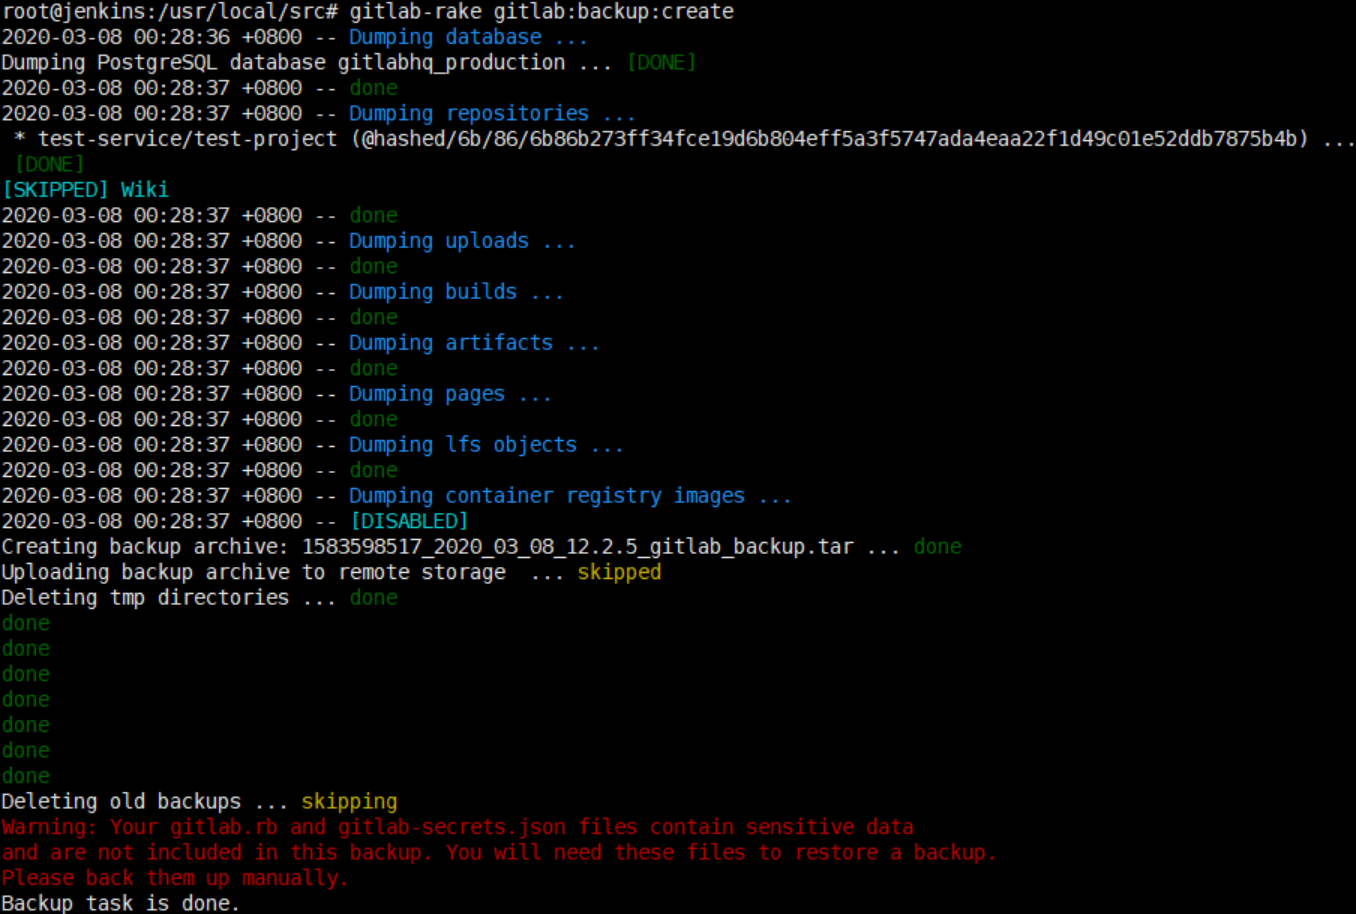
手动备份数据
//在任意目录即可备份当前 gitlab 数据
gitlab-rake gitlab:backup:create
- 备份过程
- 验证备份文件
root@jenkins:/usr/local/src# ll /var/opt/gitlab/backups/
total 140
drwx------  2 git  root   4096 Mar  8 00:38 ./
drwxr-xr-x 21 root root   4096 Mar  7 22:42 ../
-rw-------  1 git  git  133120 Mar  8 00:28 1583598517_2020_03_08_12.2.5_gitlab_backup.tar
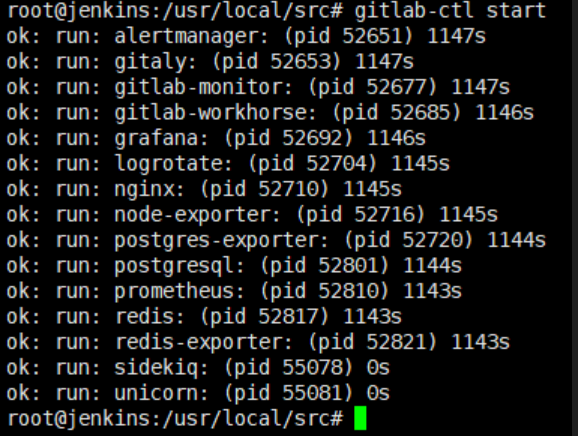
//备份完成后启动 gitlab
gitlab-ctl start
查看要恢复的文件
//gitlab 数据备份目录,需要使用命令备份的
/var/opt/gitlab/backups/

//nginx 配置文件
/var/opt/gitlab/nginx/conf/

//gitlab 配置文件
/etc/gitlab/gitlab.rb

//key 文件
/etc/gitlab/gitlab-secrets.json
执行恢复
- 删除一些数据,测试能否恢复
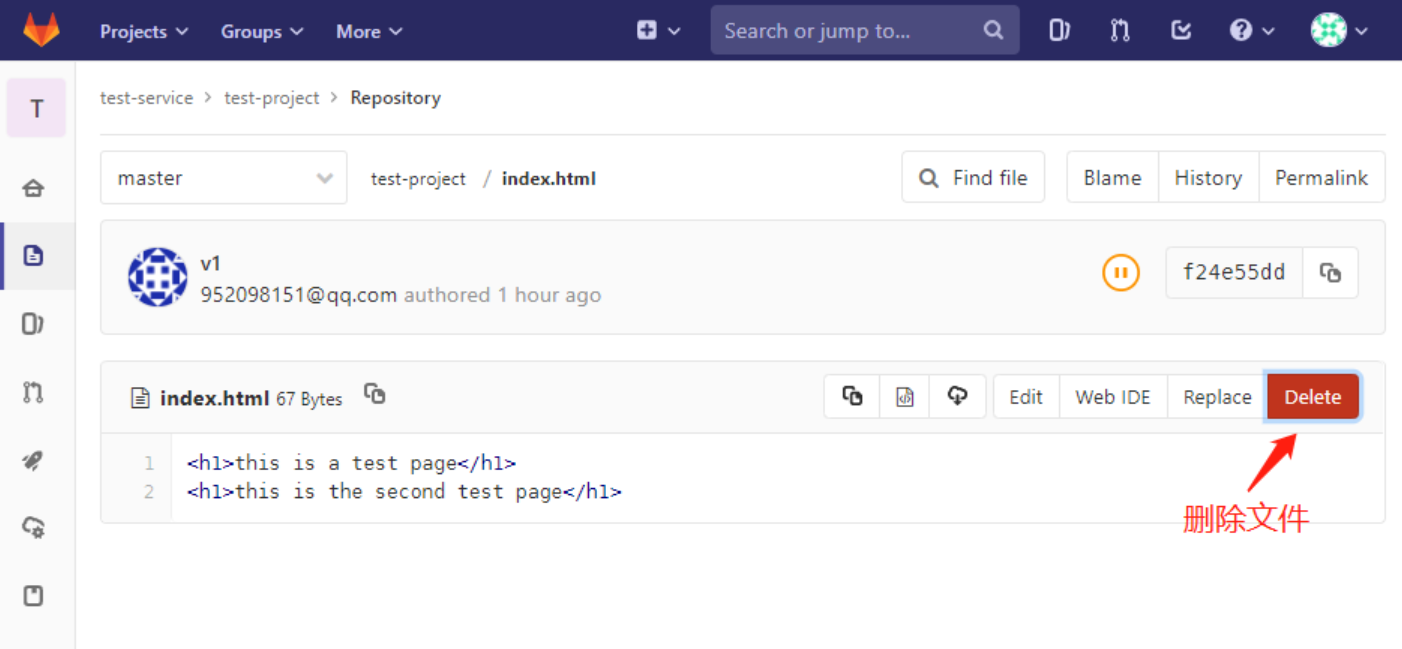
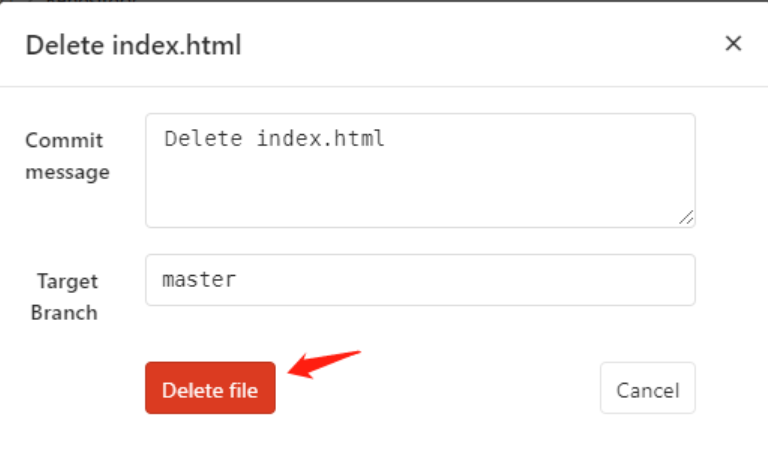

- 停止服务
//恢复数据前,需先停止服务
root@jenkins:/usr/local/src# gitlab-ctl stop unicorn
ok: down: unicorn: 0s, normally up
root@jenkins:/usr/local/src# gitlab-ctl stop sidekiq
ok: down: sidekiq: 0s, normally up
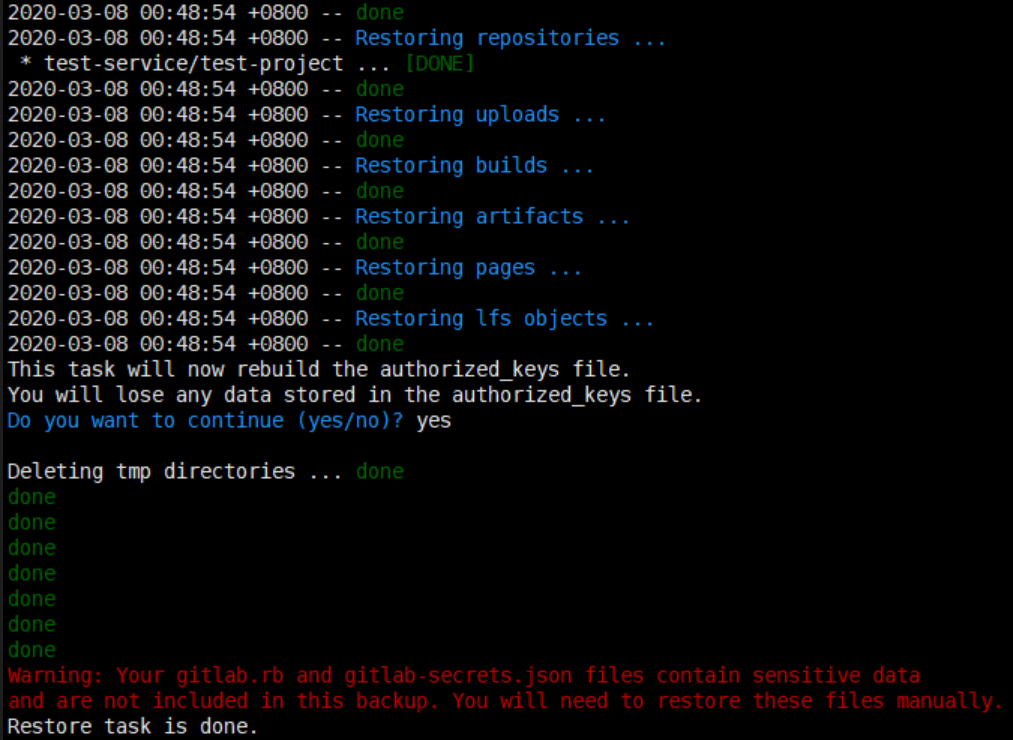
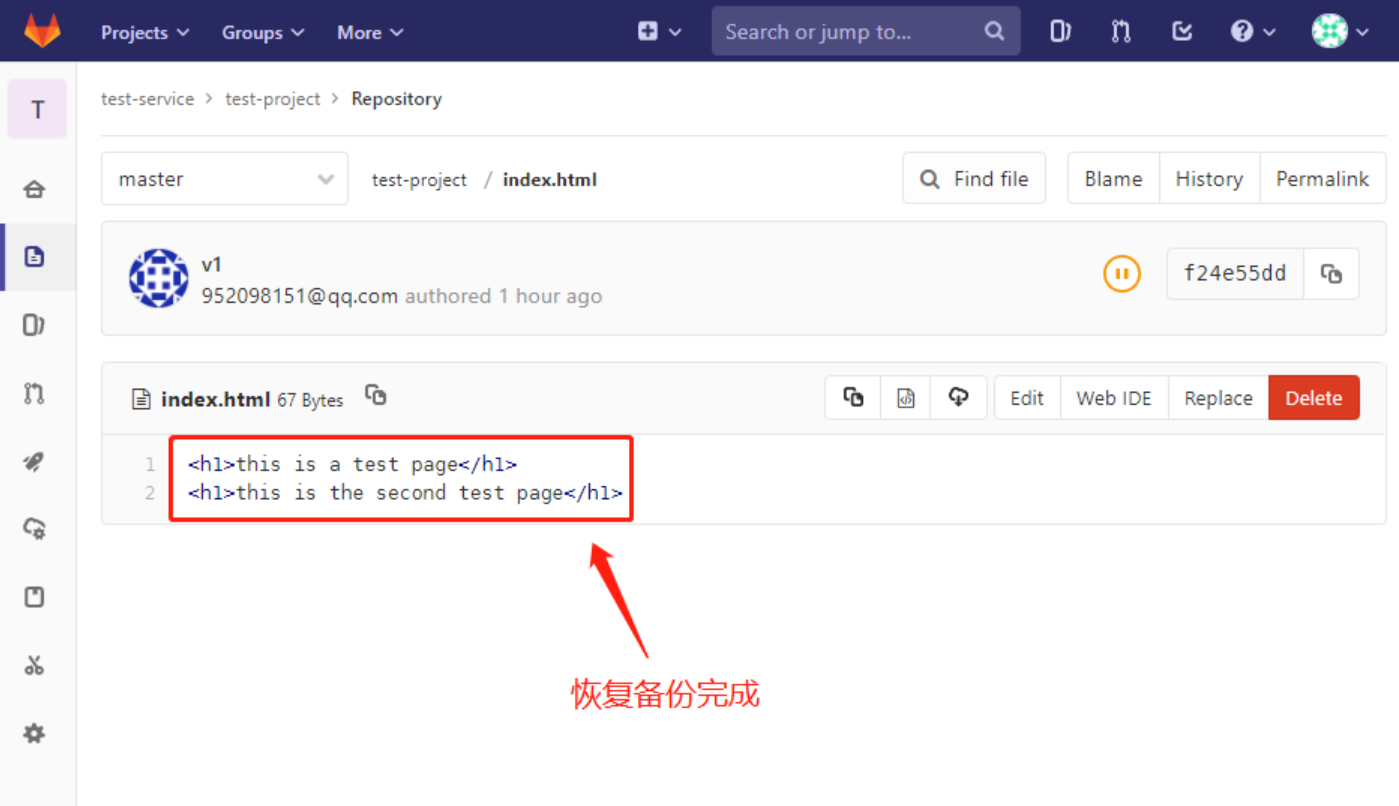
- 恢复备份
//BACKUP=后面跟/var/opt/gitlab/backups/目录下的备份文件名
root@jenkins:/usr/local/src# gitlab-rake gitlab:backup:restore BACKUP=1583598517_2020_03_08_12.2.5

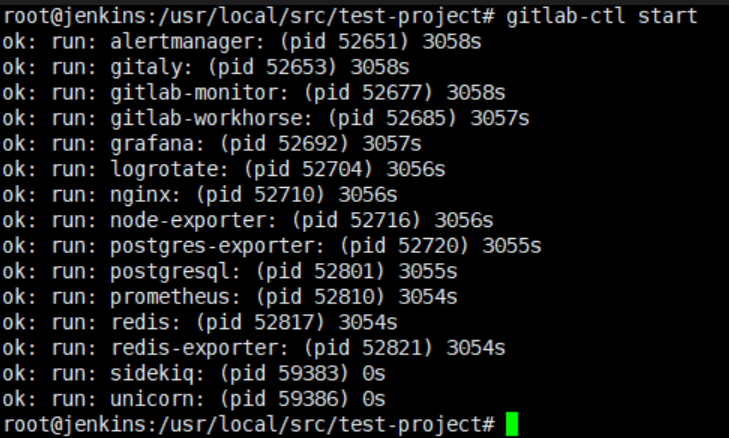
- 启动服务
root@jenkins:/usr/local/src# gitlab-ctl start
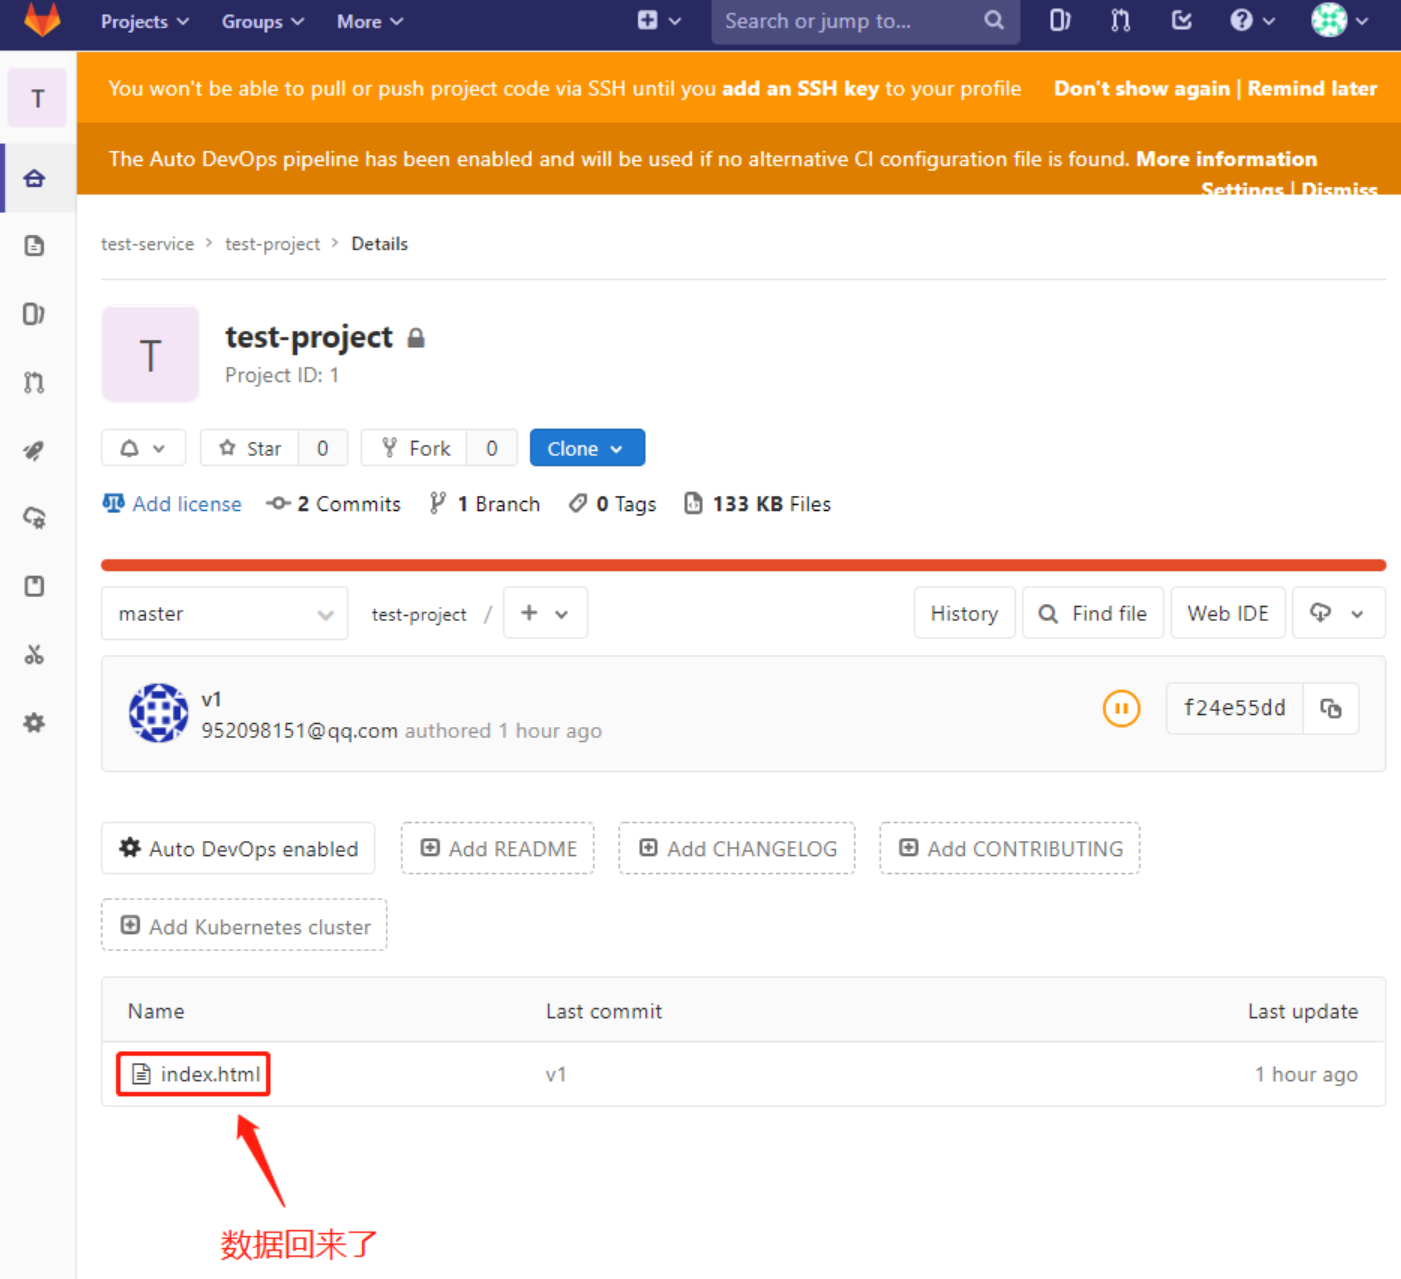
- web界面验证数据是否回来了
Gitlab 汉化
下载语言包替换
-
通过指定版本的语言包汉化
-
汉化包地址:
#首次安装gitlab步骤

//修改配置
vim /etc/gitlab/gitlab.rb

//生效文件
gitlab ctl reconfigure

------------------------------------------

#已安装gitlab步骤

//停gitlab服务
gitlab-ctl stop

//解压中文包
# tar xf gitlab-vX.Y.Z-zh.tar


//备份源文件
cp -rp /opt/gitlab/embedded/service/gitlab-rails /opt/gitlab-rails.bak

//替换文件
cp -rf gitlab-vX.Y.Z-zh/* /opt/gitlab/embedded/service/gitlab rails/

//生效文件
gitlab-ctl reconfigure

//起gitlab服务
gitlab-ctl start
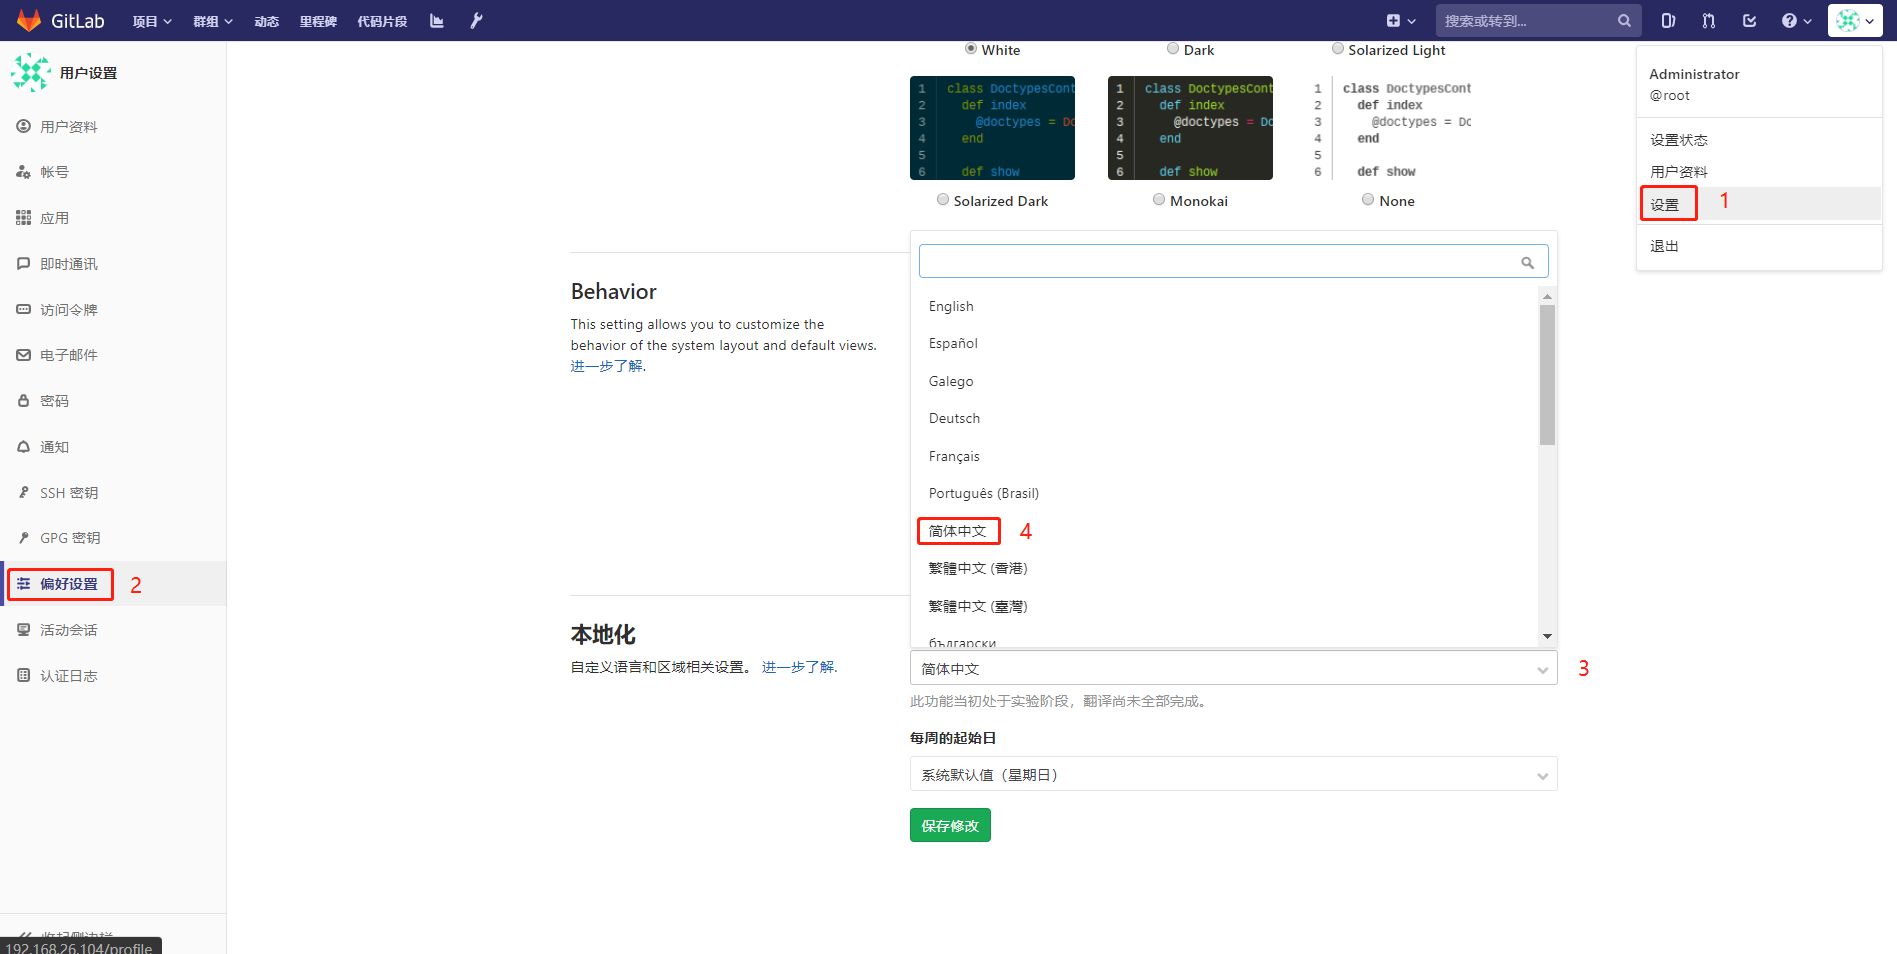
- web界面更改语言
- 右上角的账户下拉框选 Settings 然后左侧 Preferences 设置项,然后语言选择中文(保存之后记得刷新页面)
通过源码汉化
//停gitlab服务
gitlab-ctl stop

//克隆项目
git clone https://gitlab.com/xhang/gitlab.git

//查看当前的gitlab版本
head -n1 /opt/gitlab/version-manifest.txt

//进入项目目录
cd gitlab

//根据适用版本gitlab与中文版本作比较,并将不同写入文件
git diff v11.9.8 v11.9.8-zh
git diff v12.3.5 v12.3.5-zh
git diff v11.9.8 v11.9.8-zh > /root/v11.9.8-zh.diff

//导入差异文件
patch -f -d /opt/gitlab/embedded/service/gitlab-rails-p1 < /root/v11.9.8 zh.diff

//生效文件
gitlab-ctl reconfigure

//起gitlab服务
git-ctl start
常见的代码部署方式
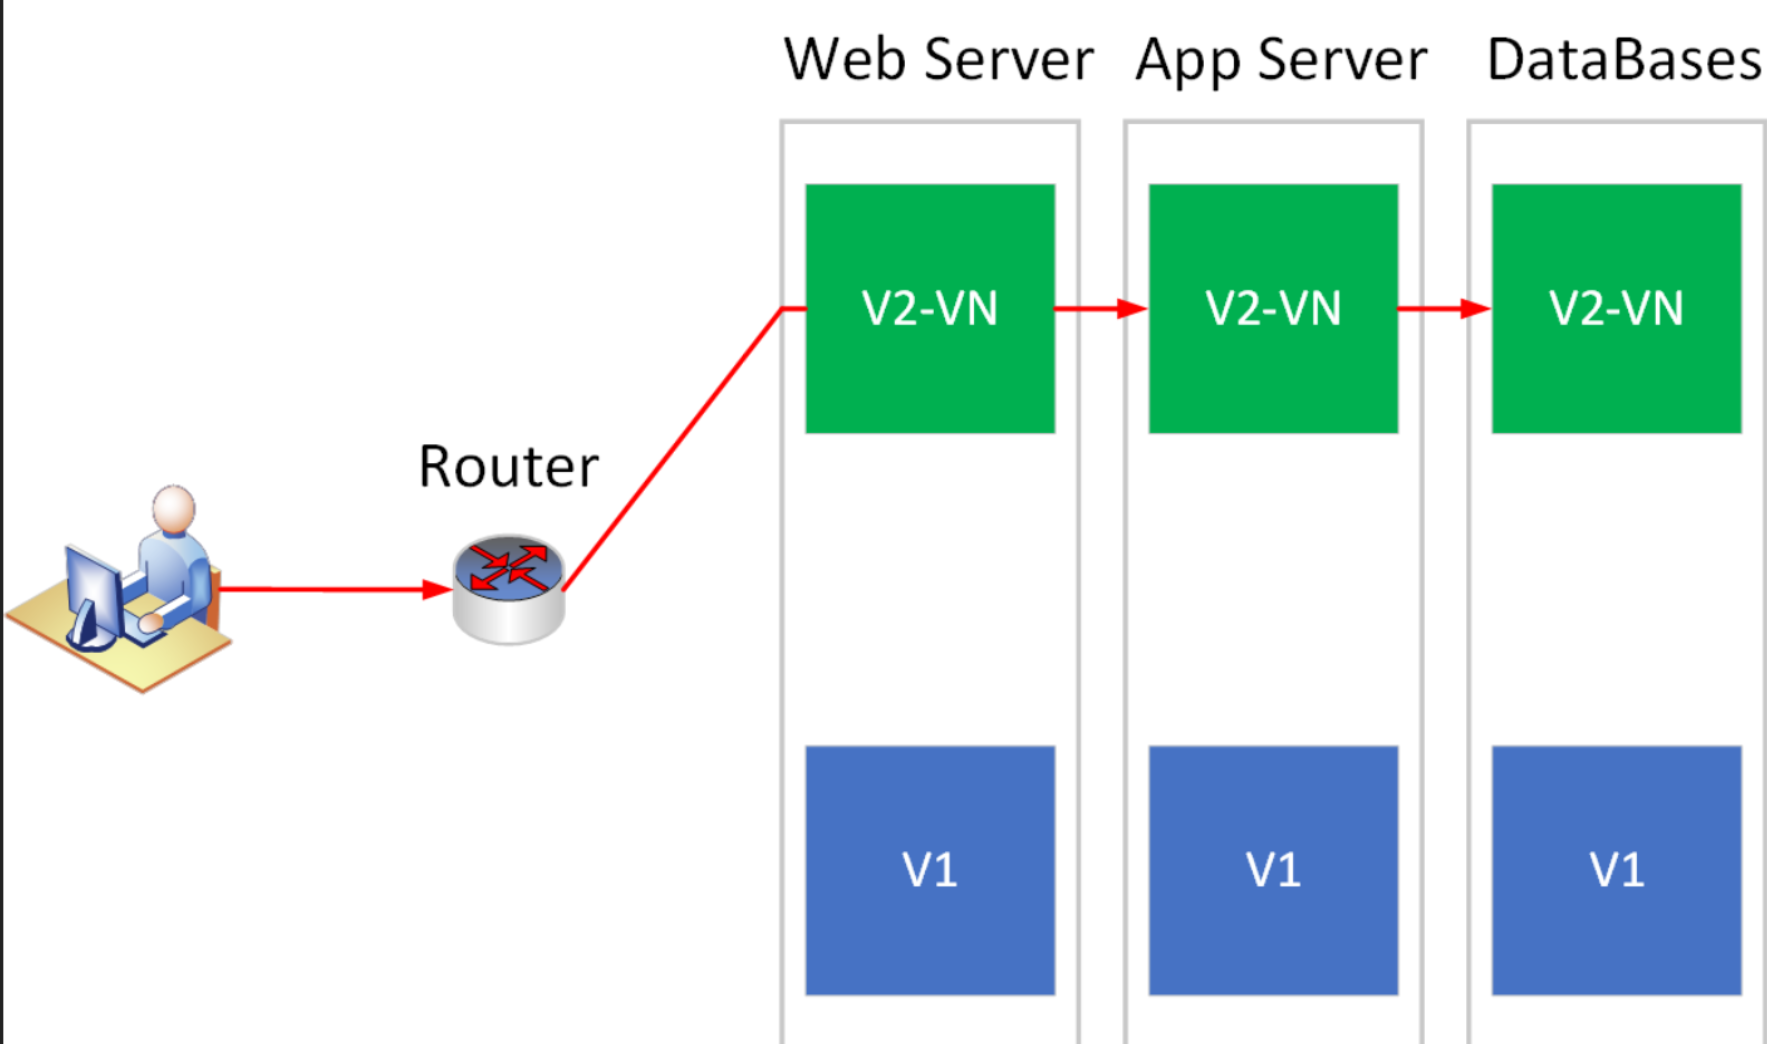
蓝绿部署
- 蓝绿部署指的是不停老版本代码(不影响上一个版本访问),而是在另外一套环境部署版本然后进行测试,测试通过后将用户流量切到新版本,其特点为业务无中断,升级风险相对较小。
具体过程
-
1.当前版本业务正常访问(V1)
-
2.在另外一套环境部署新代码(V2),代码可能是增加了功能或者是修复了某些bug
-
3.测试通过之后将用户请求流量切到新版本环境
-
4.观察一段时间,如果有异常直接回切换到旧版本
-
5.下次升级,将旧版本升级到新版本(V3)
蓝绿部署使用的场景
-
1.不停止老版本,额外部署一套新的版本,等测试发现新版本OK后,删除老版本。
-
2.蓝绿发布是一种用于升级与更新的发布策略,部署的最小维度是容器,而发布的最小维度是应用。
-
3.蓝绿发布对于增量升级有比较好的支持,但是对于涉及数据表结构变更等等不可逆的升级,并不完全适用于蓝绿发布来实现,需要结合一些业务的逻辑以及数据迁移与回滚的策略才可以完全满足。
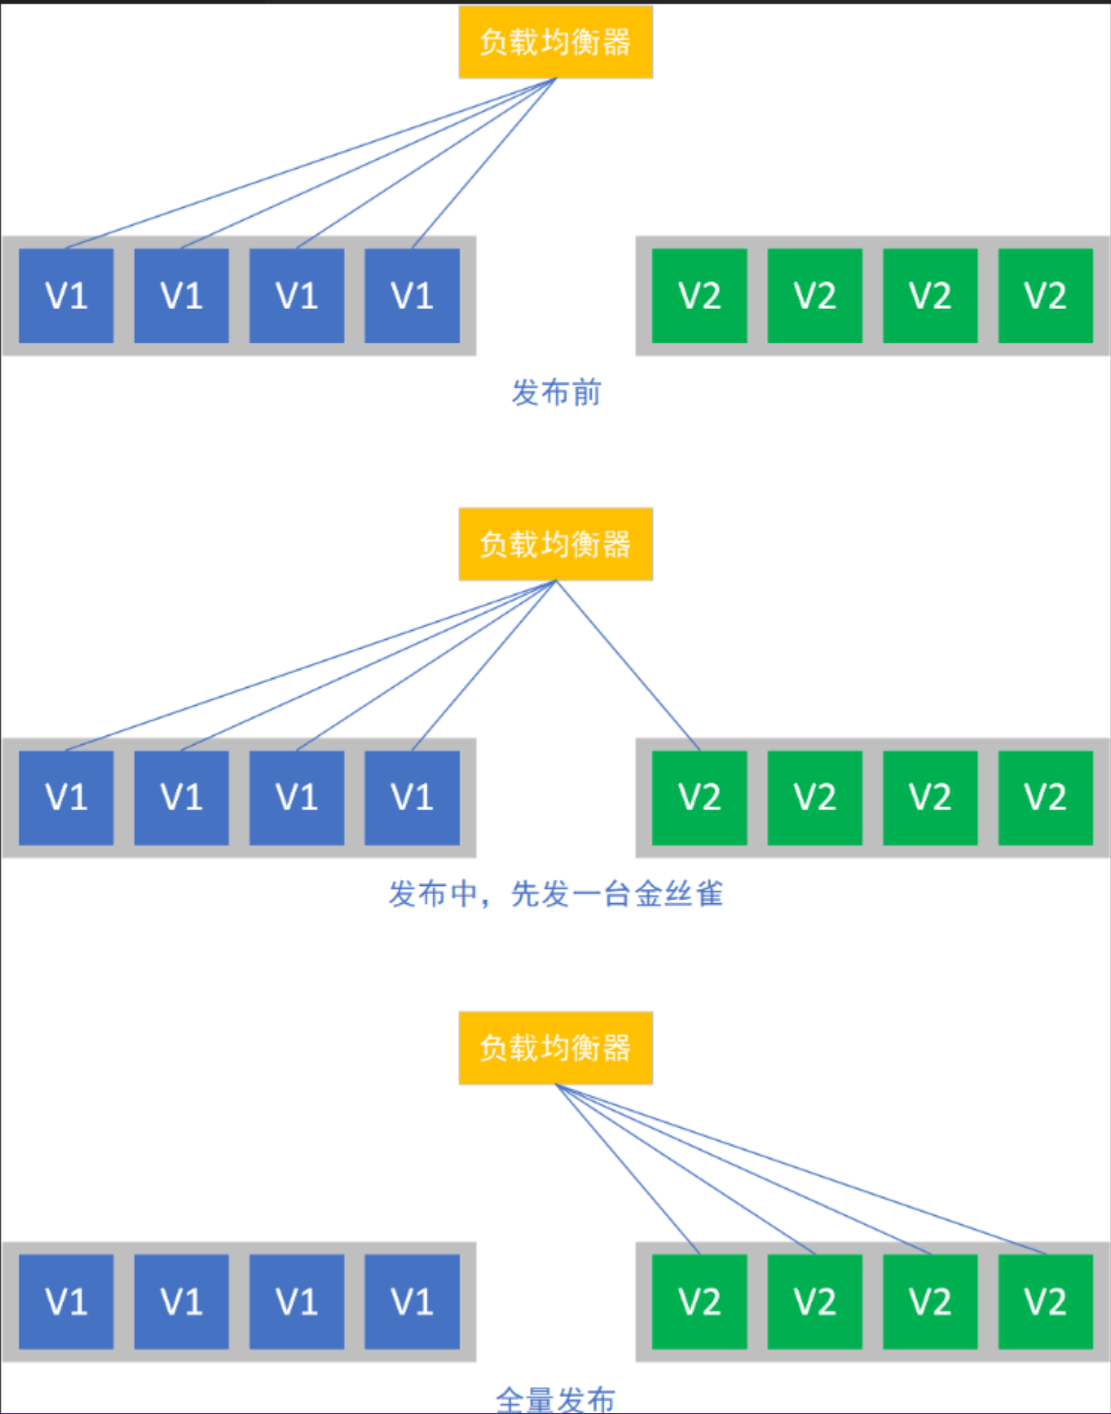
金丝雀发布
-
金丝雀发布也叫灰度发布,是指在黑与白之间,能够平滑过渡的一种发布方式,灰度发布是增量发布的一种类型,灰度发布实在原有版可用的情况下,同时部署一个新版本应用作为"金丝雀"(小白鼠),测试新版本的性能和表现,以保障整体系统稳定的情况下,尽早发现、调整问题。
-
“金丝雀"的由来:17世纪,英国矿井工人发现,金丝雀对瓦斯这种气体十分敏感。空气中哪怕有极微量的瓦斯,金丝雀也会停止唱歌;而当瓦斯含量超过一定限量时,虽然愚钝的人类毫无察觉,但是金丝雀早已毒发身亡。当时在采矿设备相对简陋的条件下,矿工们每次下井身边都会带上一直金丝雀作为"瓦斯检测指标”,以便在危险状况下紧急撤离。
金丝雀发布/灰度发布步骤组成
-
1.准备好部署各个阶段的工作,包括:构建工作、测试脚本、配置文件和部署清单文件。
-
2.从负载均衡列表中移除掉"金丝雀"服务器。
-
3.升级"金丝雀"应用(排掉原有流量并进行部署)。
-
4.对应用进行自动化测试
-
5.将"金丝雀"服务器重新添加到负载均衡列表中(连通性和健康检查)。
-
6.如果"金丝雀"在线使用测试成功,升级剩余的其他服务器(否则就回滚)。灰度发布可以保证整体系统的稳定,在初始灰度的时候就可以发现、调整问题,以保证其影响度。
灰度发布/金丝雀使用的场景
-
1.不停止老版本,额外搞一套新版本,不同版本应用共存
-
2.灰度发布,常常按照用户设置路由权重,例如90%的用户维护使用老版本,10%的用户尝试新版本。
-
经常与A/B测试一起使用,用于测试选择多种方案。
滚动发布
- 滚动发布,一般是取出一个或多个服务器停止服务,执行更新,并重新将其投入使用。周而复始,直到集群中所有的实例都更新成新版本。

A/B 测试
- A/B 测试也是同时运行两个 APP 环境,但是和蓝绿部署完全是两码事,A/B 测试时用来测试应用功能表现的方法,列出可用性、受欢迎度、可见性等等,蓝绿部署的目的是安全稳定的发布新版本应用,并在必要时回滚,即蓝绿部署是一套正式环境在线,而 A/B 测试是两套正式环境在线。


 5046
5046


 被折叠的 条评论
为什么被折叠?
被折叠的 条评论
为什么被折叠?
 到【灌水乐园】发言


