


Java_Spring框架二(练习DI和IOC)
依赖注入(DI):
当编写一个复杂的 Java 应用程序时,应用程序类应该尽可能的独立于其他的 Java 类来增加这些类可重用可能性,当进行单元测试时,可以使它们独立于其他类进行测试。依赖注入(或者有时被称为配线)有助于将这些类粘合在一起,并且在同一时间让它们保持独立。
这里将依赖关系部分转化为两个类之间的关联。例如,类 A 依赖于类 B。现在,让我们看一看第二部分,注入。所有这一切都意味着类 B 将通过 IoC 被注入到类 A 中。
IoC 容器:
IOC 容器具有依赖注入功能的容器,它可以创建对象,IOC 容器负责实例化、定位、配置应用程序中的对象及建立这些对象间的依赖。通常new一个实例,控制权由程序员控制,而"控制反转"是指new实例工作不由程序员来做而是交给Spring容器来做。

实例:
两个实体类:
package cn.zbw.domain;

public class AddressInfo {
    private String homeAddress;
    private String schoolAddress;

    public AddressInfo(String homeAddress, String schoolAddress) {
        this.homeAddress = homeAddress;
        this.schoolAddress = schoolAddress;
    }

    public AddressInfo() {
    }

    public String getHomeAddress() {
        return homeAddress;
    }

    public void setHomeAddress(String homeAddress) {
        this.homeAddress = homeAddress;
    }

    public String getSchoolAddress() {
        return schoolAddress;
    }

    public void setSchoolAddress(String schoolAddress) {
        this.schoolAddress = schoolAddress;
    }
}
package cn.zbw.domain;

public class EmpInfo {
    private int empId;
    private String empName;
    private String empSex;
    private AddressInfo address;

    public EmpInfo(int empId, String empName, String empSex, AddressInfo address) {
        this.empId = empId;
        this.empName = empName;
        this.empSex = empSex;
        this.address = address;
    }

    public EmpInfo() {
    }

    public int getEmpId() {
        return empId;
    }

    public void setEmpId(int empId) {
        this.empId = empId;
    }

    public String getEmpName() {
        return empName;
    }

    public void setEmpName(String empName) {
        this.empName = empName;
    }

    public String getEmpSex() {
        return empSex;
    }

    public void setEmpSex(String empSex) {
        this.empSex = empSex;
    }

    public AddressInfo getAddress() {
        return address;
    }

    public void setAddress(AddressInfo address) {
        this.address = address;
    }
}
实现自定义方法:
package cn.zbw.dao.impl;

import cn.zbw.dao.EmpInfoDao;

public class EmpInfoDaoImpl implements EmpInfoDao {
    @Override
    public void addEmp() {
        System.out.println("你很漂亮,漂亮的不是你,是十八岁");
    }
}
xml配置文件:
<?xml version="1.0" encoding="UTF-8"?>
<beans xmlns="http://www.springframework.org/schema/beans"
       xmlns:xsi="http://www.w3.org/2001/XMLSchema-instance"
       xsi:schemaLocation="http://www.springframework.org/schema/beans http://www.springframework.org/schema/beans/spring-beans.xsd">

<bean id="address" class="cn.zbw.domain.AddressInfo">
    <property name="homeAddress" value="宁夏省石嘴山市山水大道"></property>
    <property name="schoolAddress" value="宁夏省石嘴山市星光大道"></property>
</bean>

    <bean id="emp" class="cn.zbw.domain.EmpInfo">
        <property name="empId" value="1001"></property>
        <property name="empName" value="冰冰"></property>
        <property name="empSex" value="女"></property>
        <property name="address" ref="address"></property>
    </bean>
    <bean id="empInfo" class="cn.zbw.dao.impl.EmpInfoDaoImpl"></bean>
    <bean id="empService" class="cn.zbw.service.EmpInfoService" autowire="byType"></bean>
</beans>
Test01:
package cn.zbw.test;
import cn.zbw.domain.AddressInfo;
import cn.zbw.domain.EmpInfo;
import cn.zbw.service.EmpInfoService;
import org.springframework.context.ApplicationContext;
import org.springframework.context.support.ClassPathXmlApplicationContext;
public class Test1 {
public static void main(String[] args) {
test01();
}
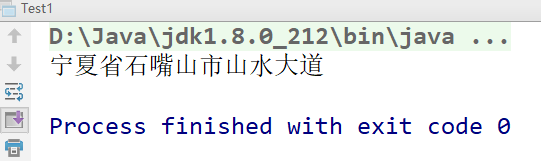
private static void test01() {
ApplicationContext ac = new ClassPathXmlApplicationContext("beans.xml");
EmpInfo ei = (EmpInfo) ac.getBean("emp");
System.out.println(ei.getAddress().getHomeAddress());
}
}
结果是:
Test02:
package cn.zbw.test;
import cn.zbw.service.EmpInfoService;
import org.springframework.context.ApplicationContext;
import org.springframework.context.support.ClassPathXmlApplicationContext;
public class Test02 {
public static void main(String[] args) {
test02();
}
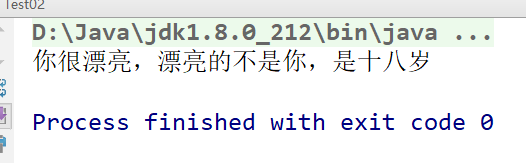
private static void test02() {
ApplicationContext ac = new ClassPathXmlApplicationContext("beans.xml");
EmpInfoService eis = (EmpInfoService) ac.getBean("empService");
eis.addEmp();
}
}
结果是:
Test03:
package cn.zbw.test;

import cn.zbw.domain.EmpInfo;
import org.springframework.context.ApplicationContext;
import org.springframework.context.support.ClassPathXmlApplicationContext;

public class Test03 {
    public static void main(String[] args) {
        test03();
    }

    private static void test03() {
        ApplicationContext ac = new ClassPathXmlApplicationContext("beans.xml");
        EmpInfo ei= (EmpInfo) ac.getBean("emp");
        System.out.println(ei.getEmpName());
        System.out.println(ei.getEmpSex());
    }
}
结果是:


 6316
6316


 被折叠的 条评论
为什么被折叠?
被折叠的 条评论
为什么被折叠?
 到【灌水乐园】发言


