


了解Security安全框架,首先要了解它的执行流程(过滤链)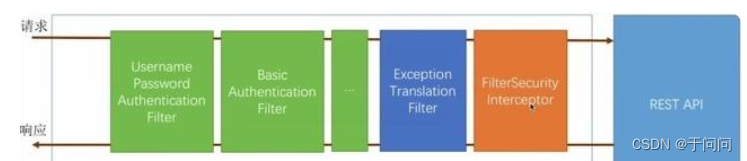
在不引入Security依赖的情况下
下面这个接口就是一个没有任何限制的接口,可以任意的访问。
@RestController
@RequestMapping(value = "/admi")
public class AdminDemoController {

    @RequestMapping(value = "/demo")
    public String run() {
        return "successfully";
    }

}
引入依赖之后,就已经开始整合了SpringSecurity安全框架
<!-- security-->
<dependency>
<groupId>org.springframework.boot</groupId>
<artifactId>spring-boot-starter-security</artifactId>
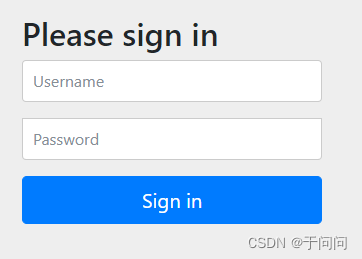
</dependency>此刻你再访问/admi/demo接口,你就会发现如图(此时的账号是user,密码是一个随机的字符串)
密码在打印到控制台上
实战演练
回到文章最开始的部分提到的流程图
第一个过滤器就是UsernamePasswordAuthenticationFilter
源码如下↓
先判断是否是Post请求
再将username和password封装成UsernamePasswordAuthenticationToken对象
并生成Authentication对象返回(此时Authentication并没有通过认证)
    public Authentication attemptAuthentication(HttpServletRequest request, HttpServletResponse response) throws AuthenticationException {
        if (this.postOnly && !request.getMethod().equals("POST")) {
            throw new AuthenticationServiceException("Authentication method not supported: " + request.getMethod());
        } else {
            String username = this.obtainUsername(request);
            String password = this.obtainPassword(request);
            if (username == null) {
                username = "";
            }

            if (password == null) {
                password = "";
            }

            username = username.trim();
            UsernamePasswordAuthenticationToken authRequest = new UsernamePasswordAuthenticationToken(username, password);
            this.setDetails(request, authRequest);
            return this.getAuthenticationManager().authenticate(authRequest);
        }
    }
接下来就会调用我们自己实现UserDetailsService接口的实现类,调用loadUserByUsername方法
返回UserDetails对象
@Service
public class UserService implements UserDetailsService {

    @Bean
    PasswordEncoder passwordEncoder() {
        return new BCryptPasswordEncoder();
    }

    @Autowired
    private PasswordEncoder passwordEncoder;

    @Override
    public UserDetails loadUserByUsername(String username) throws UsernameNotFoundException
        if (!"yuwenwen".equals(username)) {
            throw new UsernameNotFoundException("user is not fount");
        }
        String password = passwordEncoder.encode("123456");

        return new User(username, password, AuthorityUtils.commaSeparatedStringToAuthorityList("Role_vip"));
    }
}
此处的BCryptPasswordEncoder是spring推荐的加码方式(还有很多其他的加码方式)
(密码必须得加密,没有见过数据库存名码的)
此刻再取访问接口时(用我们自己定义的用户名和密码)
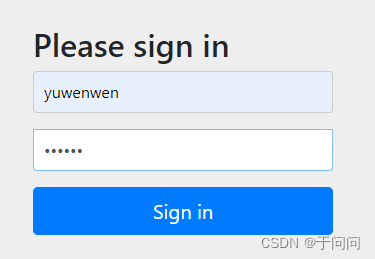
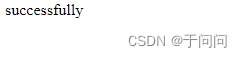
成功访问接口
这样一来这个接口就是一个需要认证成功才能调用的接口
当然我们可以自定义认证配置
首先要继承WebSecurityConfigurerAdapter
重写configure方法时可以自己定义逻辑
@EnableWebSecurity
@Configuration
public class WebSecurityConfig extends WebSecurityConfigurerAdapter {

    @Autowired
    private UserService userService;

    @Override
    protected void configure(HttpSecurity http) throws Exception {
        http.authorizeRequests()
            // 所有请求都需要认证
            .anyRequest().authenticated()
            .and()
            .formLogin()
            // 认证成功后跳转url
            .successForwardUrl("/admi/demo");
        // 跨域失效
        http.csrf().disable();
    }

    @Override
    protected void configure(AuthenticationManagerBuilder auth) throws Exception {
        //调用自己写的认证逻辑
        auth.userDetailsService(userService);
    }
}


 711
711


 被折叠的 条评论
为什么被折叠?
被折叠的 条评论
为什么被折叠?
 到【灌水乐园】发言


