


文章目录
1、Consul介绍
1、是什么

2、能干嘛?

3、使用
下载地址:https://www.consul.io/downloads.html
文档地址:https://www.springcloud.cc/spring-cloud-consul.html
2、安装与使用


3、Consul服务注册
1、 新建provider-payment-consul-8006子模块
2、修改pom.xml文件
<?xml version="1.0" encoding="UTF-8"?>
<project xmlns="http://maven.apache.org/POM/4.0.0"
         xmlns:xsi="http://www.w3.org/2001/XMLSchema-instance"
         xsi:schemaLocation="http://maven.apache.org/POM/4.0.0 http://maven.apache.org/xsd/maven-4.0.0.xsd">
    <parent>
        <artifactId>spring-cloud</artifactId>
        <groupId>indi.zhihuali</groupId>
        <version>1.0-SNAPSHOT</version>
    </parent>
    <modelVersion>4.0.0</modelVersion>

    <artifactId>provider-payment-consul-8006</artifactId>

    <dependencies>
        <!--SpringCloud consul-server -->
        <dependency>
            <groupId>org.springframework.cloud</groupId>
            <artifactId>spring-cloud-starter-consul-discovery</artifactId>
        </dependency>
        <!-- SpringBoot整合Web组件 -->
        <dependency>
            <groupId>org.springframework.boot</groupId>
            <artifactId>spring-boot-starter-web</artifactId>
        </dependency>
        <dependency>
            <groupId>org.springframework.boot</groupId>
            <artifactId>spring-boot-starter-actuator</artifactId>
        </dependency>
        <!--日常通用jar包配置-->
        <dependency>
            <groupId>org.springframework.boot</groupId>
            <artifactId>spring-boot-devtools</artifactId>
            <scope>runtime</scope>
            <optional>true</optional>
        </dependency>
        <dependency>
            <groupId>org.projectlombok</groupId>
            <artifactId>lombok</artifactId>
            <optional>true</optional>
        </dependency>
        <dependency>
            <groupId>org.springframework.boot</groupId>
            <artifactId>spring-boot-starter-test</artifactId>
            <scope>test</scope>
        </dependency>
    </dependencies>

</project>
3、application.yaml
Consul默认端口号为8500
###consul服务端口号
server:
  port: 8006

spring:
  application:
    name: provider-payment
  ####consul注册中心地址
  cloud:
    consul:
      host: localhost
      port: 8500
      discovery:
        #hostname: 127.0.0.1
        service-name: ${spring.application.name}
4、编写主启动类
注明@EnableDiscoveryClient
package indi.zhihuali;

import org.springframework.boot.SpringApplication;
import org.springframework.boot.autoconfigure.SpringBootApplication;
import org.springframework.cloud.client.discovery.EnableDiscoveryClient;

/**
 * @ program: spring-cloud
 * @ description:
 * @ author: zhihua li
 * @ create: 2021-09-07 10:57
 **/
@SpringBootApplication
@EnableDiscoveryClient
public class PaymentMainCn8006 {
    public static void main(String[] args) {
        SpringApplication.run(PaymentMainCn8006.class, args);
    }
}
5、编写业务类
PaymentController
package indi.zhihuali.controller;
import org.springframework.beans.factory.annotation.Value;
import org.springframework.web.bind.annotation.RequestMapping;
import org.springframework.web.bind.annotation.RestController;
import java.util.UUID;
/**
* @ program: spring-cloud
* @ description:
* @ author: zhihua li
* @ create: 2021-09-07 11:02
**/
@RestController
public class PaymentController {
@Value("${server.port}")
private String serverPort;
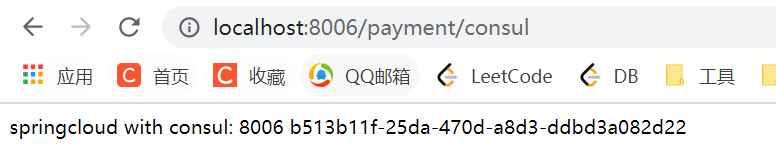
@RequestMapping("/payment/consul")
public String consul(){
return "springcloud with consul: "+serverPort+"\t\t"+ UUID.randomUUID().toString();
}
}
6、测试
运行主启动类,通过访问localhost:8006//payment/consul,接口调用成功
此时可直接在Consul可视化界面中看到服务列表中多了新的provider-payment

4、Consul服务消费
注册过程同上
- pom.xml
<?xml version="1.0" encoding="UTF-8"?>
<project xmlns="http://maven.apache.org/POM/4.0.0"
         xmlns:xsi="http://www.w3.org/2001/XMLSchema-instance"
         xsi:schemaLocation="http://maven.apache.org/POM/4.0.0 http://maven.apache.org/xsd/maven-4.0.0.xsd">
    <parent>
        <artifactId>spring-cloud</artifactId>
        <groupId>indi.zhihuali</groupId>
        <version>1.0-SNAPSHOT</version>
    </parent>
    <modelVersion>4.0.0</modelVersion>

    <artifactId>consumer-order-consul-80</artifactId>

    <dependencies>
        <!--SpringCloud consul-server -->
        <dependency>
            <groupId>org.springframework.cloud</groupId>
            <artifactId>spring-cloud-starter-consul-discovery</artifactId>
        </dependency>
        <!-- SpringBoot整合Web组件 -->
        <dependency>
            <groupId>org.springframework.boot</groupId>
            <artifactId>spring-boot-starter-web</artifactId>
        </dependency>
        <dependency>
            <groupId>org.springframework.boot</groupId>
            <artifactId>spring-boot-starter-actuator</artifactId>
        </dependency>
        <!--日常通用jar包配置-->
        <dependency>
            <groupId>org.springframework.boot</groupId>
            <artifactId>spring-boot-devtools</artifactId>
            <scope>runtime</scope>
            <optional>true</optional>
        </dependency>
        <dependency>
            <groupId>org.projectlombok</groupId>
            <artifactId>lombok</artifactId>
            <optional>true</optional>
        </dependency>
        <dependency>
            <groupId>org.springframework.boot</groupId>
            <artifactId>spring-boot-starter-test</artifactId>
            <scope>test</scope>
        </dependency>
    </dependencies>
</project>
- application.yaml
###consul服务端口号
server:
  port: 80

spring:
  application:
    name: consumer-order
  ####consul注册中心地址
  cloud:
    consul:
      host: localhost
      port: 8500
      discovery:
        #hostname: 127.0.0.1
        service-name: ${spring.application.name}
- 主启动类
package indi.zhihuali;

import org.springframework.boot.SpringApplication;
import org.springframework.boot.autoconfigure.SpringBootApplication;
import org.springframework.cloud.client.discovery.EnableDiscoveryClient;

/**
 * @auther zzyy
 * @create 2020-01-31 12:15
 */
@SpringBootApplication
@EnableDiscoveryClient //该注解用于向使用consul或者zookeeper作为注册中心时注册服务
public class OrderCnMain80 {
    public static void main(String[] args) {
        SpringApplication.run(OrderCnMain80.class, args);
    }
}
1、向容器中注入RestTemplate
package indi.zhihuali.config;

import org.springframework.cloud.client.loadbalancer.LoadBalanced;
import org.springframework.context.annotation.Bean;
import org.springframework.context.annotation.Configuration;
import org.springframework.web.client.RestTemplate;

@Configuration
public class ApplicationContextConfig {

    @Bean
    @LoadBalanced
    public RestTemplate restTemplate() {
        return new RestTemplate();
    }
}
2、编写业务类
package indi.zhihuali.controller;

import lombok.extern.slf4j.Slf4j;
import org.springframework.beans.factory.annotation.Autowired;
import org.springframework.web.bind.annotation.RequestMapping;
import org.springframework.web.bind.annotation.RestController;
import org.springframework.web.client.RestTemplate;

/**
 * @ program: spring-cloud
 * @ description:
 * @ author: zhihua li
 * @ create: 2021-09-07 11:09
 **/
@RestController
@Slf4j
public class OrderController {
    public static final String PATH = "http://provider-payment";
    @Autowired
    private RestTemplate restTemplate;

    @RequestMapping("/consumer/consul/invoke")
    public String paymentInfo() {
        return restTemplate.getForObject(PATH + "/payment/consul", String.class);
    }
}
3、测试
启动consul80模块,在url中输入http://localhost/consumer/consul/invoke

同时在Consule可视化界面中可以看到新增的80服务


 231
231


 被折叠的 条评论
为什么被折叠?
被折叠的 条评论
为什么被折叠?
 到【灌水乐园】发言


