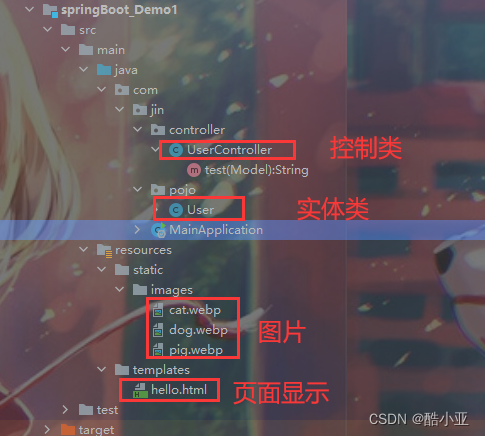
项目架构图
1、加入依赖
<dependency>
<groupId>org.springframework.boot</groupId>
<artifactId>spring-boot-starter-thymeleaf</artifactId>
<version>2.7.3</version>
</dependency>
<dependency>
<groupId>org.projectlombok</groupId>
<artifactId>lombok</artifactId>
<version>1.18.22</version>
</dependency>
2、实体类
@Data
@NoArgsConstructor
@AllArgsConstructor

public class User {

    private String name;
    private int age;
    private String honor;
}
3、控制类
@Controller
public class UserController {
@RequestMapping("/h1")
public String test(Model model) {
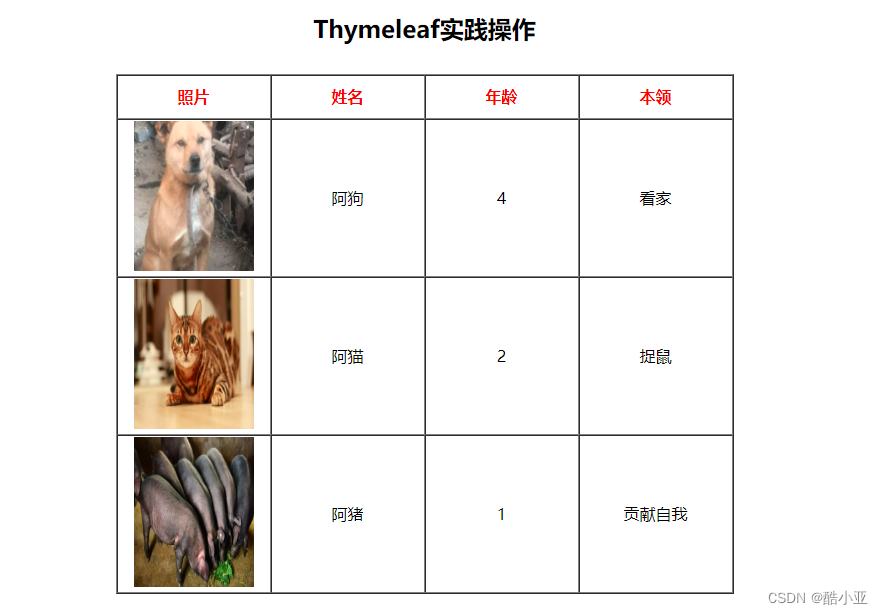
User user1 = new User("阿狗", 4, "看家");
User user2 = new User("阿猫", 2, "捉鼠");
User user3 = new User("阿猪", 1, "贡献自我");
model.addAttribute("user1", user1);
model.addAttribute("user2", user2);
model.addAttribute("user3", user3);
model.addAttribute("user","Thymeleaf实践操作");
return "hello";
}
}
3、页面显示
<!DOCTYPE html>
<html lang="en" xmlns:th="http://www.thymeleaf.org">
<head>
    <meta charset="UTF-8">
    <title>酷小亚</title>
    <style>
        table {
            margin: 30px auto;
            text-align: center;
        }
        th {
            color: red;
            width: 150px;
            height: 40px;
        }
        img {
            width: 120px;
            height: 150px;
        }
    </style>
</head>
<body>
<h2 th:text="${user}" style="text-align: center"></h2>
<table border="1" cellspacing="0">
    <tr>
        <th>照片</th>
        <th>姓名</th>
        <th>年龄</th>
        <th>本领</th>
    </tr>
    <tr>
        <td><img src="../images/dog.webp"></td>
        <td th:text="${user1.name}"></td>
        <td th:text="${user1.age}"></td>
        <td th:text="${user1.honor}"></td>
    </tr>
    <tr>
        <td><img src="../images/cat.webp"></td>
        <td th:text="${user2.name}"></td>
        <td th:text="${user2.age}"></td>
        <td th:text="${user2.honor}"></td>
    </tr>
    <tr>
        <td><img src="../images/pig.webp"></td>
        <td th:text="${user3.name}"></td>
        <td th:text="${user3.age}"></td>
        <td th:text="${user3.honor}"></td>
    </tr>
</table>
</body>
</html>
5、展示效果


 被折叠的 条评论
为什么被折叠?
被折叠的 条评论
为什么被折叠?
 到【灌水乐园】发言


