


目录
Axios资料
GitHub: https://github.com/axios/axios
先直接上手再说
1、通过BootCDN引入Axios,并简单写下代码:
<!DOCTYPE html>
<html lang="en">

<head>
    <meta charset="UTF-8">
    <meta http-equiv="X-UA-Compatible" content="IE=edge">
    <meta name="viewport" content="width=device-width, initial-scale=1.0">
    <title>Axios直接上手</title>
    <!-- 通过CDN直接引入Axios -->
    <script src="https://cdn.bootcdn.net/ajax/libs/axios/0.26.1/axios.js"></script>
</head>

<body>
    <h1>Axios直接上手</h1>
    <button id="btnGet">发送GET请求</button>
    <button id="btnPost">发送POST请求</button>

    <script>
        const btnGet = document.querySelector('#btnGet');
        btnGet.onclick = function () {
            axios({
                // 设置请求方法
                method: 'GET',
                // 设置URL
                url: 'http://localhost:3000/posts/1'
            }).then(response => {
                console.log(response);
            });
        };

        const btnPost = document.querySelector('#btnPost');
        btnPost.onclick = function () {
            axios({
                // 设置请求方法
                method: 'POST',
                // 设置URL
                url: 'http://localhost:3000/posts',
                // 设置请求体
                data: {
                    title: '领域驱动设计',
                    author: 'Eric Evans'
                }
            }).then(response => {
                console.log(response);
            })
        };
    </script>
</body>
</html>
2、启动JSON Server
db.json
{
  "posts": [
    {
      "id": 1,
      "title": "设计模式",
      "author": "GoF"
    }
  ]
}
3、在浏览器中打开页面,观察效果
GET请求

POST请求
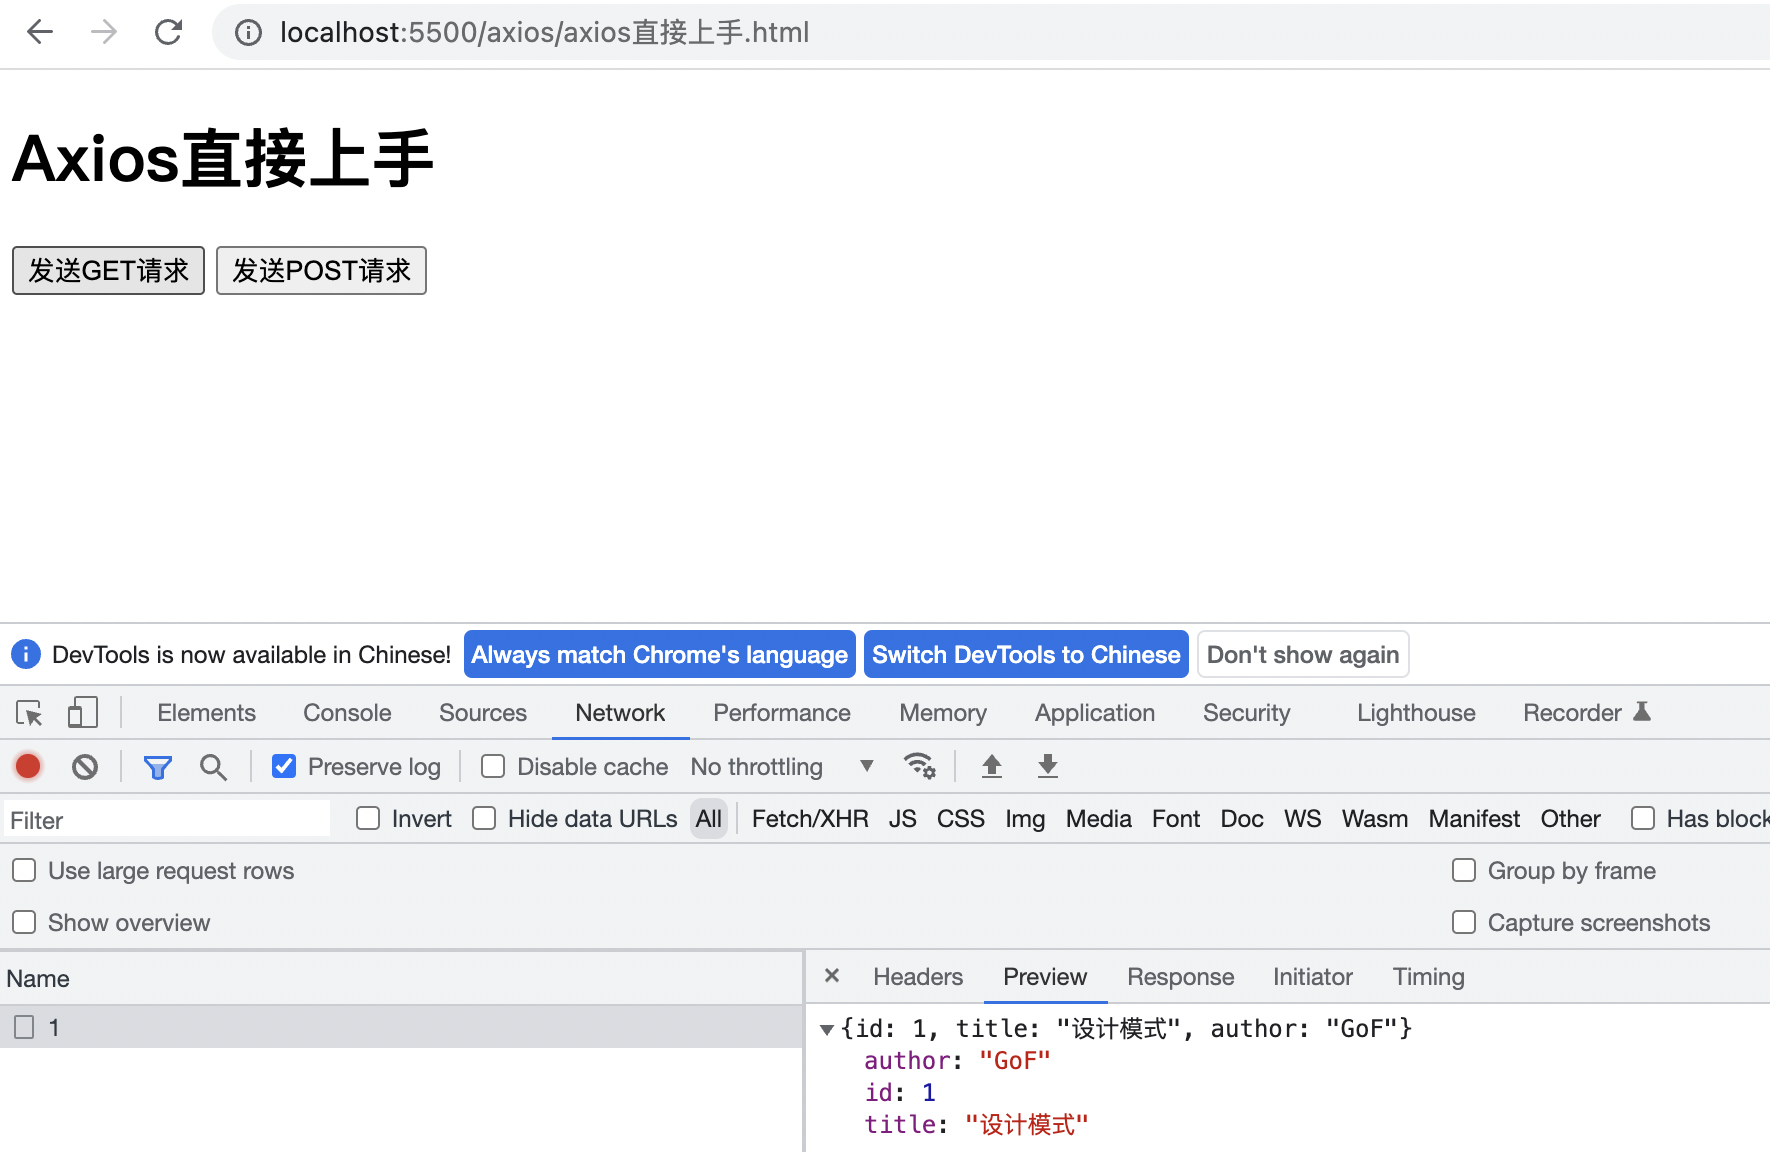
打开db.json文件,会看到增加了一条记录:

Vue中使用Axios最佳实践
通过NPM引入Axios:npm install --save axios
Axios一般用于和后端API进行通信,可以对Axios做进一步封装,然后把后端接口按功能进行分组,分成不同的模块文件,再把这些模块聚合到一个模块中对外暴露。
1、在src目录下建一个名字为api的目录,表示后端API。
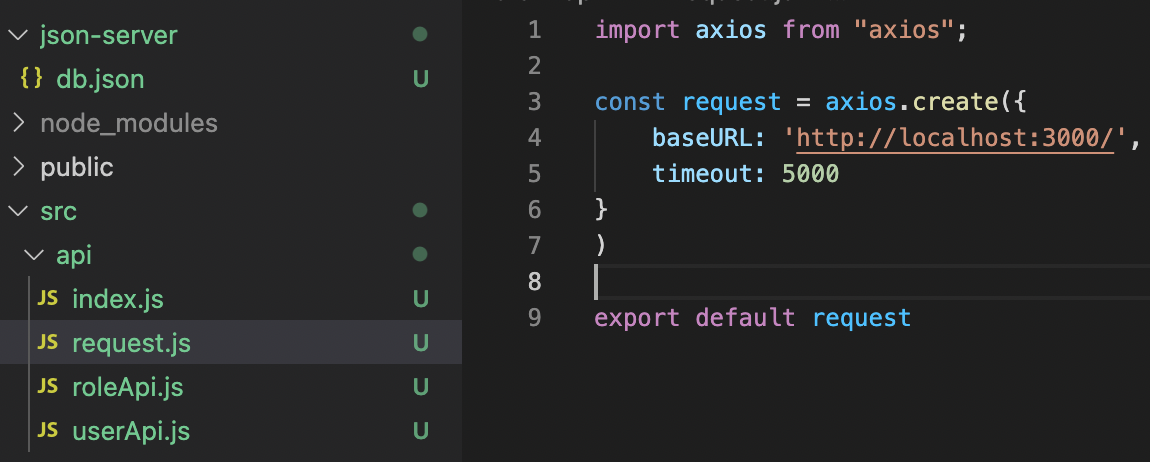
2、在api文件夹中建一个名字为request的js文件。
该模块是对Axios的封装,提供公共默认配置。
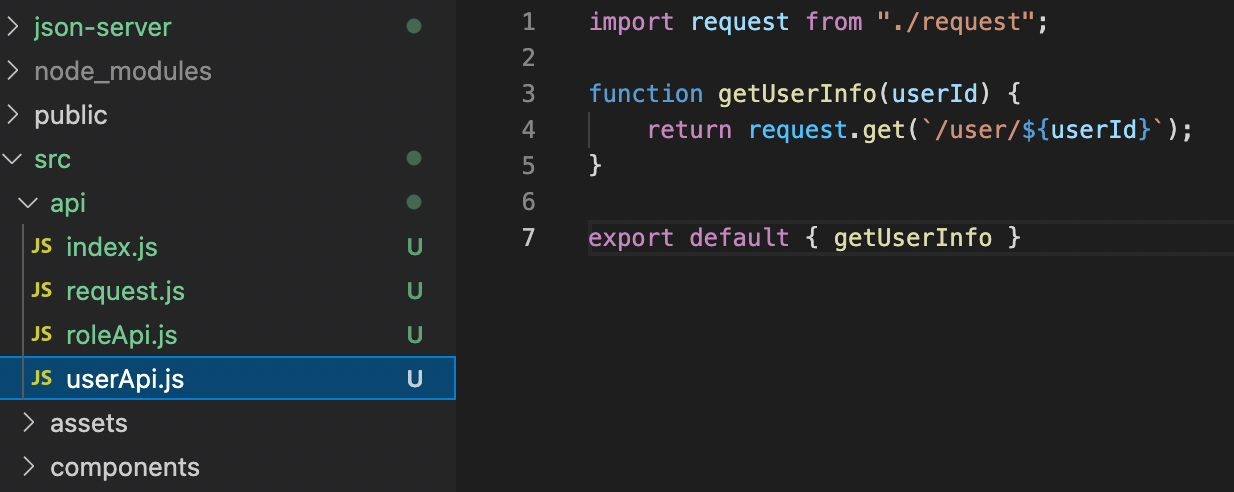
3、根据业务功能将API进行分组,例如对于一个权限系统,有user相关接口、role相关接口,
可以分别建对应的js文件,引入request,并封装接口细节,对外暴露业务含义明确的接口,
便于接口管理和复用。

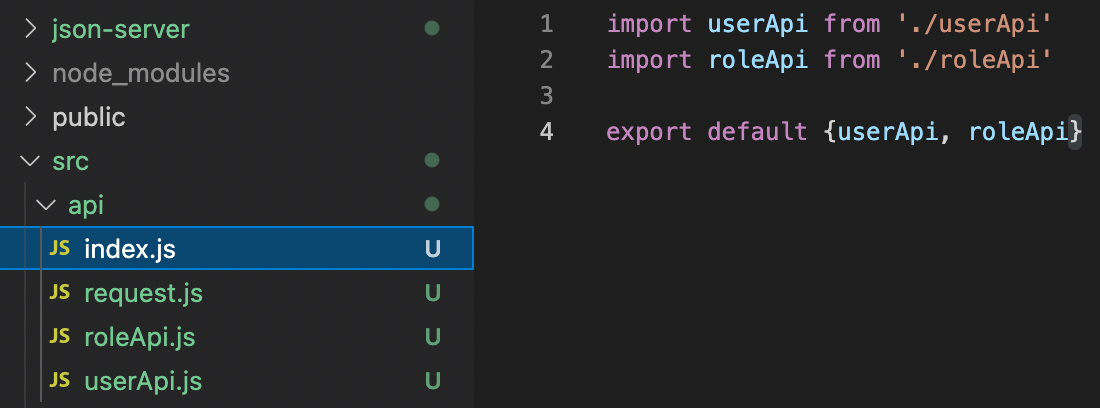
4、在API目录下建index.js文件,对个功能模块进行聚合。
5、使用API
1)在组件中直接引入api模块使用。

按这种方式使用api,是有自动补全提示的。
2)在Vue中注册全局变量$api,使用全局变量,不用再引入api模块
在main.js中引入api模块,并注册到Vue全局属性中。

在组件中直接使用$api。

按这种方式使用api,没有自动补全提示。
最终效果:


 201
201


 被折叠的 条评论
为什么被折叠?
被折叠的 条评论
为什么被折叠?
 到【灌水乐园】发言


