


这里分为了两种情况:
E2E:接近真实使用情况,用例数量少
UT:执行速度快,用例数量多
1、整理测试点
1、注册功能
- 允许匿名访问
- URL:http://127.0.0.1:8000/accounts/register/
- get请求:返回html
- post请求:提交json参数,返回json响应
- 用户名不能为空
- 密码不能为空
- 两次密码必须相同
- 密码长度不能小于6
- 用户名不能重复
- 参数正确,则返回:注册成功
2、登录
-
允许匿名访问
-
URL:http://127.0.0.1:8000/accounts/register/
-
get请求:返回html
-
post请求:提交表单,返回了重定向
-
用户名不能为空
-
密码不能为空
-
密码不能错误
3、提交反馈
-
不允许匿名访问
-
URL:http://127.0.0.1:8000/lili/submit/
-
GET:返回HTML
-
POST::提交json,返回json
- 提交的数据会入库
- 提交的数据会和用户关联
- 同一用户,不可重复发布
4、反馈的结果
- 允许匿名访问
- URL:http://127.0.0.1:8000/lili/result/
- 所有的请求返回:HTML
2、编写测试代码
主要学习两个部分的内容
1、django自带的测试组件
2、pytest-django插件
1、测试http请求
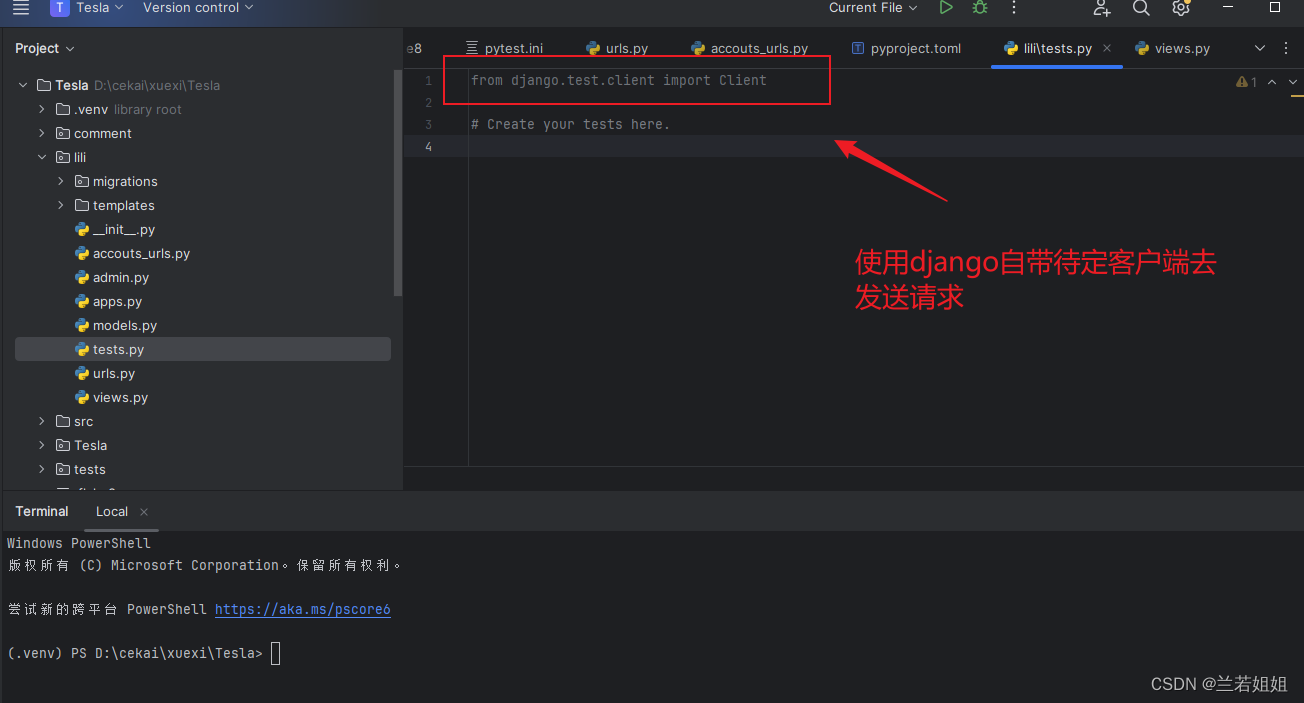
这个Client自己是一个客户端,同时也是一个服务端
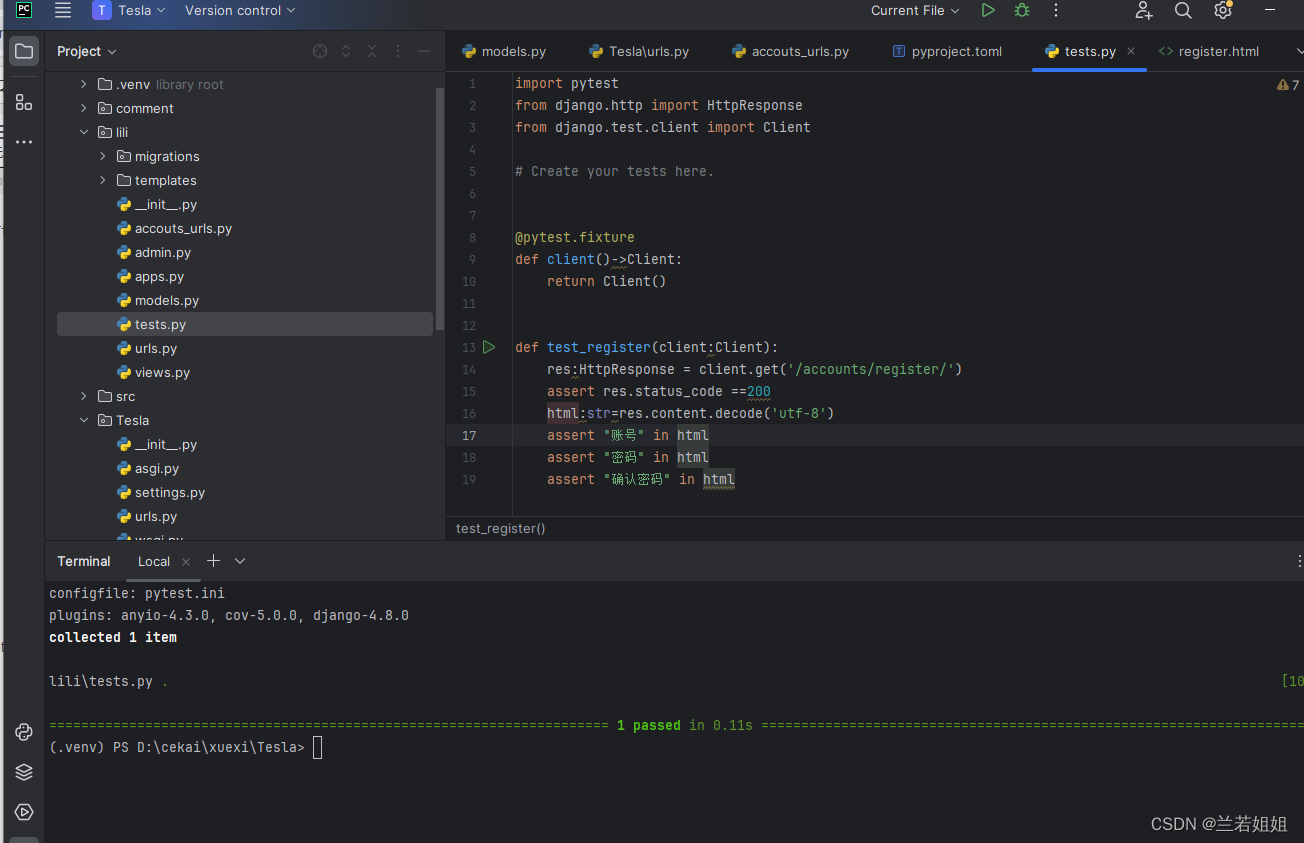
import pytest
from django.http import HttpResponse
from django.test.client import Client

# Create your tests here.


@pytest.fixture
def client()->Client:
    return Client()


def test_register(client:Client):
    res:HttpResponse = client.get('/accounts/register/')
    assert res.status_code ==200
    html:str=res.content.decode('utf-8')
    assert "账号" in html
    assert "密码" in html
    assert "确认密码" in html
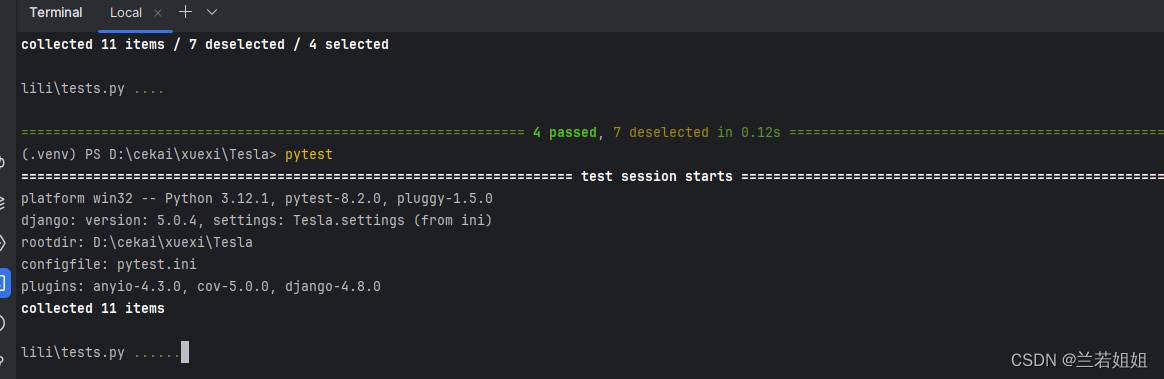
执行:pytest
得到下面的结果
2、测试db数据库
import pytest
from django.contrib.auth.models import User
from django.http import HttpResponse
from django.test.client import Client


@pytest.fixture
def user(_django_db_helper):
    new_user = User.objects.create_user(
        username="lili01",
        password="123456",
        email="lili01@qq.com"
    )
    """这里是作为fixture的返回值,接下来创建测试用例"""
    return new_user


def test_user(user):
    """这样每个都需要加"""
    pass
其中_django_db_helper目的是为了进行数据准备,比如说在数据库中创建数据
import json

import pytest
from django.contrib.auth.models import User
from django.http import HttpResponse
from django.test.client import Client

from lili.models import Feedback


# Create your tests here.


@pytest.fixture
def client()->Client:
    return Client()


def test_register(client:Client):
    res:HttpResponse = client.get('/accounts/register/')
    assert res.status_code ==200
    html:str=res.content.decode('utf-8')
    assert "账号" in html
    assert "密码" in html
    assert "确认密码" in html

@pytest.fixture
def user(_django_db_helper):
    new_user = User.objects.create_user(
        username="lili01",
        password="123456",
        email="lili01@qq.com"
    )
    """这里是作为fixture的返回值,接下来创建测试用例"""
    return new_user

@pytest.mark.parametrize("data,code,message",[
    ({"username":"lili02",
      "password":"",
       "password_confirm":"123456",
       "email":"lili02@qq.com"
      },-1,"password不能为空"),
({"username":"lili02",
      "password":"1234567",
       "password_confirm":"123456",
       "email":"lili02@qq.com"
      },-2,"两次密码必须相同"),
({"username":"lili02",
      "password":"12345",
       "password_confirm":"12345",
       "email":"lili02@qq.com"
      },-3,"密码长度必须大于等于6"),
({"username":"lili01",
      "password":"123456",
       "password_confirm":"123456",
       "email":"lili01@qq.com"
      },-4,"用户已经存在,请重新注册"),
])
def test_register_post(user, client:Client,data,code,message):
    """这样每个都需要加"""
    res:HttpResponse  = client.post('/accounts/register/',data=data,content_type='application/json')
    html = res.content.decode('utf-8')
    res_json = json.loads(html)
    assert res_json['code'] == code
    assert res_json['message'] == message
除此以外,我们也可以对数据库进行断言,比如断言用户等于1
@pytest.mark.parametrize("data,code,message", [
    ({"username": "lili02",
      "password": "",
      "password_confirm": "123456",
      "email": "lili02@qq.com"
      }, -1, "password不能为空"),
    ({"username": "lili02",
      "password": "1234567",
      "password_confirm": "123456",
      "email": "lili02@qq.com"
      }, -2, "两次密码必须相同"),
    ({"username": "lili02",
      "password": "12345",
      "password_confirm": "12345",
      "email": "lili02@qq.com"
      }, -3, "密码长度必须大于等于6"),
    ({"username": "lili01",
      "password": "123456",
      "password_confirm": "123456",
      "email": "lili01@qq.com"
      }, -4, "用户已经存在,请重新注册"),
])
def test_register_post(user, client: Client, data, code, message):
    # 断言用户等于1,
    user_list = list(User.objects.all())
    user_list_len = len(user_list)
    assert user_list_len == 1
    """这样每个都需要加"""
    res: HttpResponse = client.post('/accounts/register/', data=data, content_type='application/json')
    html = res.content.decode('utf-8')
    res_json = json.loads(html)
    assert res_json['code'] == code
    assert res_json['message'] == message
    if res_json['code'] == 0:
        user_list = list(User.objects.all())
        user_list_len = len(user_list)
        assert user_list_len == 4
3、自动登录
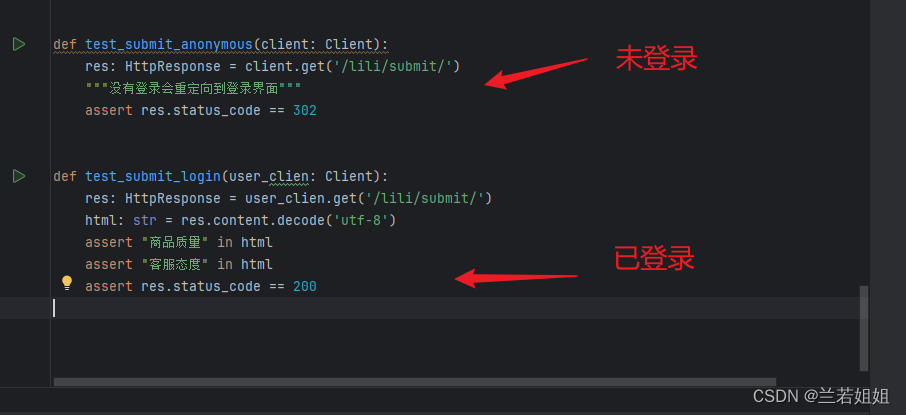
在这之前我们先测试下匿名访问这个功能,大概的思路是访问的时候返回的code不等于200,我之前的文有提到这里他会进行重定向,然后状态会变成302
def test_submit_anonymous(client: Client):
    res: HttpResponse = client.get('/lili/submit/')
    assert res.status_code == 302
开始执行,不想执行之前的用例,只执行test_submit_anonymous,可以用下面这个命令,
pytest -k test_submit_anonymous
那这种情况是没有登录的状态,接下来就来到重点,那么登录之后的状态是什么样的呢?具体要怎么做呢?请接着往下看
首先,我们需要用到@pytest.fixture,代码如下
tests.py
import json

import pytest
from django.contrib.auth.models import User
from django.http import HttpResponse
from django.test.client import Client

from lili.models import Feedback


# Create your tests here.


@pytest.fixture
def client() -> Client:
    return Client()


def test_register(client: Client):
    res: HttpResponse = client.get('/accounts/register/')
    assert res.status_code == 200
    html: str = res.content.decode('utf-8')
    assert "账号" in html
    assert "密码" in html
    assert "确认密码" in html


@pytest.fixture
def user(_django_db_helper):
    new_user = User.objects.create_user(
        username="lili01",
        password="123456",
        email="lili01@qq.com"
    )
    """这里是作为fixture的返回值,在数据库里面创建数据,接下来创建测试用例"""
    return new_user

@pytest.fixture
def user_clien(client: Client,user):
    client.force_login(user)
    return client


@pytest.mark.parametrize("data,code,message", [
    ({"username": "lili02",
      "password": "",
      "password_confirm": "123456",
      "email": "lili02@qq.com"
      }, -1, "password不能为空"),
    ({"username": "lili02",
      "password": "1234567",
      "password_confirm": "123456",
      "email": "lili02@qq.com"
      }, -2, "两次密码必须相同"),
    ({"username": "lili02",
      "password": "12345",
      "password_confirm": "12345",
      "email": "lili02@qq.com"
      }, -3, "密码长度必须大于等于6"),
    ({"username": "lili01",
      "password": "123456",
      "password_confirm": "123456",
      "email": "lili01@qq.com"
      }, -4, "用户已经存在,请重新注册"),
])
def test_register_post(user, client: Client, data, code, message):
    # 断言用户等于1,
    user_list = list(User.objects.all())
    user_list_len = len(user_list)
    assert user_list_len == 1
    """这样每个都需要加"""
    res: HttpResponse = client.post('/accounts/register/', data=data, content_type='application/json')
    html = res.content.decode('utf-8')
    res_json = json.loads(html)
    assert res_json['code'] == code
    assert res_json['message'] == message
    if res_json['code'] == 0:
        user_list = list(User.objects.all())
        user_list_len = len(user_list)
        assert user_list_len == 4


def test_submit_anonymous(client: Client):
    res: HttpResponse = client.get('/lili/submit/')
    """没有登录会重定向到登录界面"""
    assert res.status_code == 302


def test_submit_login(user_clien: Client):
    res: HttpResponse = user_clien.get('/lili/submit/')
    html: str = res.content.decode('utf-8')
    assert "商品质量" in html
    assert "客服态度" in html
    assert res.status_code == 200
接下来result这个接口的测试,我们把所有的方法都涵盖进去:
代码就是
tests.py
import json

import pytest
from django.contrib.auth.models import User
from django.http import HttpResponse
from django.test.client import Client

from lili.models import Feedback
@pytest.mark.parametrize("methond", ["get","post","delete","put"])
def test_result_all(client: Client,methond):
    res: HttpResponse = client.generic(methond.upper(),'/lili/result/')
    html: str = res.content.decode('utf-8')
    assert res.status_code == 200
然后控制台允许用例
pytest -k test_result_all
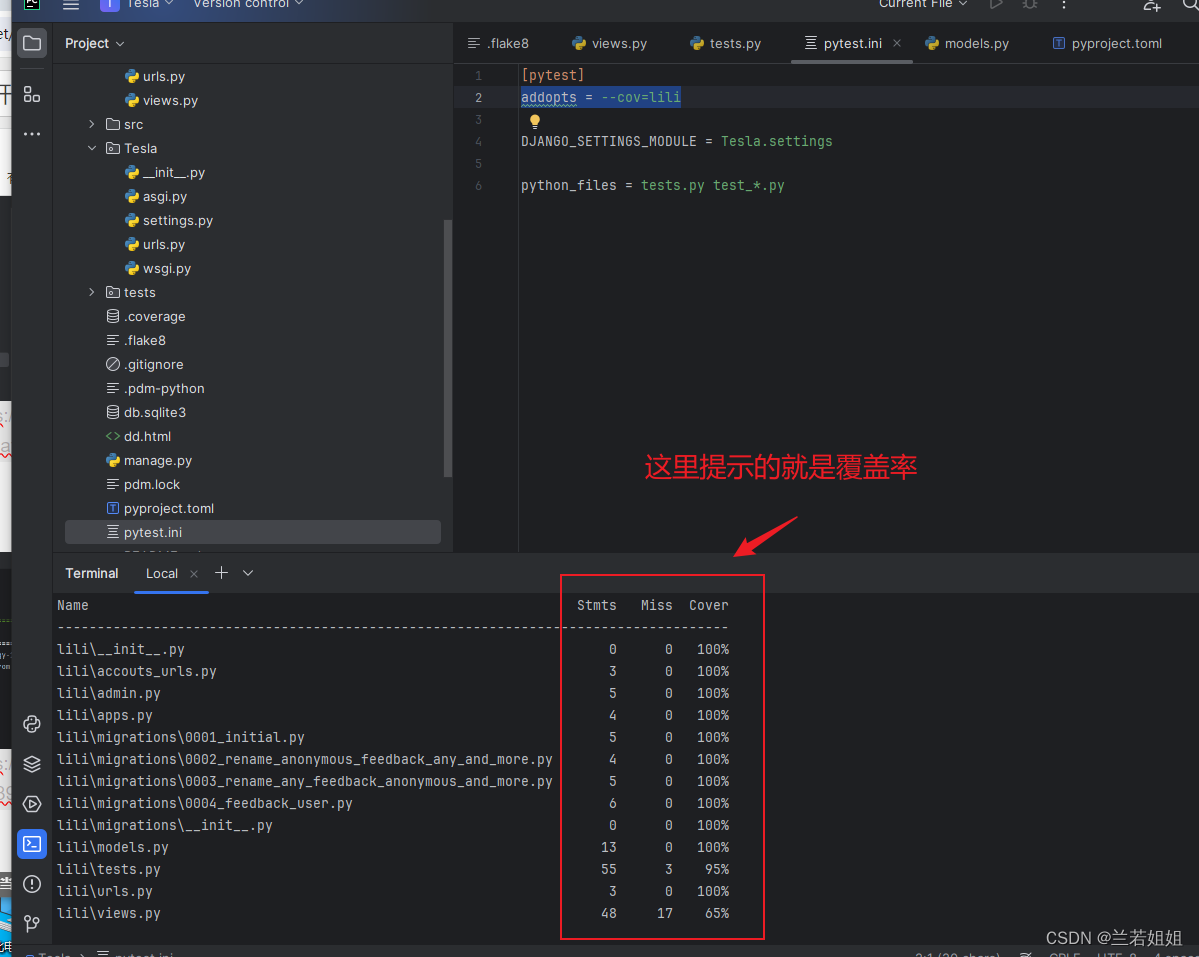
3、分析和统计测试覆盖率
在pytets.ini这个文件里面加入这么一行内容
addopts = --cov=lili
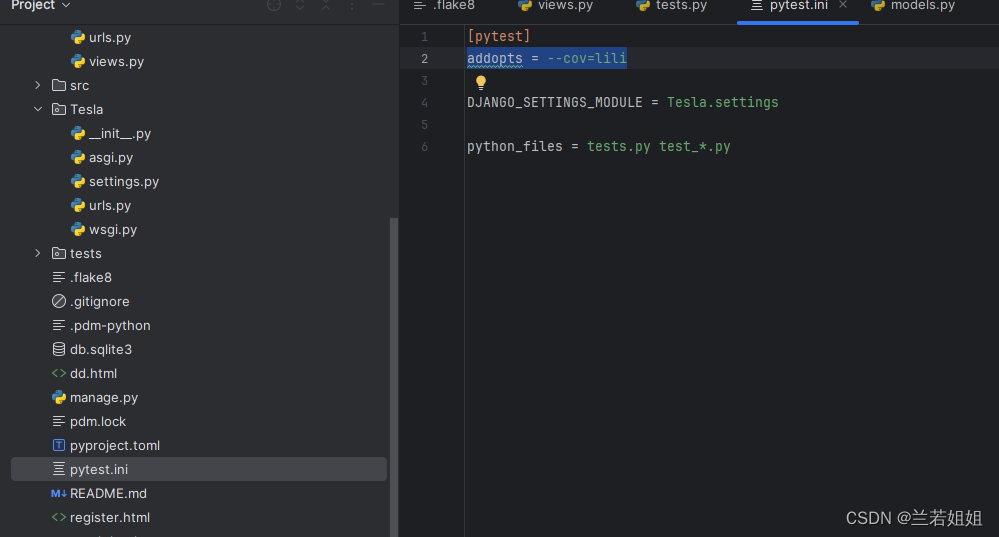
然后终端执行:pytest
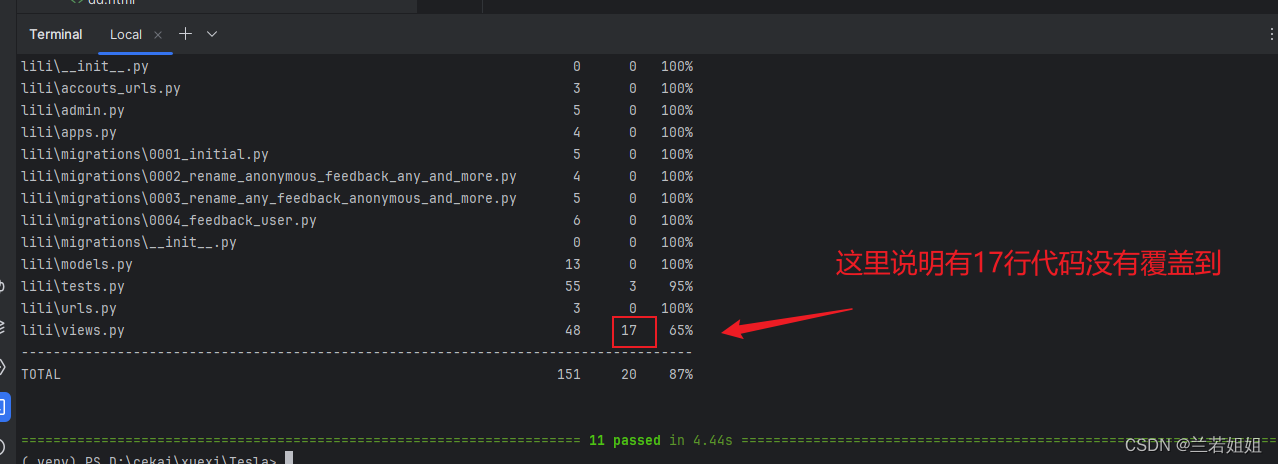
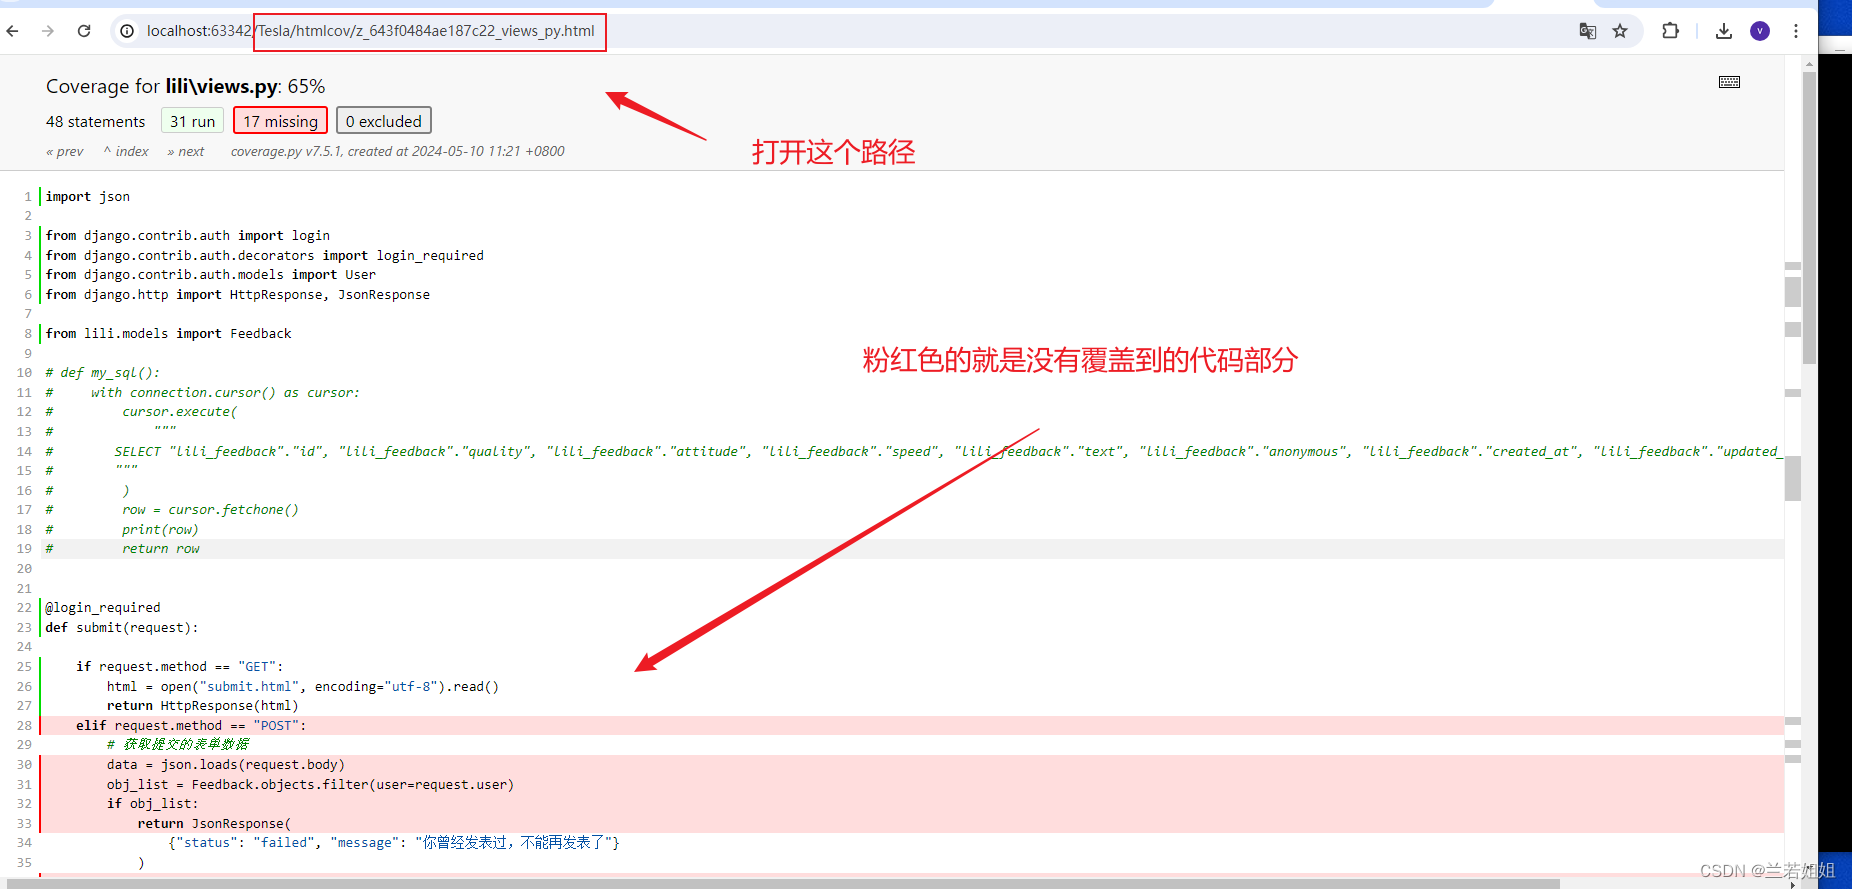
如何知道有哪17行代码没有覆盖到呢
继续修改pytets.ini这个文件里面加入这么一行内容
addopts = --cov=lili --cov-report html
然后运行:pytest
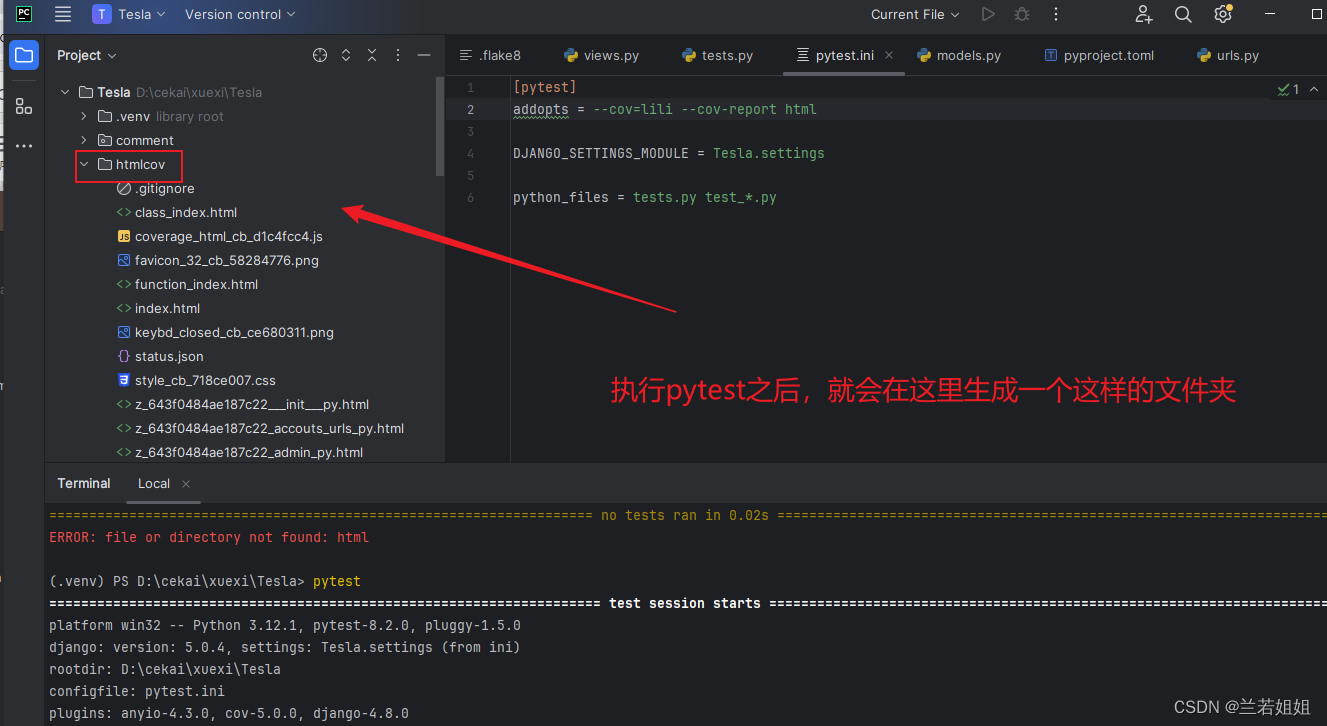
打开路径:D:\cekai\xuexi\Tesla\htmlcov\index.html


 2625
2625

 被折叠的 条评论
为什么被折叠?
被折叠的 条评论
为什么被折叠?
 到【灌水乐园】发言


