


spring.security实战与源码解析
1. demo
依赖
<?xml version="1.0" encoding="UTF-8"?>
<project xmlns="http://maven.apache.org/POM/4.0.0" xmlns:xsi="http://www.w3.org/2001/XMLSchema-instance"
         xsi:schemaLocation="http://maven.apache.org/POM/4.0.0 https://maven.apache.org/xsd/maven-4.0.0.xsd">
    <modelVersion>4.0.0</modelVersion>
    <parent>
        <groupId>org.springframework.boot</groupId>
        <artifactId>spring-boot-starter-parent</artifactId>
        <version>2.2.1.RELEASE</version>
        <relativePath/> <!-- lookup parent from repository -->
    </parent>
    <groupId>com.guo</groupId>
    <artifactId>security</artifactId>
    <version>0.0.1-SNAPSHOT</version>
    <name>security</name>
    <description>Demo project for Spring Boot</description>
    <properties>
        <java.version>1.8</java.version>
    </properties>
    <dependencies>
        <dependency>
            <groupId>org.springframework.boot</groupId>
            <artifactId>spring-boot-starter-web</artifactId>
        </dependency>

        <dependency>
            <groupId>org.springframework.boot</groupId>
            <artifactId>spring-boot-starter-security</artifactId>
        </dependency>


        <dependency>
            <groupId>org.springframework.boot</groupId>
            <artifactId>spring-boot-starter-test</artifactId>
            <scope>test</scope>
        </dependency>
    </dependencies>

    <build>
        <plugins>
            <plugin>
                <groupId>org.springframework.boot</groupId>
                <artifactId>spring-boot-maven-plugin</artifactId>
            </plugin>
        </plugins>
    </build>

</project>
controller
@RestController
@RequestMapping("/api/security/test")
public class SecurityTestController {

    @GetMapping
    public String test(){
        return "hello security!";
    }
}
yml
server:
  port: 8000
启动程序,访问接口

1.访问接口地址:http://127.0.0.1:8000/api/security/test
2.网页跳转到了登陆页面

3.输入security默认用户名:user,密码是控制台输出的随机数值
4.登陆成功后接口访问成功

2. 源码讲解
spring security本质是一个过滤器链
2.1 Filter
package javax.servlet;

import java.io.IOException;

public interface Filter {
    //初始化
    default void init(FilterConfig filterConfig) throws ServletException {
    }

    //过滤
    void doFilter(ServletRequest var1, ServletResponse var2, FilterChain var3) throws IOException, ServletException;

    //销毁
    default void destroy() {
    }
}
2.2 FilterSecurityInterceptor
方法级的权限过滤器,基本位于过滤器链的最底层
public void doFilter(ServletRequest request, ServletResponse response, FilterChain chain) throws IOException, ServletException {
        FilterInvocation fi = new FilterInvocation(request, response, chain);
        this.invoke(fi);
    }
2.2.1 invoke
public void invoke(FilterInvocation fi) throws IOException, ServletException {
        if (fi.getRequest() != null && fi.getRequest().getAttribute("__spring_security_filterSecurityInterceptor_filterApplied") != null && this.observeOncePerRequest) {
            fi.getChain().doFilter(fi.getRequest(), fi.getResponse());
        } else {
            if (fi.getRequest() != null && this.observeOncePerRequest) {
                fi.getRequest().setAttribute("__spring_security_filterSecurityInterceptor_filterApplied", Boolean.TRUE);
            }

            //该行代码表示判断下之前的过滤器对当前request的过滤情况,如果之前的过滤器已经做了放行的操作,才往下面的代码去执行。
            InterceptorStatusToken token = super.beforeInvocation(fi);

            try {
                //执行对当前请求的过滤判断
                fi.getChain().doFilter(fi.getRequest(), fi.getResponse());
            } finally {
                super.finallyInvocation(token);
            }

            super.afterInvocation(token, (Object)null);
        }

    }
2.3 ExceptionTranslationFilter
异常过滤器,用来处理在认证授权过程中抛出的异常。
public void doFilter(ServletRequest req, ServletResponse res, FilterChain chain) throws IOException, ServletException {
        HttpServletRequest request = (HttpServletRequest)req;
        HttpServletResponse response = (HttpServletResponse)res;

        try {
            //对当前请求进行过滤
            chain.doFilter(request, response);
            this.logger.debug("Chain processed normally");
        //下行的catch都是捕获了异常后对异常进行判断 然后进行处理
        } catch (IOException var9) {
            throw var9;
        } catch (Exception var10) {
            Throwable[] causeChain = this.throwableAnalyzer.determineCauseChain(var10);
            RuntimeException ase = (AuthenticationException)this.throwableAnalyzer.getFirstThrowableOfType(AuthenticationException.class, causeChain);
            if (ase == null) {
                ase = (AccessDeniedException)this.throwableAnalyzer.getFirstThrowableOfType(AccessDeniedException.class, causeChain);
            }

            if (ase == null) {
                if (var10 instanceof ServletException) {
                    throw (ServletException)var10;
                }

                if (var10 instanceof RuntimeException) {
                    throw (RuntimeException)var10;
                }

                throw new RuntimeException(var10);
            }

            if (response.isCommitted()) {
                throw new ServletException("Unable to handle the Spring Security Exception because the response is already committed.", var10);
            }

            this.handleSpringSecurityException(request, response, chain, (RuntimeException)ase);
        }

    }
2.4 UsernamePasswordAuthenticationFilter
对login的post请求进行拦截,校验表单中的用户名、密码
2.5 DelegatingFilterProxy
springboot对spring security进行了自动化装配,只需要添加对应的maven,就完成了配置。
但是如果我们使用的不是springboot,如使用的是spring,则需要自己配置security相关的配置,比如需要通过DelegatingFilterProxy配置过滤器
2.5.1 doFilter
public void doFilter(ServletRequest request, ServletResponse response, FilterChain filterChain) throws ServletException, IOException {
        Filter delegateToUse = this.delegate;
        if (delegateToUse == null) {
            synchronized(this.delegateMonitor) {
                delegateToUse = this.delegate;
                if (delegateToUse == null) {
                    WebApplicationContext wac = this.findWebApplicationContext();
                    if (wac == null) {
                        throw new IllegalStateException("No WebApplicationContext found: no ContextLoaderListener or DispatcherServlet registered?");
                    }

                    delegateToUse = this.initDelegate(wac);
                }

                this.delegate = delegateToUse;
            }
        }

        this.invokeDelegate(delegateToUse, request, response, filterChain);
    }
2.5.2 initDelegate
 protected Filter initDelegate(WebApplicationContext wac) throws ServletException {
        String targetBeanName = this.getTargetBeanName();
        Assert.state(targetBeanName != null, "No target bean name set");
      	//targetBeanName 该属性的值在security中是有固定名字的,叫FilterChainProxy
        Filter delegate = (Filter)wac.getBean(targetBeanName, Filter.class);
        if (this.isTargetFilterLifecycle()) {
            //执行该行实际上是执行了FilterChainProxy类里面的方法了。
            delegate.init(this.getFilterConfig());
        }

        return delegate;
    }
2.5.3 FilterChainProxy
public void doFilter(ServletRequest request, ServletResponse response, FilterChain chain) throws IOException, ServletException {
        boolean clearContext = request.getAttribute(FILTER_APPLIED) == null;
        if (clearContext) {
            try {
                request.setAttribute(FILTER_APPLIED, Boolean.TRUE);
                //下行代码是重点
                this.doFilterInternal(request, response, chain);
            } finally {
                SecurityContextHolder.clearContext();
                request.removeAttribute(FILTER_APPLIED);
            }
        } else {
            this.doFilterInternal(request, response, chain);
        }

    }
2.5.4 doFilterInternal
private void doFilterInternal(ServletRequest request, ServletResponse response, FilterChain chain) throws IOException, ServletException {
    	//获取request
        FirewalledRequest fwRequest = this.firewall.getFirewalledRequest((HttpServletRequest)request);
    	//获取response
        HttpServletResponse fwResponse = this.firewall.getFirewalledResponse((HttpServletResponse)response);
    	//该行代码是重点,获取所有的过滤器
        List<Filter> filters = this.getFilters((HttpServletRequest)fwRequest);
        if (filters != null && filters.size() != 0) {
            FilterChainProxy.VirtualFilterChain vfc = new FilterChainProxy.VirtualFilterChain(fwRequest, chain, filters);
            vfc.doFilter(fwRequest, fwResponse);
        } else {
            if (logger.isDebugEnabled()) {
                logger.debug(UrlUtils.buildRequestUrl(fwRequest) + (filters == null ? " has no matching filters" : " has an empty filter list"));
            }

            fwRequest.reset();
            chain.doFilter(fwRequest, fwResponse);
        }
    }
2.5.5 getFilters
private List<Filter> getFilters(HttpServletRequest request) {
        Iterator var2 = this.filterChains.iterator();

        SecurityFilterChain chain;
     	//获取到匹配当前request的chain,将chain的过滤器链获取到并返回
        do {
            if (!var2.hasNext()) {
                return null;
            }

            chain = (SecurityFilterChain)var2.next();
        } while(!chain.matches(request));

        return chain.getFilters();
    }

3.用户名密码验证
用户创建后会有用户名、密码等存储在数据库中,登陆时通过查询数据库随后进行用户名密码校验实现登陆功能。
3.1 实现方法
3.1.1 查数据库获取用户名密码
方法:写一个类继承UserDetailsService,重写loadUserByUsername()方法,该方法返回UserDetails类

UserDetails是security中的User类,我们自己的User可以实现这个UserDetail


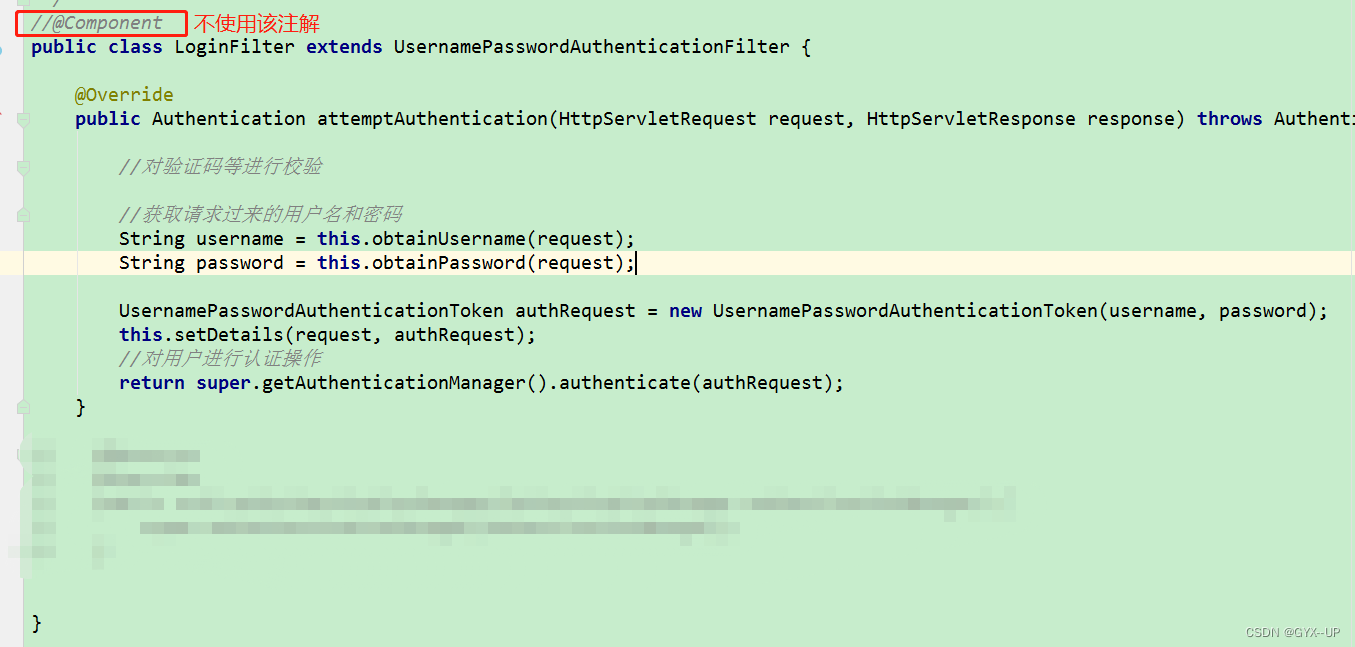
3.1.2 继承UsernamePasswordAuthenticationFilter
重写三个方法,根据上一步查询到的数据库用户信息,在该attemptAuthentication方法中编写逻辑,如果认证成功,则走successfulAuthentication方法,如果认证失败,则走unsuccessfulAuthentication方法。

认证
request请求发送过来先进行认证操作,先查询配置文件,再查询配置类,查看是否存在用户名和密码的赋值。如果不存在,则再查询自定义类获取用户名和密码。
4.1 通过在配置文件配置用户名和密码

4.2 通过配置类设置用户名和密码
@Configuration
public class WebSecurityConfig extends WebSecurityConfigurerAdapter {

    @Bean
    public PasswordEncoder passwordEncoder() {
        return new BCryptPasswordEncoder();
    }

    @Override
    protected void configure(AuthenticationManagerBuilder auth) throws Exception {

        PasswordEncoder passwordEncoder = passwordEncoder();

        auth.inMemoryAuthentication()
                .withUser("admin")
                .password(passwordEncoder.encode("admin"))
                .roles();

    }
}
4.3 通过自定义类获取用户名和密码
1. config
@Configuration
public class WebSecurityConfig extends WebSecurityConfigurerAdapter {

    private UserDetailsService userDetailsService;

    public WebSecurityConfig(UserDetailsService userDetailsService){
        this.userDetailsService = userDetailsService;
    }

    @Bean
    public PasswordEncoder passwordEncoder() {
        return new BCryptPasswordEncoder();
    }

    @Override
    protected void configure(AuthenticationManagerBuilder auth) throws Exception {

        auth.userDetailsService(userDetailsService)
                .passwordEncoder(passwordEncoder());

    }
}
2. userDetailsService
@Service("userDetailsService")
public class MyUserDetailService implements UserDetailsService {

    /**
     *
     * @param userName request发送过来的用户名 根据该用户名获取用户信息
     * @return user信息
     * @throws UsernameNotFoundException 异常
     */
    @Override
    public UserDetails loadUserByUsername(String userName) throws UsernameNotFoundException {

        //查询数据库获取用户名、密码和权限

        // 该User是实现了UserDetailsService接口的一个实现类InMemoryUserDetailsManager,用的User。该User也实现了UserDetails接口


        List<GrantedAuthority> roleList = AuthorityUtils.commaSeparatedStringToAuthorityList("role");

        return new User("test",new BCryptPasswordEncoder().encode("test"),roleList);

    }
}
注意
依赖中添加依赖
<dependency>
            <groupId>mysql</groupId>
            <artifactId>mysql-connector-java</artifactId>
        </dependency>
该依赖默认是mysql8的版本,此时yml中数据库配置就有一定的改动
driver-class-name的值是com.mysql.cj.jdbc.Driver。以前的版本对应的值中没有cj

授权
5.1 hasAuthority
如果当前主体具有指定的权限,则返回true是,否则返回false。
5.1.1 配置文件中指定某路径必须具备某权限

5.1.2 用户登陆时获取到权限

1 和 2 的权限名如果一致,则该路径可以被访问,否则无法访问,无法访问则会到下面页面中。
5.2 hasAnyAuthority
如果当前的主体具有任何给定的角色,则返回true
1. 配置config

2. 配置用户权限

3. 访问测试
5.3 hasRole
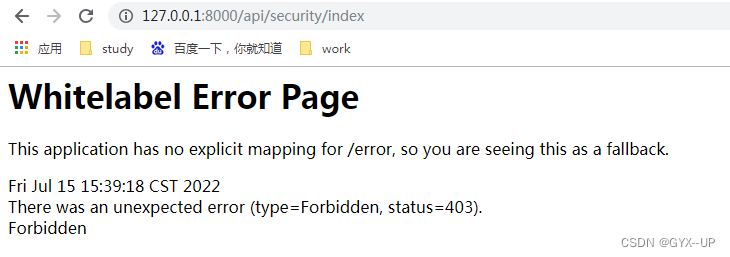
如果用户具备给定角色,就允许访问,否则返回403
源码解析
hasRole的底层源码和hasAuthority的底层源码不同

hasRole

可以看到,hasRole的底层是拼接了个前缀,ROLE_,而hasAuthority并没有。
因此如果我们配置文件中使用的是hasRole,在用户登陆后进行授权时,用户的角色都需要拼接上相同的前缀。
1. 配置文件

2. 用户登陆授权

3. 测试登陆

5.4 hasAnyRole
表示用户具备指定角色中的任意一个角色就可以访问路径
和hasAnyAuthority相同。
6. 自定义4.3无权限访问页面
1. 配置类添加配置

2. 自定义无访问权限页面

3. 测试访问

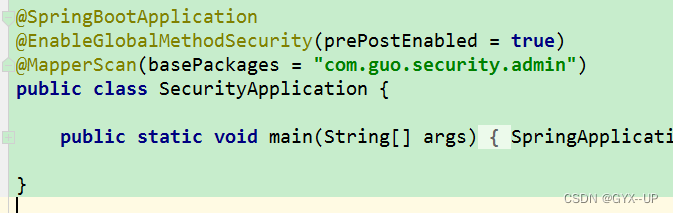
7.注解
1.@Secured
判断用户是否具有某个角色,如果有则可以访问该方法。这里匹配的字符串需要添加前缀 ROLE_
1.1 使用注解前选开启注解功能
启动类或者config配置类添加如下注解,表示开启注解功能。
@EnableGlobalMethodSecurity(securedEnabled = true)

1.2 controller对应方法上添加注解

1.3 用户登陆后授权

1.4 测试

2.@preAuthorize
判断用户是否具有某个角色,如果有则可以访问该方法。
2.1 使用注解前选开启注解功能
启动类或者config配置类添加如下注解,表示开启注解功能。
@EnableGlobalMethodSecurity(prePostEnabled = true)
2.2 controller对应方法上添加注解

2.3 用户登陆后授权

2.4 测试

3.@PostAuthorize
注解使用不多,在方法执行后再进行权限验证,适合验证带有返回值的权限
3.1 使用注解前选开启注解功能
启动类或者config配置类添加如下注解,表示开启注解功能。
@EnableGlobalMethodSecurity(prePostEnabled = true)

3.2 controller对应方法上添加注解

3.3 用户登陆后授权

3.4 测试

如果用户不具备对该方法的访问权限,该方法也会执行完成,只是最后return之后才会判断到无权限,然后跳转到无权限的页面

结果展示跳转到了无权限页面,但是控制台输出了日志。

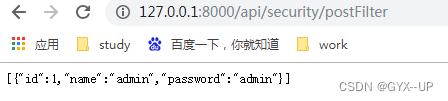
4.@PostFilter
权限验证之后对数据进行过滤,留下用户名是admin的数据
表达式中的filterObject引用的是方法返回值List中的某一个元素。
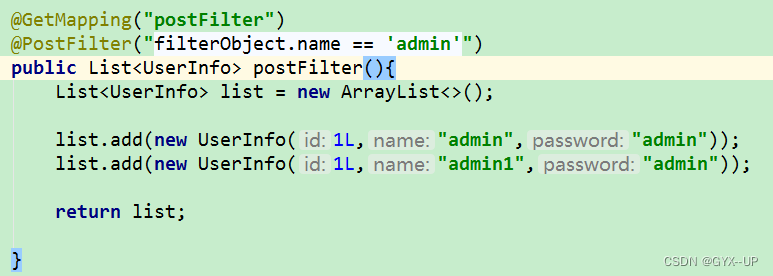
测试结果
5.@PreFilter
进入控制器之前对传入的参数进行过滤

测试结果

8.退出
1. 添加配置

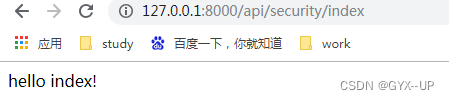
2. 编写登陆成功页面

测试结果
登陆成功后跳转页面

点击退出后跳转结果

此时再次访问任意一个controller
跳转到了登陆页面需要重新登陆。

9.源码
1.登陆请求发送过来之后,先走该filter.attemptAuthentication方法(UsernamePasswordAuthenticationFilter)

如果认证成功,则走下面的successfulAuthentication()方法,如果失败则走unsuccessfulAuthentication()方法。
2.认证方法走ProviderManager.authenticate()


3.该方法走到了AbstractUserDetailsAuthenticationProvider.authenticate()


4.接下来走到了DaoAuthenticationProvider.retrieveUser()方法。
在该方法中核心代码为UserDetails loadedUser = this.getUserDetailsService().loadUserByUsername(username);

5.走到了我们自己重写的UserDetailsService方法中。


6.如果第5步的方法返回User了,则表示认证成功,如果抛出异常或者返回null则表示认证失败
7.认证成功

8.认证失败

10 rememberMe
认证成功后,执行成功handler,里面执行rememberMeServices.loginSuccess(request, response, authResult);


看下面的图
发送请求-filter认证-认证成功-successHandler执行-rememberMeService中的tokenRepository创建token,存入数据库

请求第二次发送过来后-RememberMeServices实现自动登陆-cookie解密-对cookie中的数据进行校验-校验无误午

请求进来之后,对cookie进行解密,然后对解密后的数据进行check校验


check


11 实现自动登陆

实战
1.创建自动登陆持久化的表
create table persistent_logins (username varchar(64) not null, series varchar(64) primary key, token varchar(64) not null, last_used timestamp not null)

2.config配置


package com.guo.security.common.config;

import org.springframework.context.annotation.Bean;
import org.springframework.context.annotation.Configuration;
import org.springframework.security.config.annotation.authentication.builders.AuthenticationManagerBuilder;
import org.springframework.security.config.annotation.web.builders.HttpSecurity;
import org.springframework.security.config.annotation.web.configuration.WebSecurityConfigurerAdapter;
import org.springframework.security.core.userdetails.UserDetailsService;
import org.springframework.security.crypto.bcrypt.BCryptPasswordEncoder;
import org.springframework.security.crypto.password.PasswordEncoder;
import org.springframework.security.web.authentication.rememberme.JdbcTokenRepositoryImpl;
import org.springframework.security.web.authentication.rememberme.PersistentTokenRepository;

import javax.annotation.Resource;
import javax.sql.DataSource;

/**
 * @author gyx
 * @date 2022/7/13 10:37
 */
@Configuration
public class WebSecurityConfig extends WebSecurityConfigurerAdapter {

    private UserDetailsService userDetailsService;

    @Resource
    private DataSource dataSource;


    @Bean
    public PersistentTokenRepository persistentTokenRepository(){
        JdbcTokenRepositoryImpl jdbcTokenRepository = new JdbcTokenRepositoryImpl();
        //true表示程序启动时自动创建persistent_logins 表,由于我们是手动执行sql创建表,因此该配置注释。
        //jdbcTokenRepository.setCreateTableOnStartup(true);
        jdbcTokenRepository.setDataSource(dataSource);
        return jdbcTokenRepository;
    }

    public WebSecurityConfig(UserDetailsService userDetailsService){
        this.userDetailsService = userDetailsService;
    }

    @Bean
    public PasswordEncoder passwordEncoder() {
        return new BCryptPasswordEncoder();
    }

    @Override
    protected void configure(AuthenticationManagerBuilder auth) throws Exception {

        auth.userDetailsService(userDetailsService)
                .passwordEncoder(passwordEncoder());

    }


    @Override
    protected void configure(HttpSecurity http) throws Exception {

        //添加退出路径
        http.logout()
                .logoutUrl("/logout")
                .logoutSuccessUrl("/api/security/index")
                .permitAll();

        http.exceptionHandling().accessDeniedPage("/unauth.html");
        http.formLogin()   //自定义自己编写的登陆页面
                .loginPage("/login.html")  //登陆页面设置
                .loginProcessingUrl("/api/login/doLogin") //登陆访问路径
                .defaultSuccessUrl("/success.html")  //登陆成功后要跳转的路径

        .permitAll()
                .and()
                .authorizeRequests()  //自定义哪些方法被保护哪些方法不被保护
        .antMatchers("/api/security/test","/","/api/security/preFilter").permitAll()  //antMatchers里面的路径不需要认证就可以直接访问
                //当前登陆用户只有具备admins的权限才可以访问该路径
//                .antMatchers("/api/security/index").hasAuthority("admin")
                //当前登陆用户具备多个角色中的任意一个角色就可访问该路径
                //.antMatchers("/api/security/index").hasAnyAuthority("admin,role")
//                .antMatchers("/api/security/index").hasRole("admin")
        .anyRequest().authenticated()//所有的请求都可以访问
        .and()
        .rememberMe()//
        .tokenRepository(persistentTokenRepository())
        .tokenValiditySeconds(60)//设置有效时长 单位为秒
        .userDetailsService(userDetailsService)//设置userDetailServiec

        .and().csrf().disable()//关闭csrf的防护
        ;

    }
}
3.Filter
如果我们继承了UsernamePasswordAuthenticationFilter重写了自己的Filter,则需要这样写
方法一
package com.guo.security.common.config;

import com.guo.security.admin.security.LoginFilter;
import org.springframework.context.annotation.Bean;
import org.springframework.context.annotation.Configuration;
import org.springframework.security.authentication.AuthenticationManager;
import org.springframework.security.config.annotation.authentication.builders.AuthenticationManagerBuilder;
import org.springframework.security.config.annotation.web.builders.HttpSecurity;
import org.springframework.security.config.annotation.web.configuration.WebSecurityConfigurerAdapter;
import org.springframework.security.core.userdetails.UserDetailsService;
import org.springframework.security.crypto.bcrypt.BCryptPasswordEncoder;
import org.springframework.security.crypto.password.PasswordEncoder;
import org.springframework.security.web.authentication.UsernamePasswordAuthenticationFilter;
import org.springframework.security.web.authentication.rememberme.JdbcTokenRepositoryImpl;
import org.springframework.security.web.authentication.rememberme.PersistentTokenRepository;

import javax.annotation.Resource;
import javax.sql.DataSource;

/**
 * @author gyx
 * @date 2022/7/13 10:37
 */
@Configuration
public class WebSecurityConfig extends WebSecurityConfigurerAdapter {

    private UserDetailsService userDetailsService;
    @Resource
    private DataSource dataSource;

    @Bean
    public PersistentTokenRepository persistentTokenRepository(){
        JdbcTokenRepositoryImpl jdbcTokenRepository = new JdbcTokenRepositoryImpl();
        jdbcTokenRepository.setDataSource(dataSource);
        return jdbcTokenRepository;
    }

    public WebSecurityConfig(UserDetailsService userDetailsService){
        this.userDetailsService = userDetailsService;
    }

    @Bean
    public PasswordEncoder passwordEncoder() {
        return new BCryptPasswordEncoder();
    }

    //---------------------------------------需要生成该bean------------------------
    @Bean
    @Override
    protected AuthenticationManager authenticationManager() throws Exception { return super.authenticationManager(); }

    //-----需要new loginFilter并且将上面生成的AuthenticationManager赋值进去-------------
    @Bean
    public LoginFilter loginFilter() throws Exception {
        LoginFilter vtpLoginFilter = new LoginFilter();
        vtpLoginFilter.setAuthenticationManager(authenticationManager());
        return vtpLoginFilter;
    }


    @Override
    protected void configure(AuthenticationManagerBuilder auth) throws Exception {
        auth.userDetailsService(userDetailsService).passwordEncoder(passwordEncoder());
    }


    @Override
    protected void configure(HttpSecurity http) throws Exception {

        //添加退出路径
        http.logout()
                .logoutUrl("/logout")
                .logoutSuccessUrl("/api/security/index")
                .permitAll();

        http.exceptionHandling().accessDeniedPage("/unauth.html");
        http.formLogin()   //自定义自己编写的登陆页面
                .loginPage("/login.html")  //登陆页面设置
                .loginProcessingUrl("/api/login/doLogin") //登陆访问路径
                .defaultSuccessUrl("/success.html")  //登陆成功后要跳转的路径

        .permitAll()
                .and()
                .authorizeRequests()  //自定义哪些方法被保护哪些方法不被保护
        .antMatchers("/api/security/test","/","/api/security/preFilter").permitAll()
        .anyRequest().authenticated()//所有的请求都可以访问
        .and()
        .rememberMe()//
        .tokenRepository(persistentTokenRepository())
        .tokenValiditySeconds(60)//设置有效时长 单位为秒
        .userDetailsService(userDetailsService)//设置userDetailServiec

        .and().csrf().disable()//关闭csrf的防护
        ;

        //-----需要addFilterAt------------------------------------------
        http.addFilterAt(loginFilter(), UsernamePasswordAuthenticationFilter.class);

    }
}
方法二

package com.guo.security.common.config;

import com.guo.security.admin.security.LoginFilter;
import org.springframework.context.annotation.Bean;
import org.springframework.context.annotation.Configuration;
import org.springframework.security.authentication.AuthenticationManager;
import org.springframework.security.config.annotation.authentication.builders.AuthenticationManagerBuilder;
import org.springframework.security.config.annotation.web.builders.HttpSecurity;
import org.springframework.security.config.annotation.web.configuration.WebSecurityConfigurerAdapter;
import org.springframework.security.core.userdetails.UserDetailsService;
import org.springframework.security.crypto.bcrypt.BCryptPasswordEncoder;
import org.springframework.security.crypto.password.PasswordEncoder;
import org.springframework.security.web.authentication.UsernamePasswordAuthenticationFilter;
import org.springframework.security.web.authentication.rememberme.JdbcTokenRepositoryImpl;
import org.springframework.security.web.authentication.rememberme.PersistentTokenRepository;

import javax.annotation.Resource;
import javax.sql.DataSource;

/**
 * @author gyx
 * @date 2022/7/13 10:37
 */
@Configuration
public class WebSecurityConfig extends WebSecurityConfigurerAdapter {

    private UserDetailsService userDetailsService;

    @Resource
    private DataSource dataSource;

    @Resource
    private LoginFilter loginFilter;

    @Bean
    public PersistentTokenRepository persistentTokenRepository(){
        JdbcTokenRepositoryImpl jdbcTokenRepository = new JdbcTokenRepositoryImpl();
        jdbcTokenRepository.setDataSource(dataSource);
        return jdbcTokenRepository;
    }

    public WebSecurityConfig(UserDetailsService userDetailsService){
        this.userDetailsService = userDetailsService;
    }

    @Bean
    public PasswordEncoder passwordEncoder() {
        return new BCryptPasswordEncoder();
    }

    //如果我们没有继承UsernamePasswordAuthenticationFilter重写自己的LoginFilter,则不需要创建下面这个bean
    //如果重写自己的LoginFilter--------需要生成该bean,该bean会在LoginFilter中被赋值注入进去--
    @Bean
    @Override
    protected AuthenticationManager authenticationManager() throws Exception { return super.authenticationManager(); }


    @Override
    protected void configure(AuthenticationManagerBuilder auth) throws Exception {
        auth.userDetailsService(userDetailsService).passwordEncoder(passwordEncoder());
    }


    @Override
    protected void configure(HttpSecurity http) throws Exception {

        //添加退出路径
        http.logout()
                .logoutUrl("/logout")
                .logoutSuccessUrl("/api/security/index")
                .permitAll();

        http.exceptionHandling().accessDeniedPage("/unauth.html");
        http.formLogin()   //自定义自己编写的登陆页面
                .loginPage("/login.html")  //登陆页面设置
                .loginProcessingUrl("/api/login/doLogin") //登陆访问路径
                .defaultSuccessUrl("/success.html")  //登陆成功后要跳转的路径

        .permitAll()
                .and()
                .authorizeRequests()  //自定义哪些方法被保护哪些方法不被保护
        .antMatchers("/api/security/test","/","/api/security/preFilter").permitAll()
        .anyRequest().authenticated()//所有的请求都可以访问
        .and()
        .rememberMe()//
        .tokenRepository(persistentTokenRepository())
        .tokenValiditySeconds(60)//设置有效时长 单位为秒
        .userDetailsService(userDetailsService)//设置userDetailServiec

        .and().csrf().disable()//关闭csrf的防护
        ;

        //如果我们没有继承UsernamePasswordAuthenticationFilter重写自己的LoginFilter,则不需要赋值下面的addFilterAt
        http.addFilterAt(loginFilter, UsernamePasswordAuthenticationFilter.class);

    }
}
12 CSRF
跨域请求攻击
攻击者通过一些技术手段欺骗用户的浏览器去访问一个自己曾经认证过的网站并运行一些操作(如发邮件、甚至财产操作如转账和购买商品)。由于浏览器曾经认证过,所以被访问的网站会认为是真正的用户操作而去运行。这利用了web中用户身份验证的一个漏洞:简单的身份验证只能保证请求发自某个用户的浏览器,却不能保证请求本身是用户自愿发出的。
spring security CSRF 默认开启。针对Patch,post,put和delete方法进行保护。
实践
1.config配置
注释掉csrf关闭的代码配置


 263
263


 被折叠的 条评论
为什么被折叠?
被折叠的 条评论
为什么被折叠?
 到【灌水乐园】发言


