


在线抽奖系统
项目目标
• 巩固Spring相关知识IOC(Inversion of Control 控制反转)/DI(Dependency Injection)依赖注入。
• 复习 SpringMVC、SpringBoot 的配置以及使用。
• 复习并巩固Mybatis 以及 HttpServlet 异常处理。
• 了解项目开发流程,训练自己的代码调试能力以及在网上的抓包能力。
开发环境&使用技术
• windows
• Spring SpringMVC SpringBoot
• MySQL MyBatis Druid
• Maven
• Lombok
项目实现功能
• 用户的注册、登录
• 用户对奖项进行增加以及增删改查、对人员名单进行增删改查
• 给参加人员抽奖、从抽奖中删除中奖人员
项目演示(动图演示)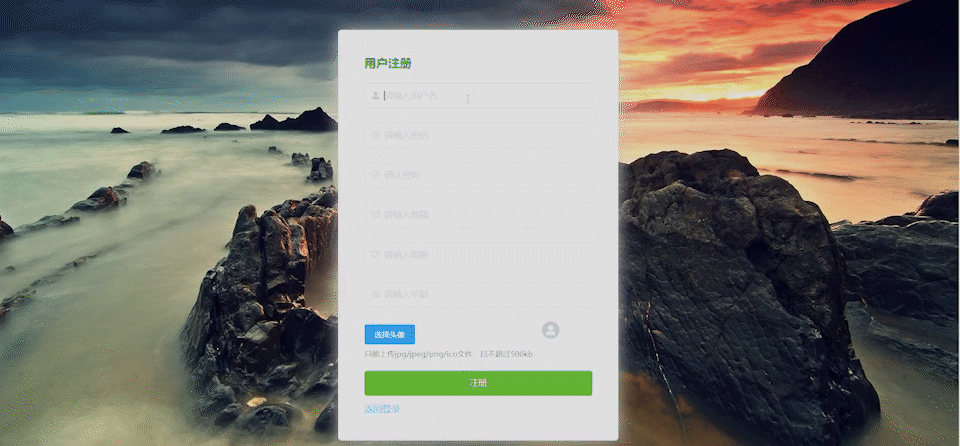

因为不能导入太大的图片,所以在这里总有些限制,所以展现了改项目的主要过程。
数据库设计

本次项目中用到的user、setting、member、award、record这些表关系如上。
用户操作的人员会记录到设置表当中,设置表记录当前用户操作的人员以及奖项。
每个奖项有多条抽奖记录,一条抽奖记录对应一个抽奖人员。
前后端接口实现
首先我们可以打开F12来看(这里我用的是谷歌浏览器)

因为点登录进去会换页面不好找,所以我们应该打开我们的调试模式打断点,然后再转到页面看我们抓到的请求(后面抓请求一样步骤我就不搞这么多截图了)

在这里,我们成功抓到了服务器的请求,是api/user/login(我是写了项目再展示的,所以只能通过这种方式来写过程了)

Cotroller的匹配规则中,用/api开头,添加前缀
打开UserController


这里总的配置是,往后的子路径都在/user之下

这样就确定了我们的路径/api/user/login

看到我们的请求体可以知道Post请求(当然这种用户名的怎么可能会是Get请求呢?这也太不安全了。)
接下来我们就按照我们的开发流程
Controller接收处理请求
然后传给Service业务层处理
再从Mapper接口获取数据库数据。

当然,如果我们的数据不存在我们应当抛出异常。我们抛出异常不能像是我们刚学的时候那样,需要返回我们的错误码和提示,这样,如果有人与我们合作完成这个项目,就更有利于别人的维护以及调试。这一点我认为是我们必备的素质。
进入了页面,页面显示信息会根据我们用户信息查询,接下来我们就需要把查询所需的一些方法写出来。
请求的奖品信息
请求的人员信息
//通过收到的请求来寻找业务层对应的方法
@GetMapping("/query")
    public Object Query(HttpSession session){
        //返回的字段时setting对象属性,缺少的属性先构造好
        //需要setting对象,可以通过user_id从数据库查询
        //user_id从session中的user获取
        User user = (User) session.getAttribute("user");
        Setting setting = settingService.query(user.getId());
        setting.setUser(user);
        return setting;
    }
//这里会返回我们的页面所需的对象信息,用mybatis查找数据
public Setting query(Integer userId) {
        Setting setting = settingMapper.queryByUserId(userId);
        List<Award> awards = awardMapper.queryBySettingId(setting.getId());
        setting.setAwards(awards);
        List<Member> members = memberMapper.queryBySettingId(setting.getId());
        setting.setMembers(members);
        return setting;
    }
做完这些事情后,服务器收到我们反馈的setting并展示信息,如下,我们变获得了我们的人员信息列表。

同理,我们写下我们通过F12可以找到服务器的请求,然后依此继续写下别的各种请求内容,我们就能够完成实现本页面的一些添加删除等操作

添加一条记录
Request URL: http://localhost:8080/api/award/add
Request Method: POST
//返回响应
{
  "success" : true,//响应是成功的
  "data" : 4(返回了这条记录的索引)
}
同理,删除
Request URL: http://localhost:8080/api/award/delete/4
Request Method: GET
{name: "添加", count: 10, award: "这次一定"}
award: "这次一定"
count: 10
name: "添加"
//返回响应
{
  "success" : true
}
修改
Request URL: http://localhost:8080/api/award/update
Request Method: POST
{name: "不靠谱大奖", count: 10, award: "未知神秘大奖", id: 5}
award: "未知神秘大奖"
count: 10
id: 5
name: "不靠谱大奖"
//返回响应
{
  "success" : true
}
对于下面的人员操作也一样,添加一个人员
Request URL: http://localhost:8080/api/member/add
Request Method: POST
{name: "我是最帅的人", no: "no90"}
name: "我是最帅的人"
no: "no90"
//返回响应
{
  "success" : true,
  "data" : 97
}
删除一个人员
Request URL: http://localhost:8080/api/member/delete/97
Request Method: GET
//返回响应
{
  "success" : true
}
人员的修改
Request URL: http://localhost:8080/api/member/update
Request Method: POST
{name: "aaad", no: "aaa", id: 98}
id: 98
name: "aaad"
no: "aaa"
//返回响应
{
  "success" : true
}

对于抽奖是这么的,现在我们操作抽到一个人
Request URL: http://localhost:8080/api/record/add/1
Request Method: POST
[43]
0: 43
//这样就是成功了
{
  "success" : true
}

去掉抽奖者,继续,网页会发出请求(删除)
Request URL: http://localhost:8080/api/record/delete/member?id=43
Request Method: GET
//删除成功响应
{
  "success" : true
}

当然,这里我们还可以修改抽奖人数
Request URL: http://localhost:8080/api/setting/update?batchNumber=20
Request Method: GET
//修改成功
{
  "success" : true
}

这么一次抽奖,抽奖结束直接可以抽到20人
开发环境准备
配置Maven相关的pom.xml
<?xml version="1.0" encoding="UTF-8"?>
<project xmlns="http://maven.apache.org/POM/4.0.0"
         xmlns:xsi="http://www.w3.org/2001/XMLSchema-instance"
         xsi:schemaLocation="http://maven.apache.org/POM/4.0.0 http://maven.apache.org/xsd/maven-4.0.0.xsd">
    <modelVersion>4.0.0</modelVersion>

    <!-- 默认使用的Spring Framework版本为5.2.10.RELEASE -->
    <parent>
        <groupId>org.springframework.boot</groupId>
        <artifactId>spring-boot-starter-parent</artifactId>
        <version>2.3.5.RELEASE</version>
        <relativePath/> <!-- lookup parent from repository -->
    </parent>
    <groupId>org.example</groupId>
    <artifactId>lucky-draw</artifactId>
    <version>1.0-SNAPSHOT</version>

    <properties>
        <java.version>1.8</java.version>
    </properties>

    <dependencies>

        <!-- spring-boot-starter-web: 基于SpringBoot开发的依赖包,
                                 会再次依赖spring-framework中基本依赖包,aop相关依赖包,web相关依赖包,
                                 还会引入其他如json,tomcat,validation等依赖 -->
        <dependency>
            <groupId>org.springframework.boot</groupId>
            <artifactId>spring-boot-starter-web</artifactId>
            <!-- 排除tomcat依赖 -->
            <exclusions>
                <exclusion>
                    <groupId>org.springframework.boot</groupId>
                    <artifactId>spring-boot-starter-tomcat</artifactId>
                </exclusion>
            </exclusions>
        </dependency>

        <!-- 添加 Undertow 依赖 -->
        <dependency>
            <groupId>org.springframework.boot</groupId>
            <artifactId>spring-boot-starter-undertow</artifactId>
        </dependency>

        <!--引入AOP依赖-->
        <dependency>
            <groupId>org.springframework.boot</groupId>
            <artifactId>spring-boot-starter-aop</artifactId>
        </dependency>

        <!-- mybatis-spring-boot-starter: Mybatis框架在SpringBoot中集成的依赖包,
                                Mybatis是一种数据库对象关系映射Object-Relationl Mapping(ORM)框架,
                                其他还有如Hibernate等 -->
        <dependency>
            <groupId>org.mybatis.spring.boot</groupId>
            <artifactId>mybatis-spring-boot-starter</artifactId>
            <version>2.1.3</version>
        </dependency>

        <!-- Mybatis代码生成工具 -->
        <dependency>
            <groupId>org.mybatis.generator</groupId>
            <artifactId>mybatis-generator-core</artifactId>
            <version>1.3.5</version>
        </dependency>

        <!-- druid-spring-boot-starter: 阿里Druid数据库连接池,同样的运行时需要 -->
        <dependency>
            <groupId>com.alibaba</groupId>
            <artifactId>druid-spring-boot-starter</artifactId>
            <version>1.2.3</version>
        </dependency>

        <!-- JDBC:mysql驱动包 -->
        <dependency>
            <groupId>mysql</groupId>
            <artifactId>mysql-connector-java</artifactId>
            <version>5.1.49</version>
            <scope>runtime</scope>
        </dependency>

        <!-- spring-boot-devtools: SpringBoot的热部署依赖包 -->
        <dependency>
            <groupId>org.springframework.boot</groupId>
            <artifactId>spring-boot-devtools</artifactId>
            <scope>runtime</scope>
            <!-- 不能被其它模块继承,如果多个子模块可以去掉 -->
            <optional>true</optional>
        </dependency>

        <!-- lombok: 简化bean代码的框架 -->
        <dependency>
            <groupId>org.projectlombok</groupId>
            <artifactId>lombok</artifactId>
            <optional>true</optional>
        </dependency>

        <!-- spring-boot-starter-test: SpringBoot测试框架 -->
        <dependency>
            <groupId>org.springframework.boot</groupId>
            <artifactId>spring-boot-starter-test</artifactId>
            <scope>test</scope>
        </dependency>
    </dependencies>

    <build>
        <plugins>
            <!-- SpringBoot的maven打包插件 -->
            <plugin>
                <groupId>org.springframework.boot</groupId>
                <artifactId>spring-boot-maven-plugin</artifactId>
            </plugin>
            <!-- 明确指定一些插件的版本,以免受到 maven 版本的影响 -->
            <plugin>
                <artifactId>maven-clean-plugin</artifactId>
                <version>3.1.0</version>
            </plugin>
            <plugin>
                <artifactId>maven-compiler-plugin</artifactId>
                <version>3.8.1</version>
            </plugin>
            <plugin>
                <artifactId>maven-deploy-plugin</artifactId>
                <version>2.8.2</version>
            </plugin>
            <plugin>
                <artifactId>maven-install-plugin</artifactId>
                <version>2.5.2</version>
            </plugin>
            <plugin>
                <artifactId>maven-jar-plugin</artifactId>
                <version>3.2.0</version>
            </plugin>
            <plugin>
                <artifactId>maven-resources-plugin</artifactId>
                <version>3.1.0</version>
            </plugin>
            <plugin>
                <artifactId>maven-site-plugin</artifactId>
                <version>3.3</version>
            </plugin>
            <plugin>
                <artifactId>maven-surefire-plugin</artifactId>
                <version>2.22.2</version>
            </plugin>

        </plugins>
    </build>

</project>
准备Springboot配置文件
debug=true
# 设置打印日志的级别,及打印sql语句
#日志级别:trace,debug,info,warn,error
#基本日志
logging.level.root=INFO
#扫描的包:druid.sql.Statement类和frank包
logging.level.druid.sql.Statement=DEBUG
logging.level.org.example=DEBUG

# 美化JSON数据格式
spring.jackson.serialization.indent-output=true
# 设置JSON数据的日期格式
spring.jackson.date-format=yyyy-MM-dd HH:mm:ss
spring.jackson.time-zone=GMT+8
# JSON数据属性为null时不返回
spring.jackson.default-property-inclusion=non_null
# get请求参数及表单提交数据的日期格式
spring.mvc.format.date=yyyy-MM-dd HH:mm:ss

#servlet上下文路径
#server.servlet.context-path=/lucky-draw
# 自定义属性:用户头像本地保存根路径
user.head.local-path=D:/TMP
user.head.remote-path=http://localhost:8080${server.servlet.context-path:}
#user.head.filename=head.jpg
# 静态资源映射:将路径映射为/,即/static/xxx,映射为/xxx,支持多个字符串,逗号间隔
# 默认为/META-INF/resources/, /resources/, /static/, /public/
# 指定外部web资源文件夹:访问的路径为/
spring.resources.static-locations=classpath:/static/,classpath:/public/,file:${user.head.local-path}

#druid数据库连接池配置
spring.datasource.driver-class-name=com.mysql.jdbc.Driver
spring.datasource.url=jdbc:mysql://localhost:3306/lucky_draw?useUnicode=true&characterEncoding=UTF-8&useSSL=false&zeroDateTimeBehavior=convertToNull&allowMultiQueries=true
spring.datasource.username=root
spring.datasource.password=root
spring.datasource.druid.initial-size=1
spring.datasource.druid.min-idle=1
spring.datasource.druid.max-active=20
spring.datasource.druid.test-on-borrow=true

#指定Mybatis表和实体映射关系xml配置文件,包含表与实体的映射,字段和属性的映射,及各个sql语句
mybatis.mapper-locations=classpath:mapper/**Mapper.xml
准备SpringBoot启动类
package org.example;

import org.springframework.boot.SpringApplication;
import org.springframework.boot.autoconfigure.SpringBootApplication;

@SpringBootApplication
public class Application {

    public static void main(String[] args) {
        SpringApplication.run(Application.class, args);
    }
}
配置数据库链接

配置文件里面写的信息
用idea右边的Database链接

进入设置界面设置数据库:

代码设计
统一异常处理
public class ExceptionAdvice {

    //自定义异常报错错误码和错误消息
    @ExceptionHandler(AppException.class)
    @ResponseBody
    public Object handle1(AppException e){
        JSONResponse json = new JSONResponse();
        json.setCode(e.getCode());
        json.setMessage(e.getMessage());
        log.debug("自定义异常", e);
        return json;
    }

    //非自定义异常(英文错误信息,堆栈信息,不能给用户看):
    // 指定一个错误码,错误消息(未知错误,请联系管理员)
    @ExceptionHandler(Exception.class)
    @ResponseBody
    public Object handle2(Exception e){
        JSONResponse json = new JSONResponse();
        json.setCode("ERR000");
        json.setMessage("未知错误,请联系管理员");
        log.error("未知错误", e);
        return json;
    }
}
<其中 方法handle1>:对于我们自定义异常,我们自己的应用发生错误的时候,我们通过我们的自定义异常AppException来仔细写明我们的错误信息。
<其中 方法handle2>:捕获到的我们没有定义到的异常,可以说是未知错误。这算是抛出未知的异常。
每次我们自己写的异常都 调用这个我们自己定义的的异常处理来写明我们的异常,说明清除异常编号以及异常的代码。

专用于本项目定义的异常处理AppException处理本应用在请求中的异常
public class AppException extends RuntimeException {

    private String code;

    public AppException( String code, String message) {
        super(message);
        this.code = code;
    }

    public AppException( String code, String message, Throwable cause) {
        super(message, cause);
        this.code = code;
    }
}
拦截器
防止不登陆直接访问管理设置页面。
public class LoginInterceptor implements HandlerInterceptor {

    private ObjectMapper objectMapper;

    public LoginInterceptor(ObjectMapper objectMapper) {
        this.objectMapper = objectMapper;
    }

    @Override
    public boolean preHandle(HttpServletRequest request, HttpServletResponse response, Object handler) throws Exception {
        HttpSession session = request.getSession(false);
        if(session != null){//获取登录时设置的用户信息
            User user = (User) session.getAttribute("user");
            if(user != null){//登录了,允许访问
                return true;
            }
        }
        //登录失败,不允许访问的业务:区分前后端
        //TODO:前端跳转登录页面,后端返回json
//        new ObjectMapper().writeValueAsString(object);//序列化对象为json字符串
        //请求的服务路径
        String servletPath = request.getServletPath();//   /apiXXX.html
        if(servletPath.startsWith("/api/")){//后端逻辑:返回json
            response.setCharacterEncoding("UTF-8");
            response.setContentType(MediaType.APPLICATION_JSON_VALUE);
            JSONResponse json = new JSONResponse();
            json.setCode("USR000");
            json.setMessage("用户没有登录,不允许访问");
            String s = objectMapper.writeValueAsString(json);
            response.setStatus(HttpStatus.UNAUTHORIZED.value());
            PrintWriter pw = response.getWriter();
            pw.println(s);
            pw.flush();
        }else{//前端逻辑:跳转到登录页面 /views/index.html
            //相对路径的写法,一定是请求路径作为相对位置的参照点
            //使用绝对路径来重定向,不建议使用相对路径和转发
            String schema = request.getScheme();//http
            String host = request.getServerName();//ip
            int port = request.getServerPort();//port
            String contextPath = request.getContextPath();//application Context path应用上下文路径
            String basePath = schema+"://"+host+":"+port+contextPath;
            //重定向到登录页面
            response.sendRedirect(basePath+"/index.html");
        }
        return false;
    }
}
设置Mybatis的Mapper基类
其余单独有要求的单独写出来
package org.example.base;

public interface BaseMapper<T> {

    int deleteByPrimaryKey(Integer id);

    int insert(T record);

    int insertSelective(T record);

    T selectByPrimaryKey(Integer id);

    int updateByPrimaryKeySelective(T record);

    int updateByPrimaryKey(T record);
}


 2518
2518

 被折叠的 条评论
为什么被折叠?
被折叠的 条评论
为什么被折叠?
 到【灌水乐园】发言


