


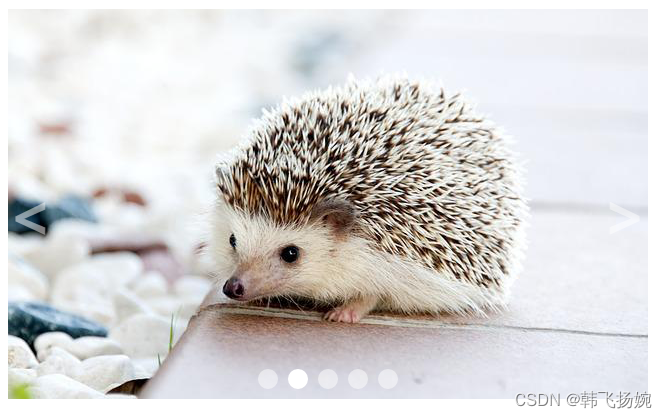
实现的效果图
原理:一次性加载所有图片,使用定位将图片重合在一起,根据opacity,z-index 属性显示当前图片
一、基本的HTML布局
创建一个外部容器来存放图片,prev-next是添加的左右切换按钮,dot存放图片下方的小白点
		<div class="outer">
            <ul class="img-list">
                <li class="current">
                    <a href="#">
                        <img src="./images/1.png" />
                    </a>
                </li>
                <li>
                    <a href="#">
                        <img src="./images/2.png" />
                    </a>
                </li>
                <li>
                    <a href="#">
                        <img src="./images/3.png" />
                    </a>
                </li>
                <li>
                    <a href="#">
                        <img src="./images/4.png" />
                    </a>
                </li>
                <li>
                    <a href="#">
                        <img src="./images/5.png" />
                    </a>
                </li>
            </ul>

            <!--
                添加切换按钮
             -->

            <div class="prev-next">
                <a id="prev" href="javascript:;"><</a>
                <a id="next" href="javascript:;">></a>
            </div>

            <!--
                导航点
             -->
            <div class="dot">
                <a class="active" href="javascript:;"></a>
                <a href="javascript:;"></a>
                <a href="javascript:;"></a>
                <a href="javascript:;"></a>
                <a href="javascript:;"></a>
            </div>
        </div>
二、css样式
opacity属性可以修改元素样式的透明度,z-index 属性设置元素的层级,首先默认图片的opacity: 0;需要哪张图片显示就添加一个类current,以及小白点的active
transition过渡属性实现切换图片时的过渡效果,不显得那么生硬,语法:transition: 指定CSS属性的name 过渡效果持续时间 指定过渡效果的转速曲线 指定过渡延迟开始时间;
		<style>
            * {
                margin: 0;
                padding: 0;
            }

            img {
                vertical-align: top;
            }

            ul {
                list-style: none;
            }

            .outer {
                width: 640px;
                height: 390px;
                margin: 100px auto;
                position: relative;
            }

            .img-list {
                height: 390px;
            }

            .img-list li {
                position: absolute;
                opacity: 0;
                transition: opacity 1s;
            }

            li.current {
                z-index: 1;
                opacity: 1;
            }

            /*
                设置两个箭头的样式
            */
            .prev-next a {
                font-size: 60px;
                color: #fff;
                font-weight: bold;
                text-decoration: none;
                position: absolute;
                height: 60px;
                top: 0;
                bottom: 0;
                margin: auto;
                z-index: 2;
                opacity: 0.5;
            }

            .prev-next a:hover {
                opacity: 1;
            }

            #next {
                right: 0;
            }

            /*
                设置导航点的样式
            */
            .dot {
                position: absolute;
                display: flex;
                justify-content: center;
                z-index: 3;
                left: 0;
                right: 0;
                bottom: 5px;
                margin: auto;
            }
            .dot a {
                width: 20px;
                height: 20px;
                margin: 5px;
                border-radius: 50%;
                background-color: #fff;
                opacity: 0.5;
            }

            .dot a:hover,
            .dot .active {
                opacity: 1;
            }
        </style>
三、js代码
		<script>
            window.onload = function () {
                const dots = Array.from(document.querySelectorAll(".dot a"))//获取小白点并转为数组
            	const imgArr = Array.from(document.querySelectorAll(".img-list li"))//获取图片列表并转为数组
            	//这里将点击事件绑定给document主要是运用事件委派,将本该绑定给多个元素的事件,统一绑定给document,这样可以降低代码复杂度方便维护
            	document.addEventListener("click", (event) => {
                	const index = dots.indexOf(event.target)
                	//event.target 触发事件的对象
					//判断是否是点击小白点
                	if (index !== -1) {
                    	changeImg(index)
                	}
            	})
            	/*
                自动切换图片
            	*/
				//这里使用闭包,使得外面访问不到timer
            	const toggleChange = (function () {
                	let timer = null
                	return () => {
                    	// 判断timer是否是null
                    	if (timer === null) {
                        	timer = setTimeout(function auto() {
                            	changeImg("next")
                            	timer = setTimeout(auto, 3000)
                        	}, 3000)
                    	} else {
                        	clearTimeout(timer)
                        	timer = null
                    	}
                	}
            	})()
            	toggleChange()

				// 获取outer
            	const outer = document.getElementsByClassName("outer")[0]
            	//鼠标移入,清空定时器,暂停图片自动切换
            	outer.onmouseenter = () => {
                	toggleChange()
            	}
				//鼠标移出,图片自动切换
            	outer.onmouseleave = () => {
                	toggleChange()
            	}
            	/*
                点击按钮切换图片
            	*/

            	const prev = document.getElementById("prev")
            	const next = document.getElementById("next")

            	prev.onclick = () => {
                	changeImg("prev")
            	}

            	next.onclick = () => {
                	changeImg("next")
            	}
            	/*
                changeImg 用来切换图片
                    参数:
                        dir 切换图片的方向
                            next
                            prev

            */
            function changeImg(dir) {
                // 获取当前显示的图片
                const current = document.querySelector(".img-list .current")

                // 获取下一个图片
                let next
                if (dir === "next") {
                    next = current.nextElementSibling || imgArr[0]
                } else if (dir === "prev") {
                    next = current.previousElementSibling || imgArr.at(-1)
                } else if (typeof dir === "number") {
                    next = imgArr[dir]
                }

                // 获取要显示的图片的索引
                const index = imgArr.indexOf(next)

                // 切换显示状态
                current.classList.remove("current")
                next.classList.add("current")

                // 切换active
                const currentActive = document.querySelector(".active")
                currentActive.classList.remove("active")

                // 获取到当前要显示的小点
                dots[index].classList.add("active")
            }
        }
       </script>


 1万+
1万+


 被折叠的 条评论
为什么被折叠?
被折叠的 条评论
为什么被折叠?
 到【灌水乐园】发言


