


mybatis懒加载
1:idea数据库的链接

2:第一个mybatis流程

1:maven所需要的包和xml拦截器进行拦截扫描
<?xml version="1.0" encoding="UTF-8"?>
<project xmlns="http://maven.apache.org/POM/4.0.0"
         xmlns:xsi="http://www.w3.org/2001/XMLSchema-instance"
         xsi:schemaLocation="http://maven.apache.org/POM/4.0.0 http://maven.apache.org/xsd/maven-4.0.0.xsd">
    <modelVersion>4.0.0</modelVersion>
    <groupId>org.example</groupId>
    <artifactId>mybatis-study</artifactId>
    <packaging>pom</packaging>
    <version>1.0-SNAPSHOT</version>
    //子工程
    <modules>
        <module>mybatis-01-hello</module>
        <module>mybatis-02-baseKnowledge</module>
    </modules>

    <dependencies>
<!--        mysql-->
        <!-- https://mvnrepository.com/artifact/mysql/mysql-connector-java -->
        <dependency>
            <groupId>mysql</groupId>
            <artifactId>mysql-connector-java</artifactId>
            <version>5.1.47</version>
        </dependency>

<!--        mybatis-->
        <!-- https://mvnrepository.com/artifact/org.mybatis/mybatis -->
        <dependency>
            <groupId>org.mybatis</groupId>
            <artifactId>mybatis</artifactId>
            <version>3.5.2</version>
        </dependency>

<!--        junit-->
        <!-- https://mvnrepository.com/artifact/junit/junit -->
        <dependency>
            <groupId>junit</groupId>
            <artifactId>junit</artifactId>
            <version>4.12</version>
            <scope>test</scope>
        </dependency>

        <!-- https://mvnrepository.com/artifact/log4j/log4j -->
        <dependency>
            <groupId>log4j</groupId>
            <artifactId>log4j</artifactId>
            <version>1.2.17</version>
        </dependency>
	 <!-- 实体类自动生成get set和构造方法和toString -->
        <dependency>
            <groupId>org.projectlombok</groupId>
            <artifactId>lombok</artifactId>
            <version>1.18.20</version>
        </dependency>
    </dependencies>
<!--  拦截识别xml用的 -->
    <build>
        <resources>
            <resource>
                <directory>src/main/java</directory>
                <includes>
                    <include>**/*.xml</include>
                    <include>**/*.properties</include>
                </includes>
                <filtering>false</filtering>
            </resource>
            <resource>
                <directory>src/main/resources</directory>
                <includes>
                    <include>**/*.xml</include>
                    <include>**/*.properties</include>
                </includes>
                <filtering>false</filtering>
            </resource>
        </resources>
    </build>
</project>
2:工具类:进行获取sqlSession
sqlsession的作用:通过下面的
工具类找到 ---- mybatis-config.xml
mybatis-config.xml 中的mapper配置找到 ---- userMapper.xml
userMapper.xml中通过命名空间(namespace) ----- 找到userMapper实体类
所以操作sqlsession操作userMapper类 就直接操作了数据库
package com.atshikai.utils;

import org.apache.ibatis.io.Resources;
import org.apache.ibatis.session.SqlSession;
import org.apache.ibatis.session.SqlSessionFactory;
import org.apache.ibatis.session.SqlSessionFactoryBuilder;

import java.io.IOException;
import java.io.InputStream;

//SqlSessionFactory ----》sqlSession
public class MyBatisUtils {
    private  static SqlSessionFactory sqlSessionFactory;
    static {
        try {
//            使用mybatis的第一步:获取sqlSessionFactory工厂
            String resource = "mybatis-config.xml";
            InputStream inputStream = Resources.getResourceAsStream(resource);
            sqlSessionFactory = new SqlSessionFactoryBuilder().build(inputStream);
        } catch (IOException e) {
            e.printStackTrace();
        }
    }
//    相当于getConnection注解的时候使用
    public static SqlSession getSqlSession(){
//        改为true是自动提交事务
        return sqlSessionFactory.openSession(true);
    }
}
关于sqlsession
1一旦创建SqlSessionFactory,SqlSessionFactoryBuilder就会被销毁—局部变量
2 SqlSessionFactory:可以想象为:数据库连接池,一旦创建在运行期间一直存在单例模式
3 SqlSession连接到连接池的一个请求,不能被共享,用完之后赶紧关闭
4一个mappe就相当于一个具体的业务!!!
sqlsession由来
就是我操作数据库我们需要两步:1:获取数据库链接,2:编写sql语句进行操作
发展一
第一是因为原始从操作数据库需要频繁的创建数据库链接
第二是因为耦合性比较高,在业务层写sql语句代码,代码的健壮性不高
    public static void main(String[] args) throws SQLException, ClassNotFoundException {
//        给user设置值
        SqlUser sqlUser = new SqlUser("1","1","1","gaishi",0,2,new Date(),"1835191037@qq.com");
        int i = addUser(sqlUser);
        if (i!=0){
            System.out.println("添加成功!!");
        }
        System.out.println(deleteUser(5));
    }
    public static int addUser(SqlUser sqlUser) throws ClassNotFoundException, SQLException {
        Class.forName("com.mysql.cj.jdbc.Driver");
        String user = "root";
        String pwd = "zzzzzz";
        String url = "jdbc:mysql://localhost:3306/tclass?useUnicode=true&characterEncoding=utf-8&useSSL=false& serverTimezone=CST";
        Connection connection = DriverManager.getConnection(url,user,pwd);
        String sql="insert into user (phone,pwd,sex,img,create_time,role,username,wechat) values(?,?,?,?,?,?,?,?)";
        PreparedStatement statement = connection.prepareStatement(sql);
        statement.setString(1,sqlUser.getPhone());
        statement.setString(2,sqlUser.getPwd());
        statement.setInt(3,sqlUser.getSex());
        statement.setString(4,sqlUser.getImg());
        statement.setObject(5,sqlUser.getCreateTime());
        statement.setInt(6,sqlUser.getRole());
        statement.setString(7,sqlUser.getUsername());
        statement.setString(8,sqlUser.getWechat());
        int i = statement.executeUpdate();
        statement.close();
        connection.close();
        return i;
    }
发展2
有了mybatis,使用sqlsession,
sql语句单独提取出来–通过mapper映射
把数据库链接也创建出来
//SqlSessionFactory ----》sqlSession
public class MyBatisUtils {
    private  static SqlSessionFactory sqlSessionFactory;
    static {
        try {
//            使用mybatis的第一步:获取sqlSessionFactory工厂
            String resource = "mybatis-config.xml";
            InputStream inputStream = Resources.getResourceAsStream(resource);
            sqlSessionFactory = new SqlSessionFactoryBuilder().build(inputStream);
        } catch (IOException e) {
            e.printStackTrace();
        }
    }
//    相当于getConnection
    public static SqlSession getSqlSession(){
//        改为true是自动提交事务
        return sqlSessionFactory.openSession(true);
    }
}
<?xml version="1.0" encoding="UTF-8" ?>
<!DOCTYPE configuration
        PUBLIC "-//mybatis.org//DTD Config 3.0//EN"
        "http://mybatis.org/dtd/mybatis-3-config.dtd">
<!--核心配置文件-->
<configuration>

    <properties resource="db.properties"/>

<!--    <settings>-->
<!--        <setting name="logImpl" value="STDOUT_LOGGING"/>-->
<!--        <setting name="logImpl" value="LOG4J"/>-->
<!--    </settings>-->
    <!--    添加配置之懒加载-->
    <settings>
        <setting name="mapUnderscoreToCamelCase" value="true"/>
        <setting name="lazyLoadingEnabled" value="true"/>
        <setting name="aggressiveLazyLoading" value="false"/>
    </settings>
<!--    类名小写的去起别名,然后供返回值使用-->
    <typeAliases>
        <package name="atshikai.pojo"/>
    </typeAliases>

    <environments default="development">
        <environment id="development">
            <transactionManager type="JDBC"/>
            <dataSource type="POOLED">
                <property name="driver" value="${driver}"/>
                <property name="url" value="${url}"/>
                <property name="username" value="${username}"/>
                <property name="password" value="${password}"/>
            </dataSource>
        </environment>
    </environments>
<!--    注册一下mapper-->
    <mappers>
<!--        下面这两个用的是mybatis数据库-->
        <mapper resource="mapper/AddressMapper.xml"/>
        <mapper resource="mapper/UserMapper.xml"/>
<!--        这个用的是educoder-->
        <mapper resource="mapper/OUserMapper.xml"/>
        <mapper resource="mapper/OrderMapper.xml"/>
<!--        <mapper class="atshikai.mapper.UserMapper"/>-->
    </mappers>
</configuration>
发展三
整合spring,通过导包mybatis-spring,数据可链接直接配置一下这个就可以
<?xml version="1.0" encoding="UTF-8"?>
<beans xmlns="http://www.springframework.org/schema/beans"
       xmlns:xsi="http://www.w3.org/2001/XMLSchema-instance"
       xmlns:context="http://www.springframework.org/schema/context"
       xsi:schemaLocation="http://www.springframework.org/schema/beans
       http://www.springframework.org/schema/beans/spring-beans.xsd
       http://www.springframework.org/schema/context
       https://www.springframework.org/schema/context/spring-context.xsd">
<!--    1关联数据库配置文件-->
    <context:property-placeholder location="classpath:dataSource.properties"/>
    <!--    2连接数据库-->
    <bean class="com.mchange.v2.c3p0.ComboPooledDataSource" id="dataSource">
        <property name="driverClass" value="${jdbc.driver}"/>
        <property name="jdbcUrl" value="${jdbc.url}"/>
        <property name="user" value="${jdbc.username}"/>
        <property name="password" value="${jdbc.password}"/>
        <!-- c3p0连接池的私有属性 -->
        <property name="maxPoolSize" value="30"/>
        <property name="minPoolSize" value="10"/>
        <!-- 关闭连接后不自动commit -->
        <property name="autoCommitOnClose" value="false"/>
        <!-- 获取连接超时时间 -->
        <property name="checkoutTimeout" value="10000"/>
        <!-- 当获取连接失败重试次数 -->
        <property name="acquireRetryAttempts" value="2"/>
    </bean>
<!--    3 sqlSessionFactory  这个类简化了之前一致-->
    <bean class="org.mybatis.spring.SqlSessionFactoryBean" id="sqlSessionFactory">
        <property name="dataSource" ref="dataSource"/>
        <property name="configLocation" value="classpath:mybatis-config.xml"/>
        <!-- 去映射mapper,去发现sql语句-->
        <property name="mapperLocations" value="classpath:GSK/ssm/dao/*.xml"/>
    </bean>

<!--    <bean class="org.mybatis.spring.SqlSessionTemplate" id="sqlSession">-->
<!--        <constructor-arg ref="sqlSessionFactory"/>-->
<!--    </bean>-->

<!--    4配置dao接口扫描包,动态地实现了Dao接口可以住到Spring容器中!
        (这样就不用写BookMapperImpl了-这里看不明白也可以写一个实现类操作sqlSession)-->
    <bean class="org.mybatis.spring.mapper.MapperScannerConfigurer">
<!--        注入sqlSessionFactory-->
        <property name="sqlSessionFactoryBeanName" value="sqlSessionFactory"/>
<!--        要扫描的包 sqlsession的作用范围-->
        <property name="basePackage" value="GSK.ssm.dao"/>
    </bean>
</beans>
3:mybatis-config.xml配置文件
<?xml version="1.0" encoding="UTF-8" ?>
<!DOCTYPE configuration
        PUBLIC "-//mybatis.org//DTD Config 3.0//EN"
        "http://mybatis.org/dtd/mybatis-3-config.dtd">
<configuration>
<!--1引入配置文件-->
    <properties resource="db.properties"/>
<!--2设置日志文件-->
    <settings>
        <!-- 解决数据库和实体类名不一致问题(严格的驼峰式命名) 数据库g_shi==实体类gShi-->
        <setting name="mapUnderscoreToCamelCase" value="true"/>
        <setting name="logImpl" value="STDOUT_LOGGING"/>
		<!--需要导入包进行操作-->
<!--        <setting name="logImpl" value="LOG4J"/>-->
    </settings>
<!-- 3   类名首字母小写的去起别名,然后供返回值使用-->
    <typeAliases>
        <package name="com.atshikai.pojo"/>
    </typeAliases>
<!--4环境配置-->
    <environments default="development">
        <environment id="development">
            <transactionManager type="JDBC"/>
            <dataSource type="POOLED">
                <property name="driver" value="${driver}"/>
                <property name="url" value="${url}"/>
                <property name="username" value="${username}"/>
                <property name="password" value="${password}"/>
            </dataSource>
        </environment>
    </environments>
<!-- 5   注册一下mapper 进行映射-->
    <mappers>
        //直接绝对路径查找,放在哪里都可以
        <!--<mapper resource="com/atshikai/dao/userMapper.xml"/>-->
        //下面两个需要在同一个路径下才可以,
        <mapper class="com.atshikai.dao.UserMapper"/>
        // 给定
<!--        <package name="com.atshikai.dao"/>-->
    </mappers>
</configuration>
4:实体类
package com.atshikai.pojo;

import lombok.AllArgsConstructor;
import lombok.Data;
import lombok.NoArgsConstructor;
@Data                              //get,set
@NoArgsConstructor                 //无参构造
@AllArgsConstructor                //有参构造
public class User {
    private int id;
    private String name;
    private String pwd;
}
Logj打印日志的生成

5:实体类接口
package com.atshikai.dao;
import com.atshikai.pojo.User;
import java.util.List;
import java.util.Map;

public interface UserMapper {
    List<User> getUserList();
//通过id查询
    User selectById(int id);
//    模糊查询
    List<User> selectIgnore(String name);
//  增
    int insertUser(User user);
//   使用map进行添加User对象
    int addUser(Map<String,Object> map);
//    删
    int deleteUser(int id);
//    改
    int updateUser(User user);
}
6:实体类接口(写sql语句)
<?xml version="1.0" encoding="UTF-8" ?>
<!DOCTYPE mapper
        PUBLIC "-//mybatis.org//DTD Mapper 3.0//EN"
        "http://mybatis.org/dtd/mybatis-3-mapper.dtd">
<mapper namespace="com.atshikai.dao.UserMapper">
    <select id="getUserList" resultType="com.atshikai.pojo.User">
    select * from mybatis.user
  </select>

    <select id="selectById" resultType="com.atshikai.pojo.User" parameterType="int">
        select * from mybatis.user where id=#{id};
    </select>

    <!--    模糊查询-->
    <select id="selectIgnore" parameterType="String" resultType="com.atshikai.pojo.User">
        select * from mybatis.user where name like #{value}
    </select>

    <insert id="insertUser" parameterType="com.atshikai.pojo.User">
        insert into mybatis.user(id,name,pwd) values(#{id},#{name},#{pwd});
    </insert>

<!--    使用map进行添加对象  传参数的时候应该用  #{}  不是${}-->
    <insert id="addUser" parameterType="java.util.Map">
        insert into mybatis.user values(#{id},#{name},#{pwd});
    </insert>


    <delete id="deleteUser" parameterType="int">
        delete from mybatis.user where id=#{id};
    </delete>

    <update id="updateUser" parameterType="com.atshikai.pojo.User">
        update mybatis.user set name=#{name},pwd=#{pwd} where id=#{id};
    </update>

</mapper>
7:进行测试
import com.atshikai.dao.UserMapper;
import com.atshikai.pojo.User;
import com.atshikai.utils.MyBatisUtils;
import org.apache.ibatis.session.SqlSession;
import org.junit.Test;
import java.util.HashMap;
import java.util.List;
import java.util.Map;
public class MyTest {
@Test
public void testSelect(){
SqlSession sqlSession = MyBatisUtils.getSqlSession();
UserMapper mapper = sqlSession.getMapper(UserMapper.class);
List<User> userList = mapper.getUserList();
for (User user:userList){
System.out.println(user);
}
sqlSession.commit();
sqlSession.close();
}
@Test
public void testInsert(){
SqlSession sqlSession = MyBatisUtils.getSqlSession();
UserMapper mapper = sqlSession.getMapper(UserMapper.class);
int i = mapper.insertUser(new User(4, "盖世凯5", "666"));
System.out.println(i);
sqlSession.commit();
sqlSession.close();
}
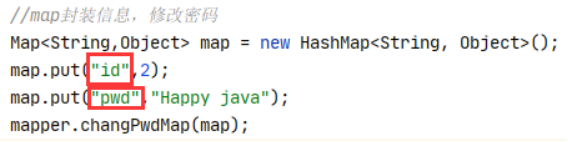
// 用map进行添加用户
@Test
public void testMapAdd(){
SqlSession sqlSession = MyBatisUtils.getSqlSession();
UserMapper mapper = sqlSession.getMapper(UserMapper.class);
Map<String,Object> map=new HashMap<String, Object>();
map.put("id",7);
map.put("name","张建");
map.put("pwd","888");
mapper.addUser(map);
sqlSession.commit();
sqlSession.close();
}
// 模糊查询
@Test
public void selectIgnore(){
SqlSession sqlSession = MyBatisUtils.getSqlSession();
UserMapper mapper = sqlSession.getMapper(UserMapper.class);
List<User> users = mapper.selectIgnore("%盖%");
for(User user:users){
System.out.println(user);
}
sqlSession.commit();
sqlSession.close();
}
@Test
public void selectById(){
SqlSession sqlSession = MyBatisUtils.getSqlSession();
UserMapper mapper = sqlSession.getMapper(UserMapper.class);
User user = mapper.selectById(2);
System.out.println(user);
sqlSession.commit();
sqlSession.close();
}
@Test
public void deleteUser(){
SqlSession sqlSession = MyBatisUtils.getSqlSession();
UserMapper mapper = sqlSession.getMapper(UserMapper.class);
int i = mapper.deleteUser(2);
System.out.println(i);
sqlSession.commit();
sqlSession.close();
}
@Test
public void updateUser(){
SqlSession sqlSession = MyBatisUtils.getSqlSession();
UserMapper mapper = sqlSession.getMapper(UserMapper.class);
int i = mapper.updateUser(new User(1, "凯凯", "888"));
System.out.println(i);
sqlSession.commit();
sqlSession.close();
}
}
3:写sql#() 和${}的区别
都可以使用但是#{} 可以防止sql注入,更安全
4resultType和resultMap
如果:数据库的column和bean中的property一致:使用resultType 直接上bean类


如果:数据库的column和bean中的property不一致:使用resultMap进行结果集映射

目的都是让数据库和bean类关联起来,进而通过操作bean来操作数据库
参数传递和返回值
Mapper接口中的方法 与 Sql映射文件的sql语句绑定,他们之间的参数是怎样转换或传递的,主要分为下面几种情况。
说明:sql语句中获取参数,都不是根据Mapper接口中定义的方法的形参名。
1.单个参数 —— 基本类型、包装类型、字符串类型
Mapper接口的方法中:一个参数,参数的类型包括基本数据类型、包装类型、String类型参数。

Sql语句中: #{随便写,建议与实际的参数名保持一致}

2. 多个参数
Mapper接口的方法中: 多个参数

封装:MyBatis会把多个参数封装成一个Map,Map中的数据形式key:value,封装时使用的key为param1 param2 … paramN 或 arg0……argN
Sql语句中:#{ param1 param2 … paramN} 或 #{arg0 arg1 arg2 …argN }

3. 命名参数
Mapper接口的方法中:使用@Param() 来指定多个参数封装Map时所使用的key。

封装: MyBatis会把多个参数封装成一个Map
Sql语句中: #{@Param指定的key} 或 #{param1 param2 … paramN}

- bean
Mapper接口的方法中:bean对象

Sql语句中: #{bean的属性名}

- Map
Mapper接口的方法中:Map对象

Sql语句中:#{map中的key}

测试:
应用场景:如果参数很多,但不是某个对象的属性,也不是很常用,可以直接封装成map进行传递。
6. 集合
Mapper接口的方法中:Collection、List、Array等集合类对象
封装:MyBatis对 Collection、Array 会进行特殊处理,将其封装为Map。
封装前类型 Map的key
Collection(List/Set) collection
List collection / list
Array array
说明
①Sql语句中参数值的获取方式(再谈)
#{}:推荐使用,预处理方式(占位符)。
${}:不推荐使用,会注入攻击。
应用场景原生的JDBC不支持占位符的地方,如果想要动态的传递参数,就需要使用${}的方式。
eg: select ${}… from
w
h
e
r
e
条件
{} where 条件
where条件{}= #{} … group by ${} having ${} = #{} order by
d
e
s
c
/
a
s
c
(
{} desc/asc(
desc/asc({}) limit #{},#{}
②#{username, javaType=int,jdbcType=VARCHAR},在Sql语句中,获取参数值时,可以通过jdbcType明确指明对应的数据库字段的类型,javaType明确指明对应的java的属性类型。
mybatis中select语句一定要指定返回值类型
就是user数据库传递回来的值,你要用这些值进行封装成User对象,但db字段和pojo字段名不一致,我们可以用resultMap
resultType
1:resultType可以把查询结果封装到pojo类型中,但必须pojo类的属性名和查询到的数据库表的字段名一致。
2:如果sql查询到的字段与pojo的属性名不一致,则需要使用resultMap将数据库字段名和pojo属性名对应起来,进行手动配置封装,将结果映射到pojo中
resultMap
resultMap可以实现将查询结果映射为复杂类型的pojo,比如在查询结果映射对象中包括pojo和list实现一对一查询和一对多查询。
1.简单结果查询——resultType
①单个对象


②多个对象的集合List


③单行数据Map<key,value> ,key为字段名,value为字段值


④多条数据Map<key,Bean>,key为Bean的某个属性,value为Bean
Mapper接口的方法中,使用@MapKey()来指定Map的对象的某个属性作为可以。


5:多表查询(一对多,多对一)
总结:注意点
javaType用来指定对象所属的java数据类型,也就是private List<Post>posts 的ArrayList类型
ofType用来指定对象的所属javaBean类,也就是尖括号的泛型private List<Post>posts

多对一(多个学生对应一个老师)
<?xml version="1.0" encoding="UTF-8" ?>
<!DOCTYPE mapper
        PUBLIC "-//mybatis.org//DTD Config 3.0//EN"
        "http://mybatis.org/dtd/mybatis-3-mapper.dtd">
<mapper namespace="com.atshikai.dao.StudentMapper">

<!--    按照结果嵌套处理 resultMap关联外部的sql(常用)-->
    <select id="getStudents1" resultMap="studentMap1">
        select s.id sid,s.name sname,t.id,t.name tname
        from student s,teacher t
        where s.tid=t.id;
    </select>
    <resultMap id="studentMap1" type="student">
        <result property="id" column="sid"/>
        <result property="name" column="sname"/>
        <!--对于复杂的查询,我们需要单独处理,要一一对应,需要什么字段,就写什么字段 对象:association 集合:collection-->
        <association property="teacher" javaType="Teacher">
            <result property="id" column="id"/>
            <result property="name" column="tname"/>
        </association>
    </resultMap>
<!--    ================================================================   -->
    <!--
    思路:1 查询所有学生的信息,2 根据查出来的学生id,寻找对应的老师 这个可以实现懒加载
    -->
    <resultMap id="studentMap" type="student">
        <result property="id" column="id"/>
        <result property="name" column="name"/>
<!--        对于复杂的查询,我们需要单独处理,对象:association 集合:collection-->
        <association property="teacher" column="tid"
                     javaType="Teacher" select="getTeacher"/>
    </resultMap>
    <select id="getStudents" resultMap="studentMap">
        select * from student
    </select>
    <select id="getTeacher" resultType="teacher">
        select * from teacher where id=#{Tid};
    </select>
</mapper>
一对多(一个老师对应多个学生)
<?xml version="1.0" encoding="UTF-8" ?>
<!DOCTYPE mapper
        PUBLIC "-//mybatis.org//DTD Config 3.0//EN"
        "http://mybatis.org/dtd/mybatis-3-mapper.dtd">
<mapper namespace="com.atshikai.dao.TeacherMapper">
<!--  子查询  这个可以实现懒加载-->
    <select id="getTeachers1" resultMap="teacherMap1">
        select * from teacher t where t.id=#{Tid}
    </select>
    <resultMap id="teacherMap1" type="Teacher">
        <result property="id" column="id"/>
        <result property="name" column="name"/>
        <collection property="students" ofType="Student"
                    javaType="ArrayList" select="queryStudentByTid" column="id"/>
    </resultMap>
    <select id="queryStudentByTid" resultType="Student">
        select * from student where tid=#{Tid}
    </select>
<!--    =====================================================-->
<!-- 联合查询 (常用)-->
    <select id="getTeachers" resultMap="teacherMap">
        select s.id sid,s.name sname, t.id tid,t.name tname
        from student s,teacher t
        where s.tid=tid and tid=#{Tid}
    </select>
    <resultMap id="teacherMap" type="Teacher">
        <result property="id" column="tid"/>
        <result property="name" column="tname"/>
        <collection property="students" ofType="Student">
            <result property="id" column="sid"/>
            <result property="name" column="sname"/>
            <result property="tid" column="tid"/>
        </collection>
    </resultMap>

</mapper>
5:动态sql语句
复习成果
1:对应参数
public int deleteBillByProviderId(@Param("a") Integer providerId)throws Exception;

<delete id="deleteBillByProviderId" parameterType="int">
	delete from bill
      <where>
		providerId=#{a}
		//前面的providerId要和sql数据库中的字段名保持一致,后面要和你的@Param一致,
		//如果没有@Param默认是数据库字段名,就像传递过来一个对象,他会自动匹配你的sql语句进行对应
      </where>
</delete>
2:where查询
正确写法
Select * from emp where sal > 2000 and sal < 3000;
错误写法:在拼接sql语句的时候不可以添加 ,
Select * from emp where sal > 2000 ,and sal < 3000;
对于自动生成的id类
package com.atshikai.utils;

import java.util.UUID;

public class IdUtils {
    public static String getId(){
        return UUID.randomUUID().toString().replace("-","");
    }
}
所谓的动态sql,本质还是sql语句,只是在里面加了逻辑代码
- sql片段:查询include(尽量include中不使用where)
- 这里的where 1=1是防止第一个if条件不成立多出来一个and致使sql语句错误
 <sql id="if-title-author">
        <if test="title!=null">
            and title=#{title}
        </if>
        <if test="author!=null">
            and author=#{author}
        </if>
    </sql>
<select id="queryBlogIf" parameterType="map" resultType="blog">
    select * from blog where 1=1
    <include refid="if-title-author"></include>
</select>
- 查询where,choose,when(where嵌套可以智能的去掉无用的==and和,==如果where嵌套的没有东西,不影响代码执行)
<select id="queryBlogChoose" parameterType="map" resultType="blog">
    select * from blog
    <where>
        <choose>
            <when test="title!=null">
                and title=#{title}
            </when>
            <when test="author!=null">
                and author=#{author}
            </when>
            <otherwise>
                views=#{views}
            </otherwise>
        </choose>
    </where>
</select>
- 更新set(可以智能的去掉不需要的,如果set中没有东西,就会出错)
<update id="updateBlog" parameterType="map">
    update blog
    <set>
        <if test="title!=null">
            title=#{title},
        </if>
        <if test="author!=null">
            author=#{author}
        </if>
    </set>
    where id=#{id}
</update>
- 查询forEach
<select id="queryByIDs" parameterType="map" resultType="blog">
    select * from blog
    <where>
        <foreach collection="list" item="id"
                 open="(" separator="or" close=")">
            id=#{id}
        </foreach>
    </where>
</select>
collection——指定要迭代的集合(list,array,map);item——代表当前从集合中迭代出的元素;open——开始字符;close——结束字符;separator:——分隔符;index——如果迭代的是List集合, index表示的元素的下标; 如果迭代的Map, index表示的map的key。
6:mybatis一级二级缓存
详细看狂神27,28,29集

小结:
一级缓存:相当于一个map
缓存失效的情况:
1不同sqlSession查询相同东西的时候;
2增删改操作,可能会改变之前的操作,所以必定刷新
3查询不同的Mapper.xml
4手动清理缓存(一级缓存默认是开启的,关不掉)sqlSession.clearCache();
//    测试一级缓存
    public void testOneCache(){
        SqlSession sqlSession = MyBatisUtils.getSqlSession();
        SqlSession sqlSession1 = MyBatisUtils.getSqlSession();
        AddressMapper mapper = sqlSession.getMapper(AddressMapper.class);
        AddressMapper mapper1 = sqlSession1.getMapper(AddressMapper.class);
        mapper.testCache(1);
//        3:手动清除一级缓存
        sqlSession.clearCache();
        mapper.testCache(1);
//        1:不同的sqlSession也会破坏一级缓存
        mapper1.testCache(1);
//     2:中间增删改数据,会清除一级缓存
        Address address = new Address();
        address.setCity("北京");
        address.setProvince("河北省");
        mapper.testInsertCache(address);

        mapper.testCache(1);
        sqlSession.close();
    }
二级缓存
就是我(一级缓存)死了,然后吧缓存遗传给你(二级缓存)
//    测试二级缓存
    public void testTwoCache(){
        SqlSession sqlSession = MyBatisUtils.getSqlSession();
        SqlSession sqlSession1 = MyBatisUtils.getSqlSession();
        AddressMapper mapper = sqlSession.getMapper(AddressMapper.class);
        AddressMapper mapper1 = sqlSession1.getMapper(AddressMapper.class);
//        不同的sqlsession,但是因为二级缓存,就不会有两个查询操作
        mapper.testCache(1);
//        把一级缓存关掉,这里只要不关闭sqlSession,一级缓存还存在,所以二级缓存没有东西
//			没有下面一行代码,这里还是用的一级缓存,所以会有两个查询操作
        sqlSession.close();
        mapper1.testCache(1);
        sqlSession.close();
    }


 1542
1542


 被折叠的 条评论
为什么被折叠?
被折叠的 条评论
为什么被折叠?
 到【灌水乐园】发言


