


配置
版本说明:
springCloud Alibaba组件版本关系
我用的是 cloud Alibaba 2.2.1.RELEASE 、springboot 2.2.5.RELEASE、nacos 1.2.1、seata1.2.0
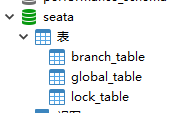
1. 配置数据库
seata 主要的任务便是对数据库进行事务回滚,保证事务的一致性,所以我们需要先行配置数据库,seata需要一个进行事务管理的数据库用于自身使用。
MySQL中创建 seata 数据库,存储引擎为 InnoDB(默认)
-- the table to store GlobalSession data
drop table if exists `global_table`;
create table `global_table` (
  `xid` varchar(128)  not null,
  `transaction_id` bigint,
  `status` tinyint not null,
  `application_id` varchar(32),
  `transaction_service_group` varchar(32),
  `transaction_name` varchar(128),
  `timeout` int,
  `begin_time` bigint,
  `application_data` varchar(2000),
  `gmt_create` datetime,
  `gmt_modified` datetime,
  primary key (`xid`),
  key `idx_gmt_modified_status` (`gmt_modified`, `status`),
  key `idx_transaction_id` (`transaction_id`)
);

-- the table to store BranchSession data
drop table if exists `branch_table`;
create table `branch_table` (
  `branch_id` bigint not null,
  `xid` varchar(128) not null,
  `transaction_id` bigint ,
  `resource_group_id` varchar(32),
  `resource_id` varchar(256) ,
  `lock_key` varchar(128) ,
  `branch_type` varchar(8) ,
  `status` tinyint,
  `client_id` varchar(64),
  `application_data` varchar(2000),
  `gmt_create` datetime,
  `gmt_modified` datetime,
  primary key (`branch_id`),
  key `idx_xid` (`xid`)
);

-- the table to store lock data
drop table if exists `lock_table`;
create table `lock_table` (
  `row_key` varchar(128) not null,
  `xid` varchar(96),
  `transaction_id` long ,
  `branch_id` long,
  `resource_id` varchar(256) ,
  `table_name` varchar(32) ,
  `pk` varchar(36) ,
  `gmt_create` datetime ,
  `gmt_modified` datetime,
  primary key(`row_key`)
);
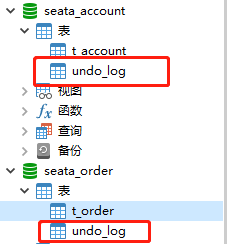
2. 在涉及到的其它业务库中添加日志表 undo_log
该表用于事务回滚时,数据的恢复
-- the table to store seata xid data
-- 0.7.0+ add context
-- you must to init this sql for you business databese. the seata server not need it.
-- 此脚本必须初始化在你当前的业务数据库中,用于AT 模式XID记录。与server端无关(注:业务数据库)
-- 注意此处0.3.0+ 增加唯一索引 ux_undo_log
drop table `undo_log`;
CREATE TABLE `undo_log` (
  `id` bigint(20) NOT NULL AUTO_INCREMENT,
  `branch_id` bigint(20) NOT NULL,
  `xid` varchar(100) NOT NULL,
  `context` varchar(128) NOT NULL,
  `rollback_info` longblob NOT NULL,
  `log_status` int(11) NOT NULL,
  `log_created` datetime NOT NULL,
  `log_modified` datetime NOT NULL,
  `ext` varchar(100) DEFAULT NULL,
  PRIMARY KEY (`id`),
  UNIQUE KEY `ux_undo_log` (`xid`,`branch_id`)
) ENGINE=InnoDB AUTO_INCREMENT=1 DEFAULT CHARSET=utf8;
3. 修改配置文件
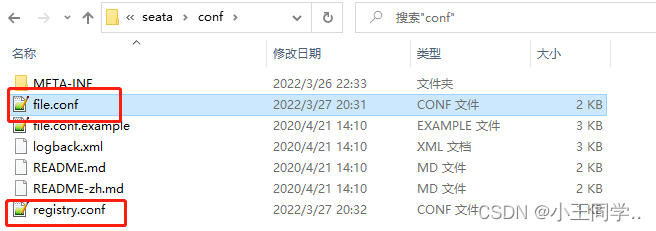
3.1 file.conf
## seata-service
service {
  #交易服务组映射 的组名称必须要与客户端一致 my_test_tx_group  fsp_test_group必须要与registrt.conf 一致
  #transaction service group mapping
  vgroupMapping.my_test_tx_group = "fsp_test_group"
  #only support when registry.type=file, please don't set multiple addresses
  #这里设置ip, 一般不用改
  default.grouplist = "127.0.0.1:8091"
  #disable seata
  disableGlobalTransaction = false
}


## transaction log store, only used in seata-server
store {
  ## store mode: file、db
  ##TODO 修改为数据库类型
  mode = "db"

  ## file store property
  file {
    ## store location dir
    dir = "sessionStore"
    # branch session size , if exceeded first try compress lockkey, still exceeded throws exceptions
    maxBranchSessionSize = 16384
    # globe session size , if exceeded throws exceptions
    maxGlobalSessionSize = 512
    # file buffer size , if exceeded allocate new buffer
    fileWriteBufferCacheSize = 16384
    # when recover batch read size
    sessionReloadReadSize = 100
    # async, sync
    flushDiskMode = async
  }

  ## database store property
  #TODO 下面这一堆就安装自己MySQL去改就行了,使用的库便是我们上面创建的seata库
 db {
    ## the implement of javax.sql.DataSource, such as DruidDataSource(druid)/BasicDataSource(dbcp) etc.
    datasource = "druid"
    ## mysql/oracle/postgresql/h2/oceanbase etc.
    dbType = "mysql"
    driverClassName = "com.mysql.jdbc.Driver"
    url = "jdbc:mysql://127.0.0.1:3306/seata?useUnicode=true&characterEncoding=utf8&serverTimezone=UTC"
    user = "root"
    password = "root"
    minConn = 5
    maxConn = 30
    globalTable = "global_table"
    branchTable = "branch_table"
    lockTable = "lock_table"
    queryLimit = 100
    maxWait = 5000
  }
}
3.2 registry.conf
registry {
  # file 、nacos 、eureka、redis、zk、consul、etcd3、sofa
  #TODO 配置为nacos
  type = "nacos"

#TODO 设置你自己的nacos即可
  nacos {
    application = "fsp_test_group"
    serverAddr = "localhost:8848"
    namespace = "public"
    cluster = "default"
    username = "nacos"
    password = "nacos"
  }
  eureka {
    serviceUrl = "http://localhost:8761/eureka"
    application = "default"
    weight = "1"
  }
  redis {
    serverAddr = "localhost:6379"
    db = 0
    password = ""
    cluster = "default"
    timeout = 0
  }
  zk {
    cluster = "default"
    serverAddr = "127.0.0.1:2181"
    sessionTimeout = 6000
    connectTimeout = 2000
    username = ""
    password = ""
  }
  consul {
    cluster = "default"
    serverAddr = "127.0.0.1:8500"
  }
  etcd3 {
    cluster = "default"
    serverAddr = "http://localhost:2379"
  }
  sofa {
    serverAddr = "127.0.0.1:9603"
    application = "default"
    region = "DEFAULT_ZONE"
    datacenter = "DefaultDataCenter"
    cluster = "default"
    group = "SEATA_GROUP"
    addressWaitTime = "3000"
  }
  file {
    name = "file.conf"
  }
}

config {
  # file、nacos 、apollo、zk、consul、etcd3
  type = "nacos"

 nacos {
    serverAddr = "localhost:8848"
    namespace = "public"
    group = "SEATA_GROUP"
    username = "nacos"
    password = "nacos"
  }
  consul {
    serverAddr = "127.0.0.1:8500"
  }
  apollo {
    appId = "seata-server"
    apolloMeta = "http://192.168.1.204:8801"
    namespace = "application"
  }
  zk {
    serverAddr = "127.0.0.1:2181"
    sessionTimeout = 6000
    connectTimeout = 2000
    username = ""
    password = ""
  }
  etcd3 {
    serverAddr = "http://localhost:2379"
  }
  file {
    name = "file.conf"
  }
}
4. 启动 (先启动nacos,然后启动seata)
4.1 seata 启动
bin 目录下 seata-server.bat 直接双击
4.2 启动闪退解决
- 提示没有logs文件夹

解决:在bin同级目录下新建logs文件夹,在logs中新建seata_gc.log - 如果还是闪退的话就新建环境变量,path里面直接
E:\seata\bin,这个路径为seata目录
5. 配置Springboot
5.1 pom.xml
		<!--nacos-->
        <dependency>
            <groupId>com.alibaba.cloud</groupId>
            <artifactId>spring-cloud-starter-alibaba-nacos-discovery</artifactId>
        </dependency>

        <!--seata-->
        <dependency>
            <groupId>com.alibaba.cloud</groupId>
            <artifactId>spring-cloud-starter-alibaba-seata</artifactId>
            <exclusions>
                <exclusion>
                    <groupId>io.seata</groupId>
                    <artifactId>seata-spring-boot-starter</artifactId>
                </exclusion>
            </exclusions>
        </dependency>
        <dependency>
            <groupId>io.seata</groupId>
            <artifactId>seata-spring-boot-starter</artifactId>
            <version>1.2.0</version>
            <exclusions>
                <exclusion>
                    <groupId>io.seata</groupId>
                    <artifactId>seata-all</artifactId>
                </exclusion>
            </exclusions>
        </dependency>
        <dependency>
            <groupId>io.seata</groupId>
            <artifactId>seata-all</artifactId>
            <version>1.2.0</version>
        </dependency>

        <!--openFeign-->
        <dependency>
            <groupId>org.springframework.cloud</groupId>
            <artifactId>spring-cloud-starter-openfeign</artifactId>
        </dependency>
        <!--web-actuator-->
        <dependency>
            <groupId>org.springframework.boot</groupId>
            <artifactId>spring-boot-starter-web</artifactId>
        </dependency>
        <dependency>
            <groupId>org.springframework.boot</groupId>
            <artifactId>spring-boot-starter-actuator</artifactId>
        </dependency>
        <!--mysql-druid mybatis-->
        <dependency>
            <groupId>mysql</groupId>
            <artifactId>mysql-connector-java</artifactId>
            <version>5.1.37</version>
        </dependency>
        <dependency>
            <groupId>com.alibaba</groupId>
            <artifactId>druid-spring-boot-starter</artifactId>
            <version>1.1.10</version>
        </dependency>
        <dependency>
            <groupId>org.mybatis.spring.boot</groupId>
            <artifactId>mybatis-spring-boot-starter</artifactId>
        </dependency>
        <dependency>
            <groupId>org.projectlombok</groupId>
            <artifactId>lombok</artifactId>
            <optional>true</optional>
        </dependency>
5.2 配置文件
application.yml
server:
  port: 2001

spring:
  application:
    name: seata-order-service
  cloud:
    nacos:
      discovery:
        server-addr: localhost:8848
        username: nacos
        password: nacos
  datasource:
    driver-class-name: com.mysql.jdbc.Driver
    url: jdbc:mysql://127.0.0.1:3306/seata_order?useUnicode=true&characterEncoding=utf8&serverTimezone=UTC
    username: root
    password: root

feign:
  hystrix:
    enabled: false

mybatis:
  mapper-locations: classpath:mapper/*.xml
  type-aliases-package: com.hbsi.entity

# seata的配置在这里
seata:
  enabled: true
  application-id: ${spring.application.name}
  tx-service-group: my_test_tx_group
5.3 必须要配置 DruidDataSource 数据源,不配就报错
@Configuration
public class DBConfig {
    @Bean
    @ConfigurationProperties(prefix = "spring.datasource")
    public DataSource druidDataSource(){
        return new DruidDataSource();
    }
}
6. 使用 @GlobalTransactional 注解进行分布式事务管理

seata 事务失效常见场景
1. 无法获取XID
在每个微服务中调用 RootContext.getXID() 方法检查XID是否一致
1.1 解决方法1:
需要引用spring-cloud-starter-alibaba-seata依赖。这个依赖里才有xid传递的功能。 seata-spring-boot-starter依赖,并没有传递功能
1.2解决方法2:
在调用各个微服务时,直接将XID进行手动传参绑定RootContext.bind(XID);
2. Feign调用了fallback降级或异常处理
手动回滚 :GlobalTransactionContext.reload(RootContext.getXID()).rollback()
手动提交:GlobalTransactionContext.reload(RootContext.getXID()).commit()
undo_log表有脏数据
清除undo_log表以及seata持久化数据库的brach_table、global_table、lock_table、undo_log表中的脏数据


 2567
2567


 被折叠的 条评论
为什么被折叠?
被折叠的 条评论
为什么被折叠?
 到【灌水乐园】发言


